How to Create a Location
The final step in setting up Buildings is creating Locations within each building. These are the physical locations where product may be installed or stored, depending on the Building Type. This post outlines the procedure involved in setting up a Location in SnapTracker.
Step-by-step instructions
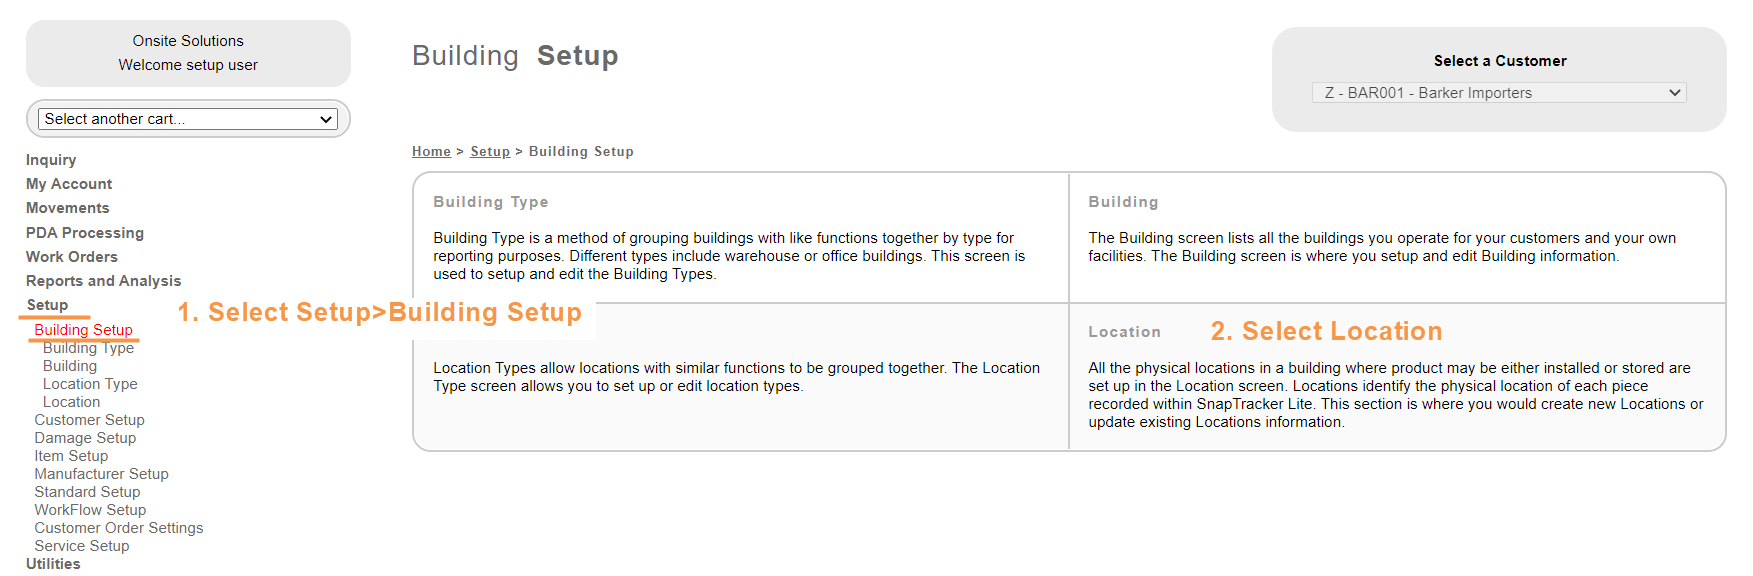
From the main navigation bar on the left, select Setup, Building Setup.
The Building Setup screen displays. Select Location
The Location screen displays.
This is where you can create a new Location.
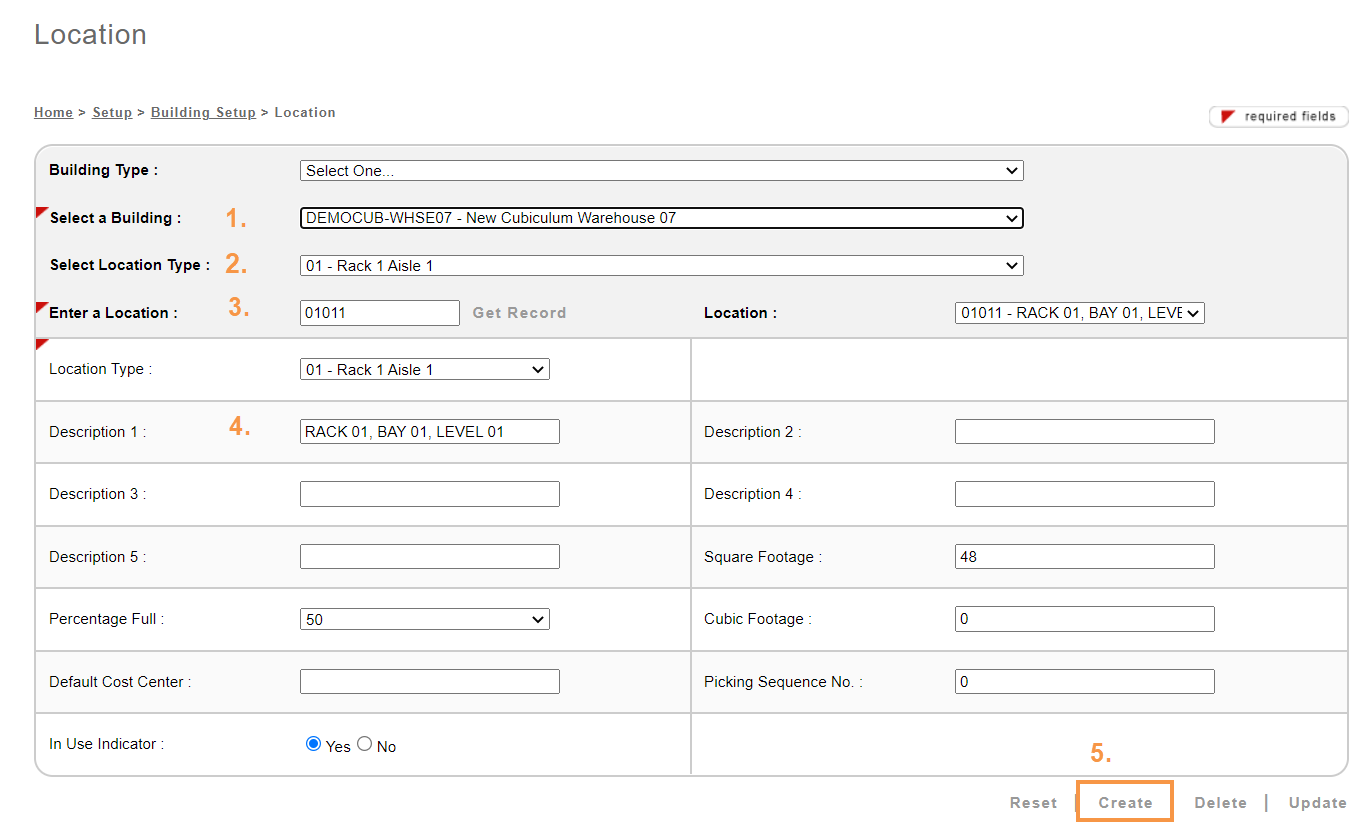
To create a new Location, you need to first have Building and Location Type created.
- From the Select a Building drop-down selection box select the Building you are creating the Location for.
- From the Select a Location Type drop-down selection box, select the Location Type you want to create the new Location in.
- In the Enter a Location box, type in the Location. The character limit is 10 digits.
- You can enter additional information about the Location using the Description boxes.
- Click Create at the bottom of the page.
The Location is created.
Note
Percentage Full – The numeric value that displays in this field is the total percentage of all occupied space for one customer within the location. It is determined by the last value entered in this data field.
Cubic / Square Footage – A numeric value assigned to the location that represents the total cubic / square footage of a location. You can use either cubic or square footage.
Default Cost Center – Your company’s own cost center or department that uses the specified space. This field is primarily used by the SnapTracker dealer to identify locations within the dealer’s warehouse such as customer storage, pre-sold, refurbishing area, staging, etc.
Picking Sequence No. – This is generally used on warehouses over 500,000 square feet. The warehouse can be divided into quadrants to help control traffic flow within the warehouse. The picking sequence is put on the individual locations in the warehouse and printed on a Work Order Ticket. This tells the warehouse personnel where (and what) to pull first.
In Use Indicator – Allows you to flag all locations that are currently in use. The default is Yes whenever a new Location is added.
Tips
Locations should be logical, easily decipherable and kept consistent. An example of a location is “010101” to represent Row 1, Bay 01 and Level 01.
Did you know?
When this final step is complete, the buildings are available for product to be received in for any Customers within SnapTracker.