How to Create a New Condition
It is crucial to record and track the condition of furniture assets when it comes to asset management. This post outlines the process of creating a new Condition in SnapTracker.
You may also watch a quick 3 minute tutorial video on how to use Copy From to quickly create Condition codes.
Step-by-step instructions
- From the left navigation, select Setup>Customer Setup.
- Select Condition.
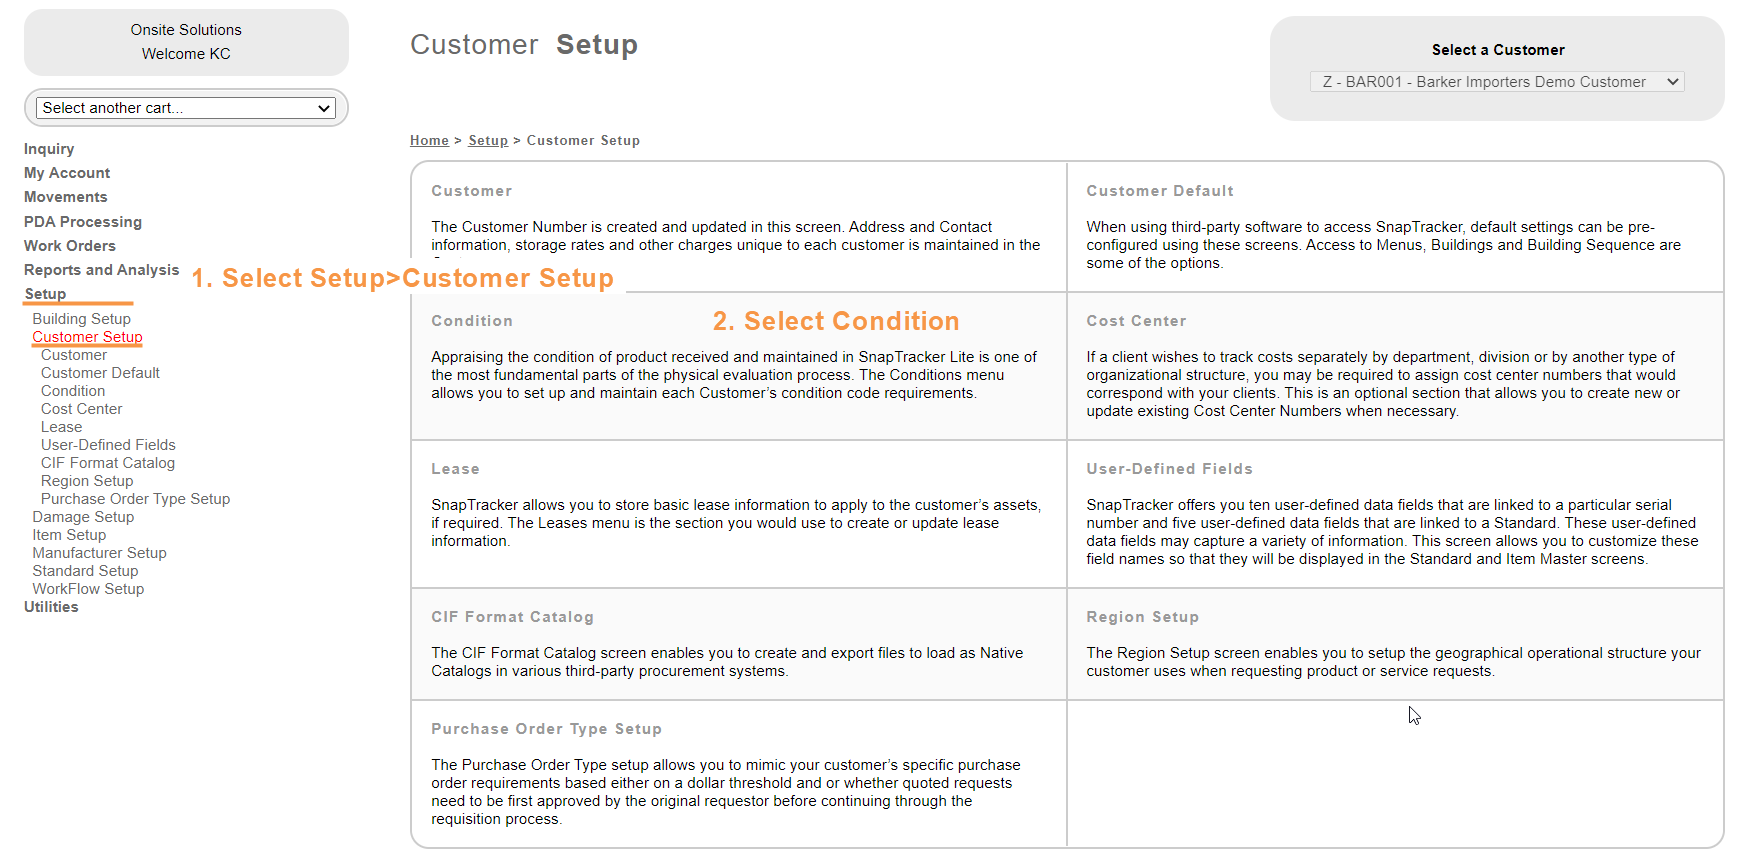
The Condition Setup screen displays.
This is where you can create a new Condition.
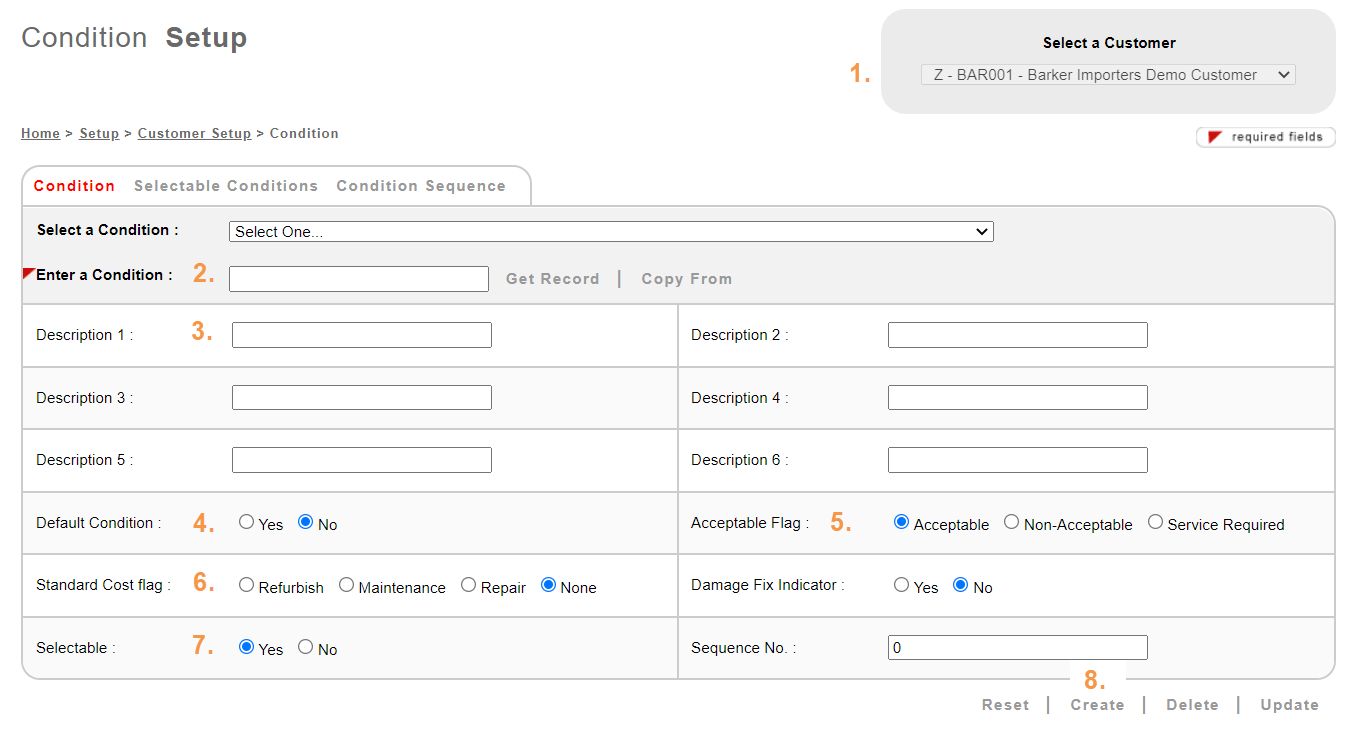
- From the Select a Customer drop-down selection box on the top right corner, select the Customer you would like to create a new Condition for.
- In the Enter a Condition text box, type in a new condition code (e.g. “Fair”). (There is a 10 character limit).
- In the Description text boxes, enter the description of the Condition (e.g. “Product has signs of basic wear and tear”). Note: You may need to use more than one of the description boxes provided, as each Description has a 60 character limit.
- From the Default Condition options, select Yes or No. (The Default Condition Flag refers to whether the Condition is the default condition when a product is received into inventory). Only one Condition can be set as the default.
- From the Acceptable Flag options, select from Acceptable, Non-Acceptable or Service Required. The Acceptable flag refers to whether the Customer deems products in this specific condition as Acceptable, Non-Acceptable or Service Required. The decision should be made on a case by case basis depending on the Customer. For example, while Customer A finds products in the Condition “Fair” Acceptable (i.e. willing to receive products in such condition), Customer B finds products in that condition Non-acceptable.
- From the Standard Cost Flag, select one of the options. Note: The Standard Cost Flag refers to whether there is a cost relating to Refurbish, Maintenance or Repair associated to the Condition.
- From the Selectable options select Yes or No. This determines if product in the Condition displays in the Inquiry screens.
- In the Sequence No. text box, you can enter a numeric value. The Sequence No. determines the order the Condition is displayed on the list of Conditions and what order is used to allocate product. If the sequence number is the same for multiple Conditions, the Conditions display in alphanumeric order.
- Click Create.
The Condition is created.
Note
Each time a new Customer is created, 10 default conditions are populated. They are: BROKER, CLEAN, DISPOSE, DONATE, GOOD, INCOMPLETE, NEW, REFURBISH, REPAIR, and SELL. You can create your own Conditions or use the system default Conditions depending on the customer’s requirements.
We recommend that you complete each Condition’s setup, such as giving it description and assigning the appropriate Acceptable Flag. You may complete the setup for the default Condition and click Update.
Tips
You can use the Copy From button (located next to the Enter a Condition text box) to copy one or more conditions from another Customer to save you time.