How to Setup Default Addresses for Checkout
During the checkout process of a requisition, a user is prompted to enter billing and shipping information. SnapTracker enables you to create common sold to addresses that populate the Billing and Shipping screen when a requisition is checked out. This saves the user time when checking out and helps ensure fewer data entry mistakes as the information is already created.
The number of Sold To and Ship To addresses you can enter for a customer is unlimited.
This post outlines the process for setting up the default addresses.
Step-by-step instruction
From the main navigation bar on the left, select Setup, Work Flow Setup.
The Work Flow Setup screen displays. Select Addresses.
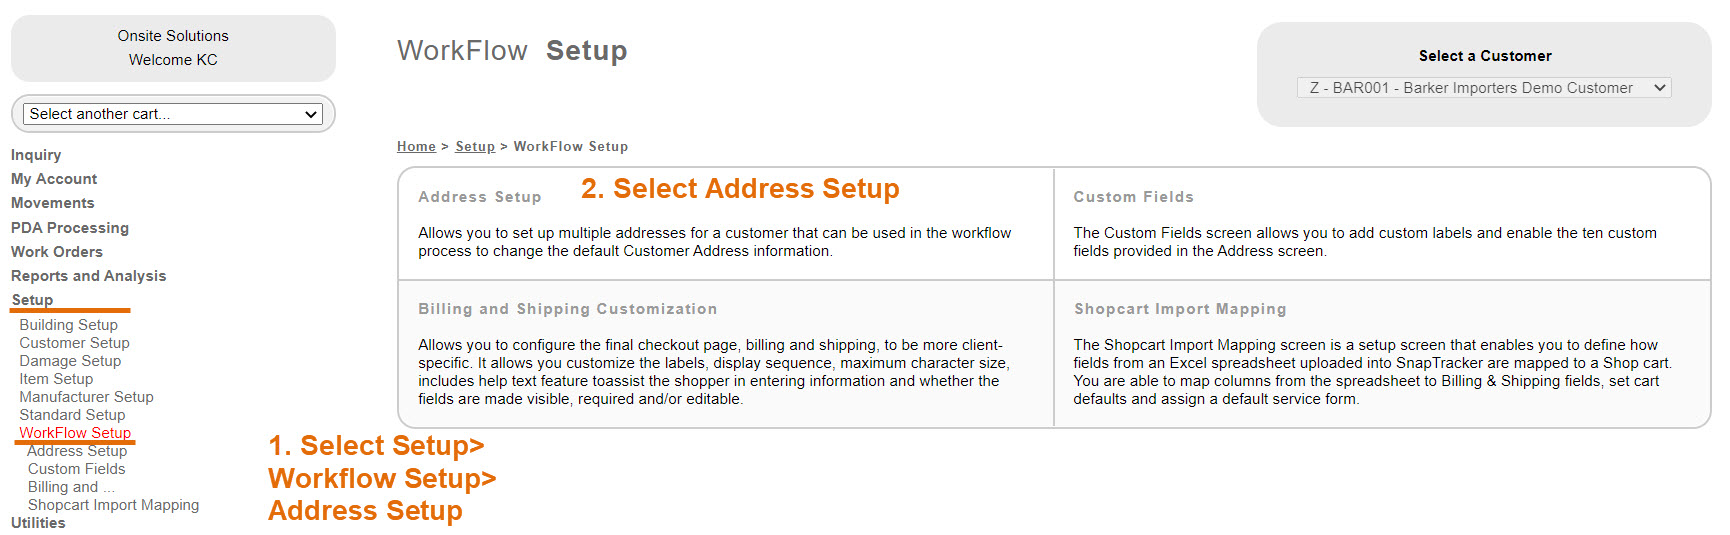
The Address Detail Setup screen displays.
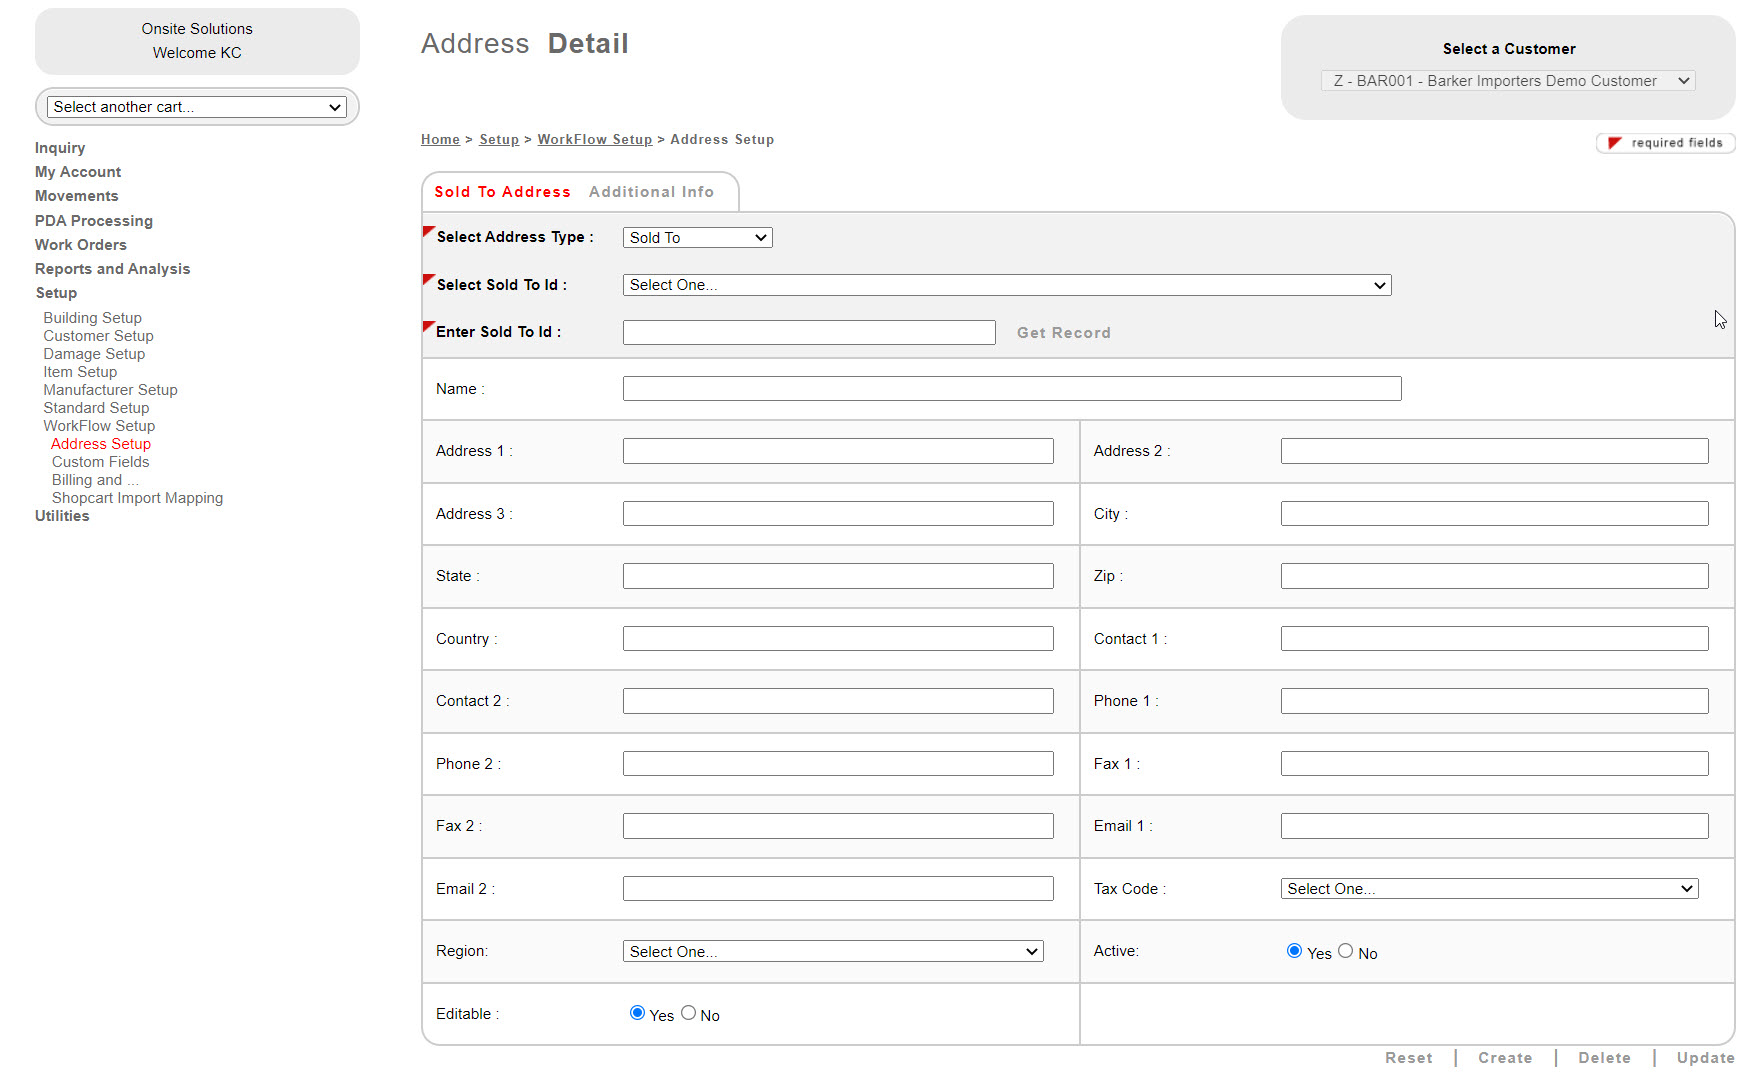
Here is where you can set up default addresses for checkout.
First and foremost, from the Select a Company drop-down selection box, select the Customer Number under which you would like to set up the default addresses.
You may set up both Sold To and Ship To addresses on this screen.
Select Address Type, choose either Sold To or Ship To.
In the Enter a Sold To/ Ship To ID field, enter the unique Address ID.
It is recommended that you create IDs that are intuitive for end-use, so that the user can easily scroll through a list of address IDs to find the correct address.
Enter the basic information of the address using the fields below, such as Name, Address, City, State and Contact.
Click Create at the bottom of the page.
The Address is created.
Tips
You may Update the address information on the Address Detail Setup screen. You may also Delete an Address ID on the same screen.