
How to Create, Edit, and Delete Manufacturers
A key field in identifying product in SnapTracker is the manufacturer. Every product created in SnapTracker requires a Manufacturer be assigned when it is created. The Manufacturer screen enables you to manage the manufacturers used to organize manufacturer catalogs (Catalog IDs) and Standards across your SnapTracker site. Manufacturers are set up once and accessible to all Customers on the site.
The screen is pre-populated with a list of manufacturers when you begin using SnapTracker. Corresponding manufacturer catalogs (Catalog IDs) also exist in the SnapTracker database.
The Manufacturer screen enables you to conduct a search through all existing manufacturers to view details and last update dates. You may create new manufacturers, or make edits to the existing manufacturers. You can also delete a manufacturer in the screen if desired. Note: A manufacturer can only be deleted if there are no Catalog IDs assigned to it.
Before starting, make sure:
- You are logged into SnapTracker.
- You have access to Manufacturer Setup.
This post outlines how to create, edit, and delete manufacturers on your SnapTracker site.
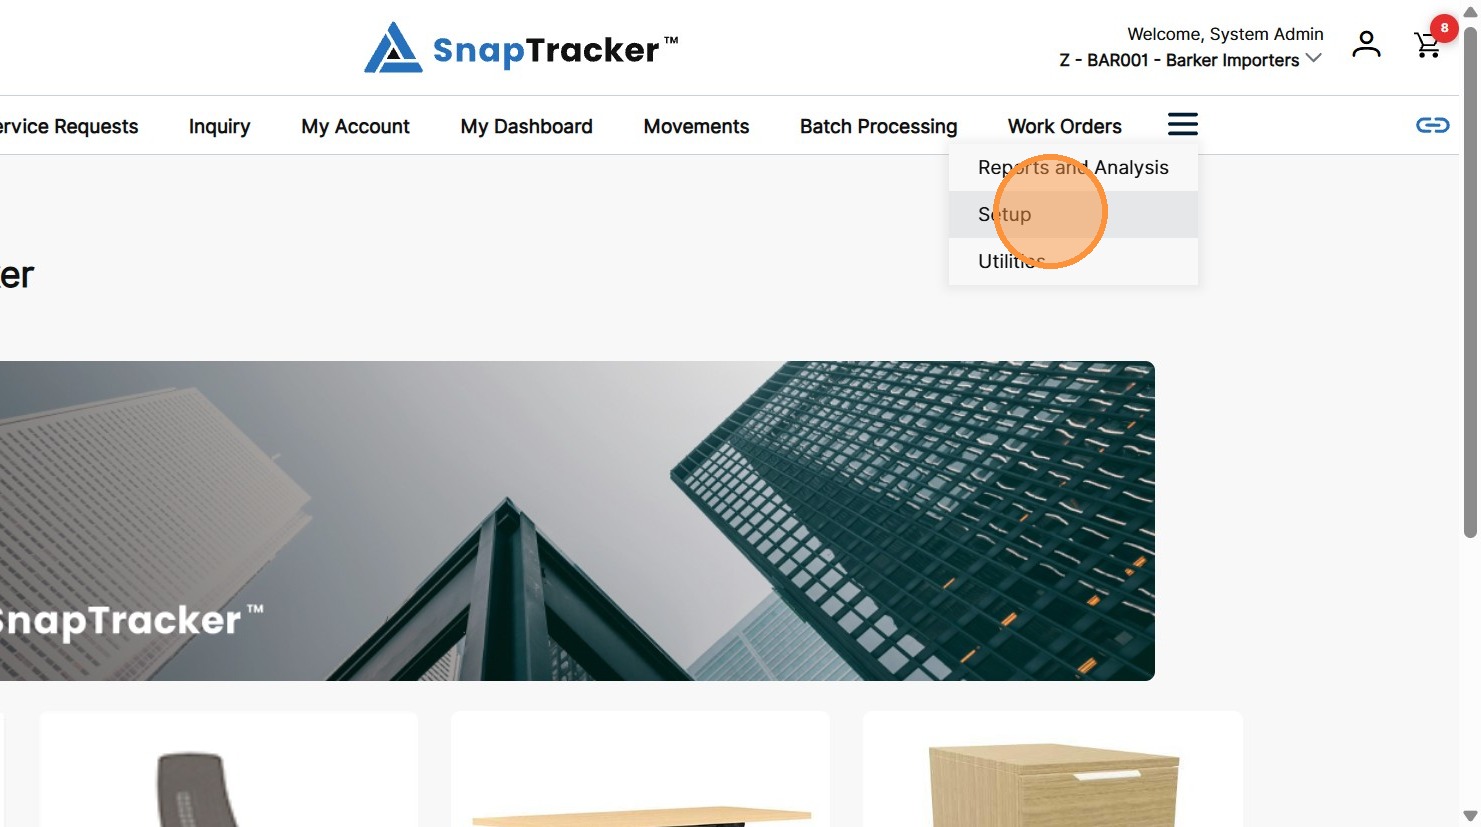
1. In the header section, click Setup.
Note: Depending on your browser, you may need to click the View menu items icon to see Setup.
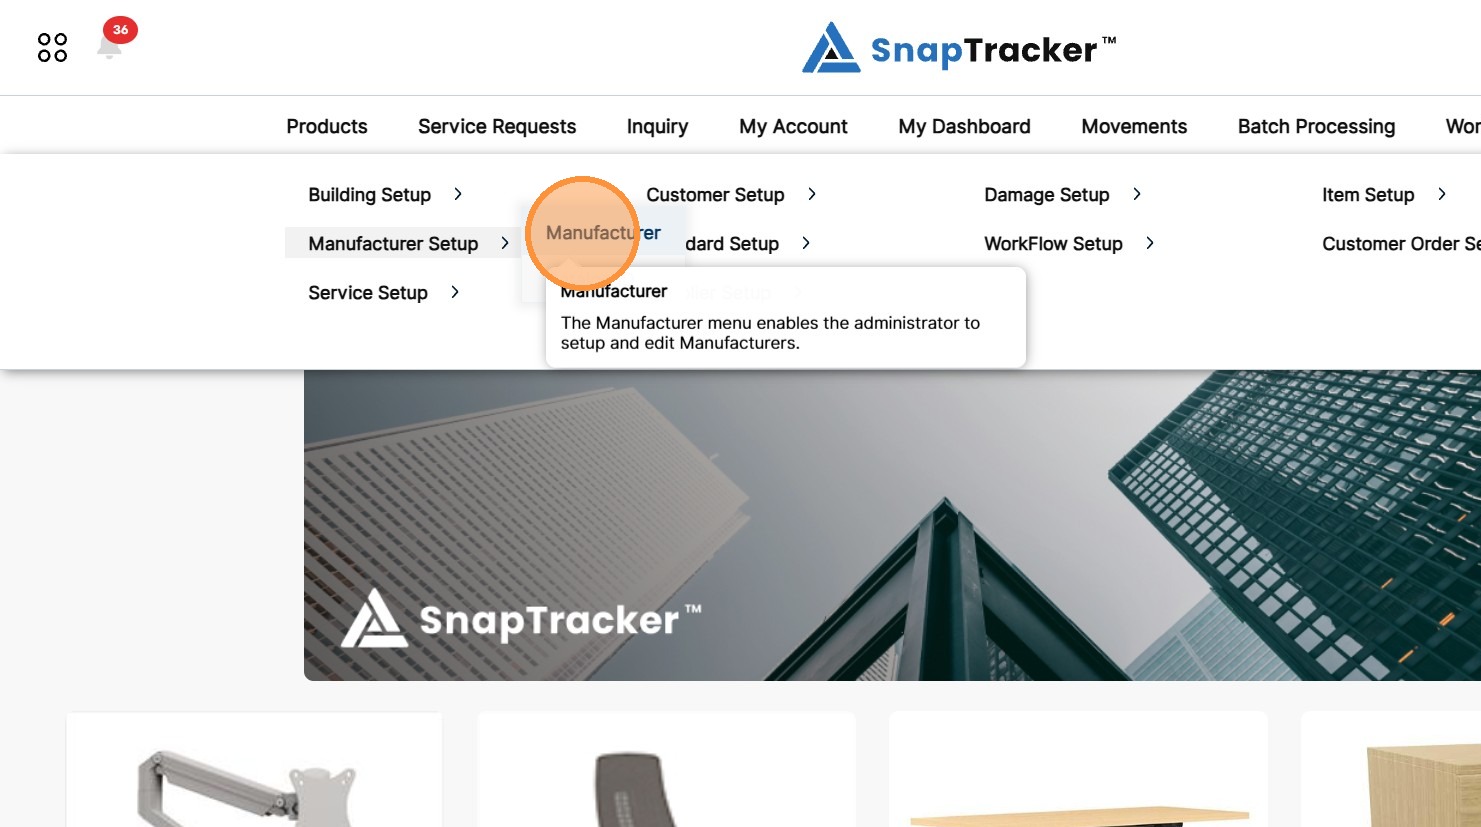
2. Click the arrow beside Manufacturer Setup, then click Manufacturer.
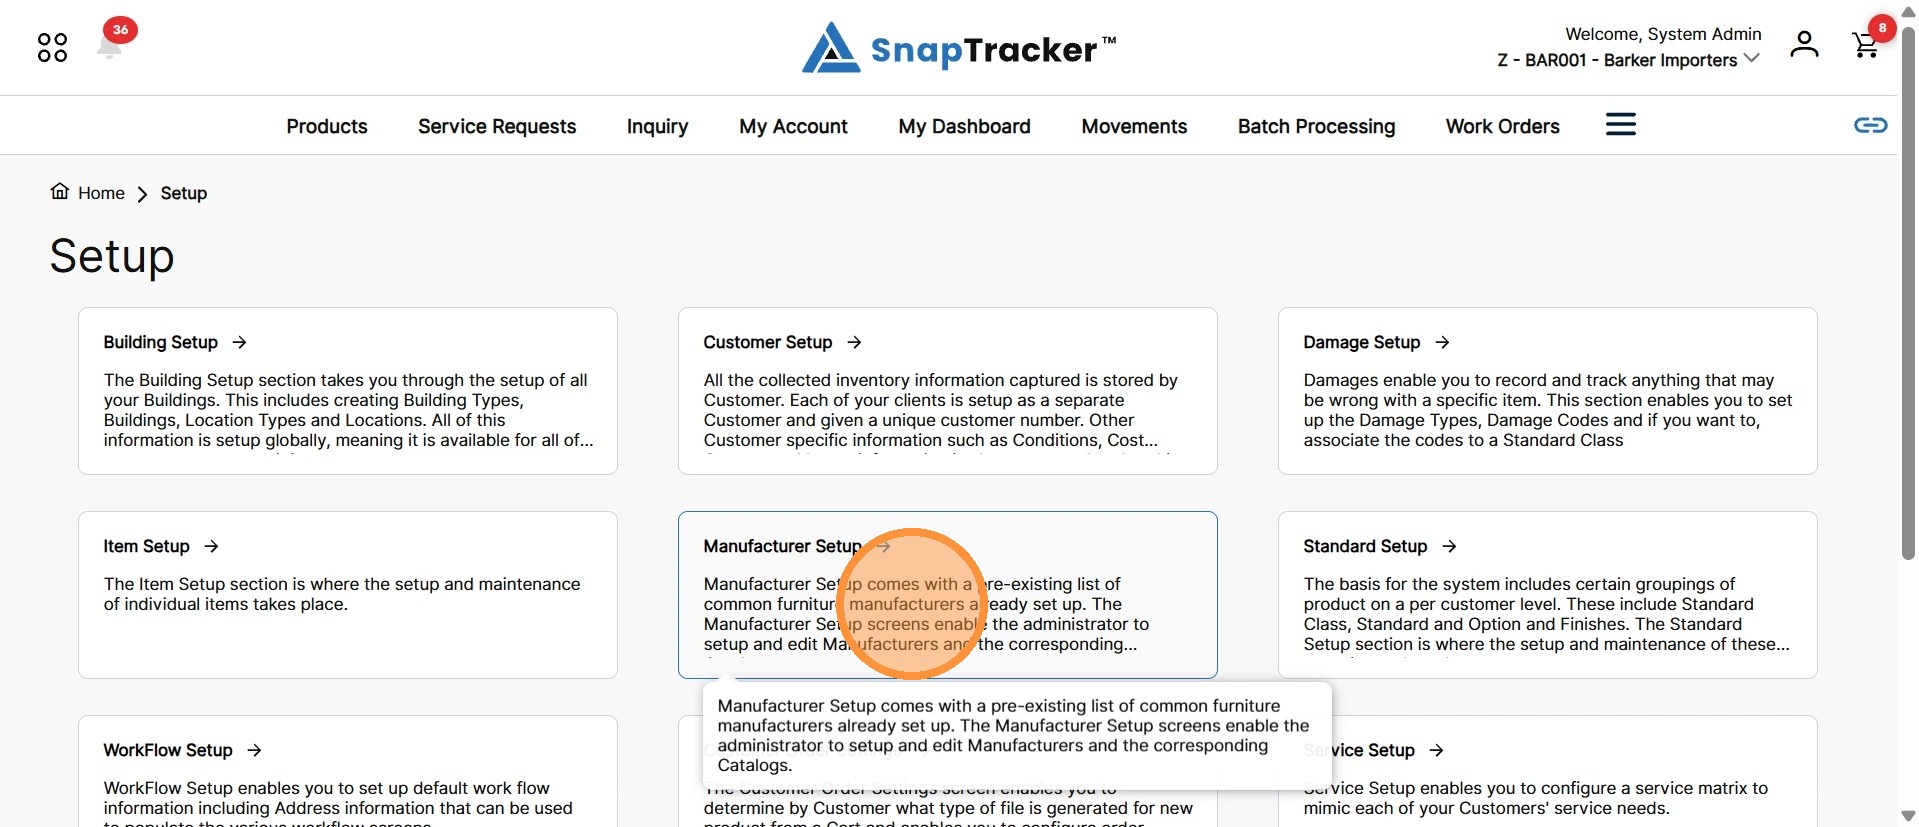
Another way to access the Manufacturer screen is to navigate to the Setup main screen.
From here, select Manufacturer Setup.
The Manufacturer screen displays, with all results.
Note: By default, the results display according to the default filters.
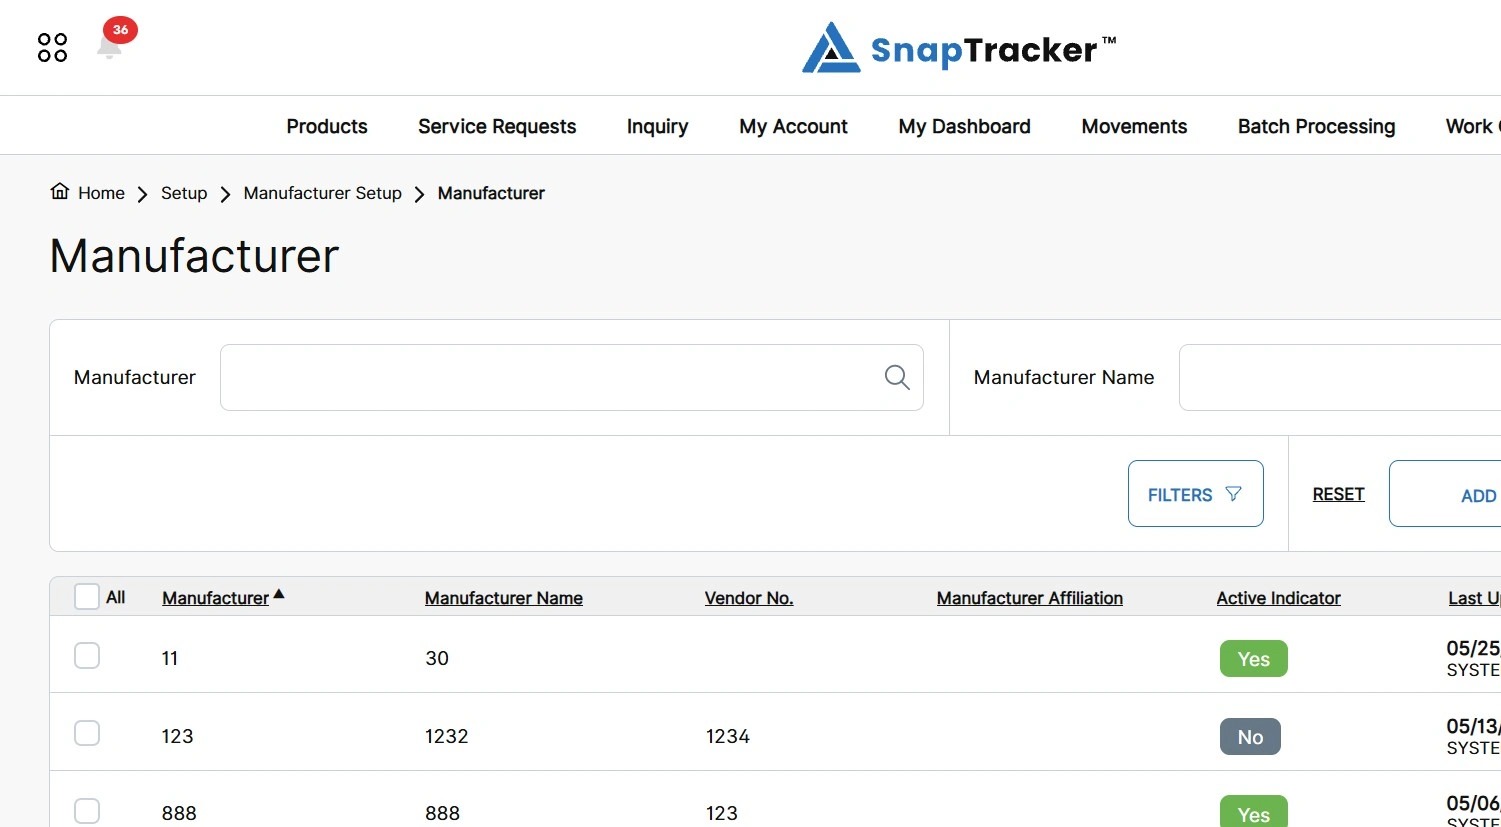
Observe the fields in the results:
- All – Select the checkbox of the desired manufacturer(s), or select All, to complete a bulk action.
- Manufacturer – The manufacturer code.
- Manufacturer Name – The manufacturer’s name.
- Vendor No. – The vendor number associated to the manufacturer, if applicable.
- Manufacturer Affiliation – The group the manufacturer is affiliated with, if applicable.
- Active Indicator – Indicates whether or not the manufacturer is active for use.
- Last Update Date – The last date any changes were made to the manufacturer and the User that completed the update.
- Actions – Available actions for an existing manufacturer. The options are Edit or Delete.
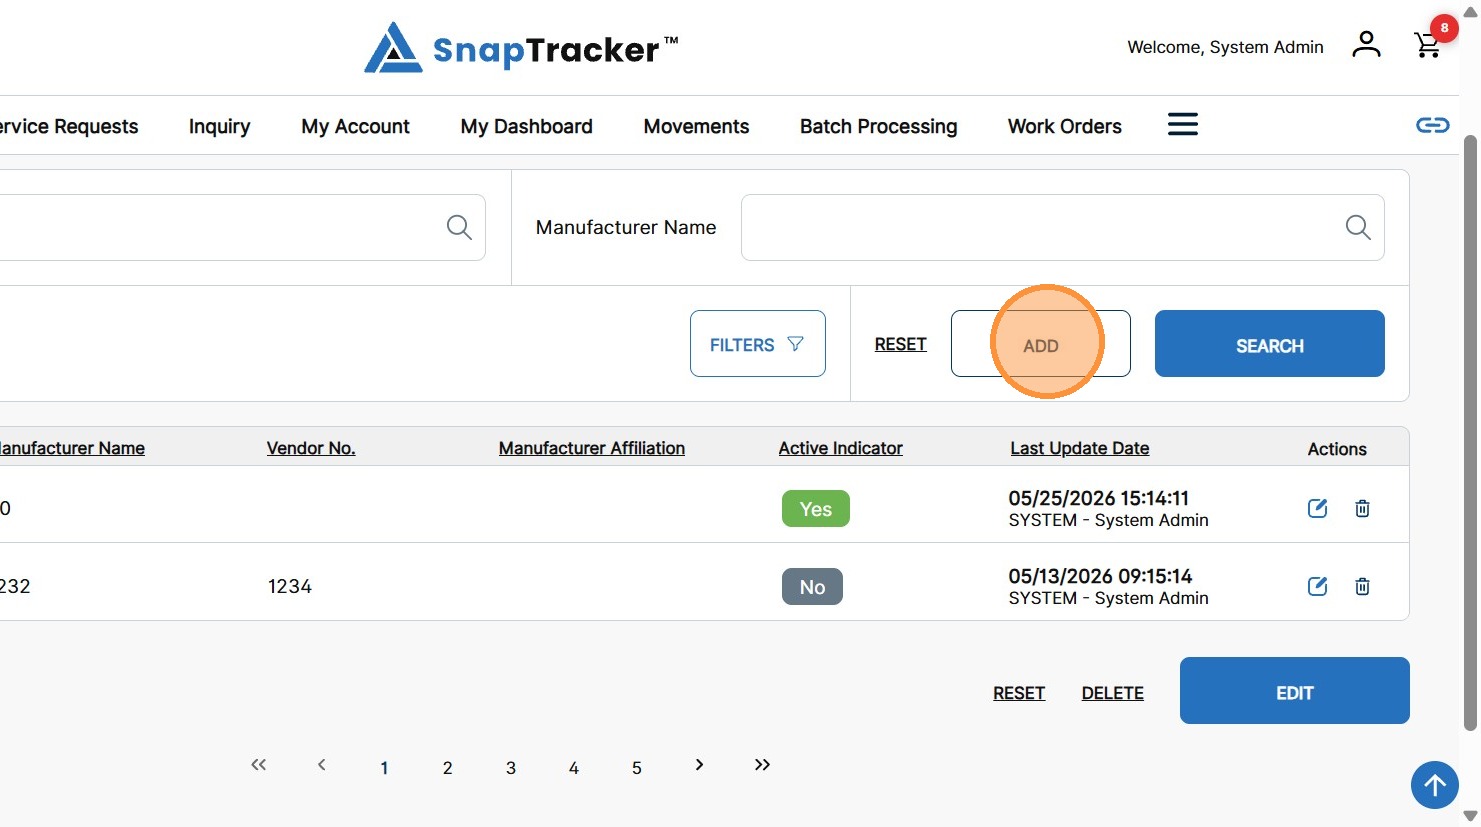
3. To create a new manufacturer, click Add.
Note: You can only create one manufacturer at a time. The Add button becomes disabled until the new manufacturer is created or the action is canceled.
A new, empty row displays in the results table.
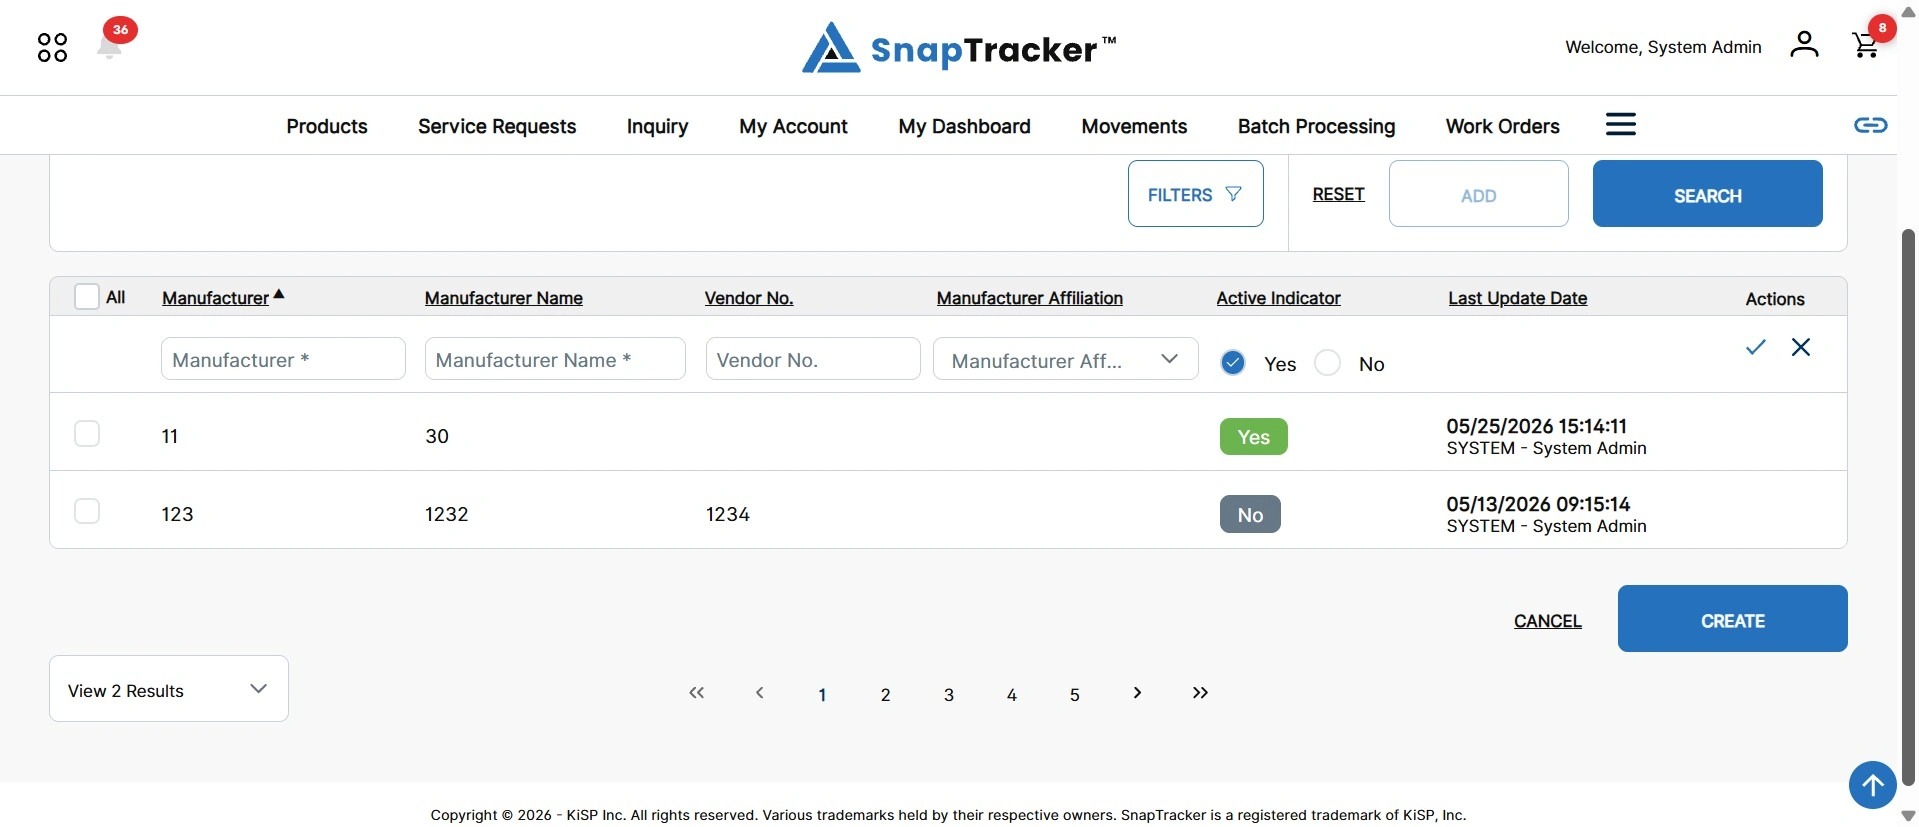
Observe the fields to input in for the new manufacturer:
- Manufacturer – (Required) The unique, manufacturer code.
- Manufacturer Name – (Required) The manufacturer’s name.
- Vendor No. – The vendor number associated to the manufacturer, if applicable. Enter up to 6 characters.
- Manufacturer Affiliation – The group the manufacturer is affiliated with, if applicable.
- Active Indicator – Indicates whether or not the manufacturer is active for use. Defaults to Yes.
Note: The required fields are indicated by an asterisk.
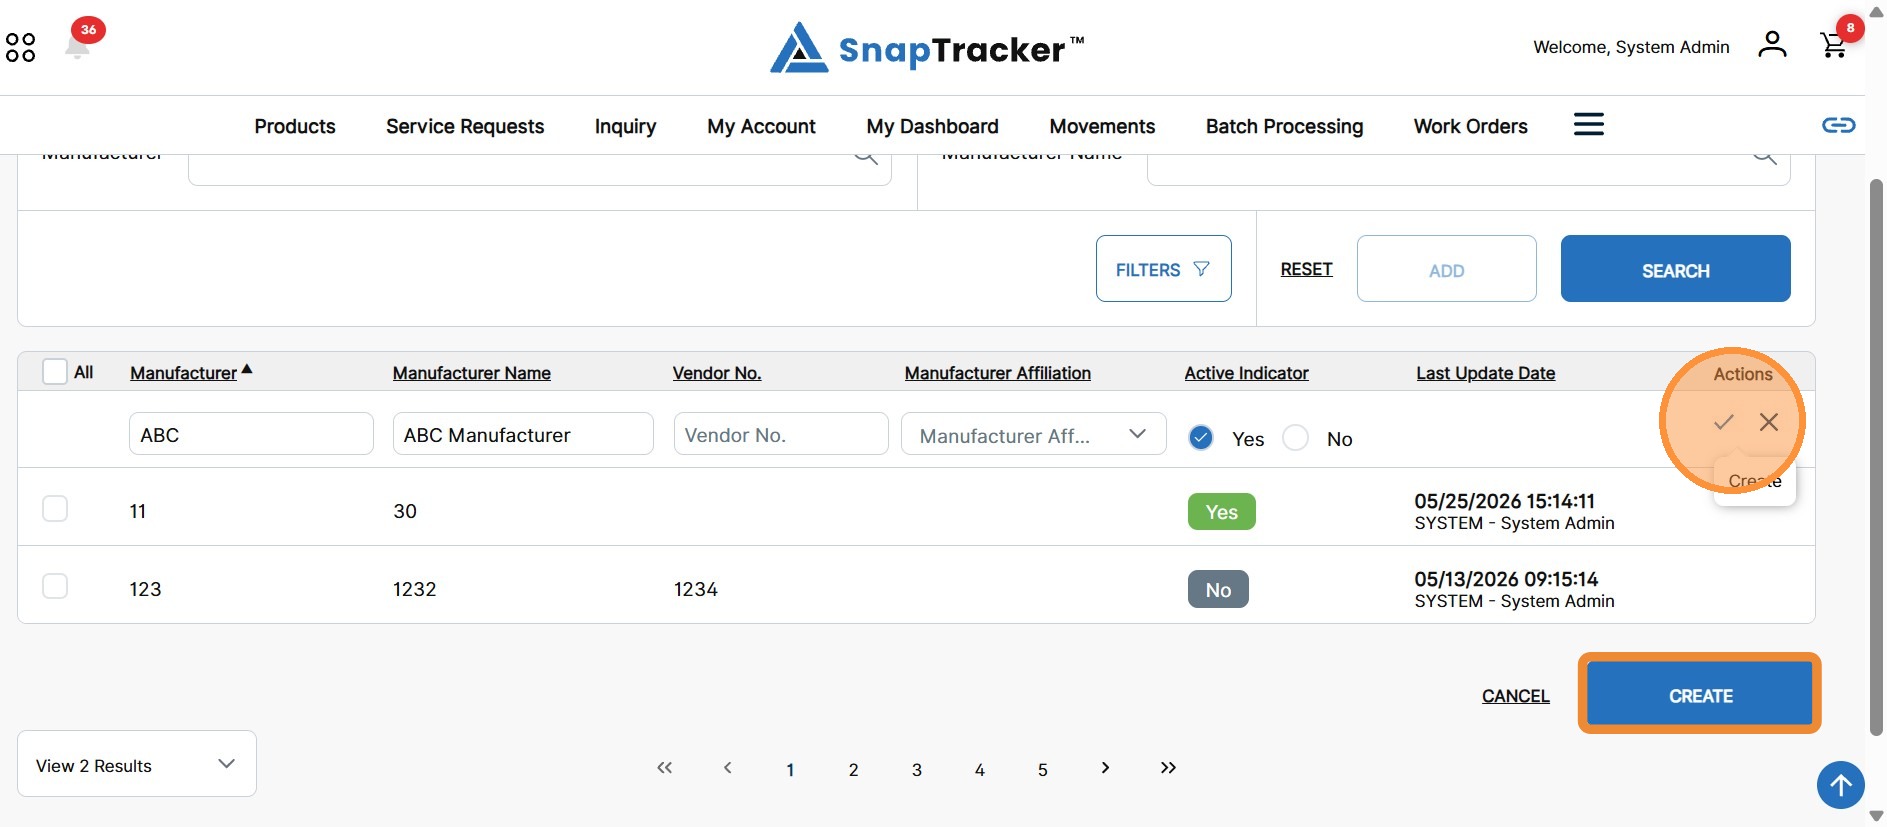
4. Populate the desired fields and click the checkmark icon or Create to create a new manufacturer.
Note: Alternatively, click the X icon or Cancel to remove the unsaved new entry.
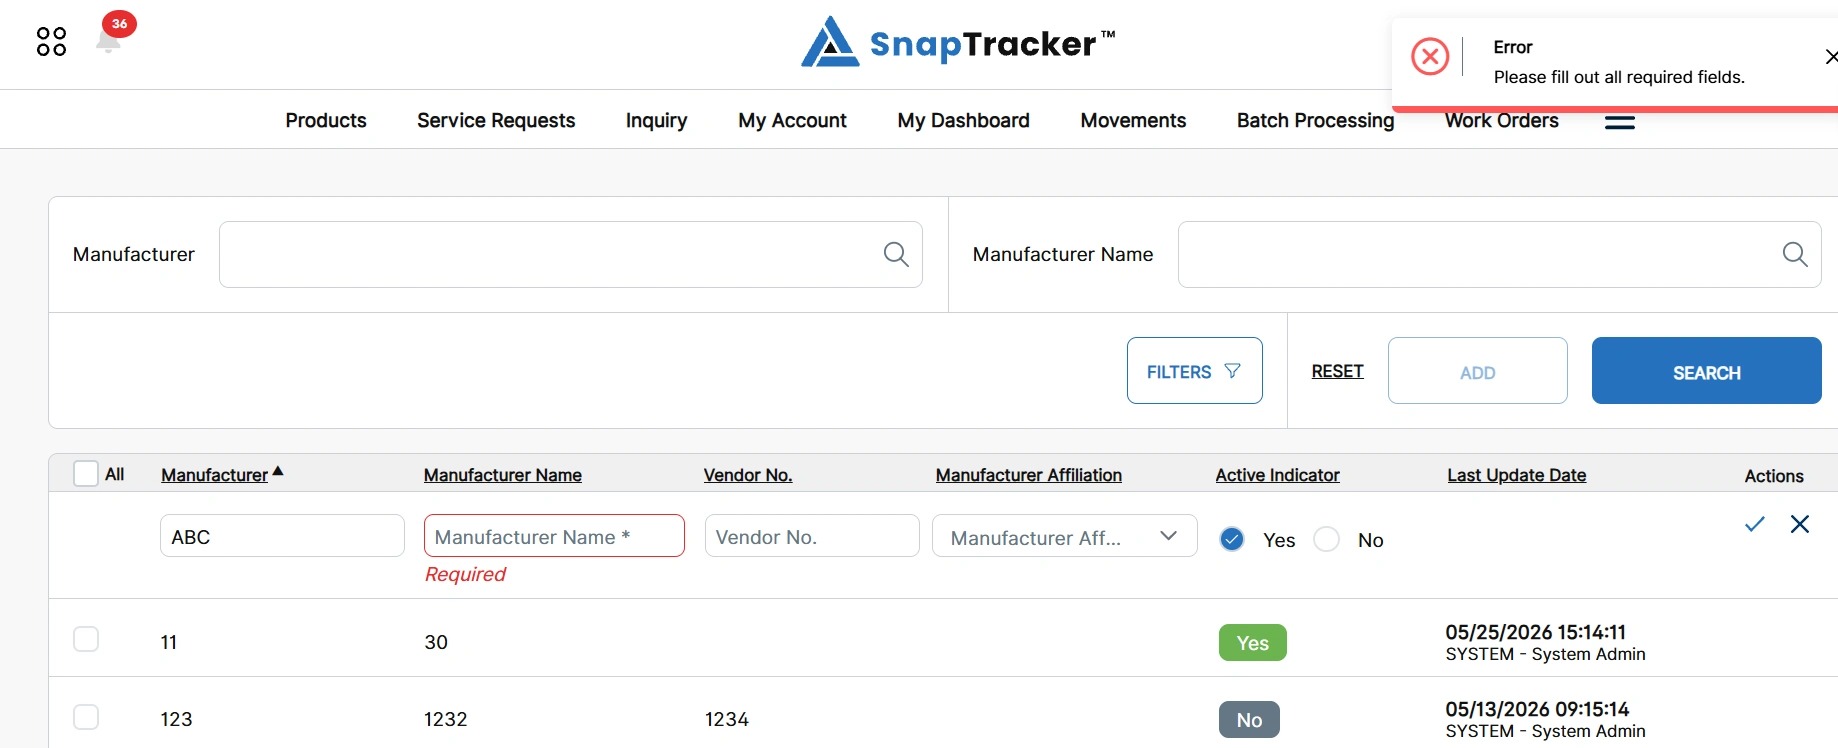
If any required fields are missing, the missing field is highlighted and Required displays below.
An error message displays, indicating that all required fields need to be entered.
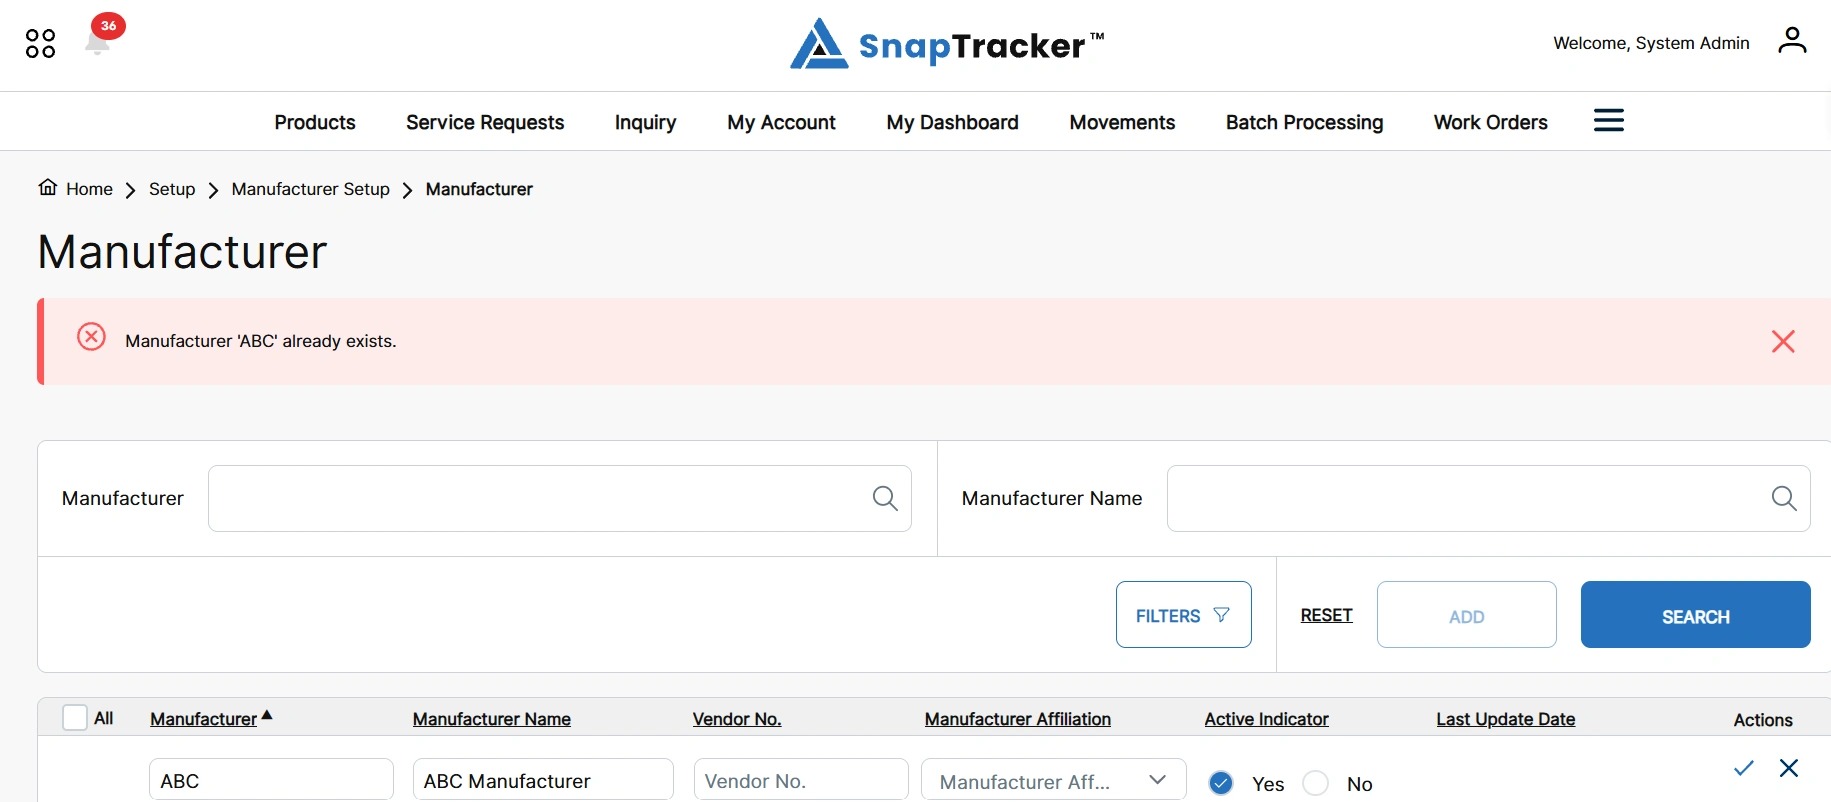
If a manufacturer exists with the same manufacturer code, an error banner displays, indicating that the manufacturer already exists.
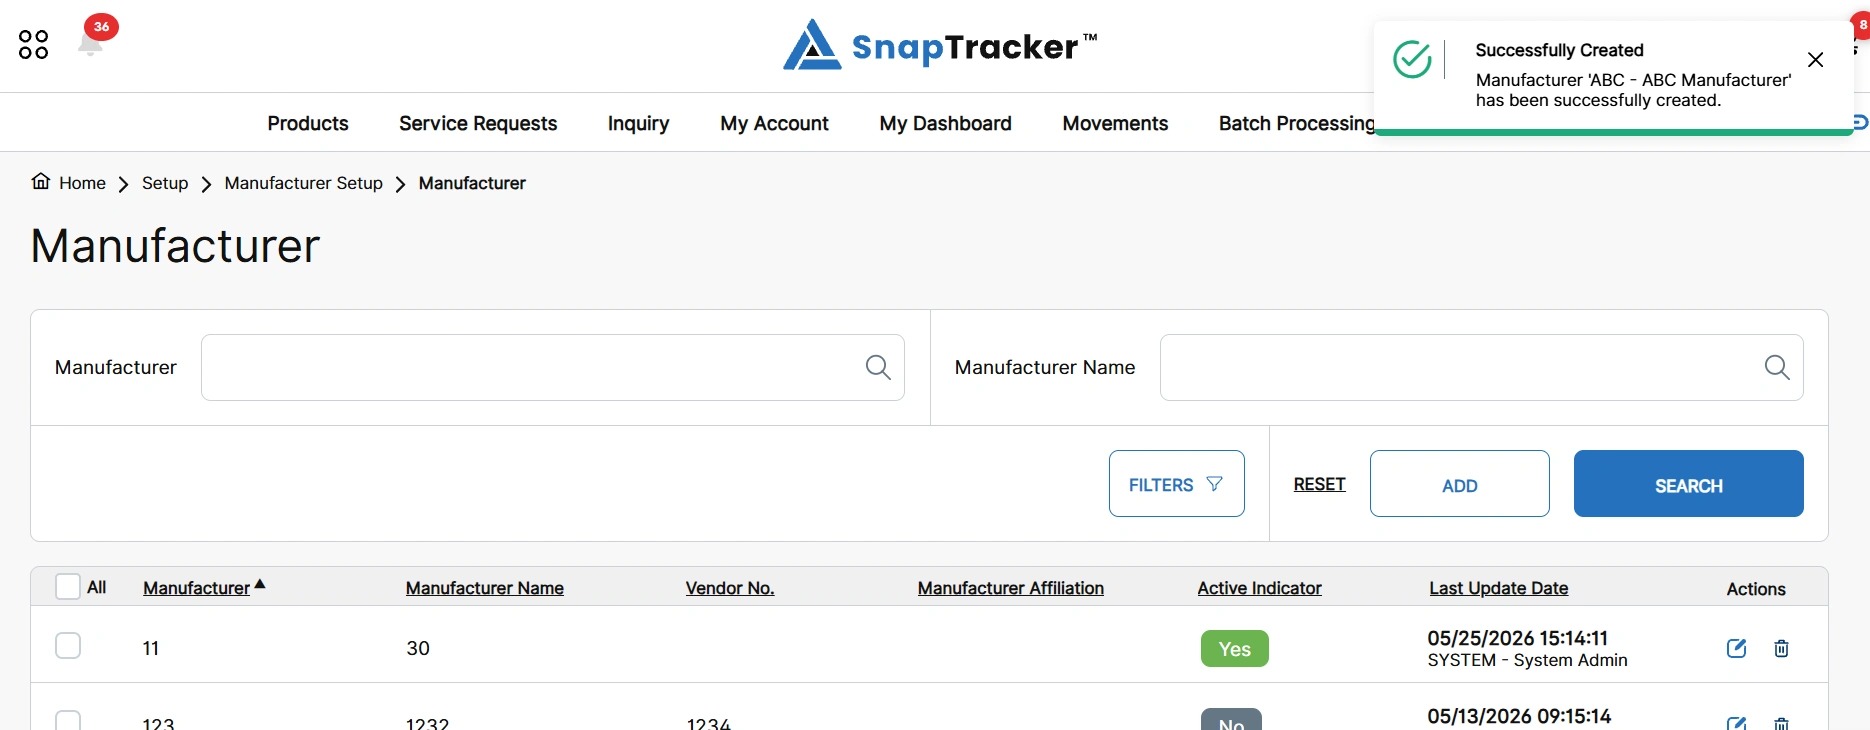
If the new manufacturer is created successfully, a success message displays.
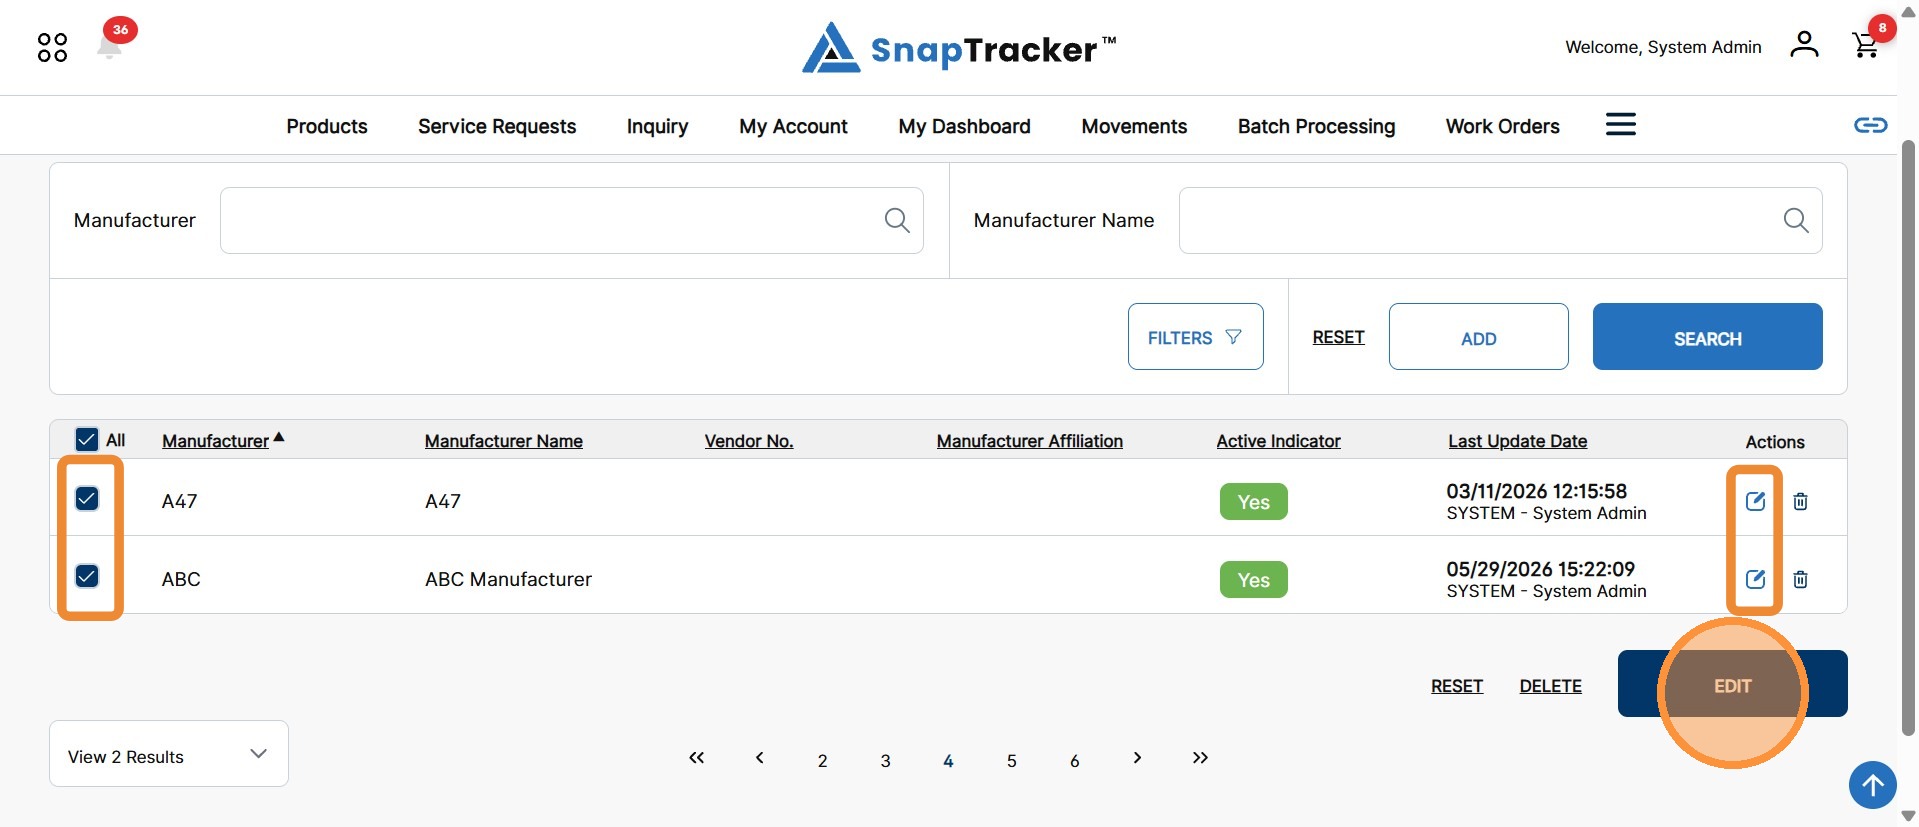
5. To edit a manufacturer, click the Edit icon for an individual manufacturer.
Alternatively, to edit multiple manufacturers, select the checkbox of the desired manufacturers and click on the global Edit button.
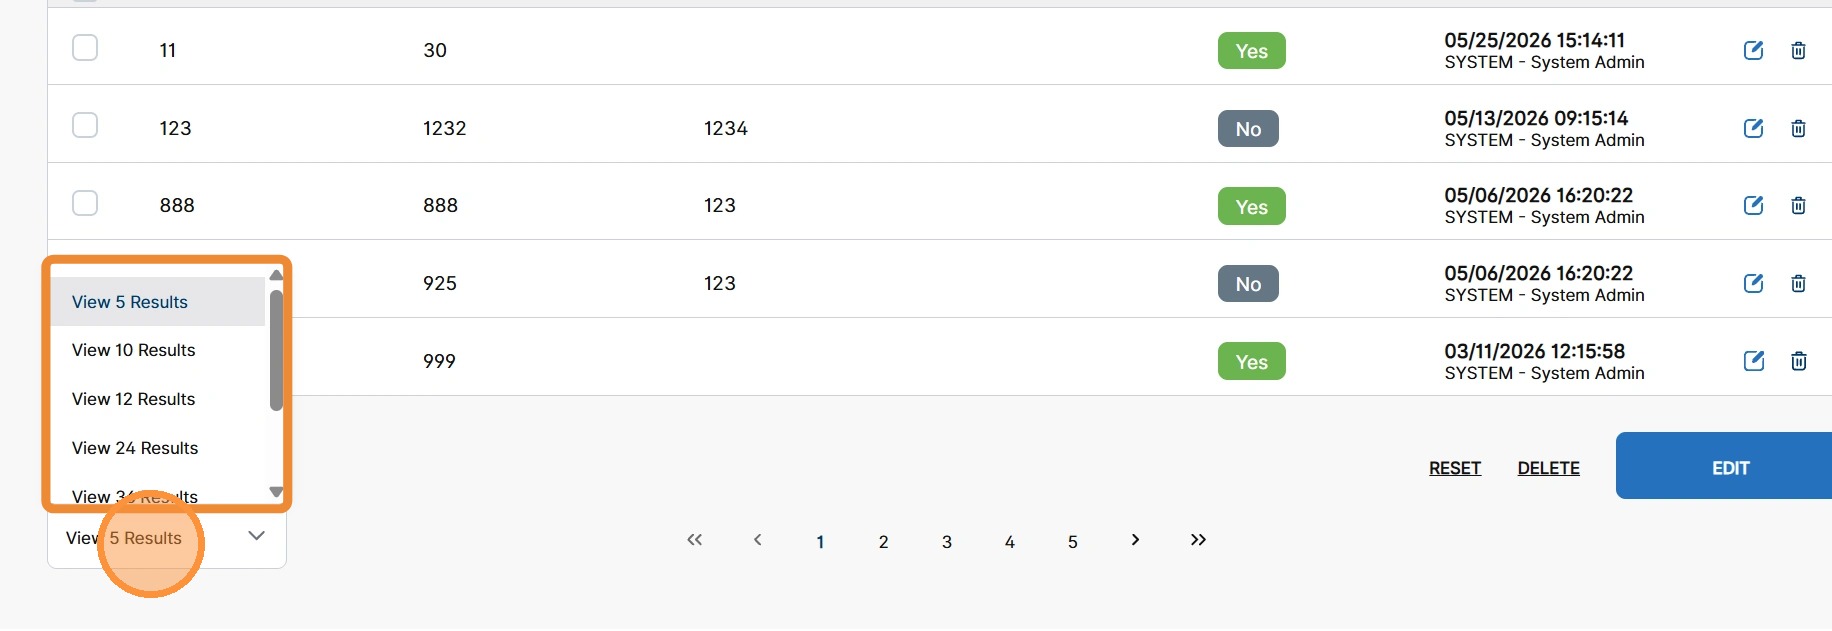
Note: You can only edit multiple manufacturers that display on the screen at once, not across multiple pages. To edit more manufacturers, click the View Number of Results dropdown to adjust the number of results to view on the page.
The selected manufacturers update to Edit mode, where editable fields are enabled.
Note: The Manufacturer field is disabled because it is a primary key and cannot be adjusted after creation. To correct this field, delete and re-create a new manufacturer.
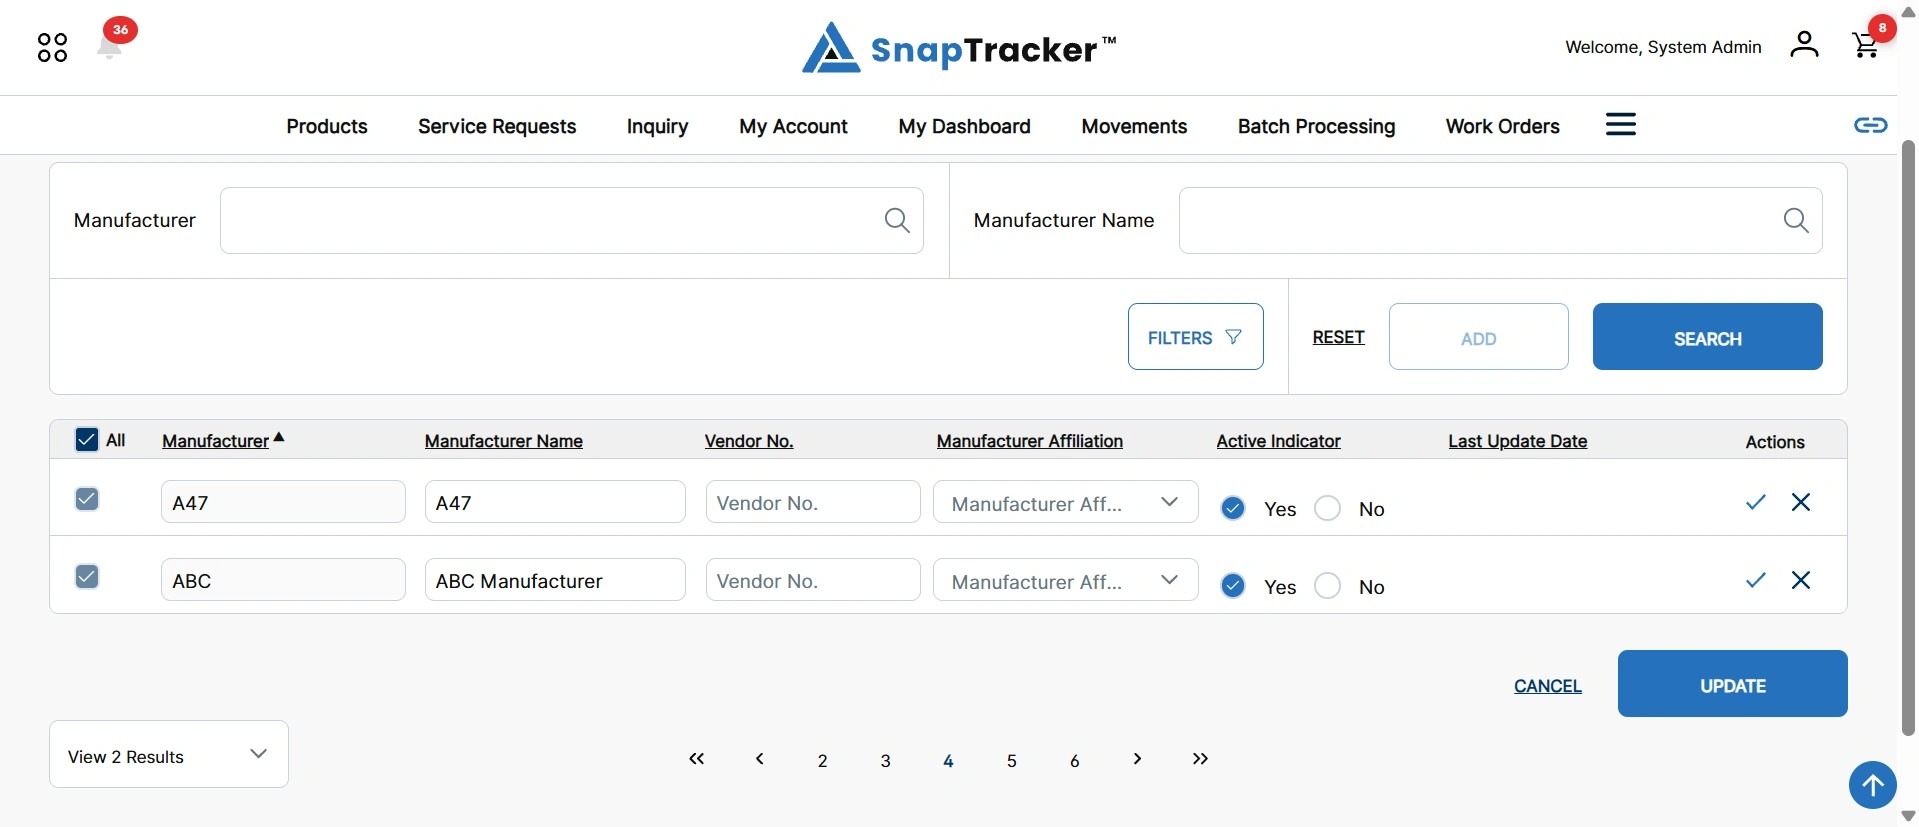
6. Edit the desired fields.
Click the checkmark icon for an individual manufacturer to save changes, or click Update to save changes for all manufacturers.
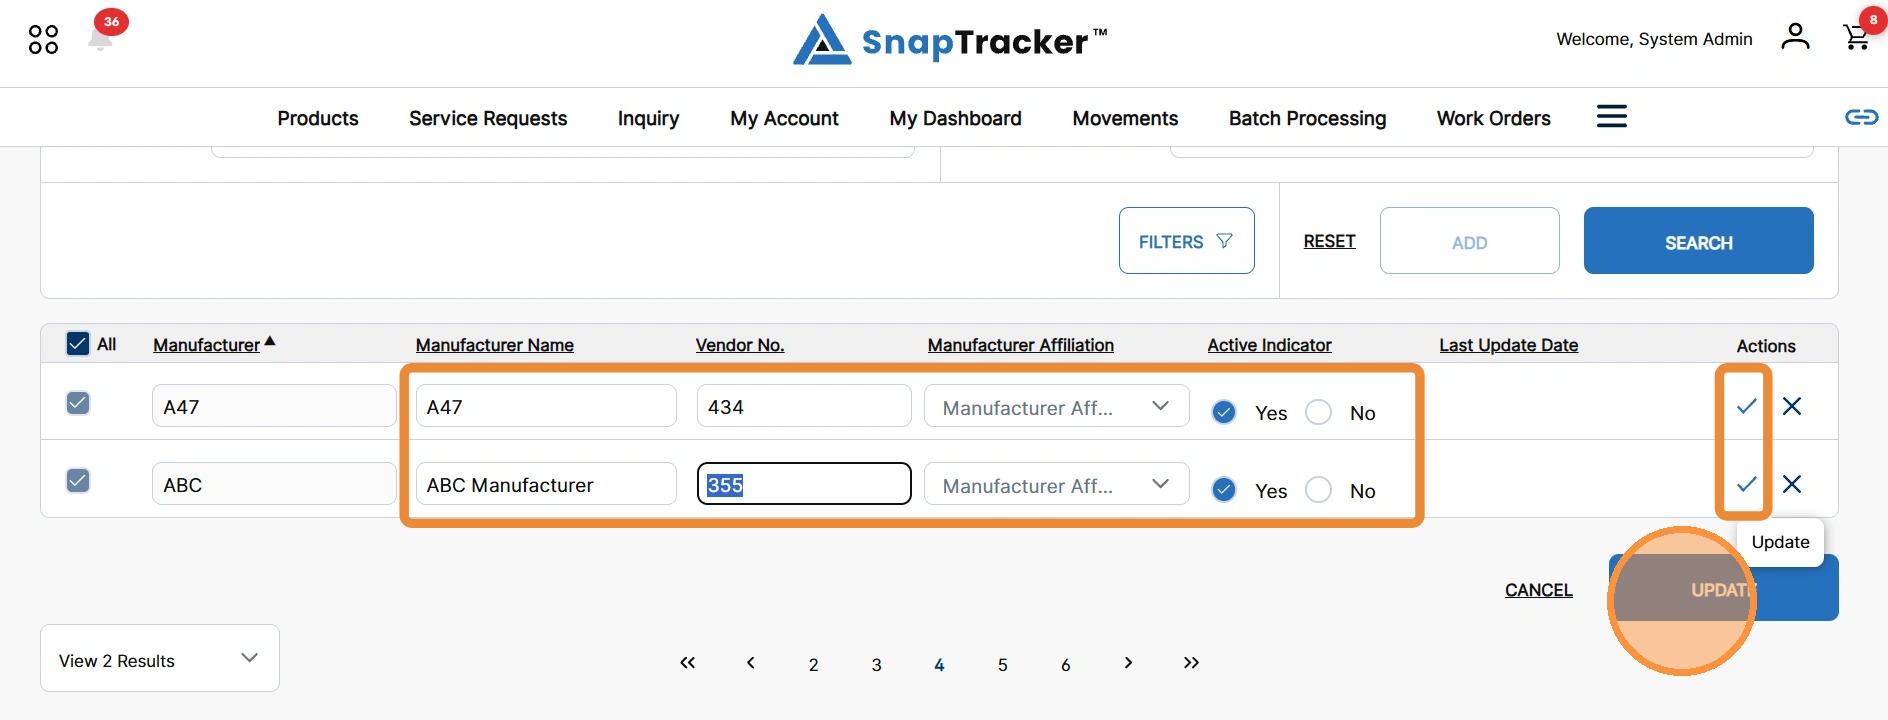
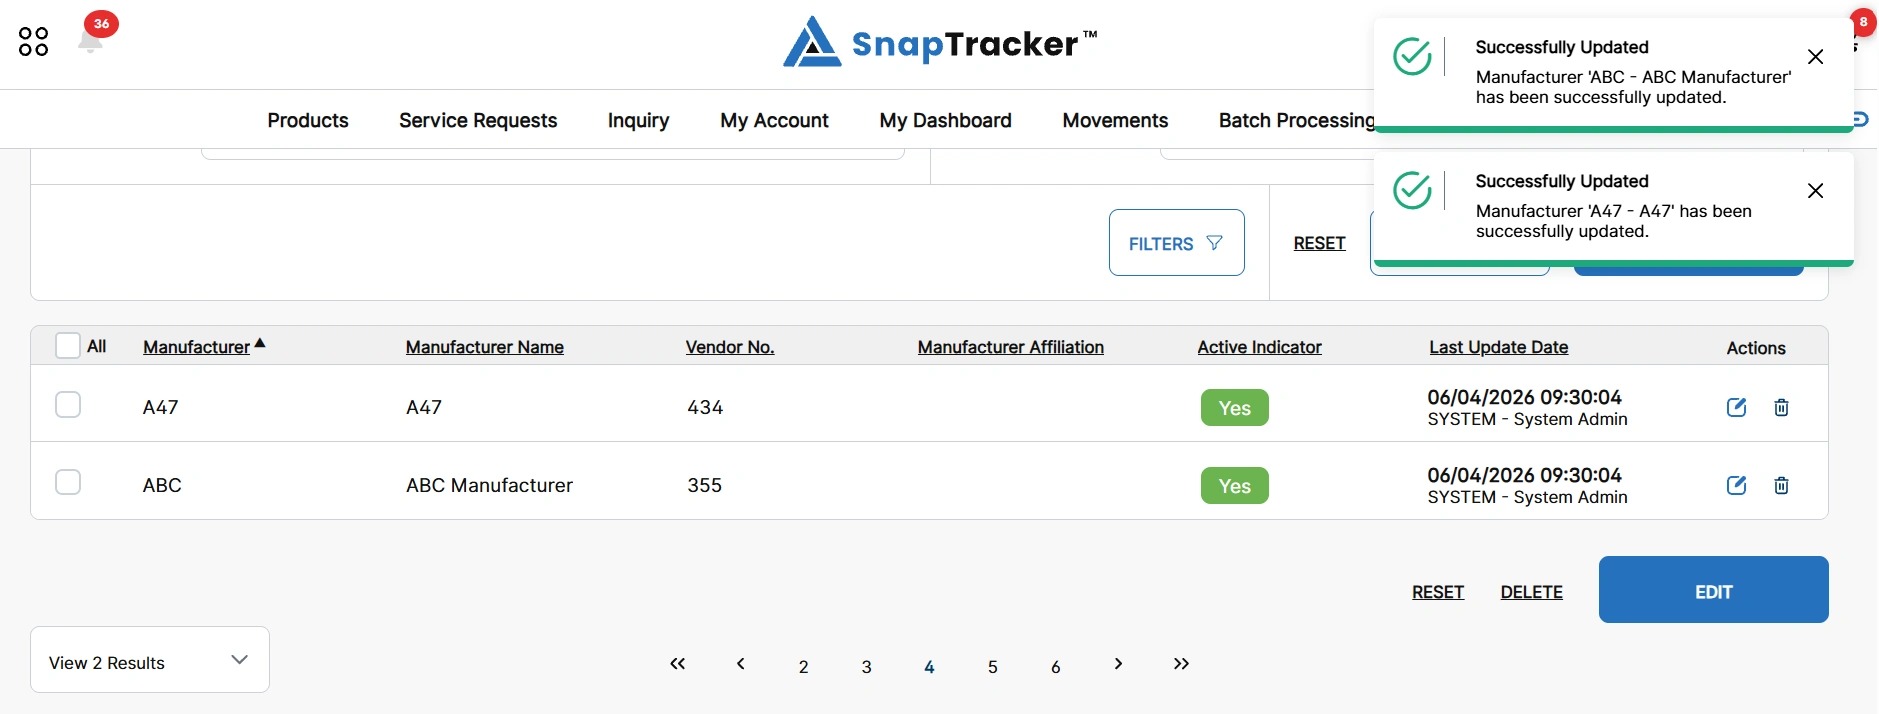
The manufacturers update with the applied changes and success messages display.
7. To delete a manufacturer, click the trash icon for an individual manufacturer.
Alternatively, to delete multiple manufacturers, select the checkbox beside the desired manufacturers and click the Delete button.
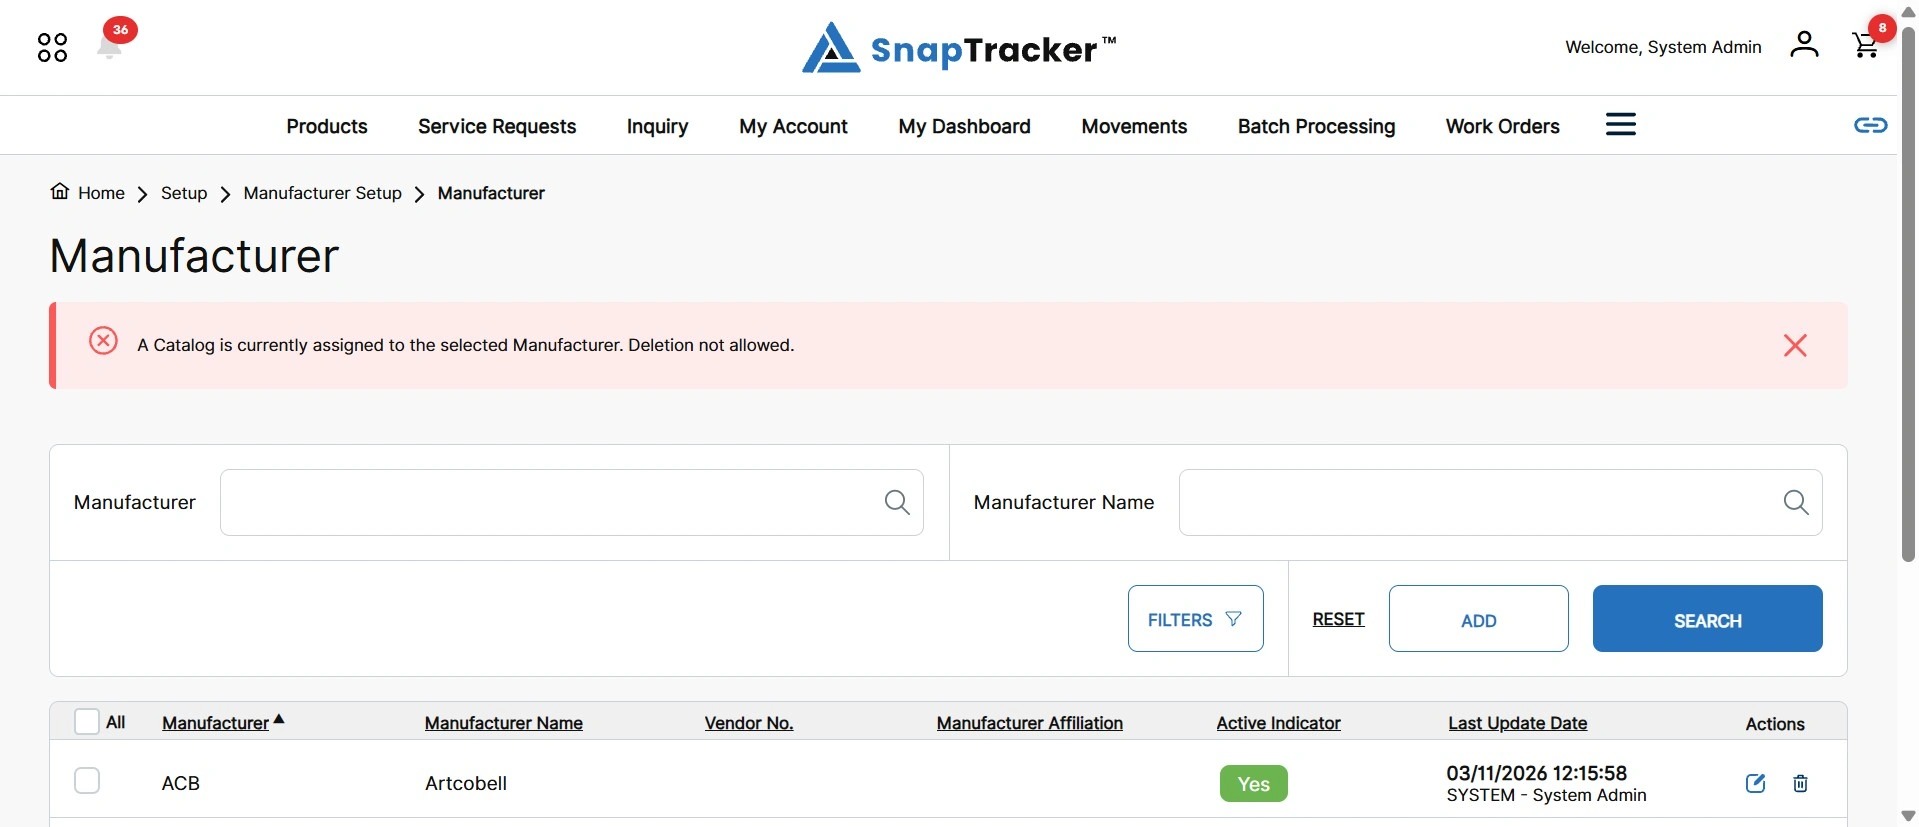
Note: You can only delete a manufacturer if it has no assigned Catalog IDs.
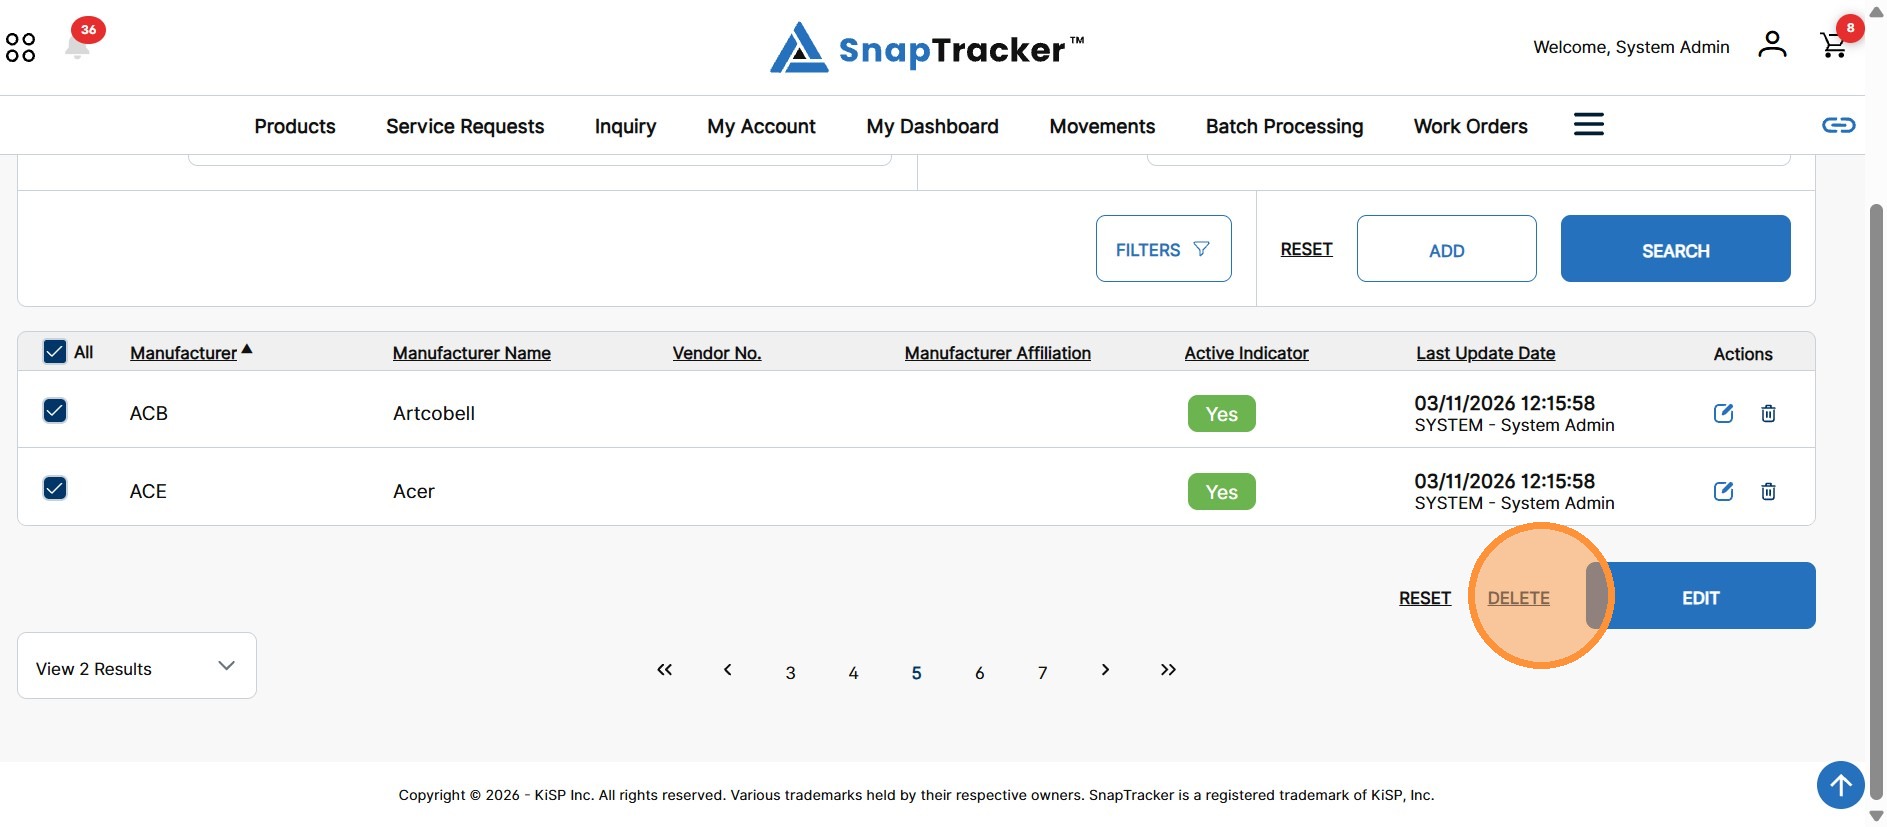
The Delete Manufacturer pop-up displays.
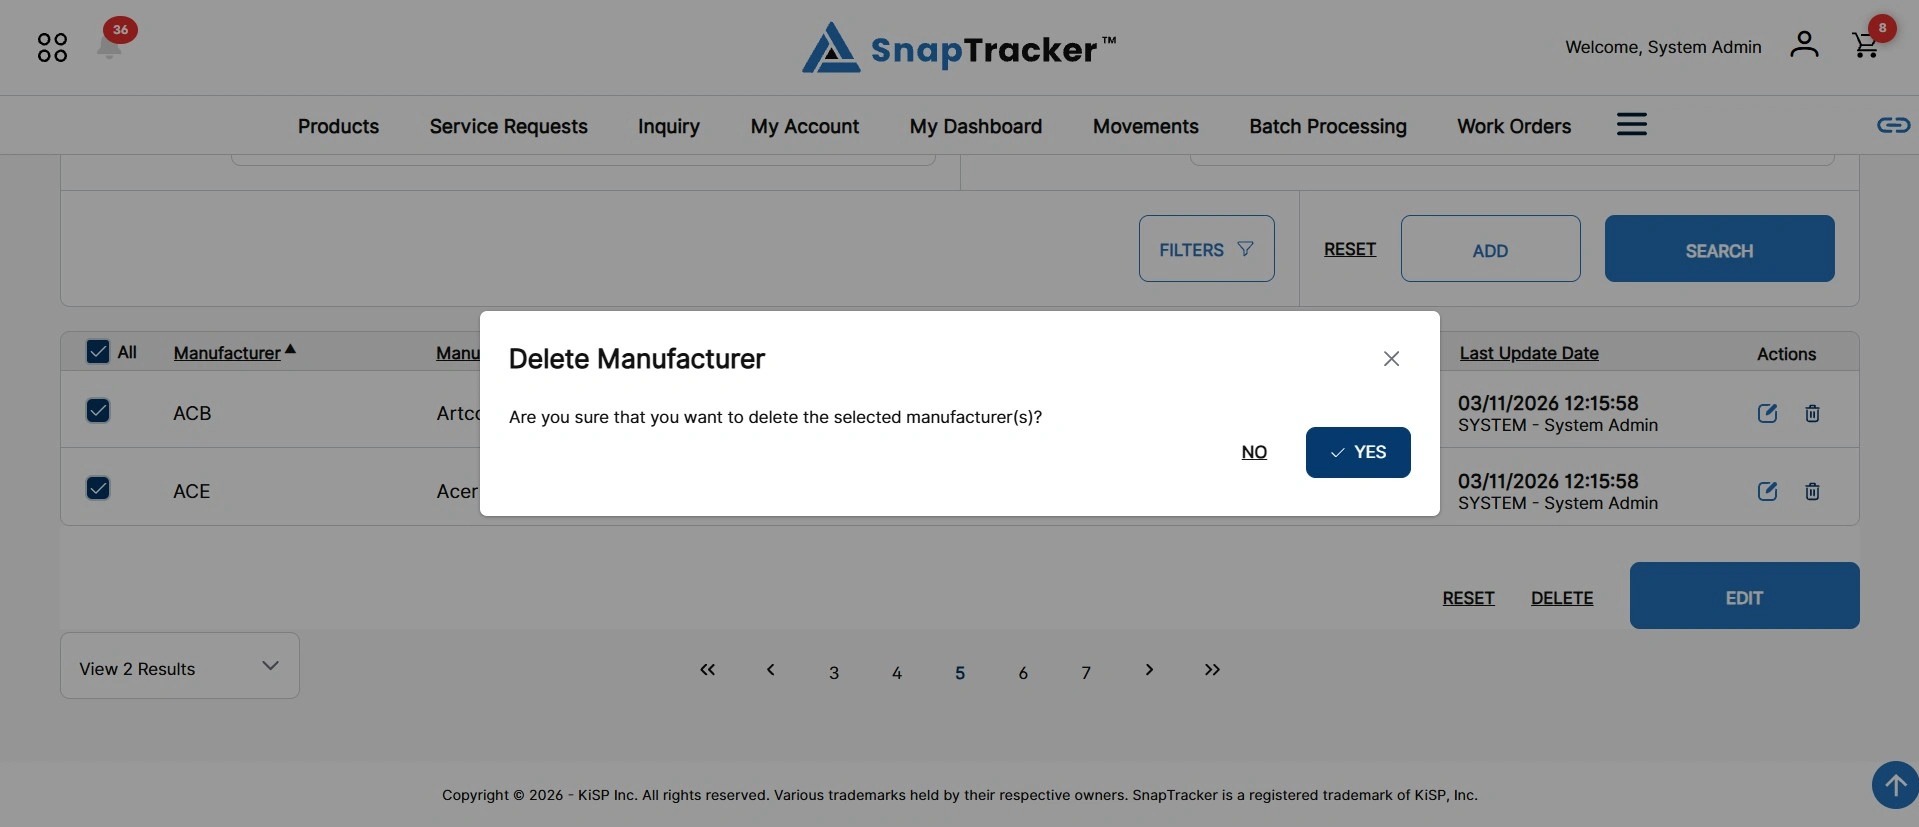
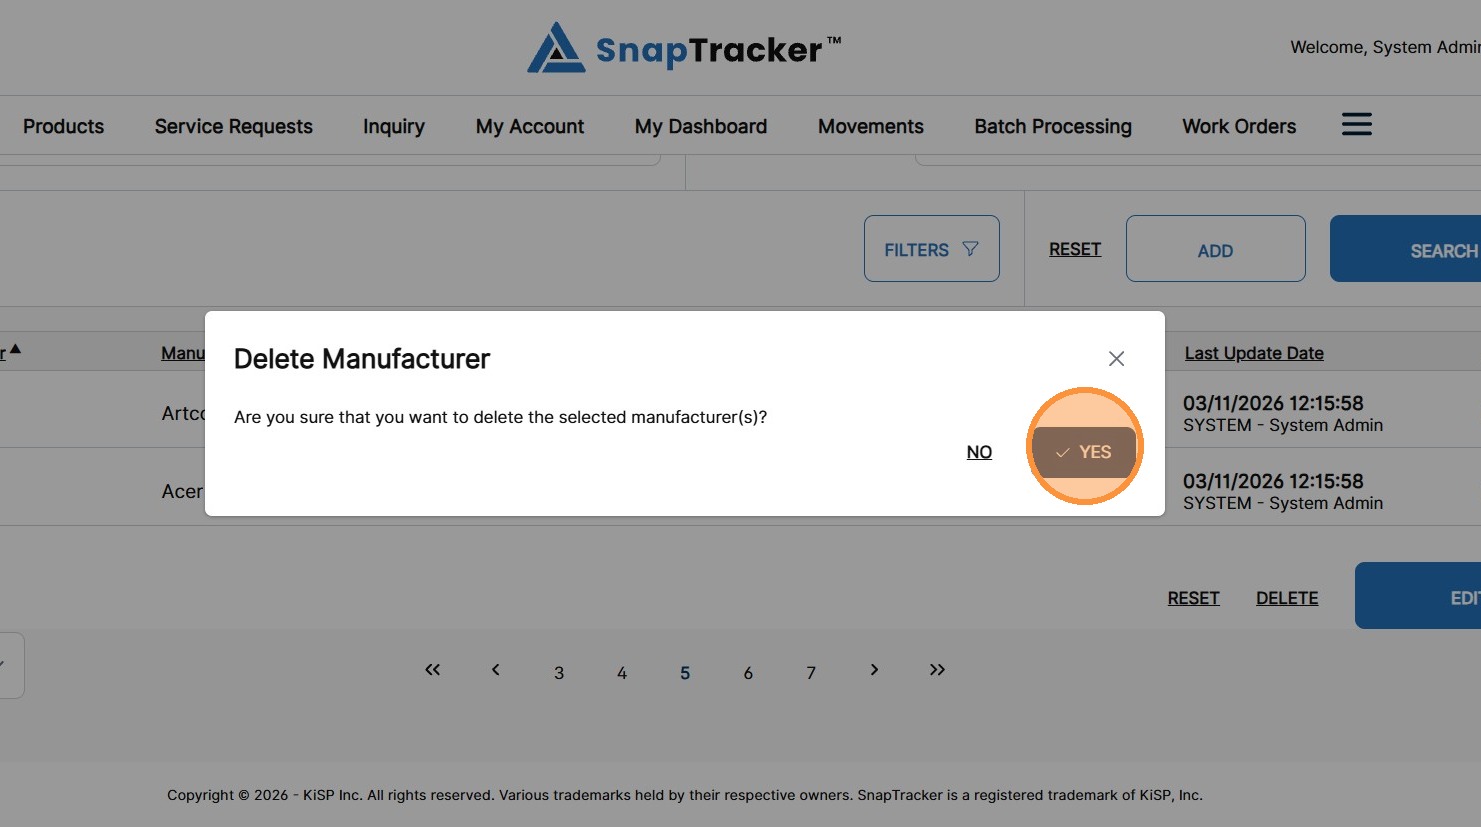
8. Click Yes to delete the selected manufacturer(s).
To cancel the delete, click No or X.
If a Catalog ID is assigned to a Manufacturer and deletion fails, an error message displays.
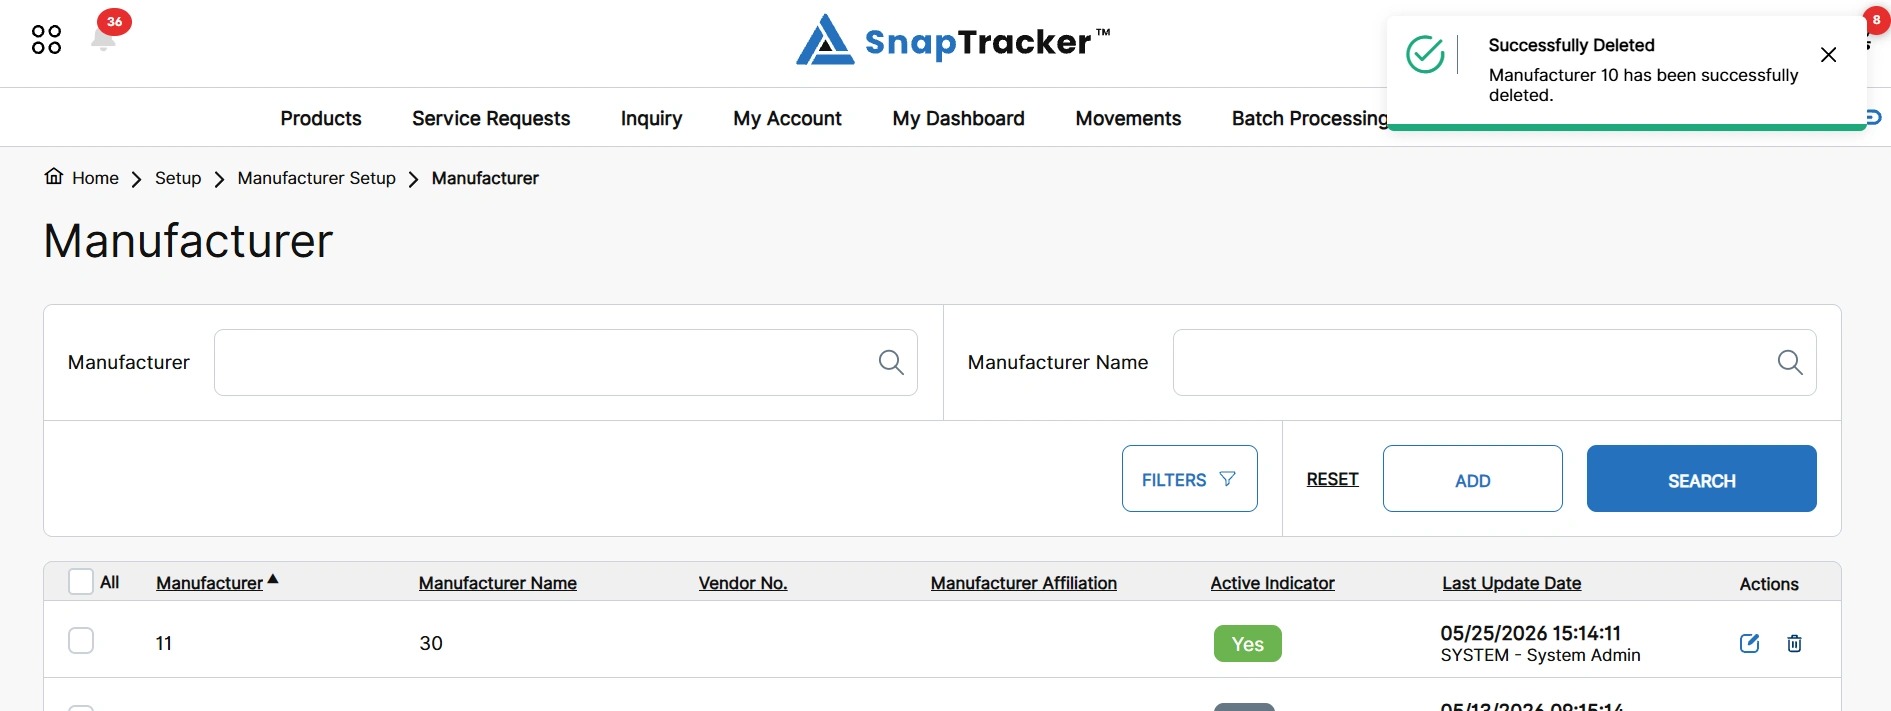
If the deletion is successful, a success message displays.
For more information on how to conduct a search for Manufacturers, see “How to Search for a Manufacturer.”