
How to Approve Orders
SnapTracker has several different workflows that can be configured for a Customer. One workflow enables a single level of approval to be set up for a User per Customer in SnapTracker. If approval is enabled for the Customer and User, when a cart is checked out, the order is routed to a designated approver. The User is notified that the order is being routed to an approver and who that approver is. At the same time, an email is sent to the approver letting them know there is an order waiting for their approval.
The assigned Approver can accept, edit or reject the order during the approval process before the order is finalized.
Note: The Approval process needs to be configured at both the Customer and User settings levels.
Before starting, make sure:
- You are logged into SnapTracker.
- The approval process is set up for the desired Customer.
- There is a minimum of one order created and sent to you for approval.
- Your user has shopping enabled.
- The correct Customer is selected from the Customer selection list.
This post outlines how to view and approve orders.
1. In the header section, click My Account.

2. Click Approve Orders.

The Approve Orders screen displays.
There are two ways the screen may initially display. The initial view is based on your user settings.
By default it may display a list of the requests:

Or by default it may display filters for you to select before the list of the orders displays.
For more information on the filters, go to Step 7 (below).
Note: Filters can be toggled on or off using the Filter option.

Observe the Approve Orders screen.
- Order No. – The SnapTracker order number.
- Order Date – The date the order was submitted for approval.
- Days in Approval – Numbers of days the order has been pending approval.
- Created By – The user who created the order.
- Total – The total value of the order.
3. To change the sort order of the results, click any hyperlinked column header to sort the results by that column in ascending or descending order.

4. To display a summary of the order, click the individual + icons.
The expanded order details display outlining details that include the name and the description of the cart.

The Approve Orders screen is paginated and you can scroll through the pages. You can also change the number of results displayed on a single page by clicking the View Results drop-down and changing the number of records displayed.

The primary actions for the Approve Orders screen display at the bottom right of the screen.

Observe the primary actions:
- Print – Print order summary details by selecting order(s).
- Reset – Reset any applied filters.
- Reject – Reject the selected orders with or without a comment.
- Approve – Approve the selected orders with or without a comment.
5. To quickly accept or reject an order, select the checkbox beside the desired order and click the desired action.

The Approval/Rejection Comments pop-up displays.

6. You can enter a comment and click Approve/Reject, or simply click Approve/Reject.
Note: When an order is rejected, an email is sent to the user that submitted the cart letting them know the cart is rejected. A rejected cart cannot be resubmitted for approval. A new cart needs to be created.

7. To view additional filters, click the Filter icon.
Note: The Filters may display for you by default, depending on your user settings.

The filters display.

One filter or a combination of filters can be applied to get the desired results.
- Search By – Select a field to search for a keyword in.
- Enter Search Text – Combined with Search By. Type in a keyword to search for in the selected field.
- Date Range – Select a date range to filter results by.
8. Make your selections using the corresponding sections. Click Search.
The filtered results display.

9. To view the full details of the order, click a hyperlinked Order No.

The Order Details screen displays.
The Order Details screen shows the product requested, Attachments (if applicable), Order History, the Payment Information, Order Information, Additional Information and Address sections.
Note: For more information on the sections on the Order Details screen, refer to How to View an Order Receipt.
Approvers have the ability to edit any order that is sent to them for approval. This includes the ability to edit any aspect of the order including:
- Quantity.
- Quantity Type (New or Stock, based on approver rights).
- Notes.
- Add ad-hoc lines.
- Billing and Shipping Information.
- Delete product from the order.

10. To review the order details, scroll through the full order receipt.

There are different actions you can complete in the Order Details screen. There are two different areas on the screen with actions:
- Below the product listed on the order.
- At the bottom of the Order Details screen.

Observe the actions below the product:
- Print Items – Print Items enables you to print the items in the order, excluding the rest of the order information.
- Edit – Edit and update details in the order.
- Expand All/Collapse All – To quickly expand or collapse all order details at once.
11. To print only the product in the order, click PRINT ITEMS.

The Print screen displays and you can print the page.

12. To edit any details in the order, click Edit.

The Edit Cart screen displays and is editable. You can modify quantities or add additional lines to the order.

13. To edit products in the order, update the values in the associated quantity fields.
You can add ad-hoc items (if your user settings allow) using a SIF or Excel file by clicking the Upload icon to upload an order file.
When all changes are complete, click Update.

You can edit quantities, remove items or add additional items to the order.
See the following articles for more information about how to modify products and/or quantities in an order:
14. To edit Checkout information, click the More Actions icon, then click Edit Billing Info.

The Edit Billing Info screen displays.
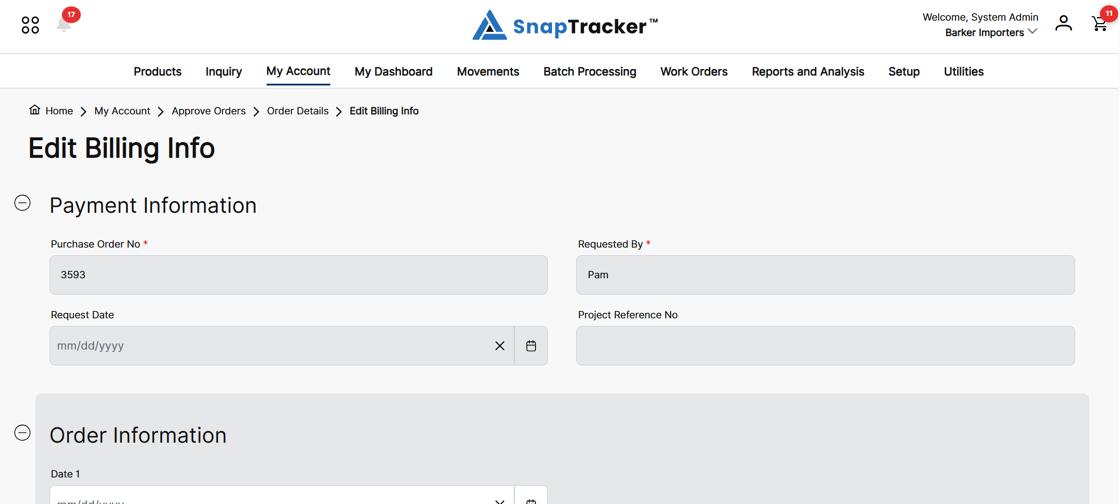
15. Make any changes necessary, scroll to the bottom of the screen and click Update to save the changes.
Click Back to leave the screen and return to the Order Details screen.
See the following article for more information on adding/editing Checkout information:

At the bottom of the Order Details screen, additional actions are available.

Actions available at the bottom of the Order Details screen may include:
- Cancel – Close the Order Details screen and go back to the Approve Orders screen.
- Print Order – Print the full order details. The print out includes the product and any additional open/expanded sections on the screen.
- Edit – Edit and update details in the order.
- Reject – Reject the order with or without a comment.
- Approve – Approve the order with or without a comment.
16. Determine if you want to accept or reject the order and click the corresponding button.
A success notification displays.
An email is sent to the shopper advising them the order has been approved or rejected. If the order is approved, order emails are sent to the service provider with the order details.
You are returned to the Approve Orders screen.