How to Create Shareable Links – Custom Menu
Custom Menus can be created in SnapTracker by site admins to create shortcuts to specific areas within the site or add additional content such as a link to the service provider’s corporate website or product information for their users. Custom Menus can be created as new navigational links or displayed within selected modules, with a URL or custom HTML.
Shareable links can be created from these custom menu links to share with internal SnapTracker users (private) or external people (public).
Before starting, make sure:
- You are logged in to SnapTracker.
- You have Menu Access to Utilities and Custom Menus.
This post outlines how to create shareable links for Custom Menus.
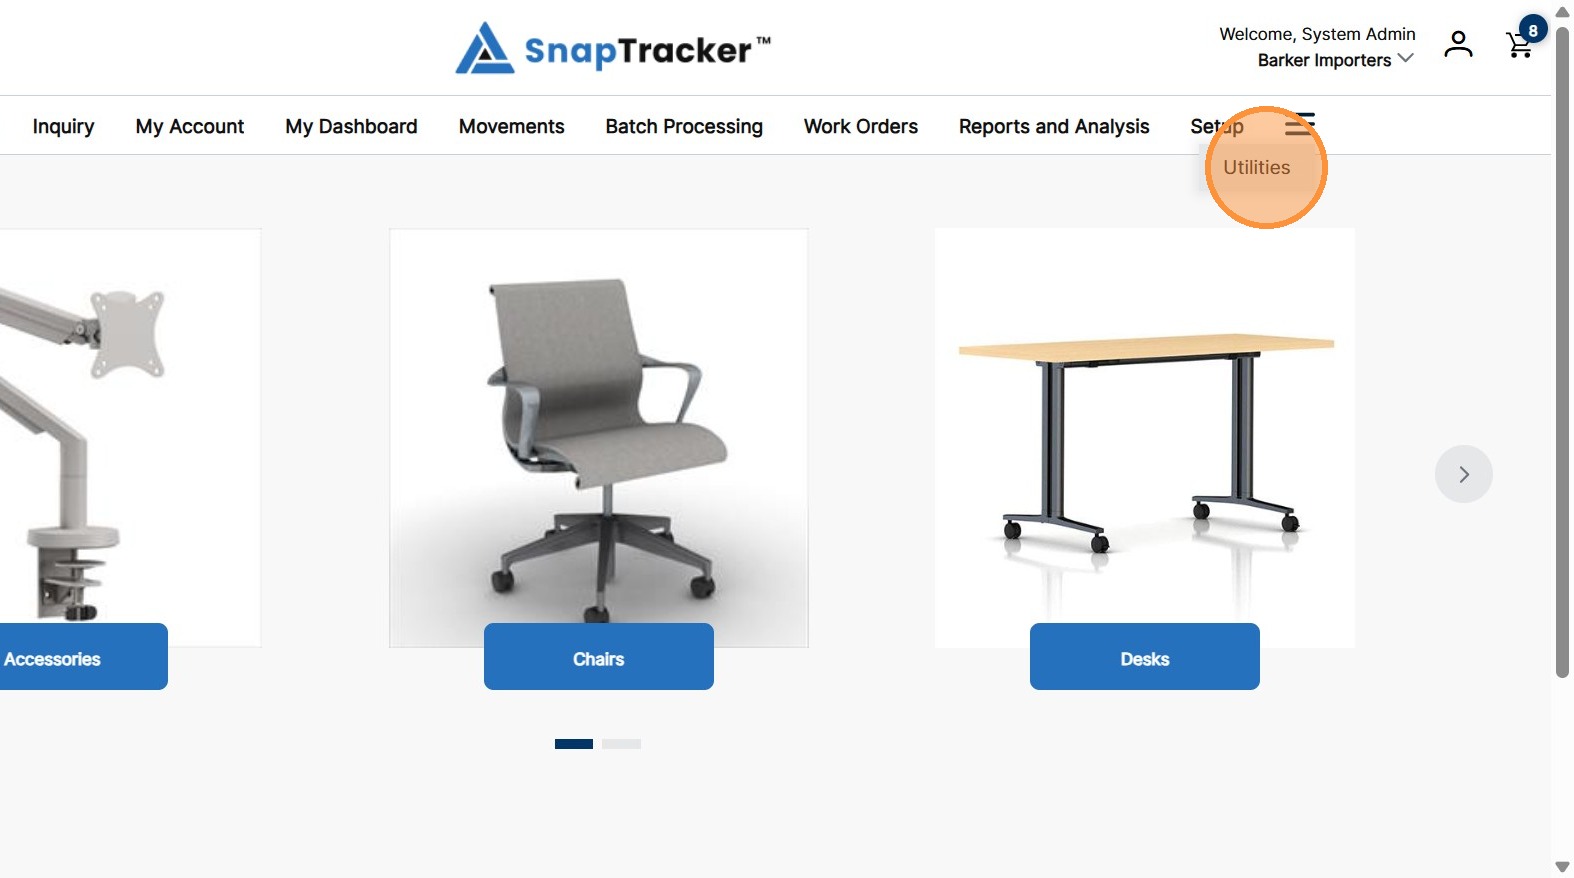
1. In the header, click Utilities.
2. Click the arrow beside User Setup, then click Custom Menu.
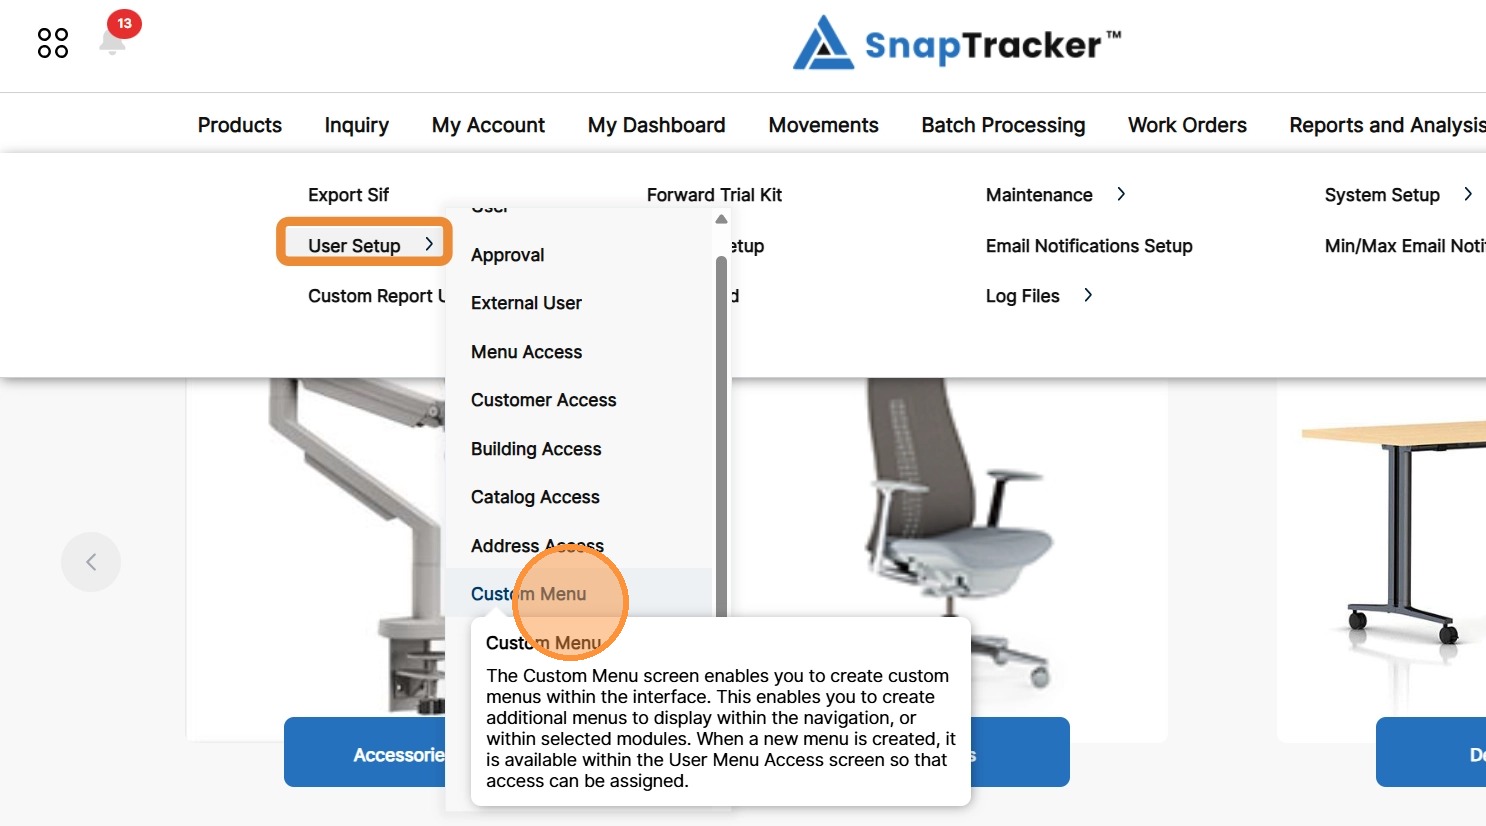
Another way to access the Custom Menu screen is to click Utilities>User Setup.
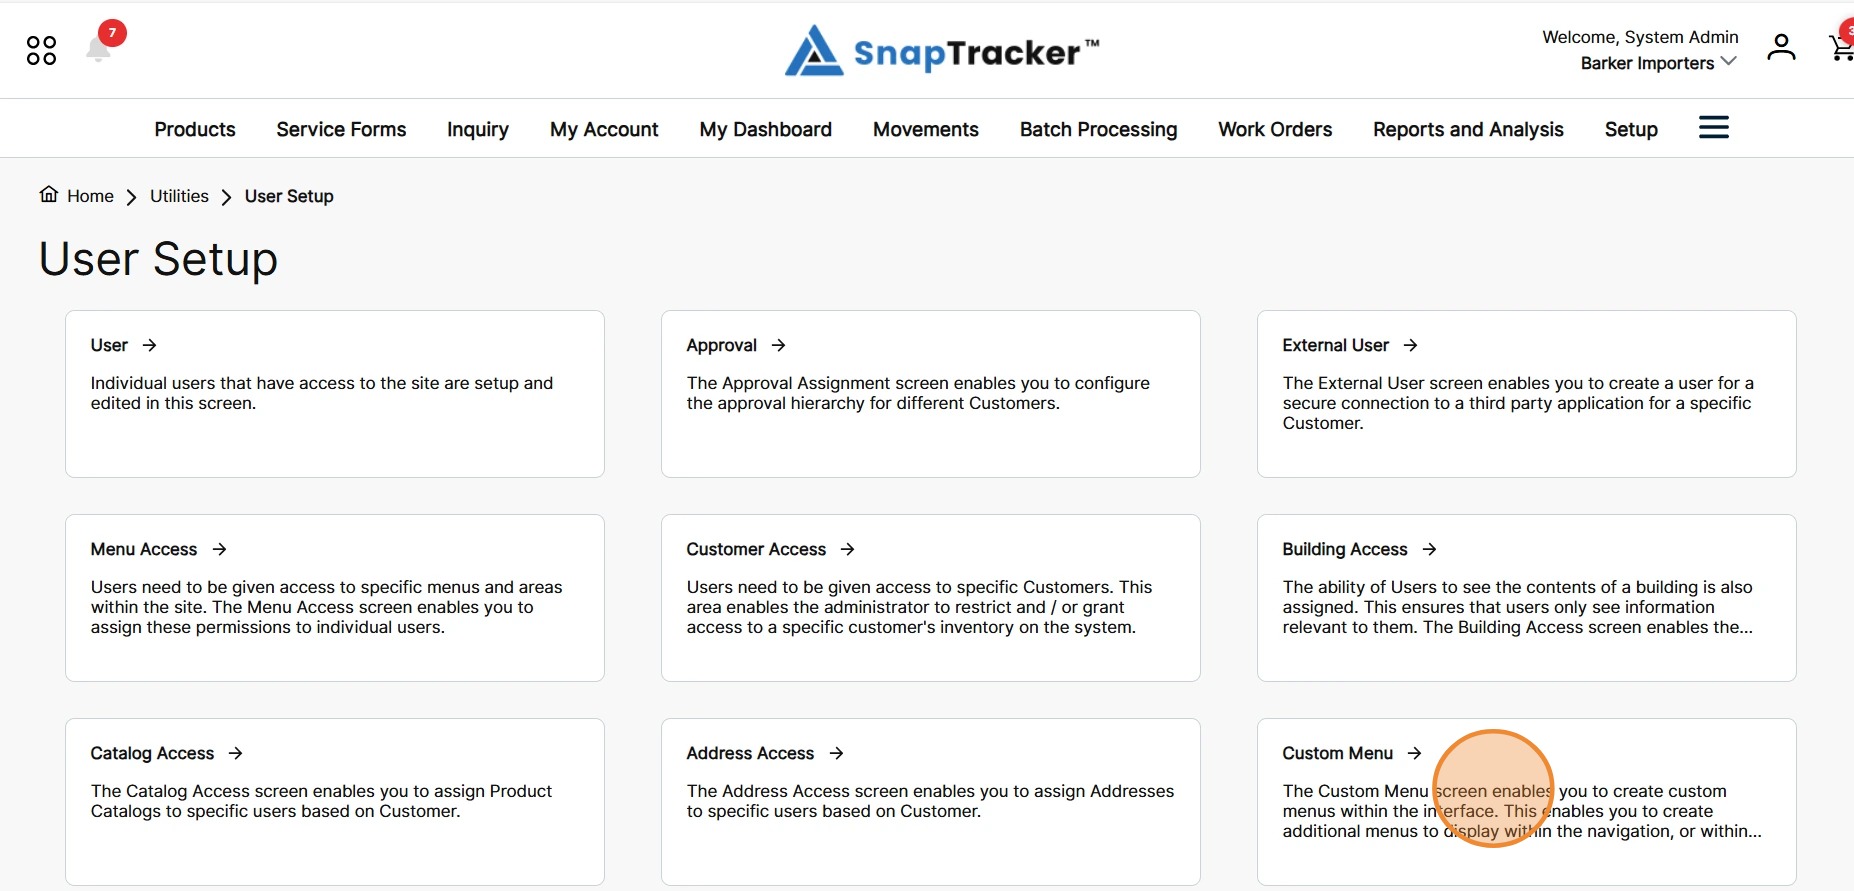
The different User Setup screens display. From here select Custom Menu.
The Custom Menu screen displays.
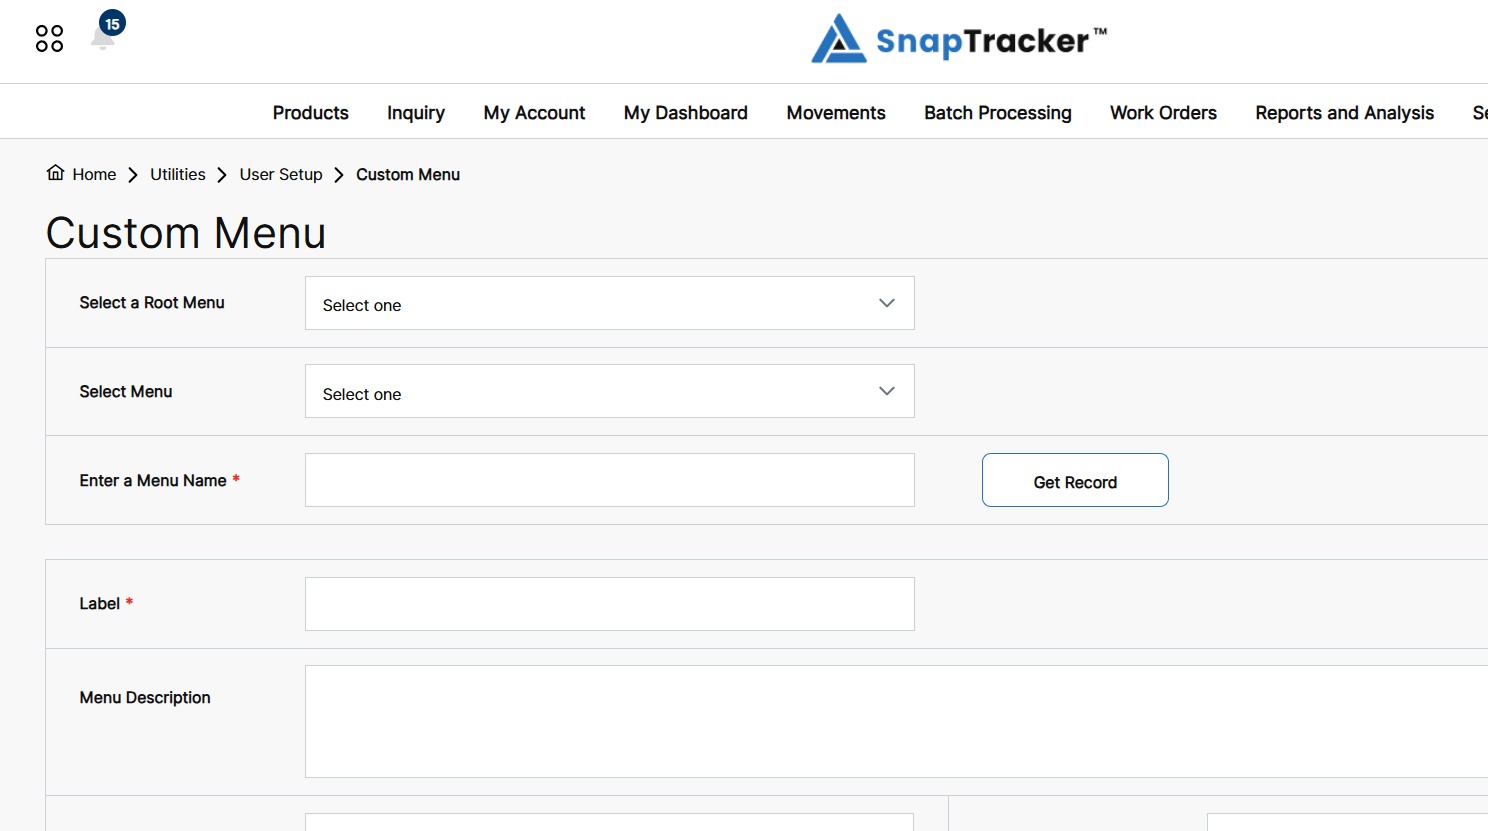
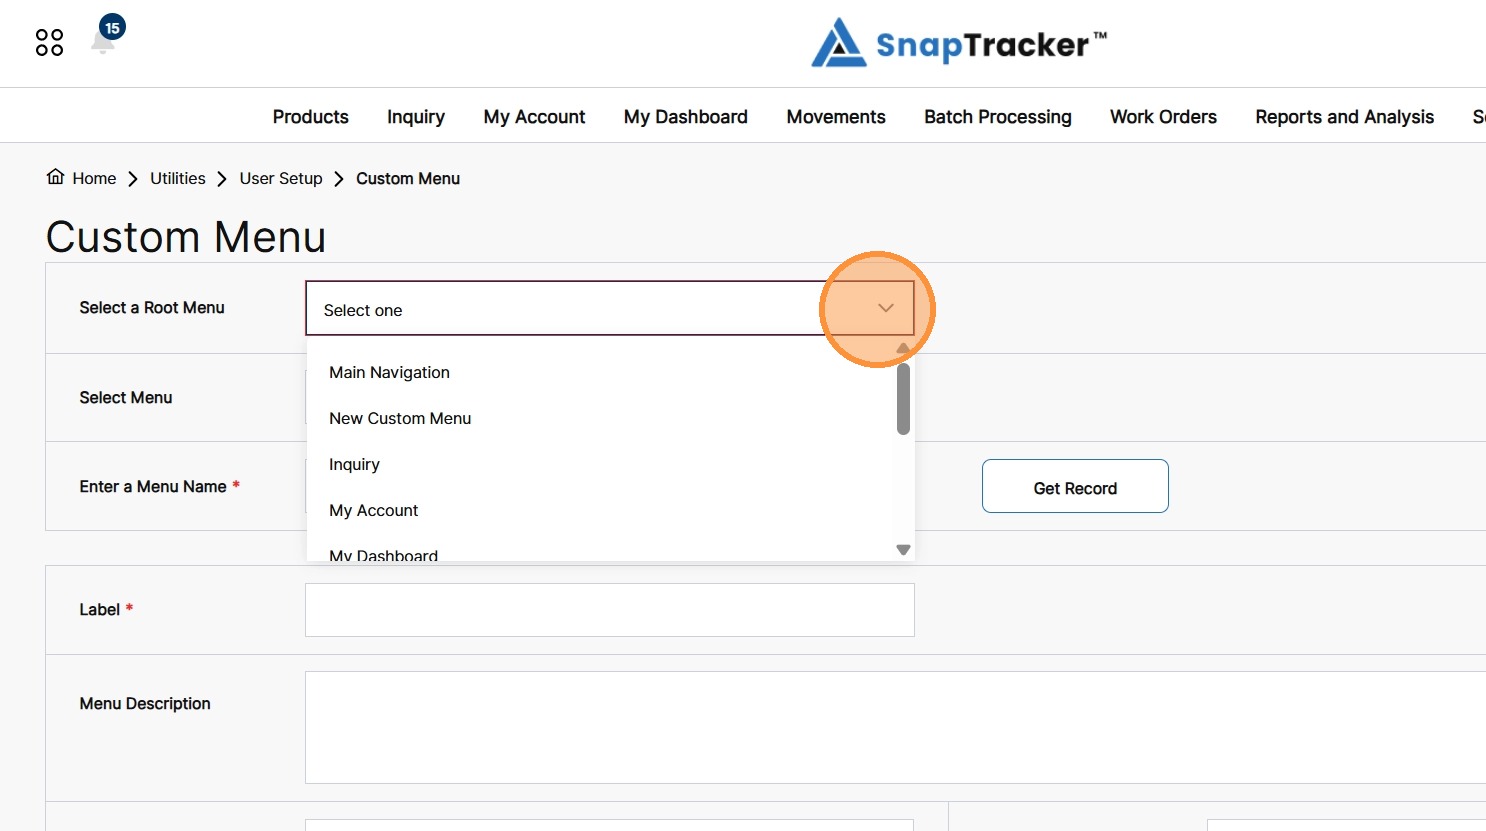
3. Click the Select a Root Menu dropdown to select a Root Menu.
Note: The Select Menu dropdown is filtered based on the selected Root Menu.
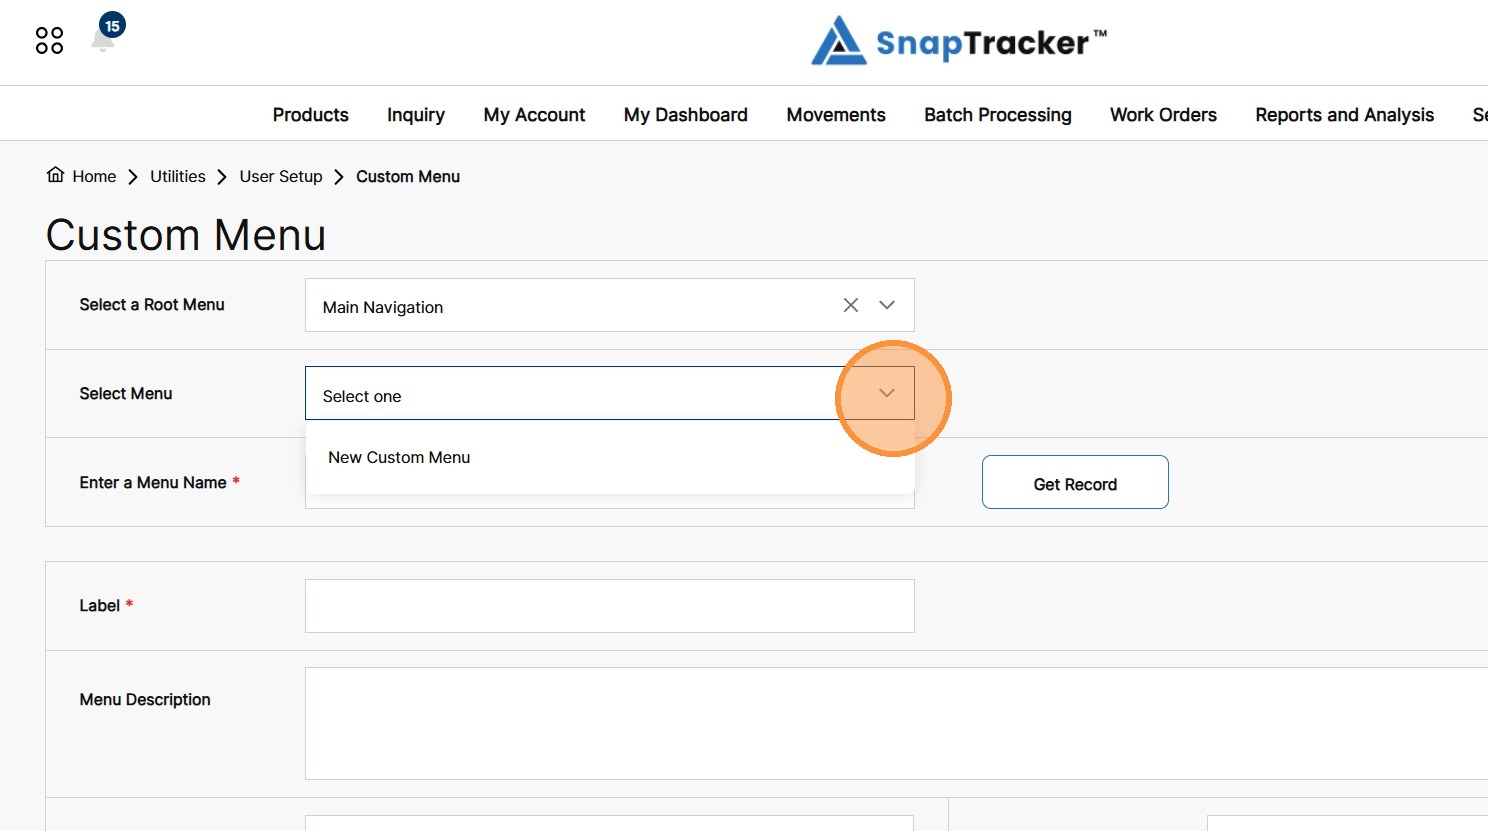
4. Click the Select Menu dropdown to select a created Custom Menu.
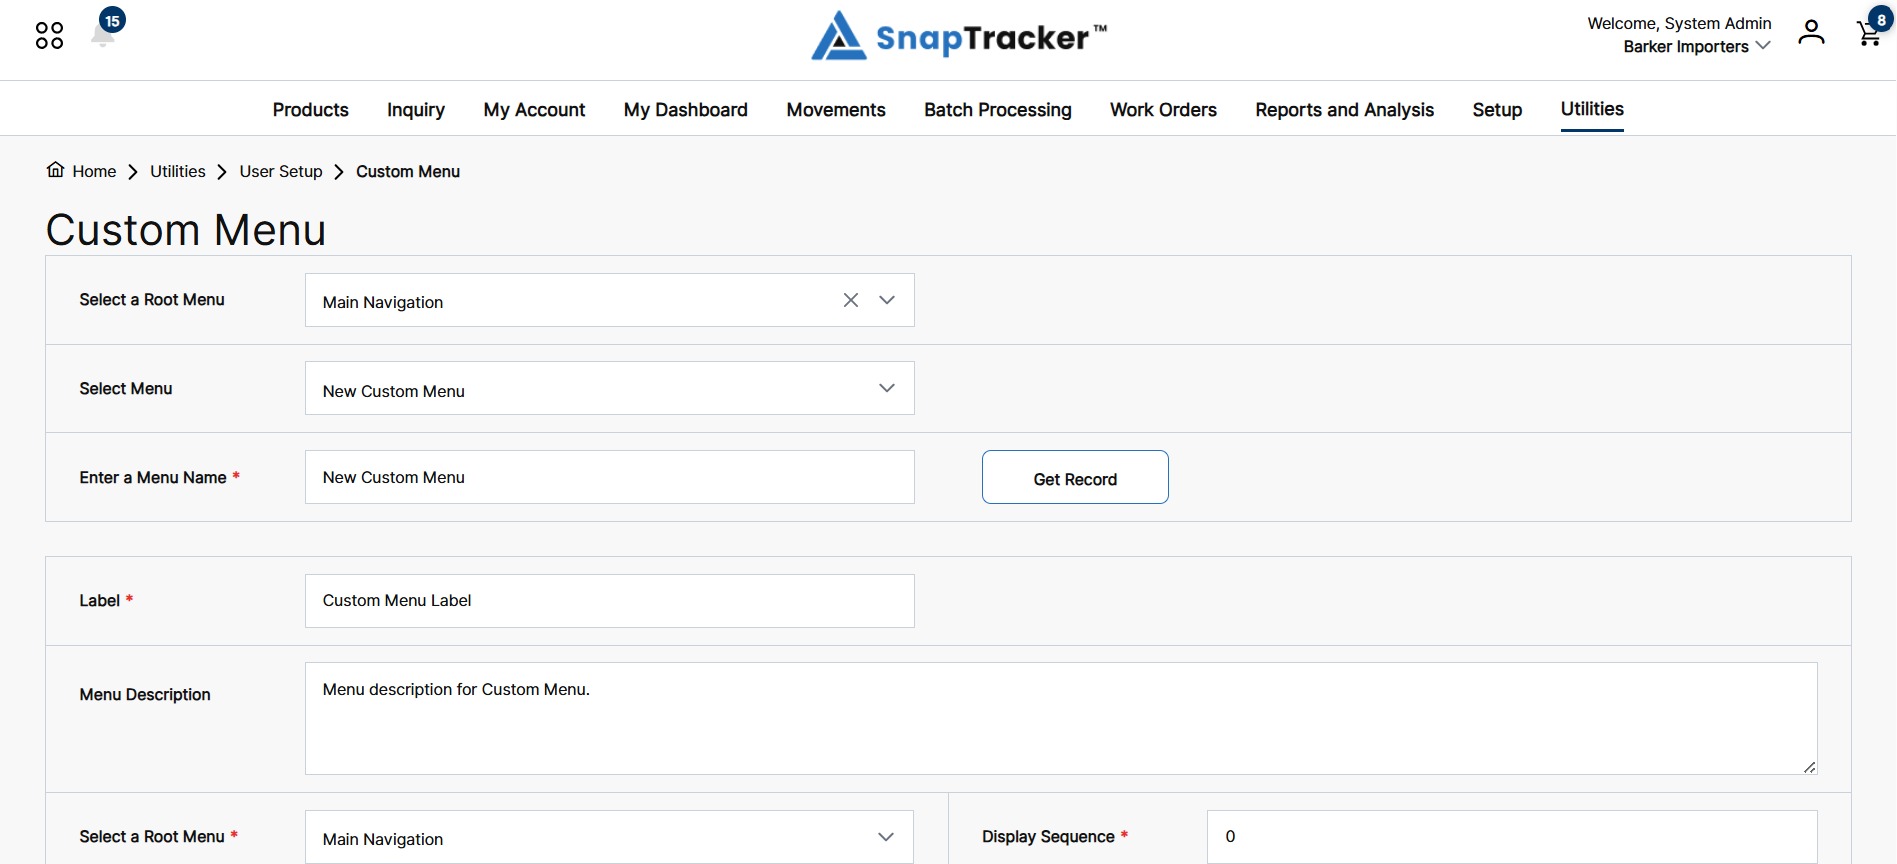
The selected Custom Menu details display.
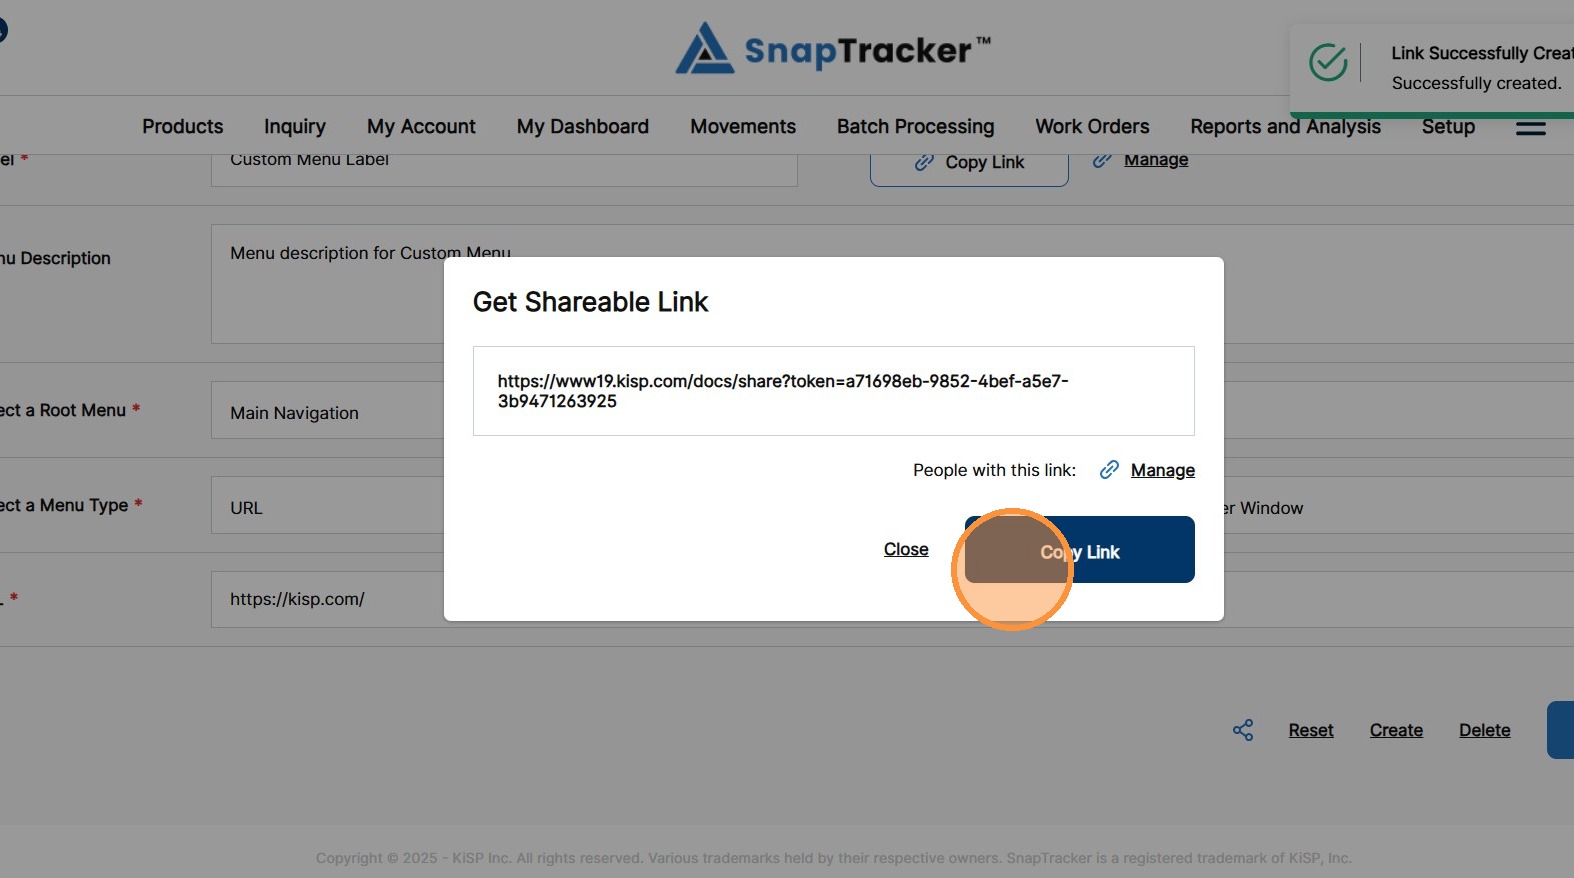
5. Scroll to the bottom and click the Shareable Link icon.
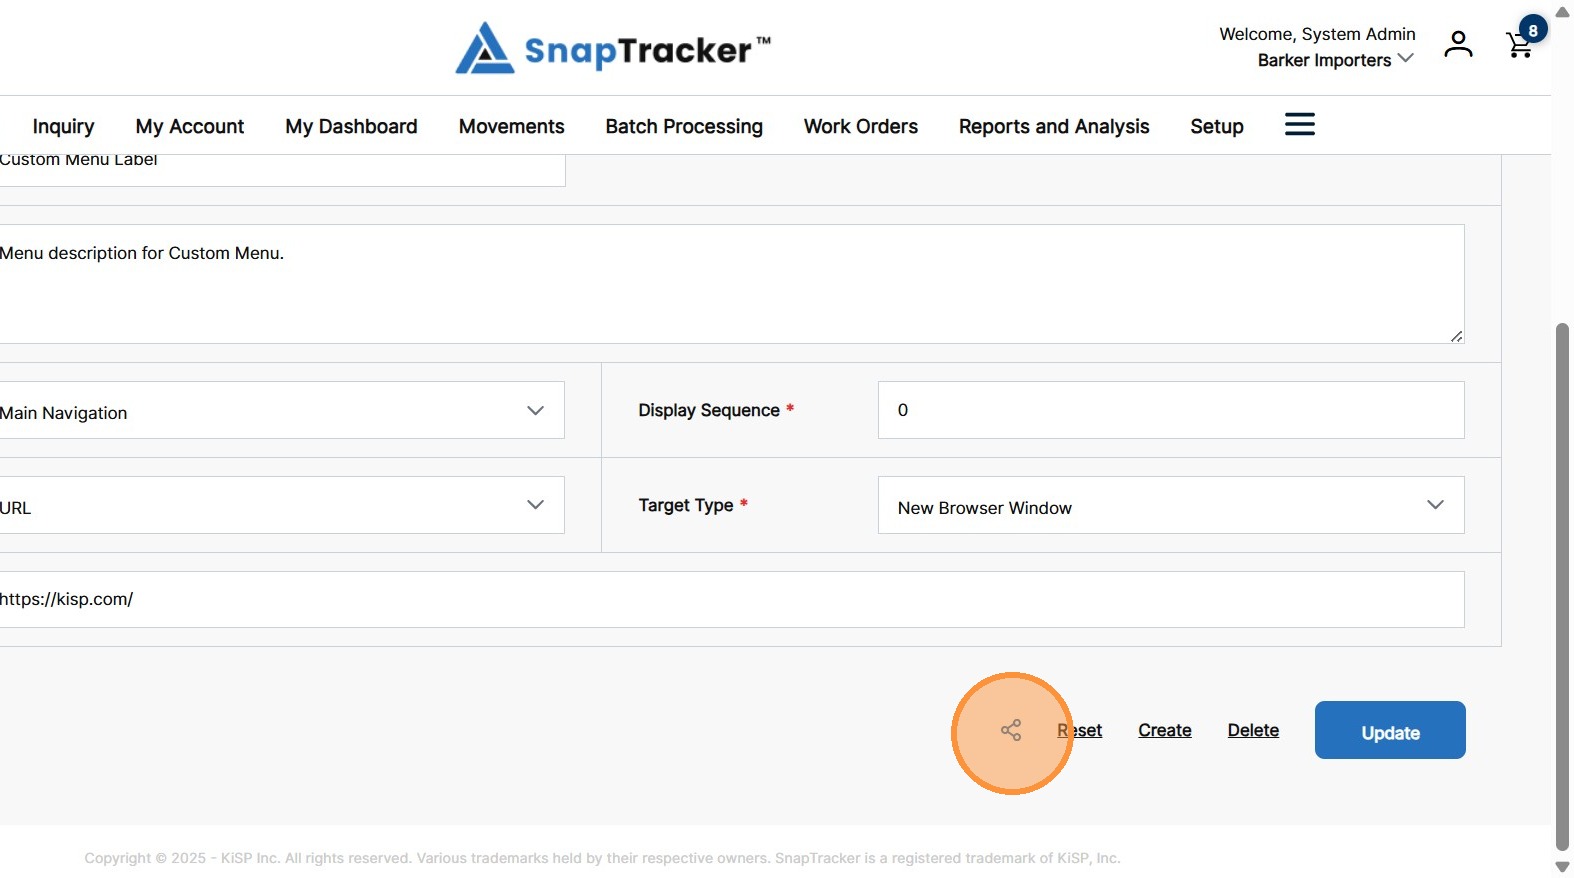
The Shareable Link is created and the Get Shareable Link pop-up displays.
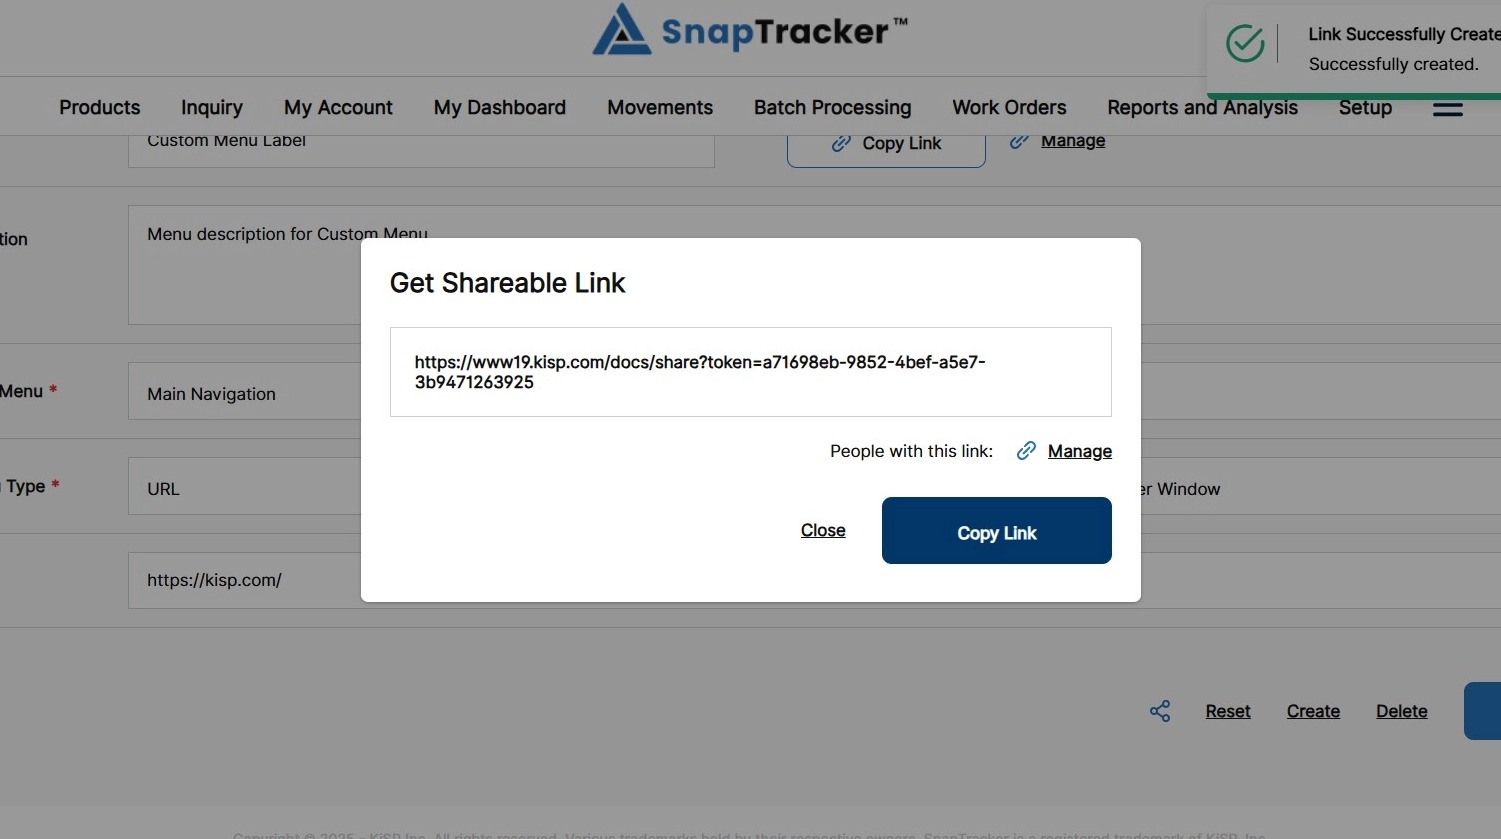
6. Click Copy Link in the Get Shareable Link pop-up, or click Close.
For more information on managing a Shareable link for a Custom Menu, refer to “How to Manage Shareable Links – Custom Menu“.