
How to Review and Edit a Request
SnapTracker has several different workflows that can be configured for a Customer. One such workflow enables service providers to have a collaborative approach to requesting products between a shopper and the service provider called Review Cart.
The customer shopping experience can be configured so that a cart/request goes to the dealer to review before final checkout and order creation.
Based on the defined criteria, when a shopper checks out the cart it is sent to another user registered on the site (usually the service provider CSR) to review.
The customer service rep for the service provider can add additional product, additional charges, such as labor, tax, or delivery and installation, before the final checkout to provide the shopper with a full picture of the total costs of the request.
When this functionality is configured, the user submits a cart, the CSR reviews the cart and makes any required changes. The cart is then made available to the shopper to verify. If the shopper proceeds to check out the cart with the changes made, an order is created.
SnapTracker determines if the request should be reviewed prior to final checkout. If the request qualifies for the review process, the end user/shopper is notified the order is being routed to a reviewer and emails are sent as notifications.
Before starting, make sure:
- You are logged into SnapTracker.
- The review cart process is set up for the desired Customer.
- There is at minimum one cart created and sent to you for review.
- Your user has shopping enabled.
- The correct Customer is selected from the Customer selection list.
This post outlines how to review a request, edit a request and release the request back to the user.
1. In the header section, click My Account.
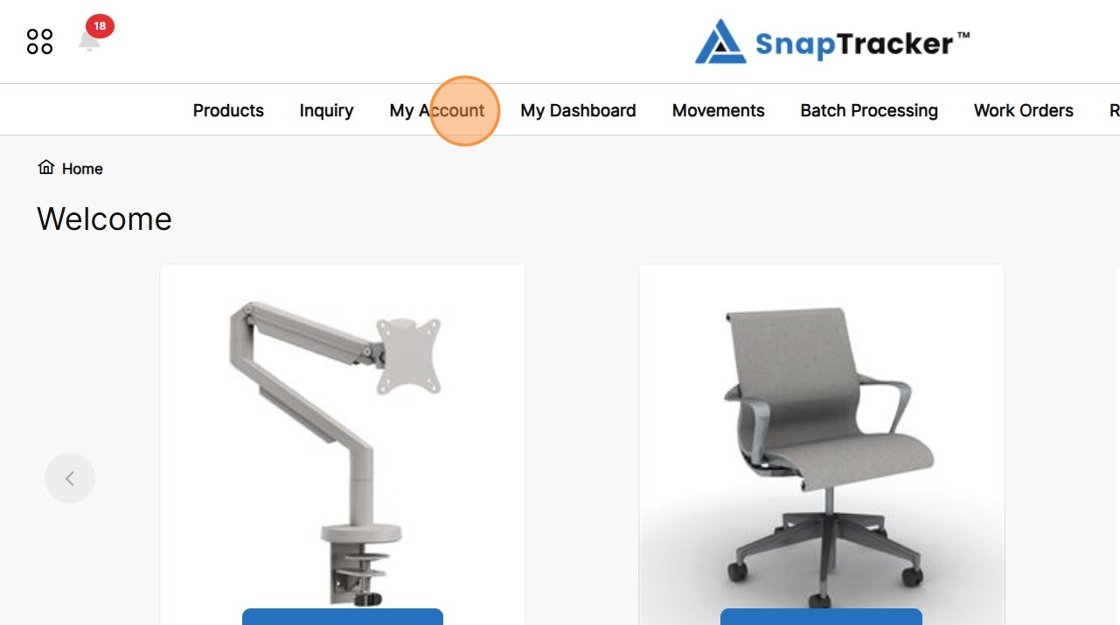
2. Click Review Requests.

The Review Requests screen displays.
For more information on using this screen, refer to How to Access a Request in the Review Process.

3. To review the details of an individual request, click the hyperlinked request no.
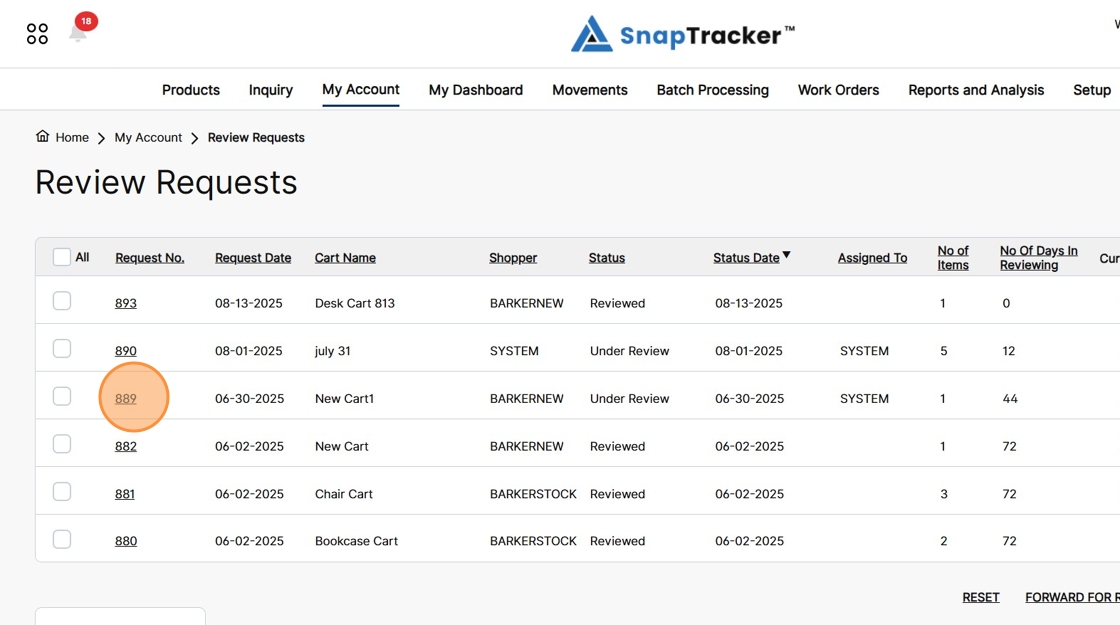
The Request Details screen displays.

4. Scroll through the full request details to review all the product details and prices.

5. To view more details within a certain section, click the respective + icon.

The selected section expands with details.
Note: For more information on the sections on the Request Details screen, refer to How to View an Order Receipt.

6. To add/edit product or additional charges, click Edit.

The Review Cart screen displays and is editable. You can modify quantities or add additional lines to the request.

7. To add an ad-hoc line, click the More Actions icon.

8. Click Insert Line.

The Insert Line pop-up displays.

Observe the Insert Line fields to add an ad-hoc item to the request:
- Model No. – Enter the model number for the product, if available.
- Man. – Enter the manufacturer name of the product, if available.
- Cat. Id – Enter the catalog ID of the product, if available.
- Quantity – (Required) Enter the quantity of the product, as New or Stock.
- Unit Price – Enter the unit price for the product, if available.
- Description – (Required) Enter a description for the product or additional charge.
- Notes – Enter any additional notes for the product.
9. Populate the desired fields and click Create.

The added product or additional charge displays as an ad-hoc item in the cart.

10. To edit Billing and Shipping information, click the More Actions icon.

11. Click Edit Billing Info.

The Edit Billing Info screen displays.
Make any changes necessary and scroll to the bottom of the screen and click Update to save the changes.
Click Back to leave the screen and return to the Request Details screen.

12. To add Standards to the request, click Insert Product.
The Standard Search screen displays.
Locate the Standard you want to add to the request, select it and click Assign.
The product is added to the request.

13. To forward the request to another user, click Forward for Reviewing.
The Forward Request pop-up displays.

14. A list of all users that have access to the selected Customer display. Click the dropdown to select a user to forward the request to for review.

15. Populate other fields as desired, then click Forward.

16. Once you have finalized all required edits to the request, click Release Request.

A success notification displays. The status of the request is updated to Reviewed.
An email is sent to the shopper advising them the request has been reviewed. The shopper is able to access the cart from their Carts list.
