
How to Use File Upload
The File Upload feature enables you to upload spreadsheets to quickly complete bulk information updates to your SnapTracker database.
This screen enables you to implement mass changes to certain data through an uploaded file, and provide immediate processing feedback as available. Certain file types require batch processing (such as Inventory, Mass Deliver and Global Adjustment Types). In such cases, the batch information displays and the user is redirected to the appropriate screen to complete the process.
Before starting, make sure:
- You are logged into SnapTracker.
- You have the file template for the respective file types.
- The correct Customer is selected from the Customer selection list (if applicable).
- You have access to Utilities – File Upload.
This post outlines the process of uploading a file to File Upload to implement bulk changes.
1. In the header section, click Utilities.
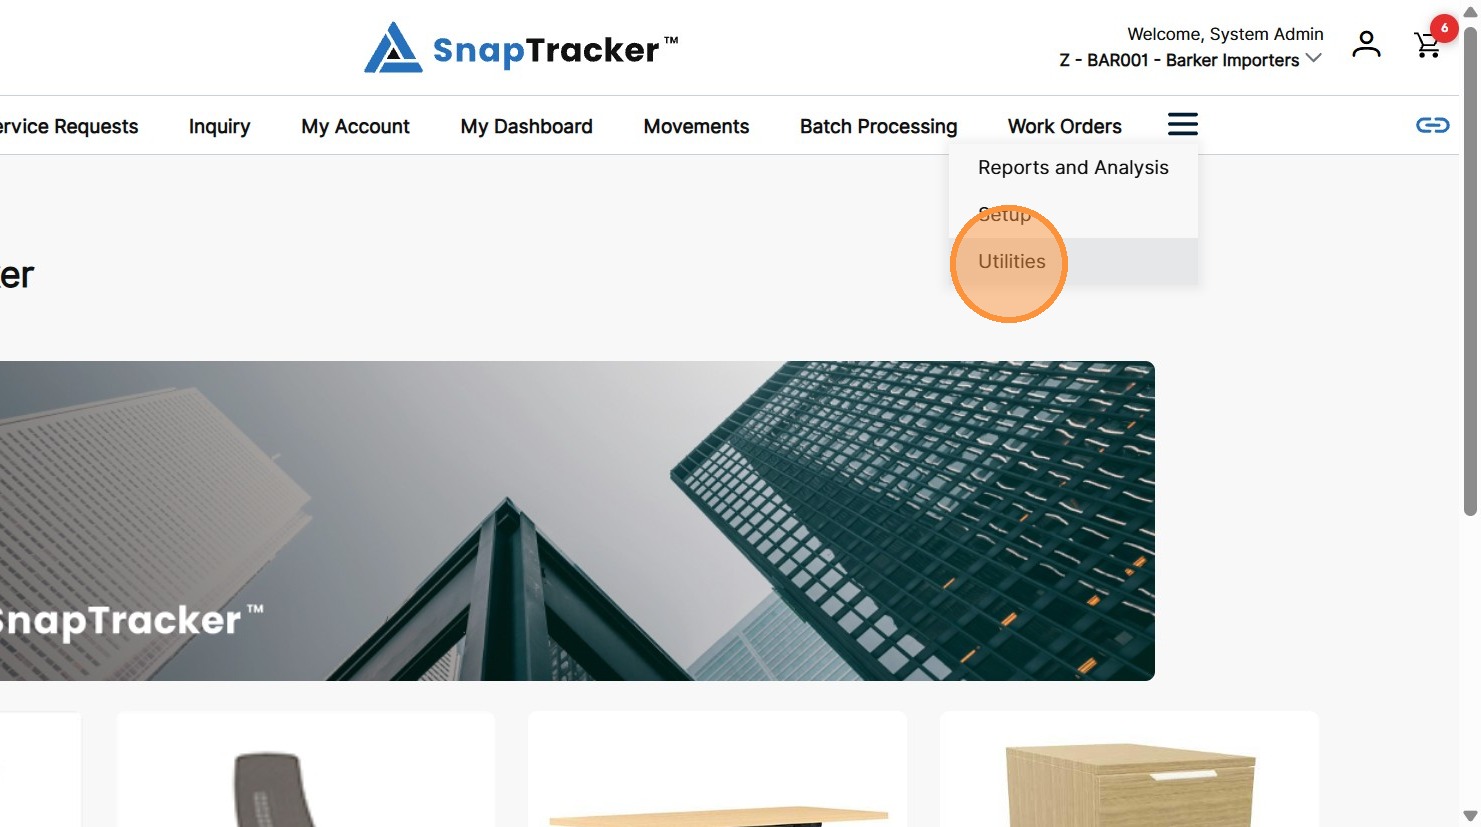
2. Click File Upload.
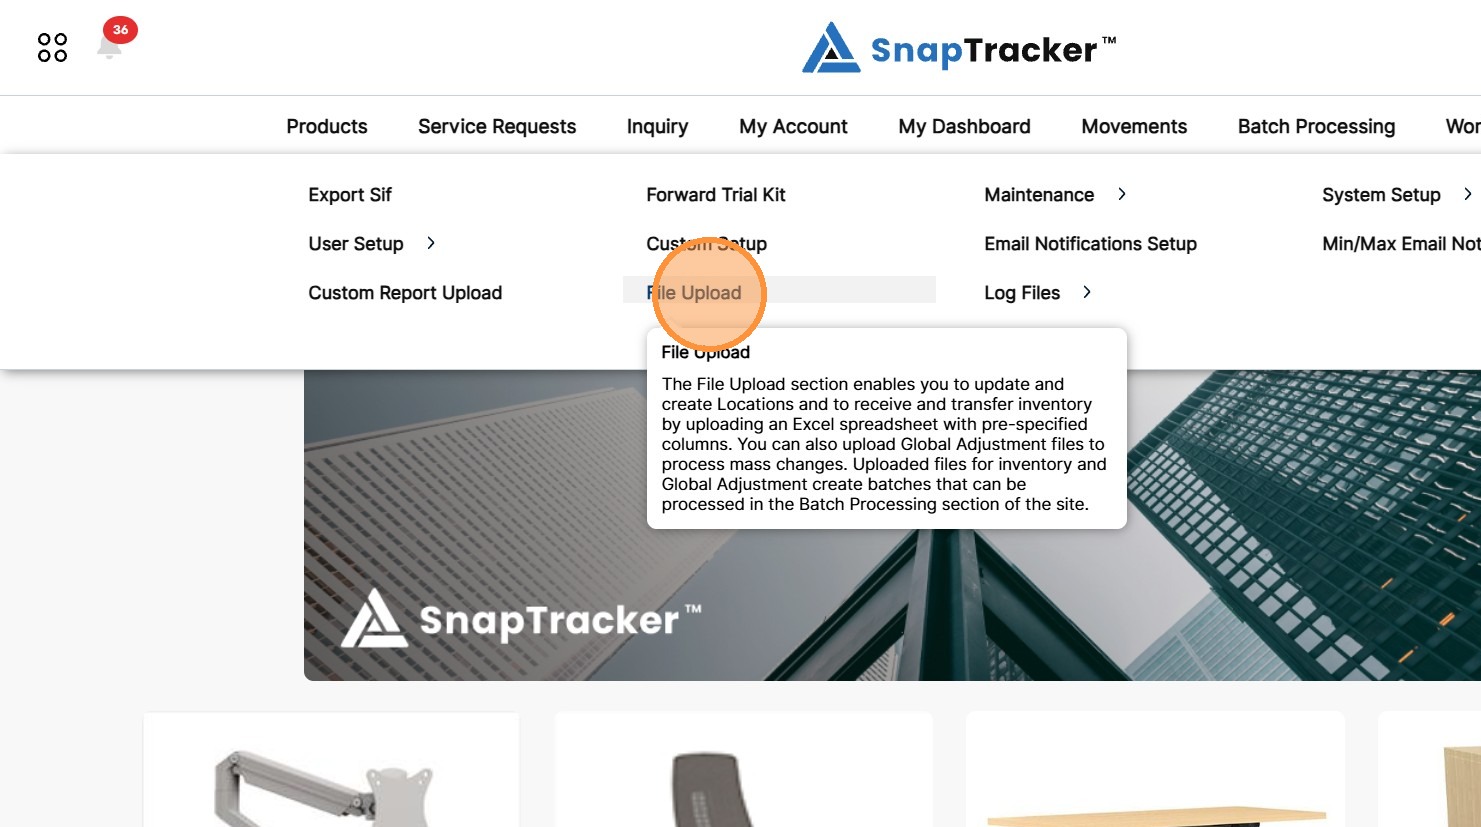
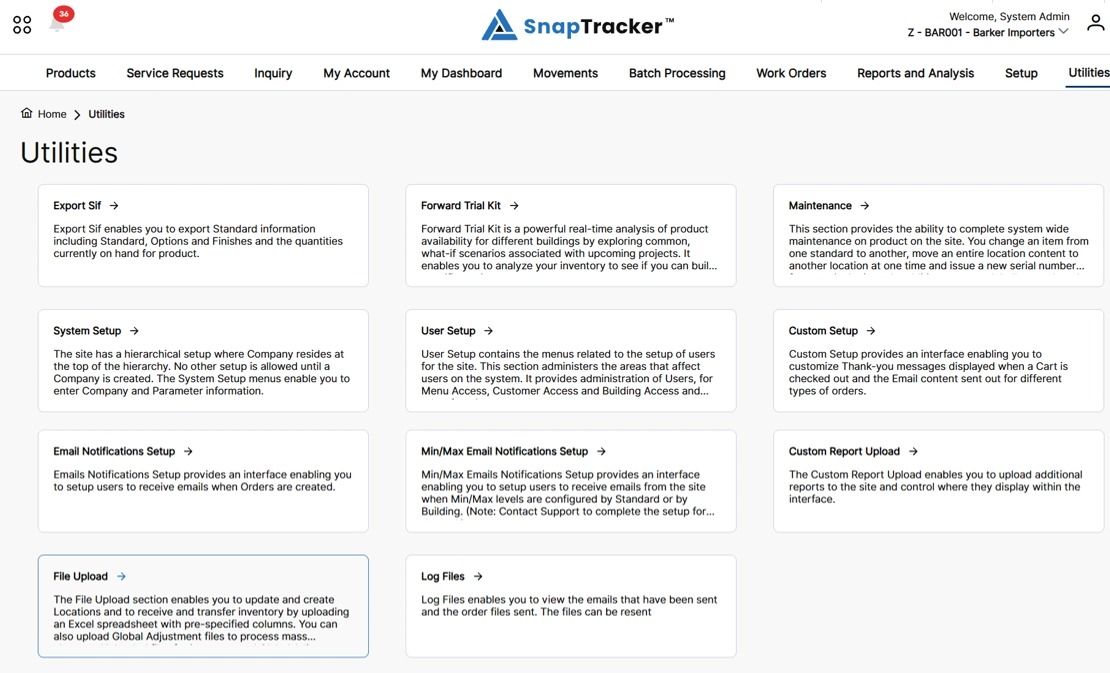
Another way to access the File Upload screen is to navigate to the Utilities main screen.
From here, select File Upload.
The File Upload screen displays.
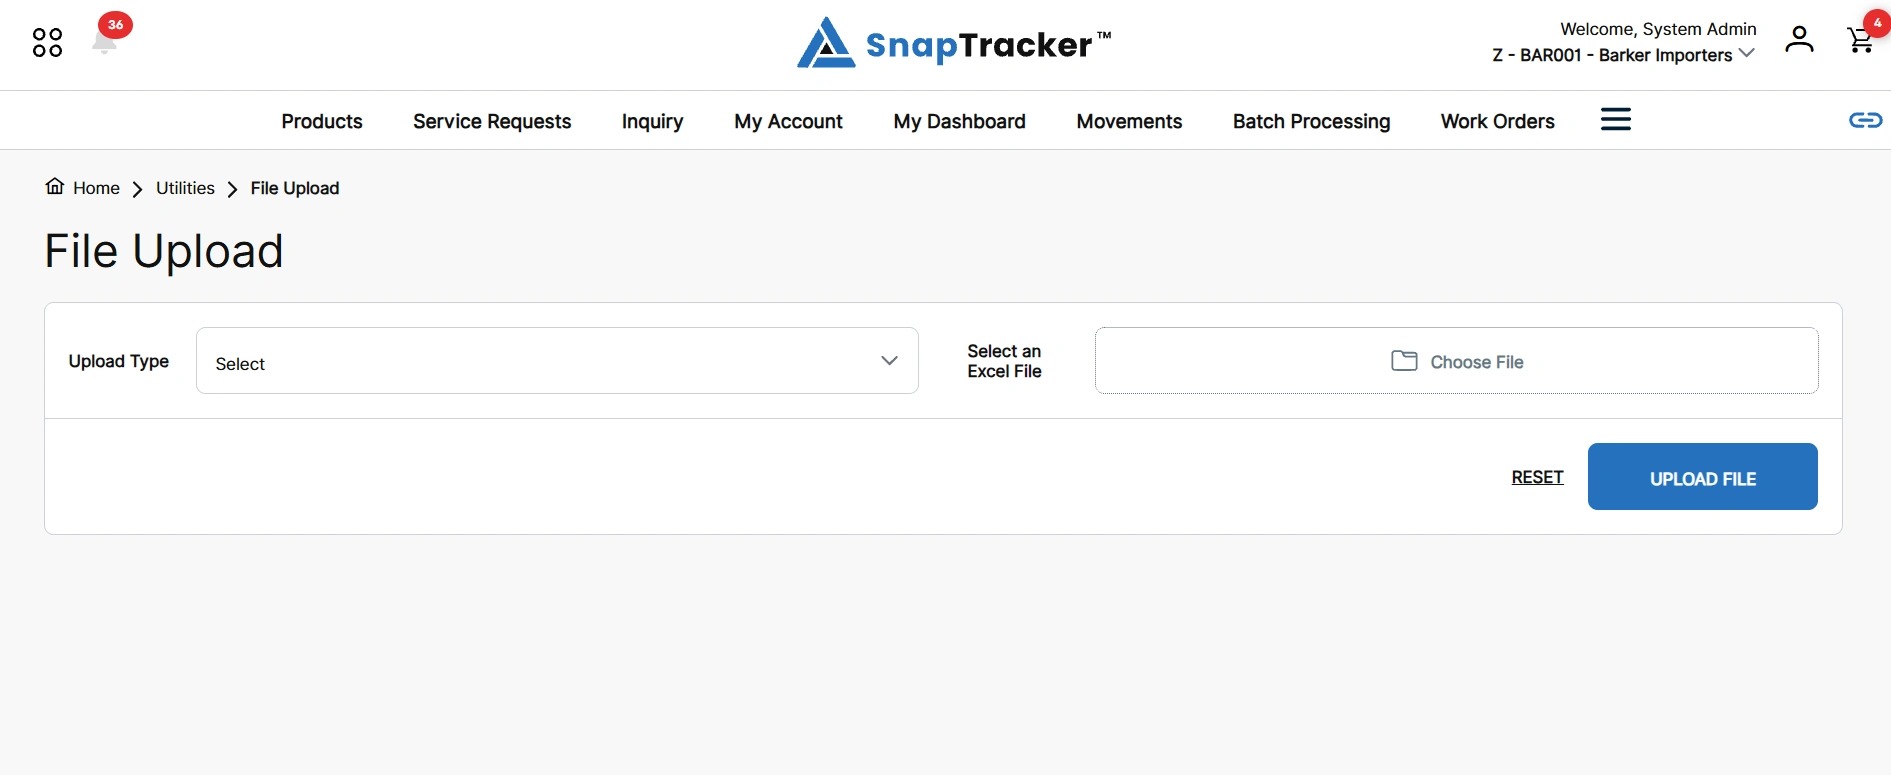
3. To view or access the different types of updates you can complete, click the Upload Type dropdown.
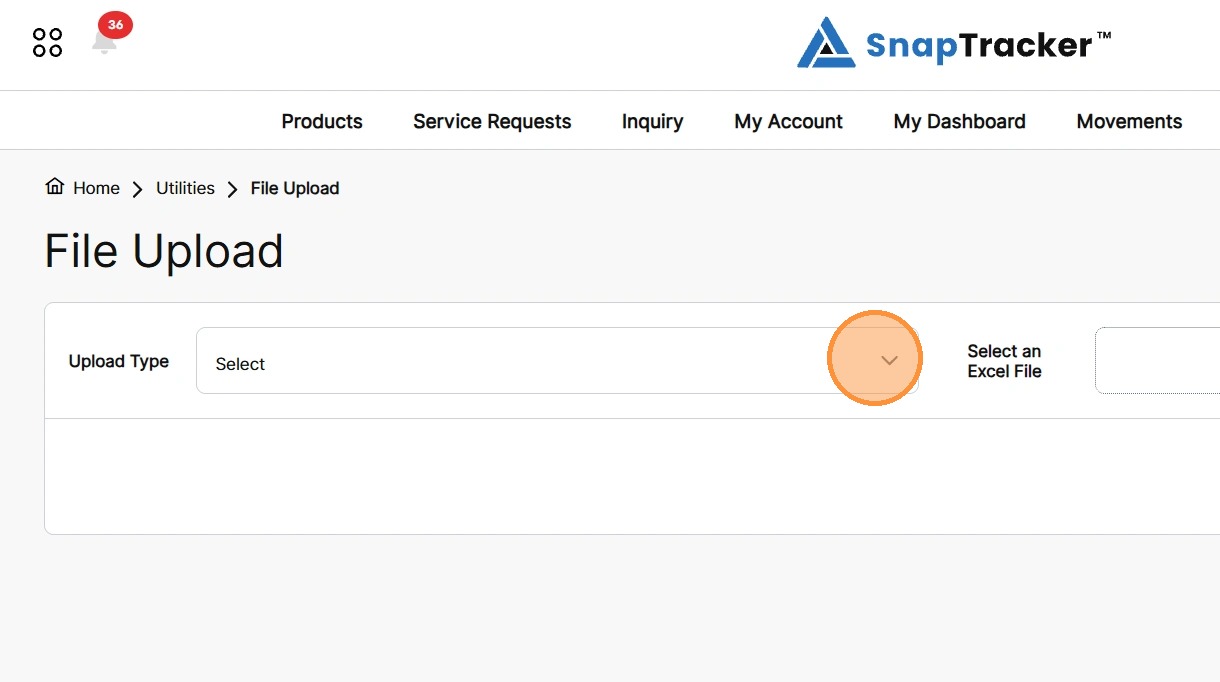
All available Upload Types display.
Note: The Upload Type list below is divided into two images to display all options.
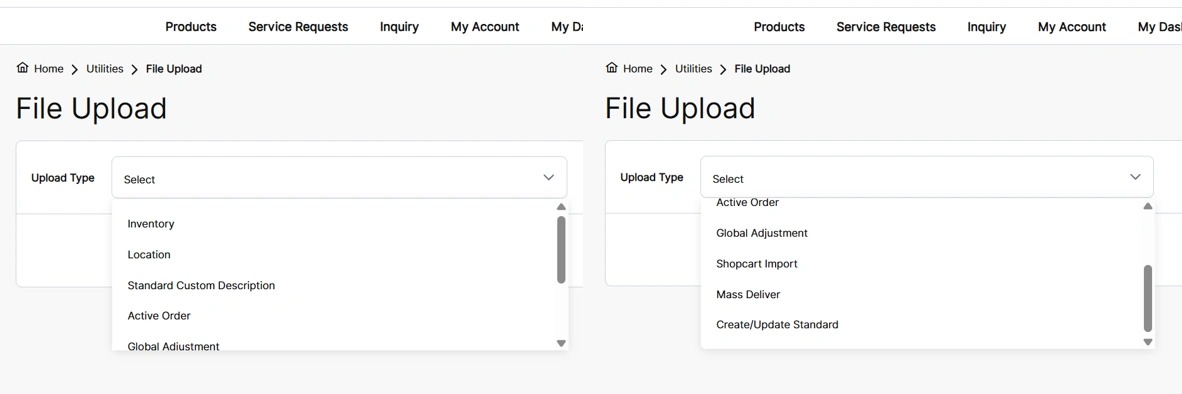
Observe each upload type:
- Inventory – The Inventory option enables you to update the current inventory by receiving or transferring items.
- Location – The Location option enables you to add or update Locations across various Buildings. Note: The option to update Locations is Customer agnostic and the Building must exist for the Locations to be added.
- Standard Custom Description – The Standard Custom Description option enables you to add custom descriptions to an existing Standard, with Custom HTML as desired.
- Active Order – The Active Order option enables you to add and update orders in the Active Orders screen.
- Global Adjustment – The Global Adjustment option enables you to use the exported Global Adjustments templates for updating information to the relevant tables.
- Shopcart Import – The Shopcart Import option enables you to add and update existing shop carts, based on certain information already mapped for the workflow.
- Mass Deliver – The Mass Deliver option enables you to deliver many stock items from your inventory at one time.
- Create/Update Standard – The Create/Update Standard option enables you create and update multiple Standards. Note: Options and Finishes cannot be imported using this method.
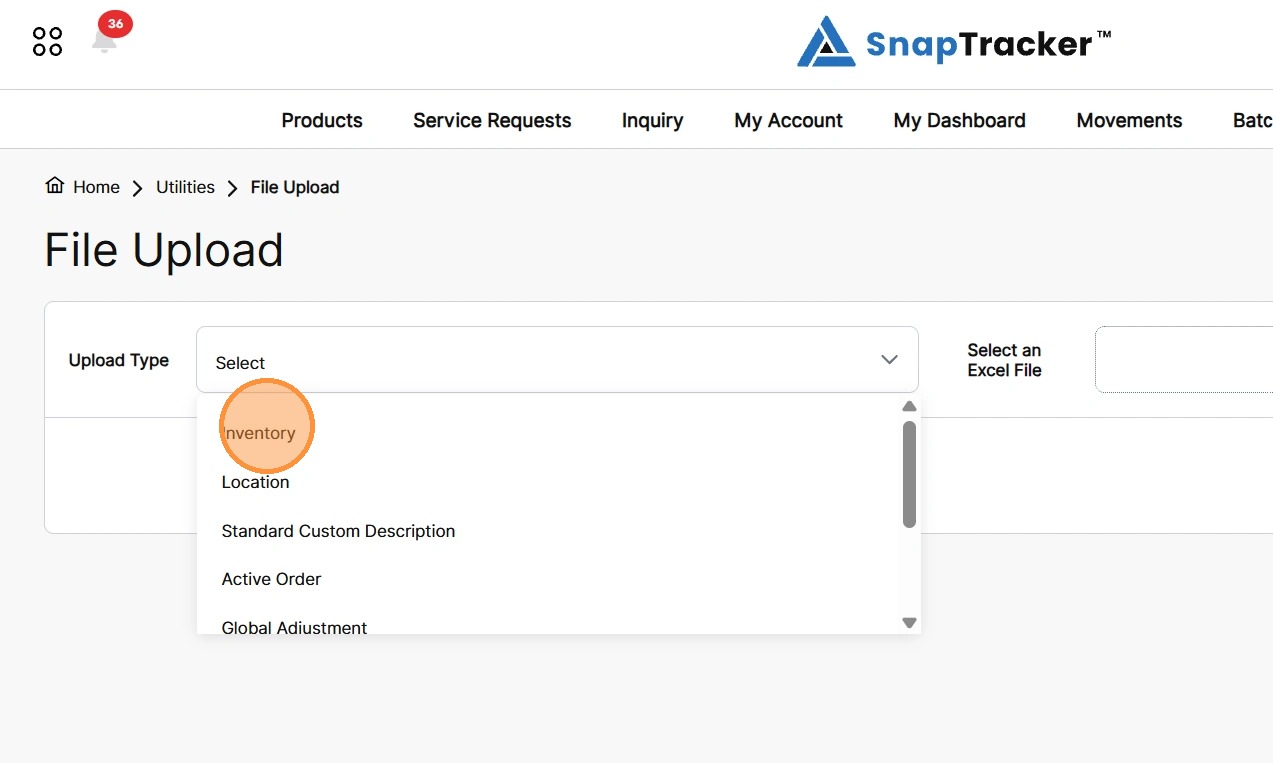
4. From the Upload Type dropdown, select a Upload Type.
5. From the Select an Excel File box, click Choose File and select the relevant file from your computer.
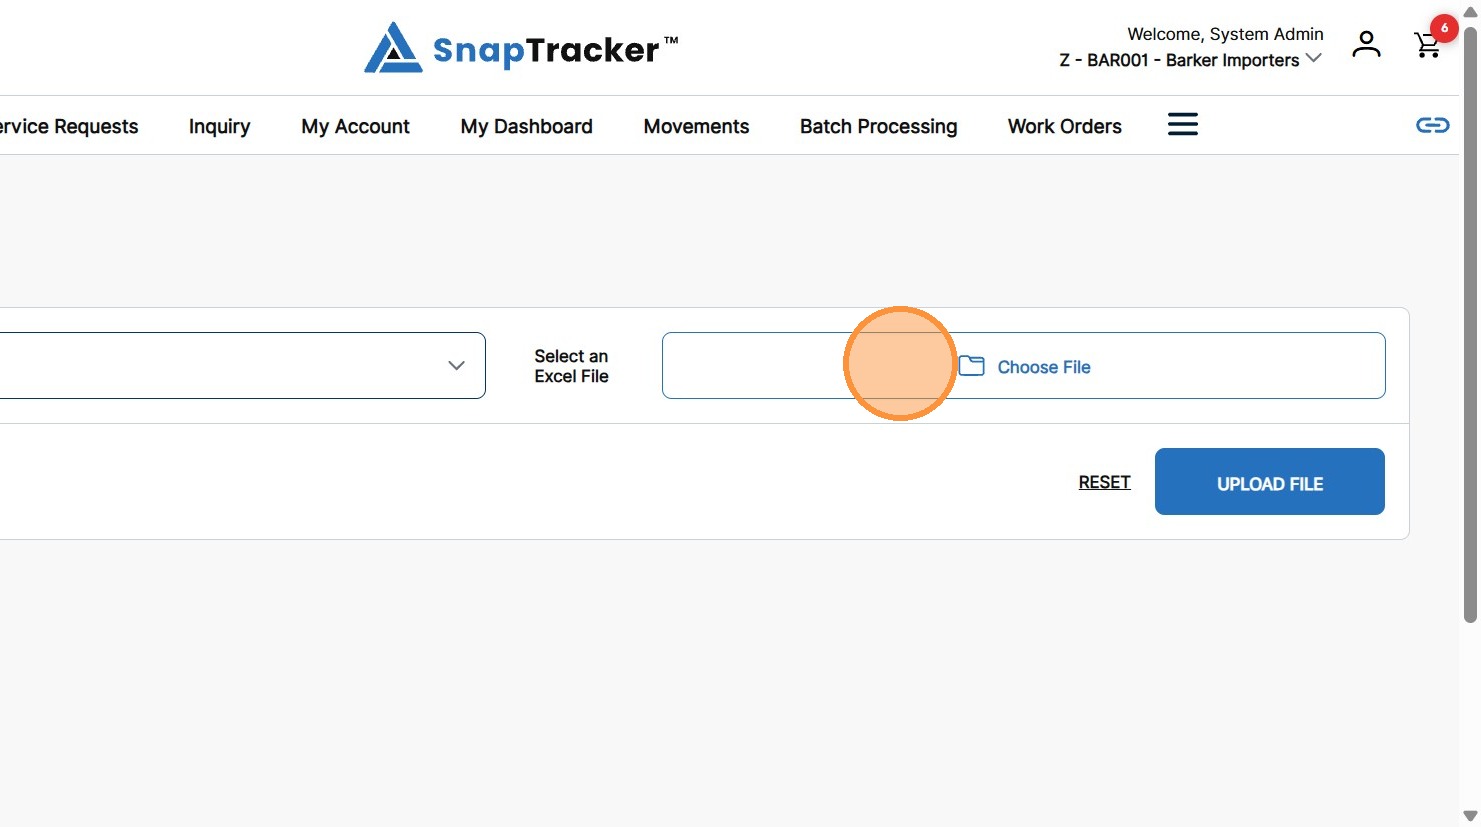
6. Click Upload File.
Note: To remove the uploaded file, click the trash icon. If necessary, you can select a new file to upload.
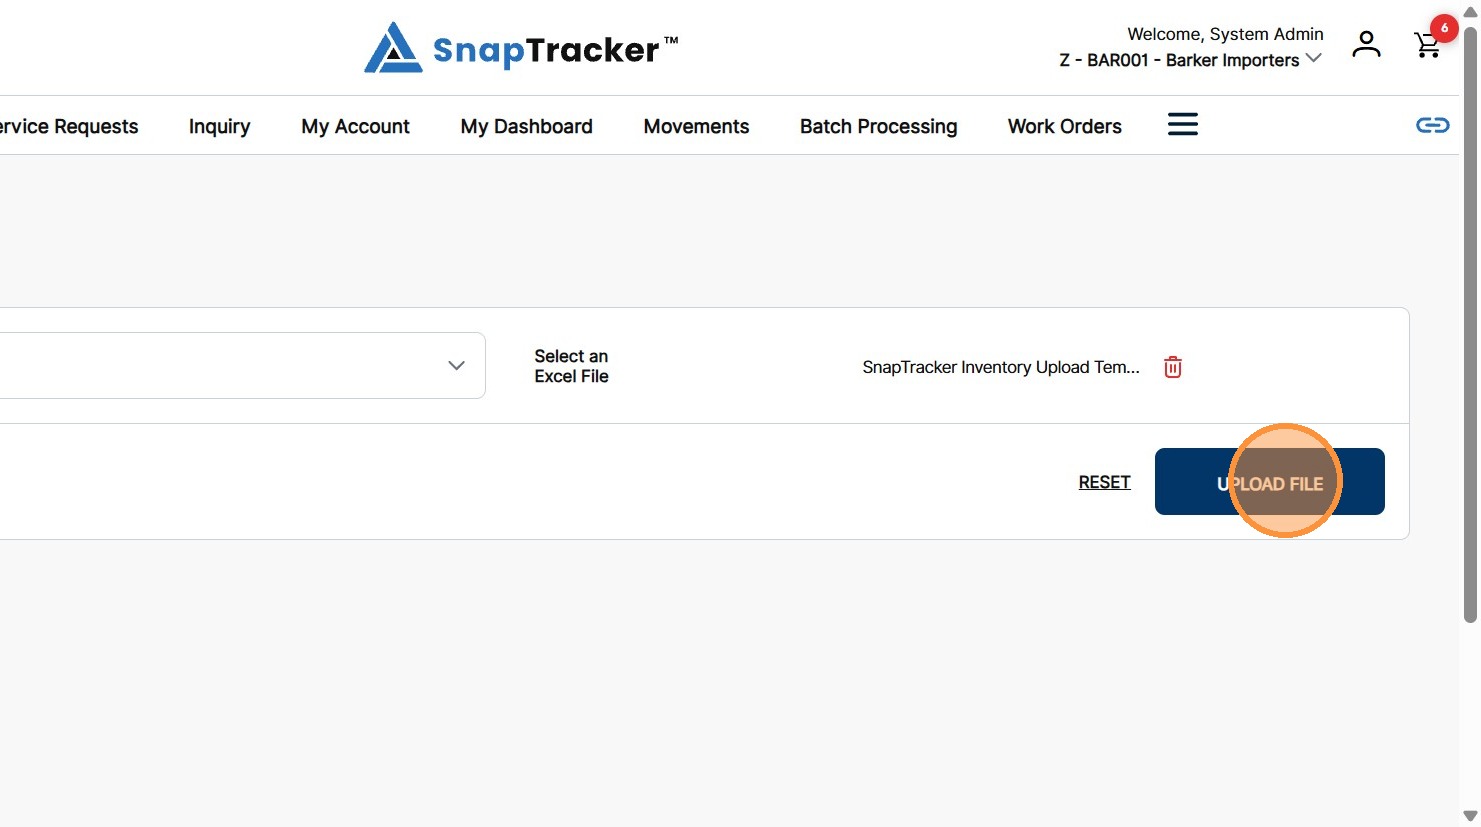
The File Upload screen also accommodates Excel spreadsheets generated from the Global Adjustment screen in addition to the other upload templates. You can use the Global Adjustment options to edit pre-existing information.
7. To select a Global Adjustment upload option, in the Upload Type dropdown, click Global Adjustment.
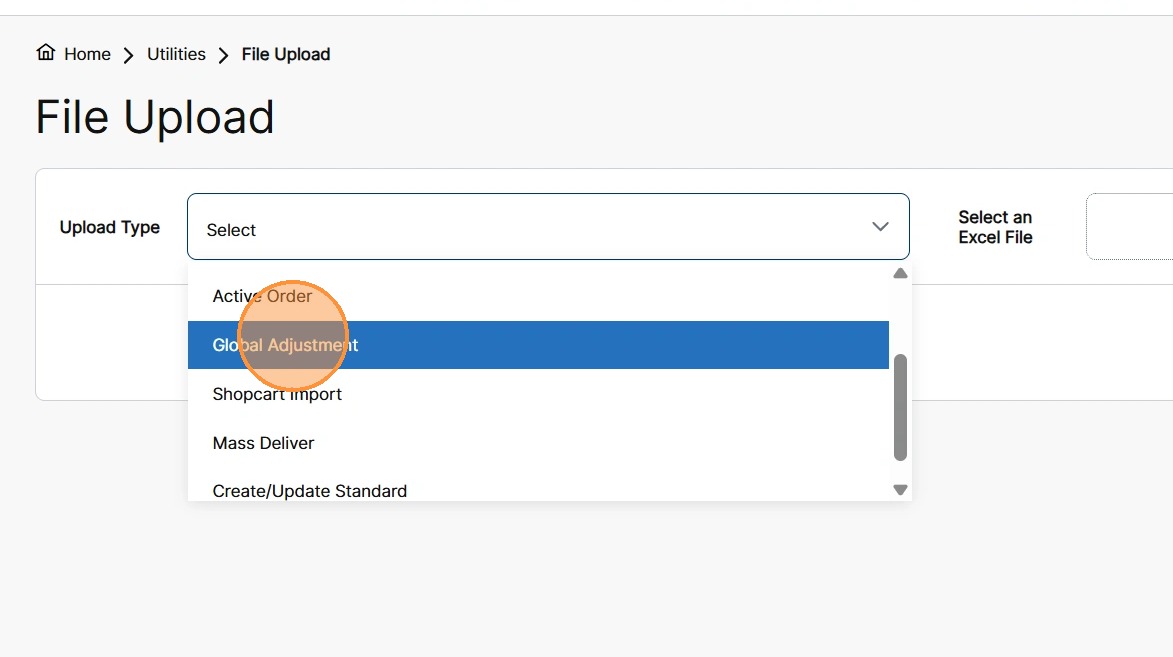
A secondary Table dropdown displays listing all the Global Adjustment options.
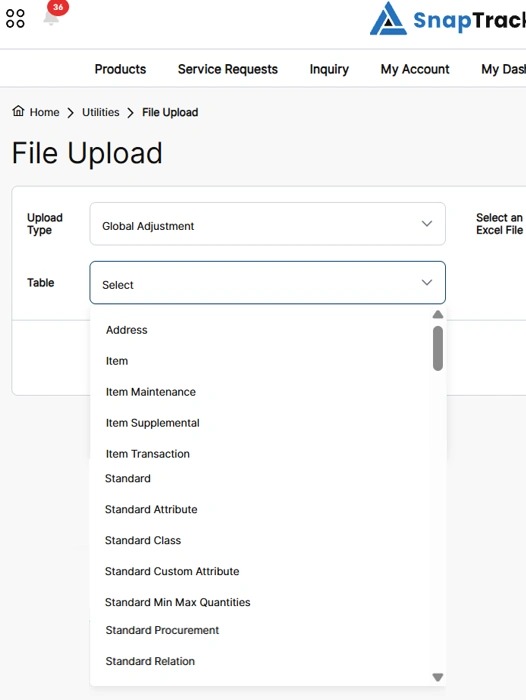
Observe the Global Adjustment tables that can be modified using File Upload:
Note: Company Code and Customer must be defined in each spreadsheet.
- Address – The Address table enables you to create and update Sold To, Ship To and Bill To addresses.
- Item – The Item option enables you to update specific Item information for pre-existing assets.
- Item Maintenance – The Item Maintenance table enables you to edit certain maintenance costs for pre-existing items.
- Item Supplemental – The Item Supplemental table enables you to edit or add information to the Item User Fields for pre-existing items.
- Item Transaction – The Item Transaction table enables you to edit certain pre-existing item transaction history information.
- Standard – The Standard table enables you to edit Standard information for pre-existing Standards.
- Standard Attributes – The Standard Attributes table enables you to edit and add information to the ten Standard Attribute fields.
- Standard Class – The Standard Class table enables you to edit pre-existing Standard Class information.
- Standard Custom Attribute – The Standard Custom Attribute table enables you to edit the Standard Custom Attribute fields created for Standard Classes.
- Standard Min Max Quantities – The Standard Min Max Quantities table enables you to add or edit the minimum, maximum and reorder levels set for Standards in each Building when the Customer is configured to capture the information at the Building level.
- Standard Procurement – The Standard Procurement table enables you to edit the different procurement information fields such as Supplier Part Auxiliary ID (SPAID) for Standards.
- Standard Relation – The Standard Relation table enables you to edit the display swatch field for options and finishes at the Standard level.
8. From the Table dropdown, select the correct global adjustment table .
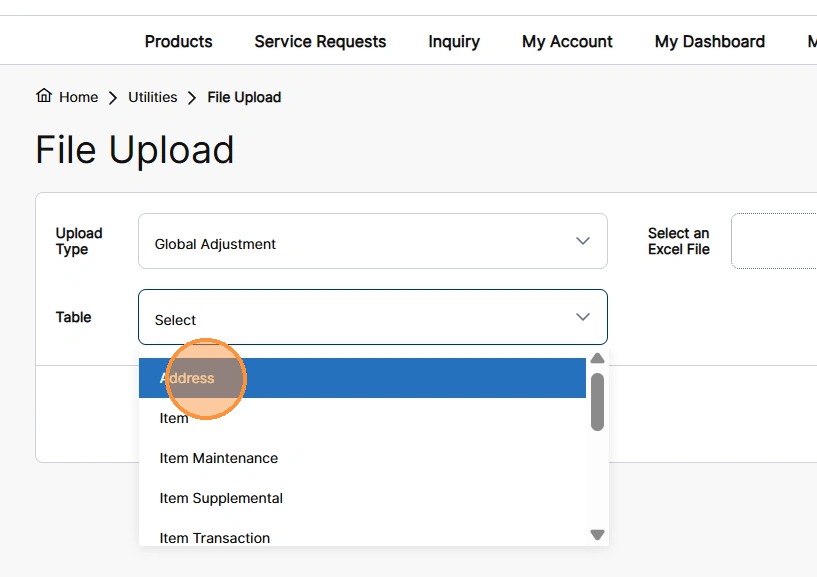
9. From the Select an Excel File box, click Choose File, select the relevant file from your computer and click Upload File.
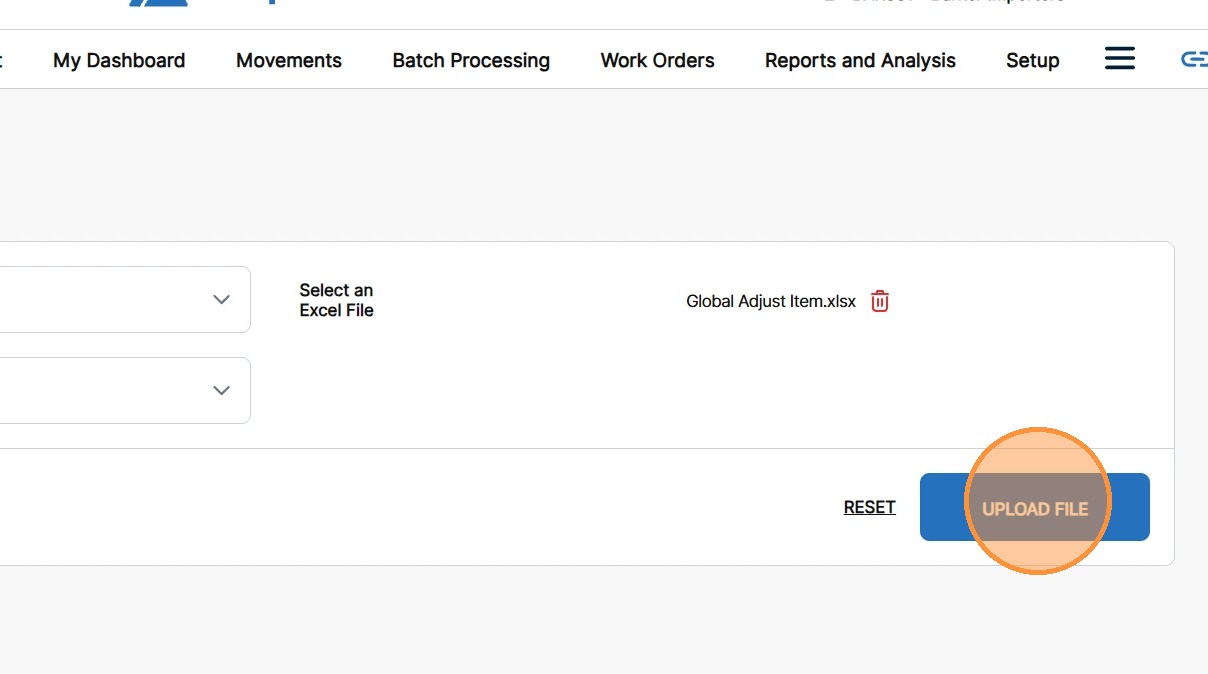
There are two possible responses for different upload types:
- Upload with a Batch – The file is uploaded and a batch is created. The batch must be processed to identify any issues and implement any changes in the database.
- Upload without a Batch – The file is uploaded and processed (no separate batch is created for processing). On-screen messages display to provide feedback on the upload and changes are implemented in the database immediately.
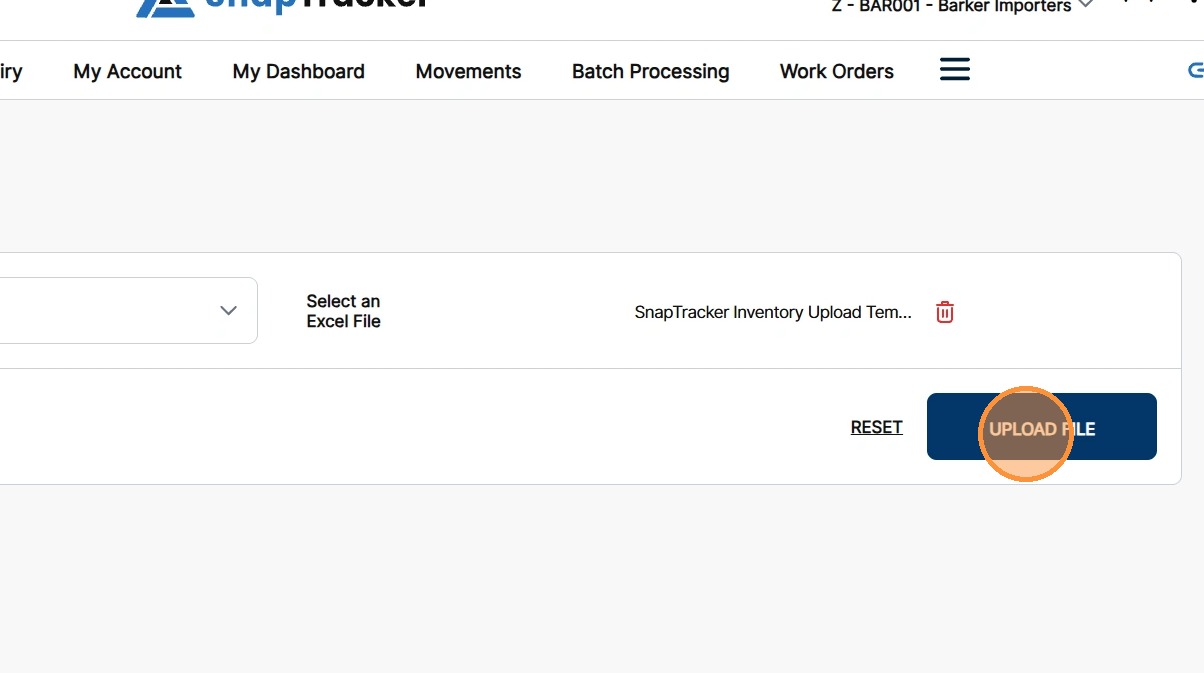
10. Select an upload type that creates a batch (e.g. Inventory), and upload a file.
Click Upload file.
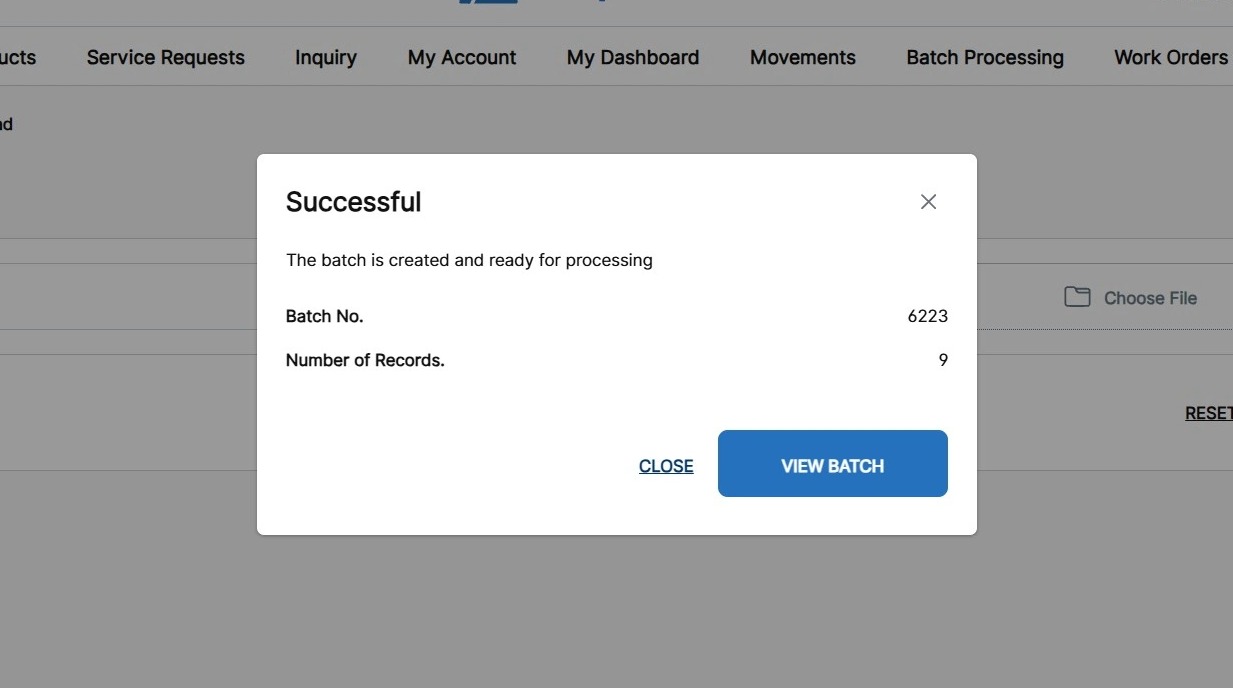
A success pop-up displays.
The pop-up indicates the batch number that is created and the number of records (or lines uploaded from the file) contained in that batch.
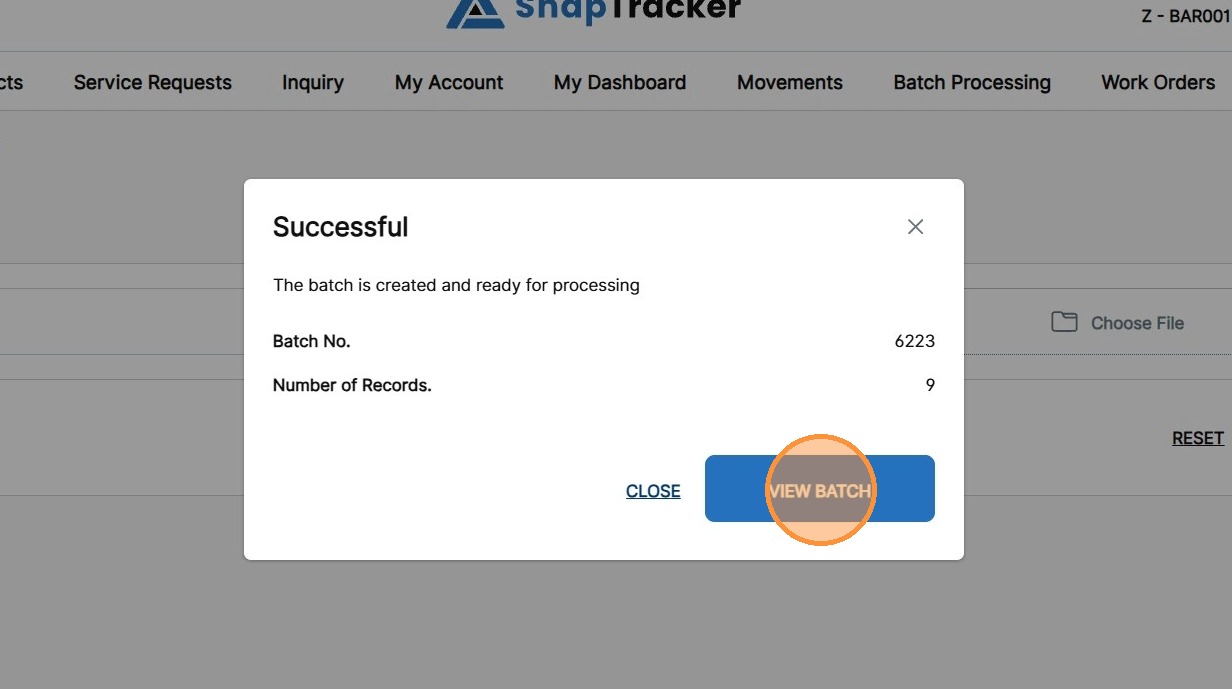
11. To process the batch, click View Batch, or, to close the pop-up click Close.
12. If you click Close, an on-screen message displays indicating the batch number that was created and a hyperlink to view and process the batch.
To process the batch, click the hyperlinked batch number.
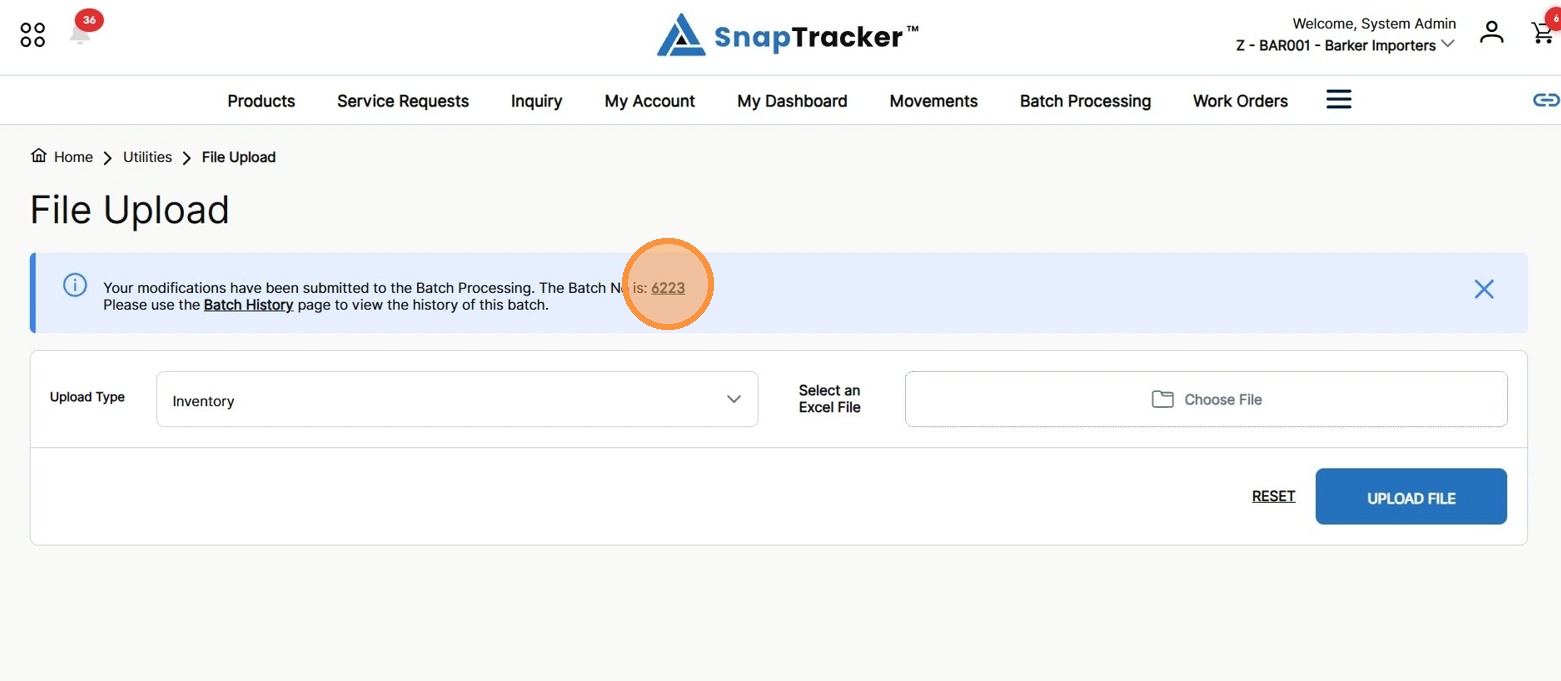
The Process Batch screen displays.
Note: This screen is undergoing redesign in the new SnapTracker interface. As such, this screen currently displays the existing Legacy design until complete.
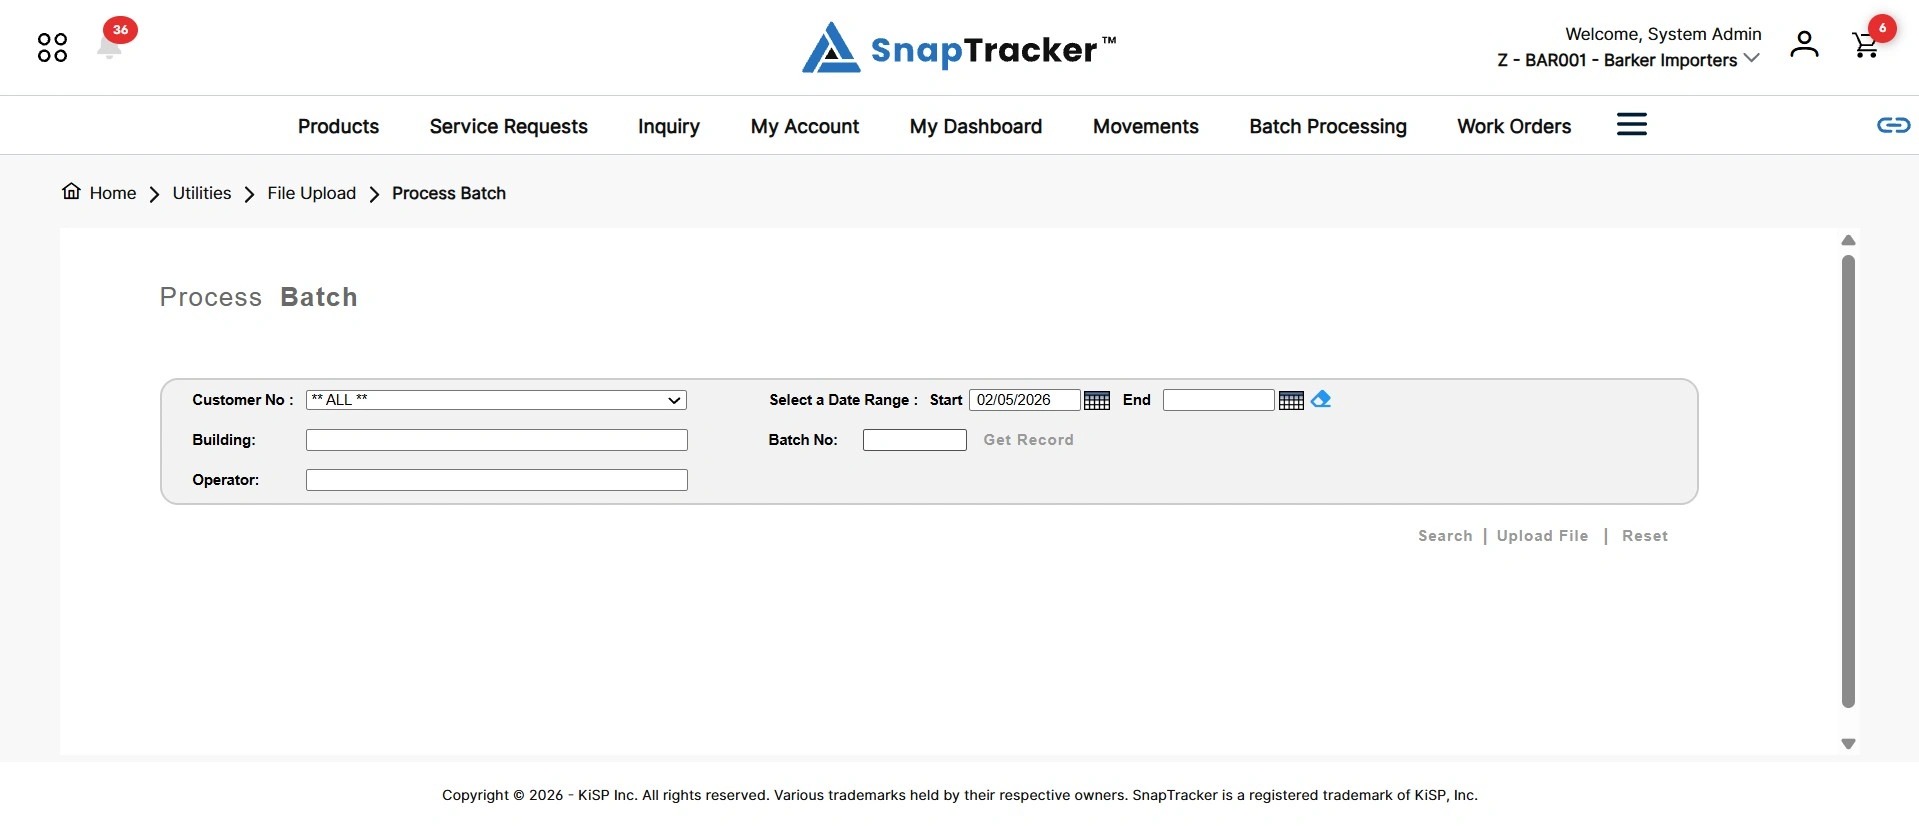
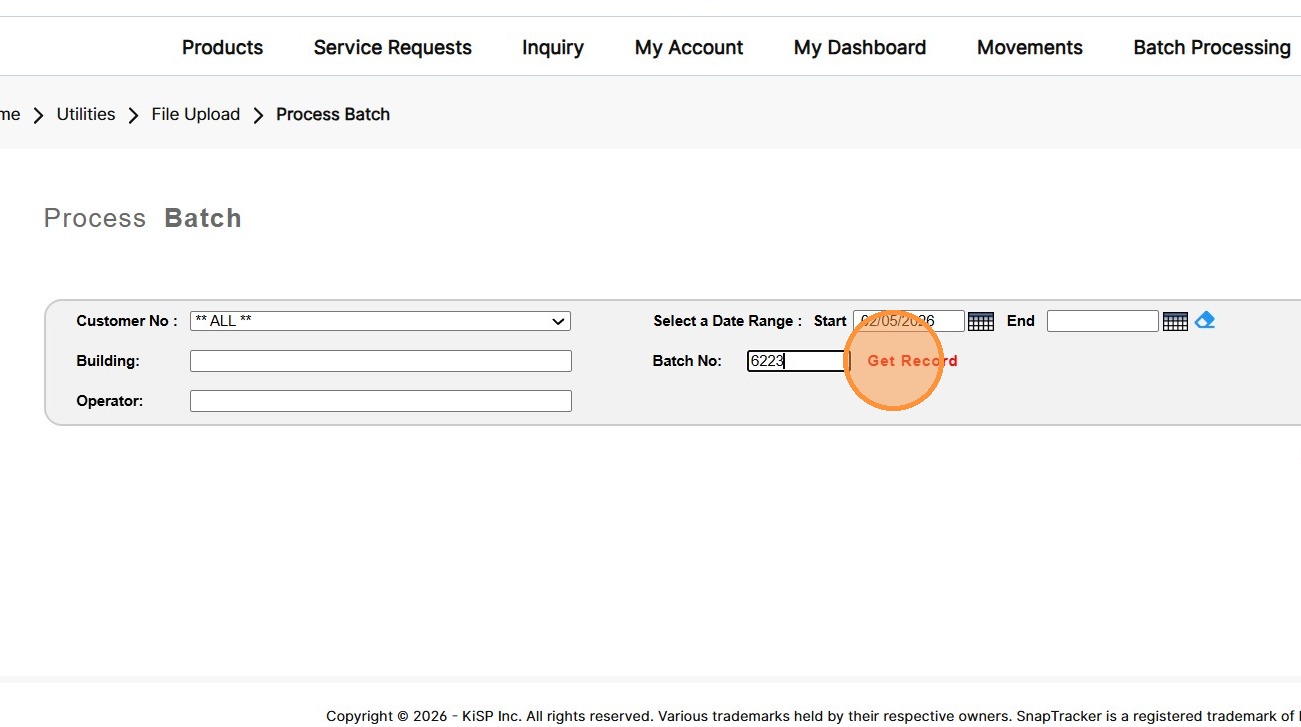
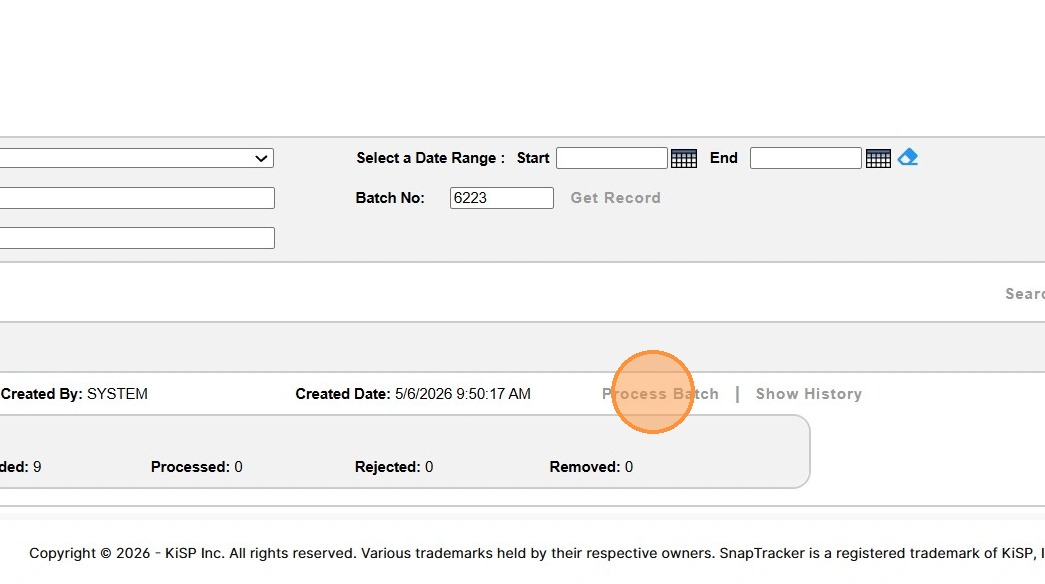
13. In the Batch No field, enter the batch number and click Get Record.
The batch number displays with details about the batch.
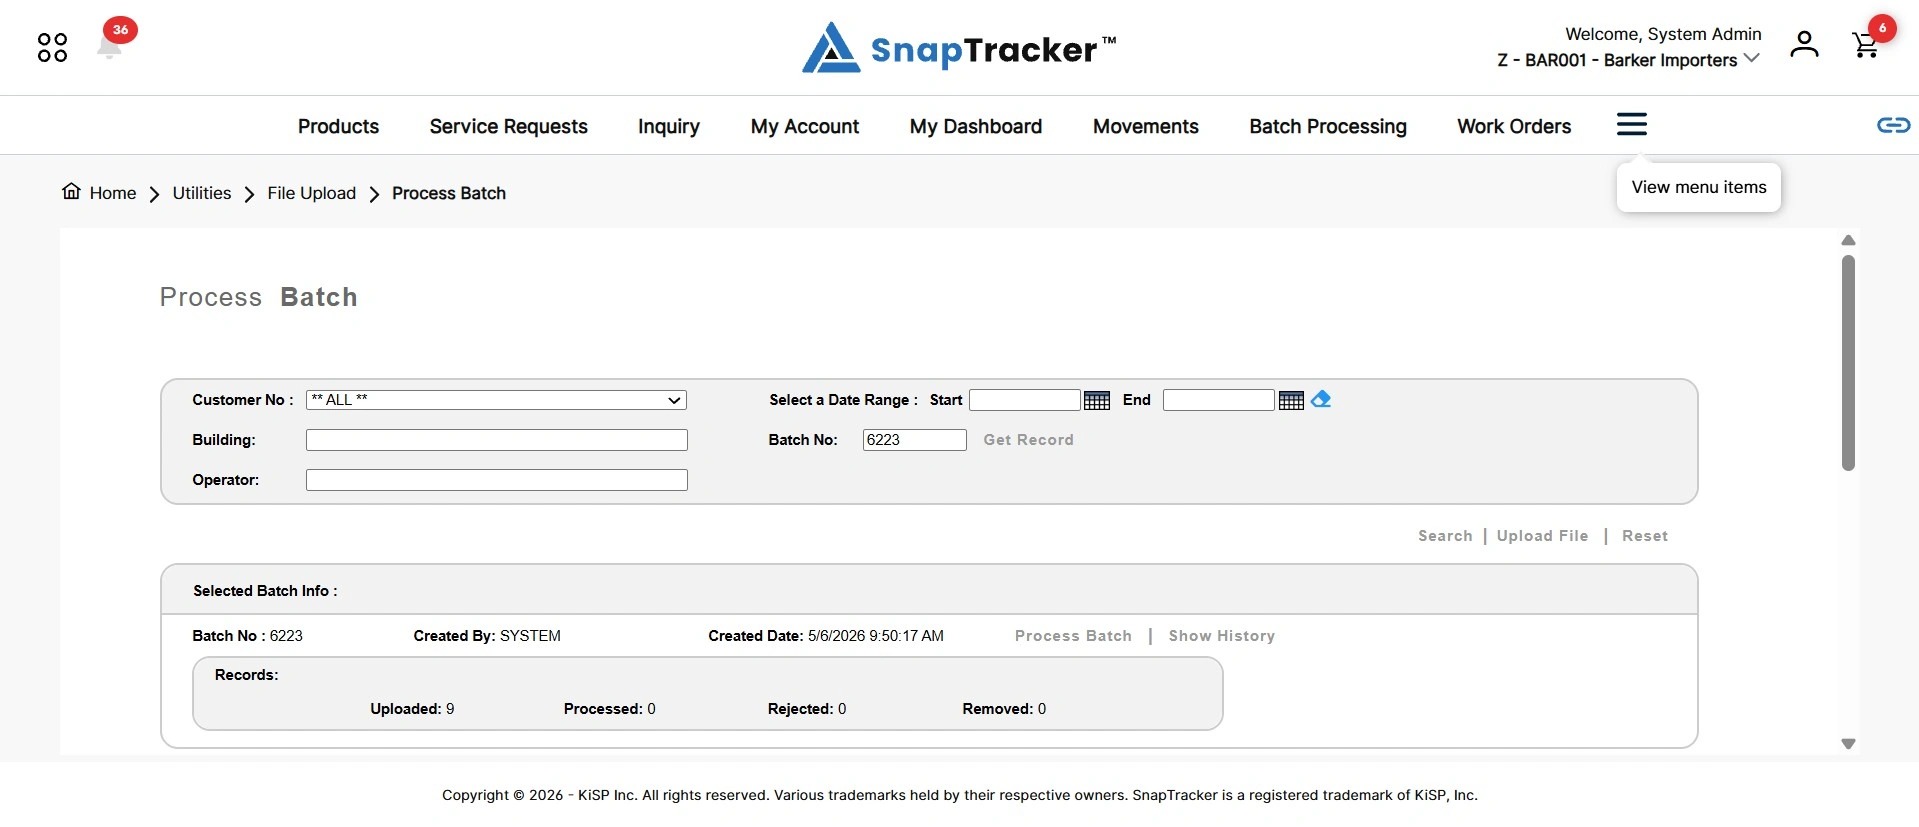
14. Click Process Batch.
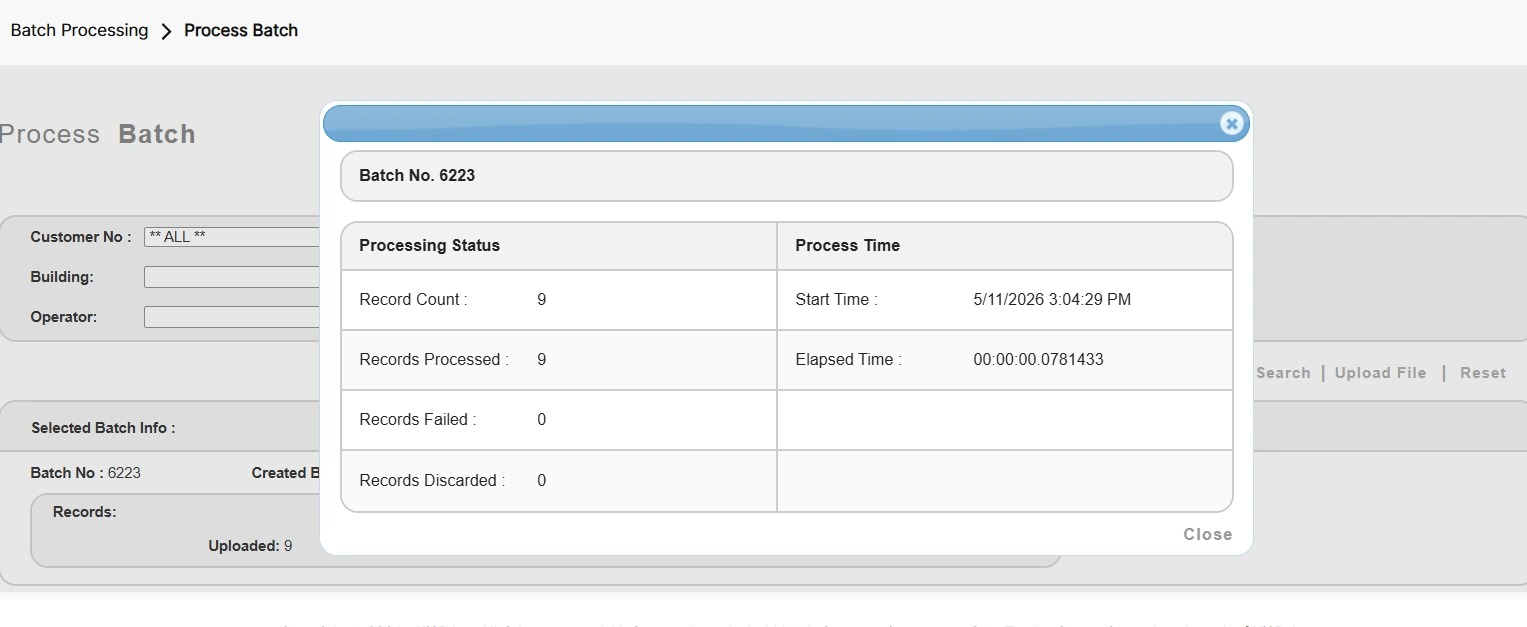
The process batch pop-up displays, indicating the number of records processed, failed, and discarded.
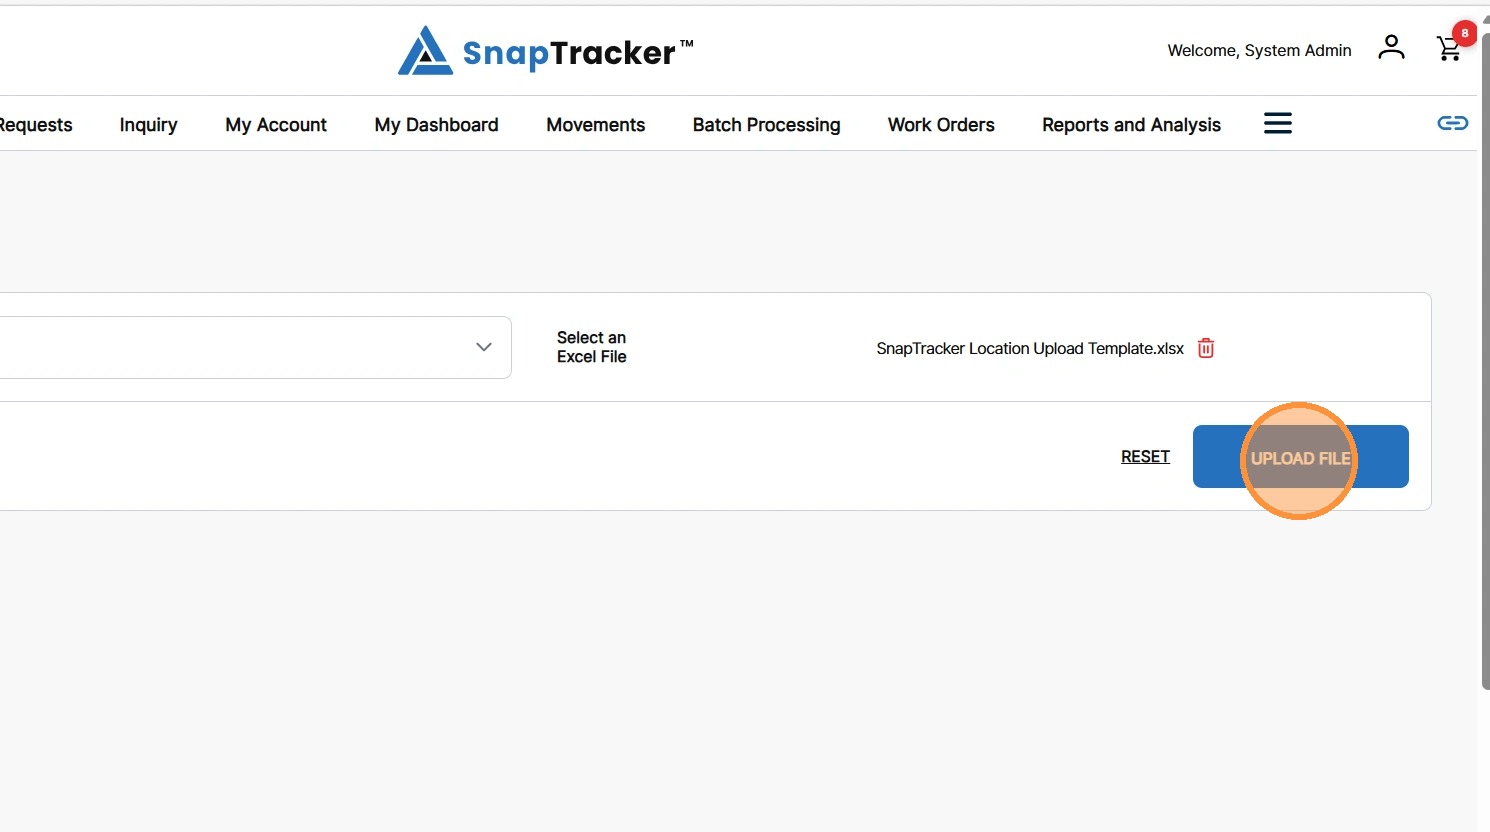
15. Select a transaction type that does not create a batch (e.g. Location), and upload a file.
Click Upload file.
Note: Location is Customer agnostic, so the Customer selection does not display in the top right of the screen when Location is selected.
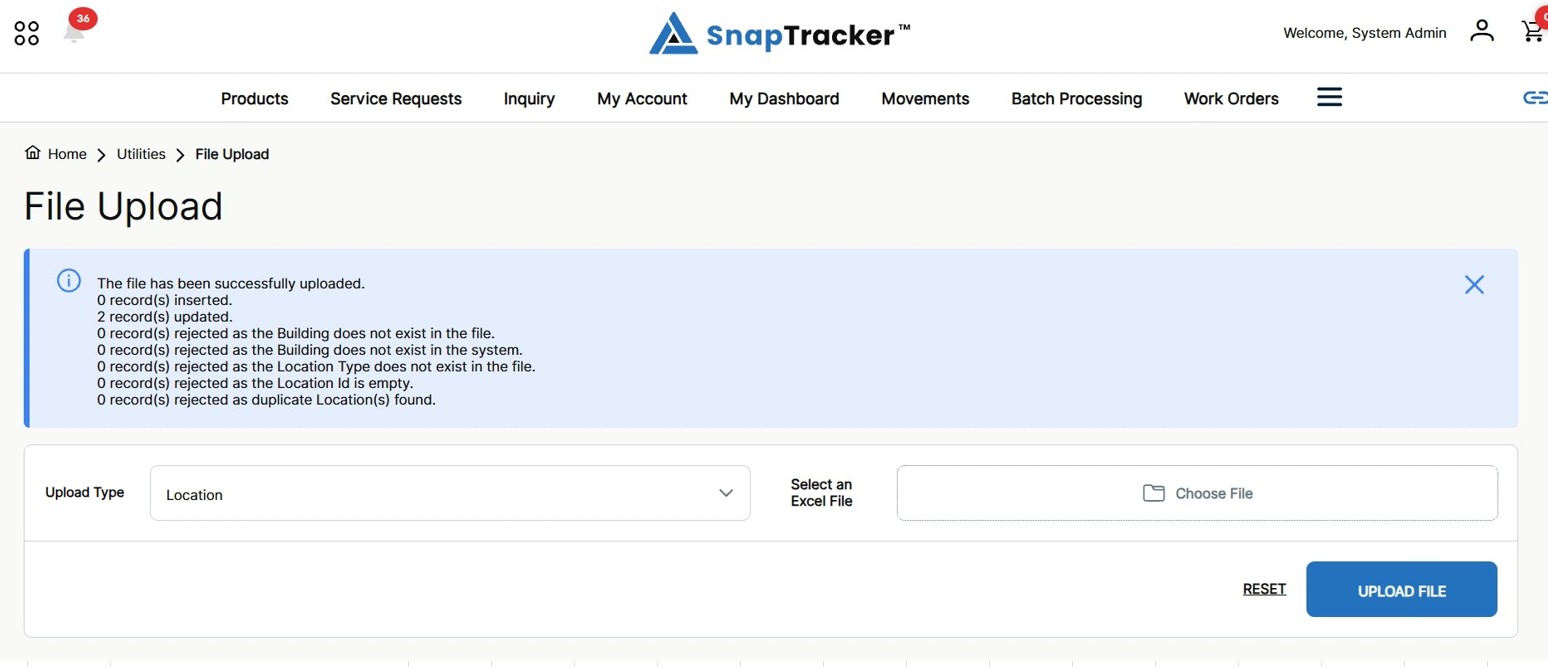
The file is processed and the on-screen message displays providing feedback on the upload.
Depending on the upload type, the message may indicate the number of records inserted, updated, or reasons why a certain number of records were rejected.
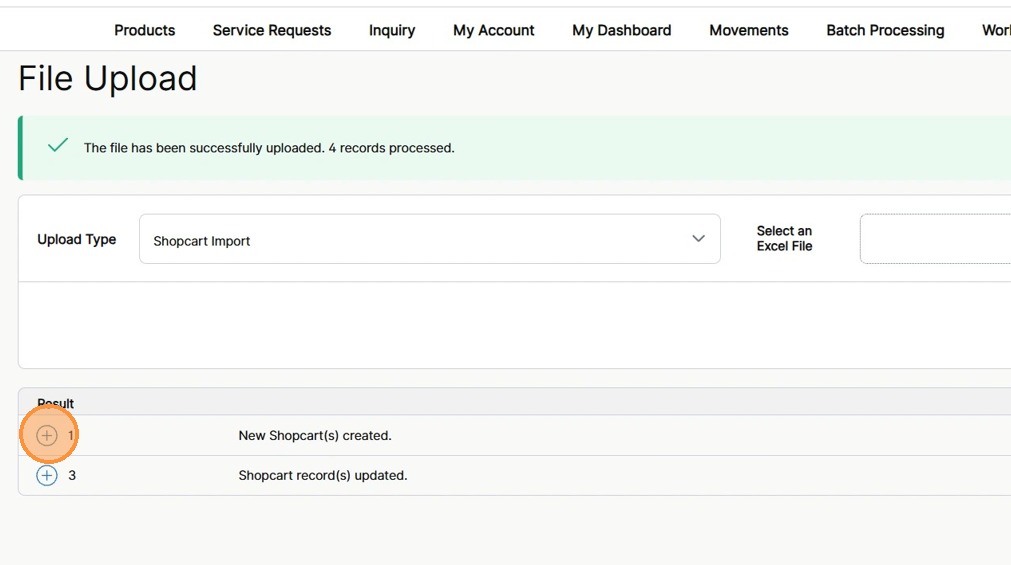
16. For the Shopcart Import option, a results section displays indicating the number of records created and/or updated.
Click the +/- icon to show or hide shopcart import details.
Note: Before using the Shop Cart Import option, mapping needs to be completed in Workflow Setup to define what fields are used in the process.
17. To download the shopcart import results, click Download Results.
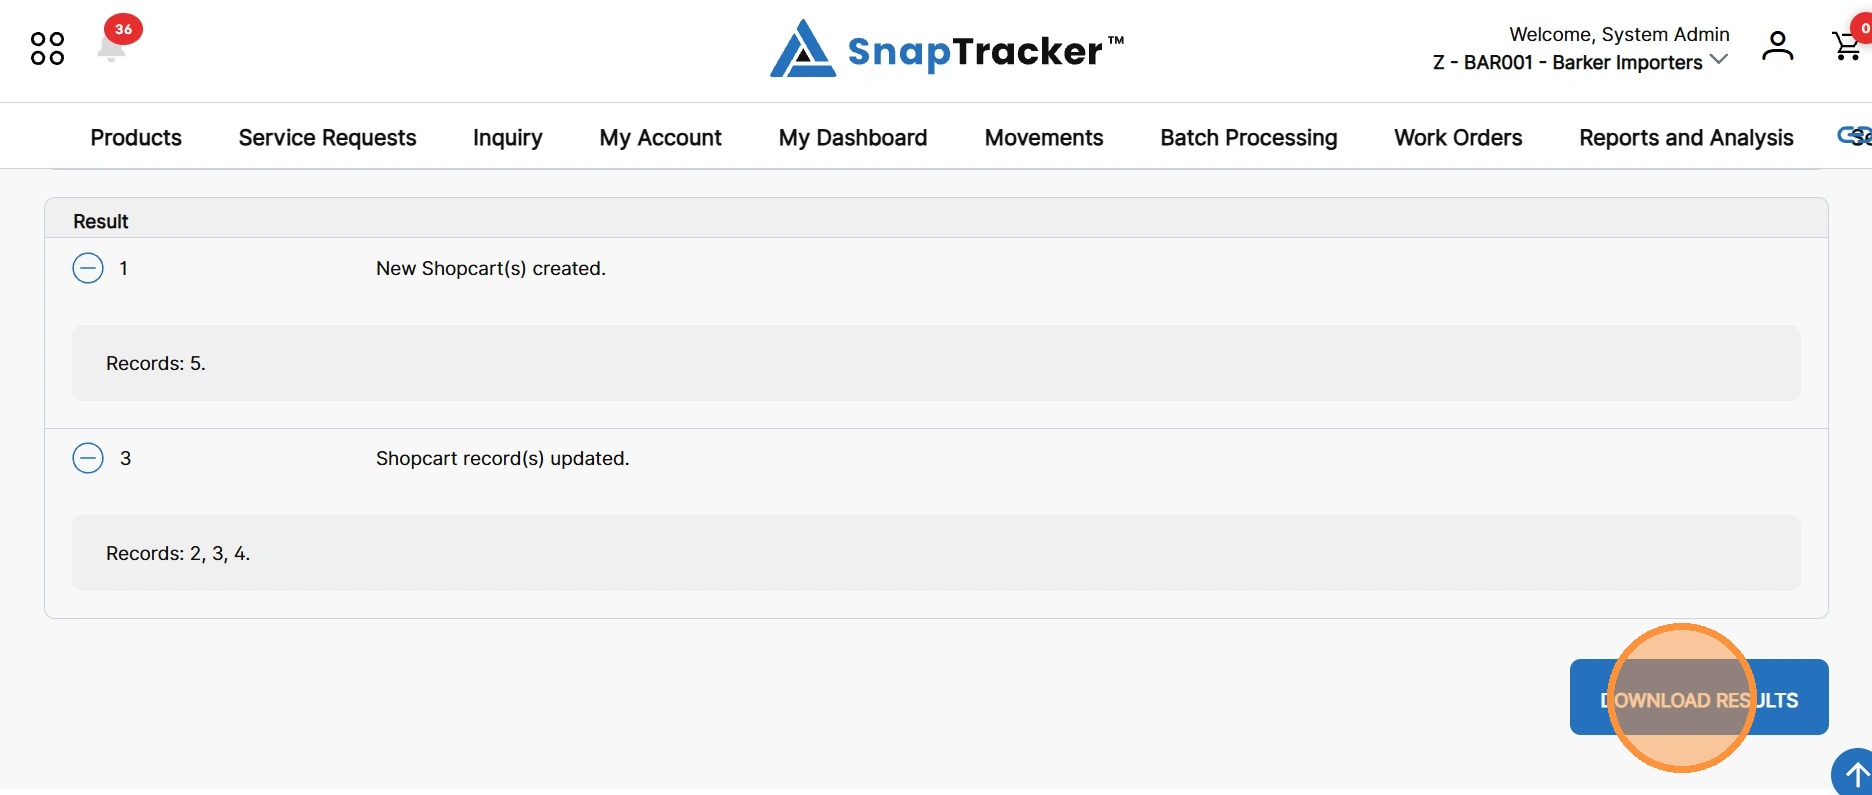
The file is downloaded in Excel format and can be opened for review.