
How to Use Inquiry – Location Contents – View Report
Location Contents is designed to provide you with inventory information of all products you have in stock in a specific building. After applying your search criteria, you can choose to view the information in two different ways: View Report or View Results.
Both options present the same product results in different formats. View Report provides results in a report format. View Results provides easy to read, summarized views of the Location Contents results.
View Report provides a detailed report view of your Location Contents results. The results include details of products in all Locations, Location Types, Customers, Standard Classes, and Conditions with Standard details. The Report View is developed for easy export and download.
Before starting, make sure:
- You are logged into SnapTracker.
- There is at minimum one Building created with inventory.
- You have access to Location Contents.
There are several ways to use Location Contents to view inventory details. This post outlines the process of conducting a search in Location Contents returning products in the View Report format.
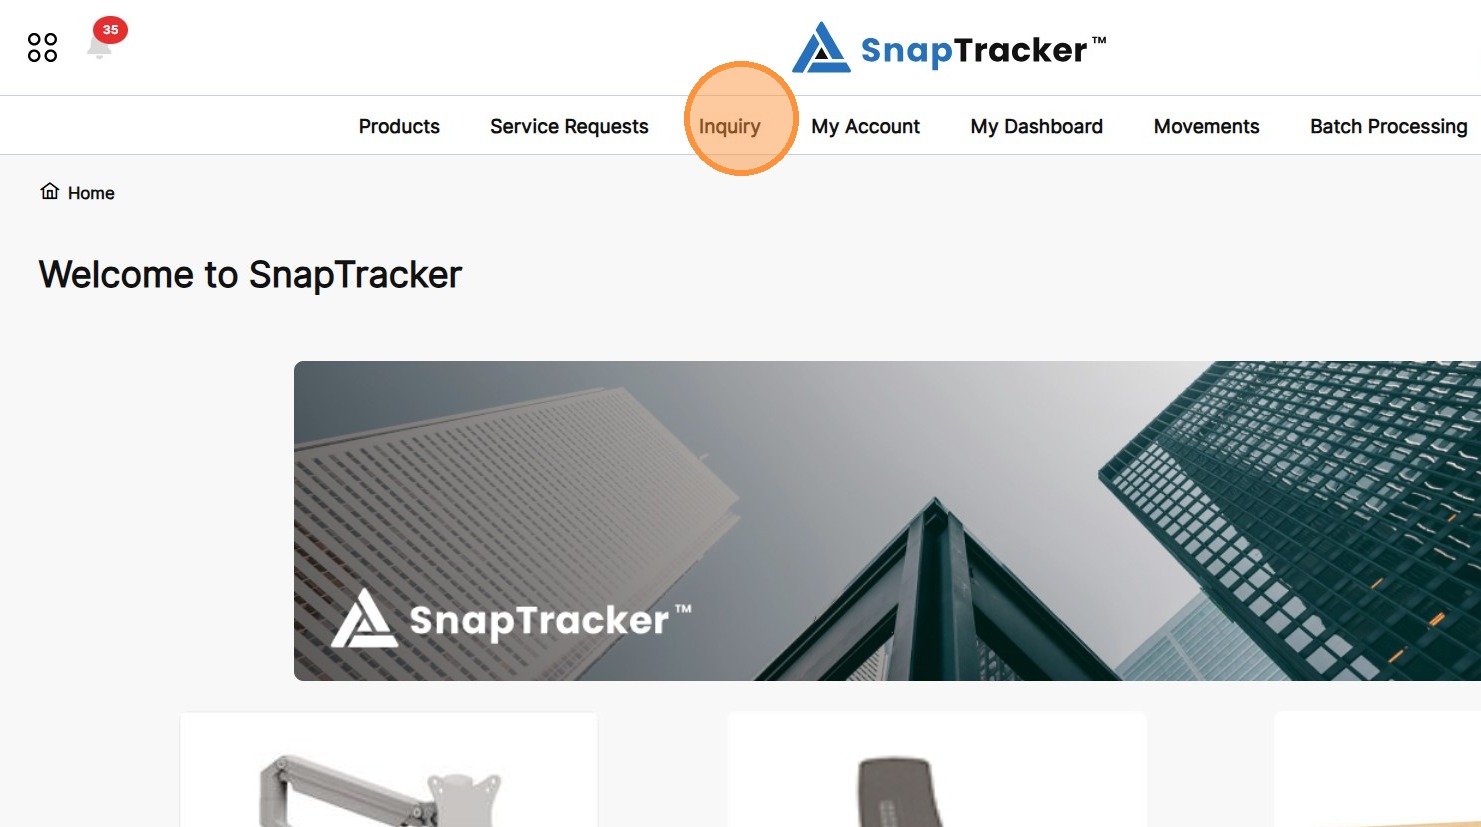
1. In the header section, click Inquiry.
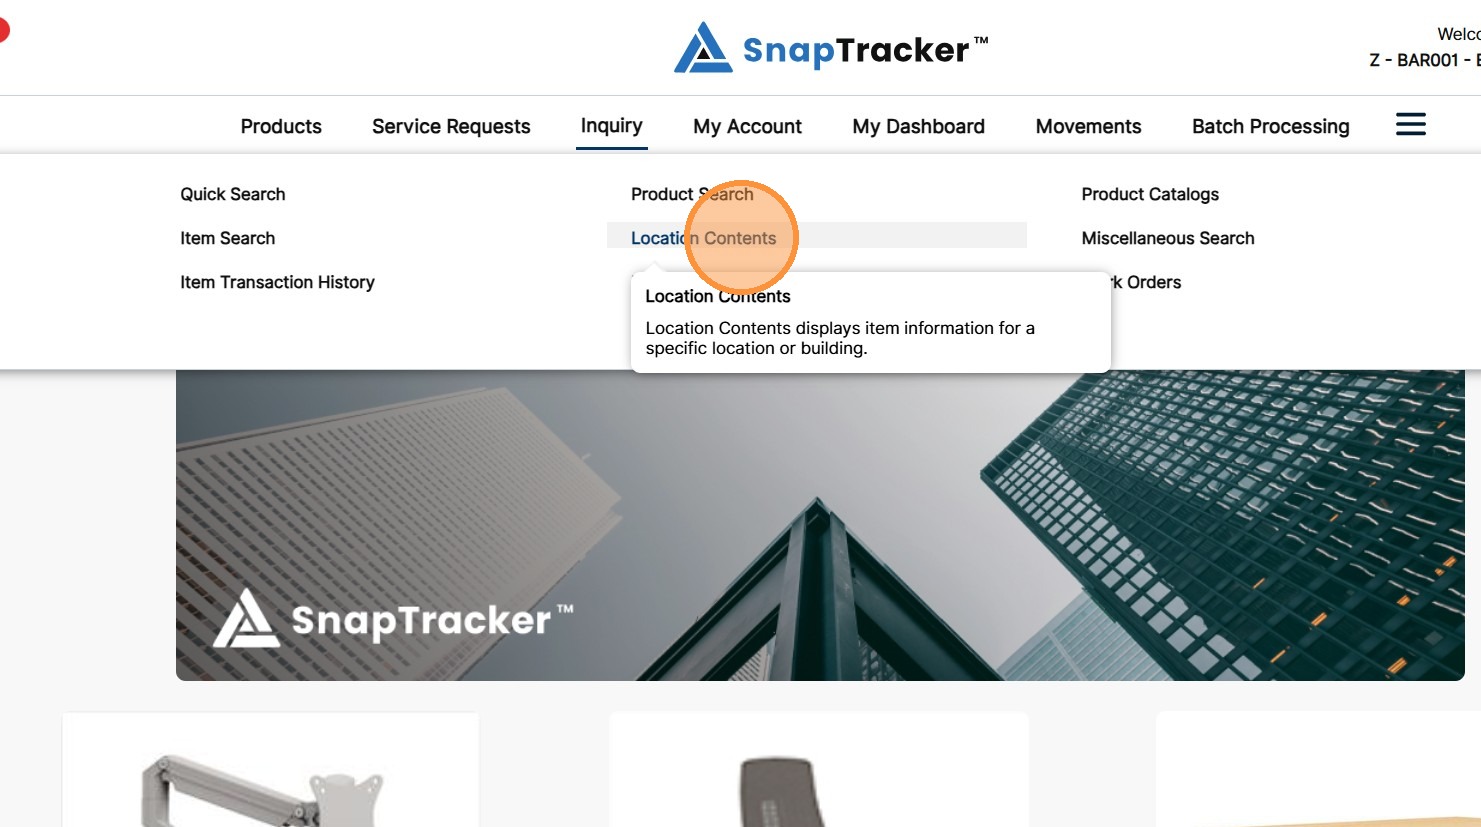
2. Click Location Contents.
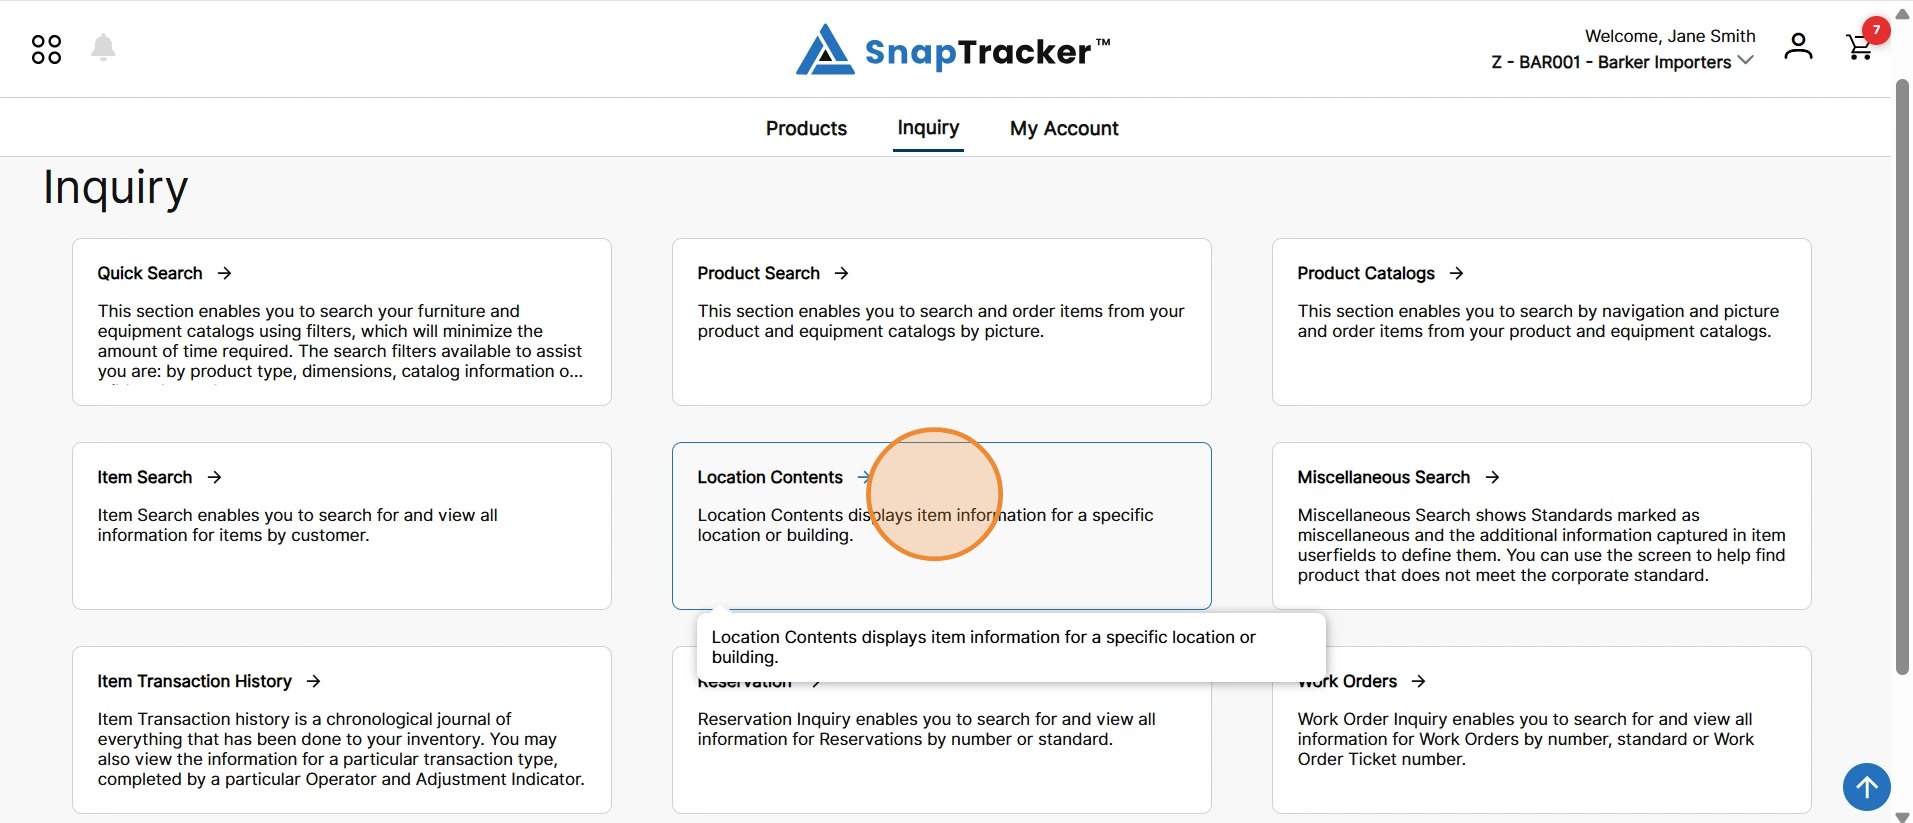
Another way to access the Location Contents screen is to navigate to the Inquiry main screen.
From here, select Location Contents.
The Location Contents screen displays, showing available search and filter options.
Note: The Customer selection in the header does not display in the Location Contents screen. By default results show product in the selected Building for all Customers you have access to (depending on the selections made).
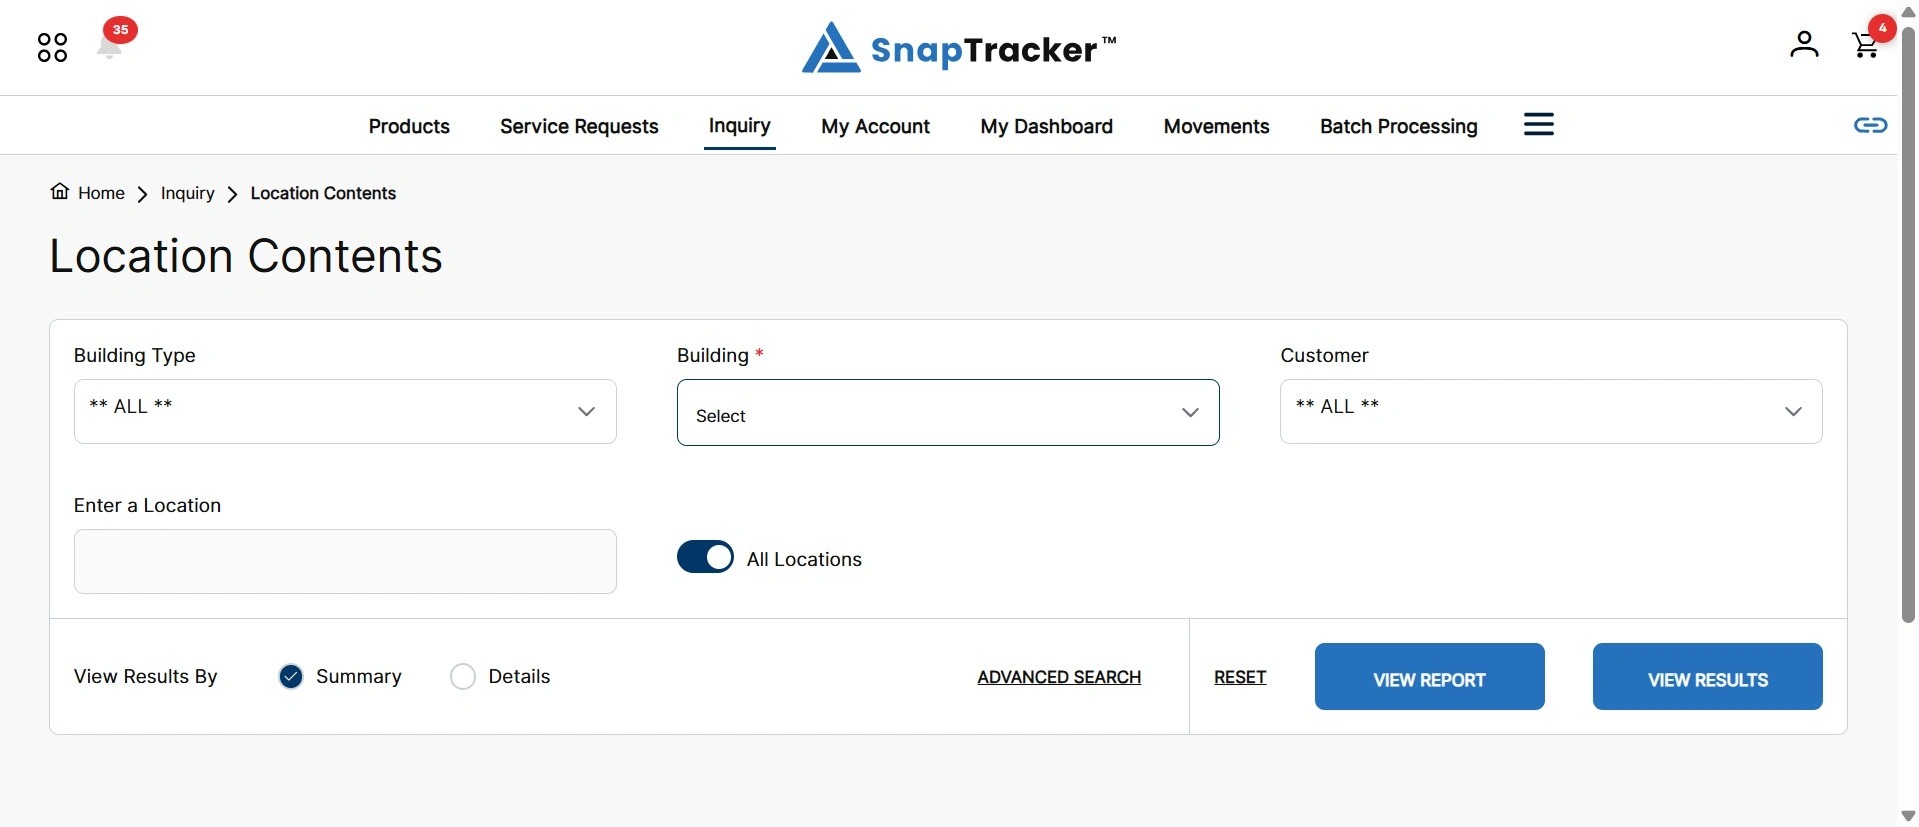
3. From the Building drop down, select the desired Building and apply any other optional field(s).
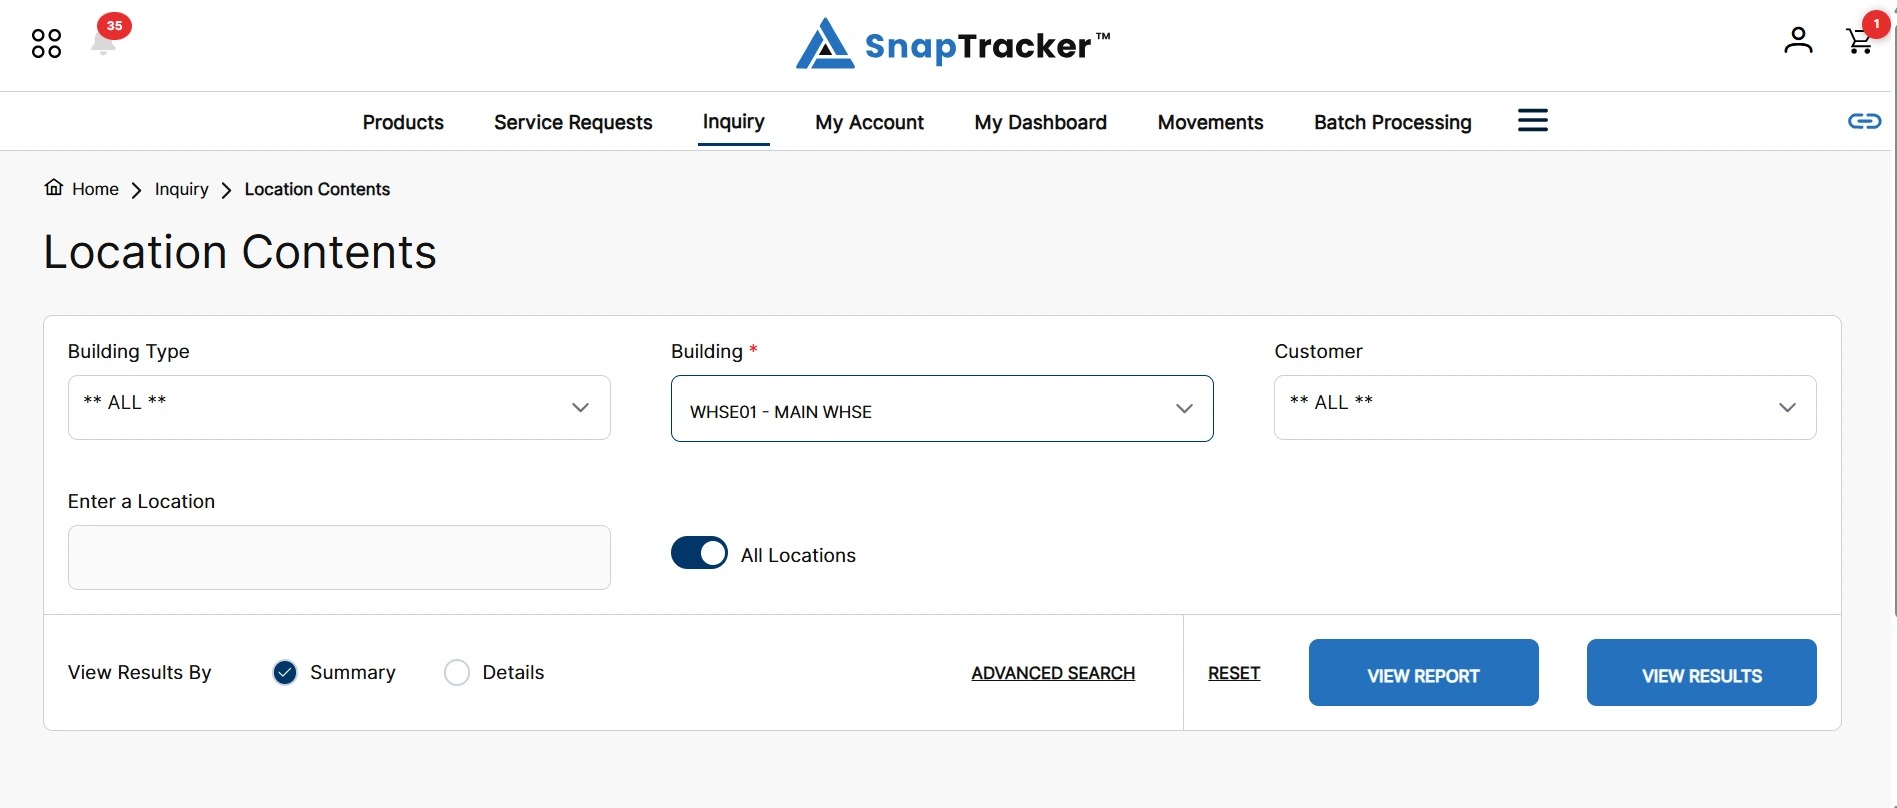
4. In View Results By, select Summary and click View Report.
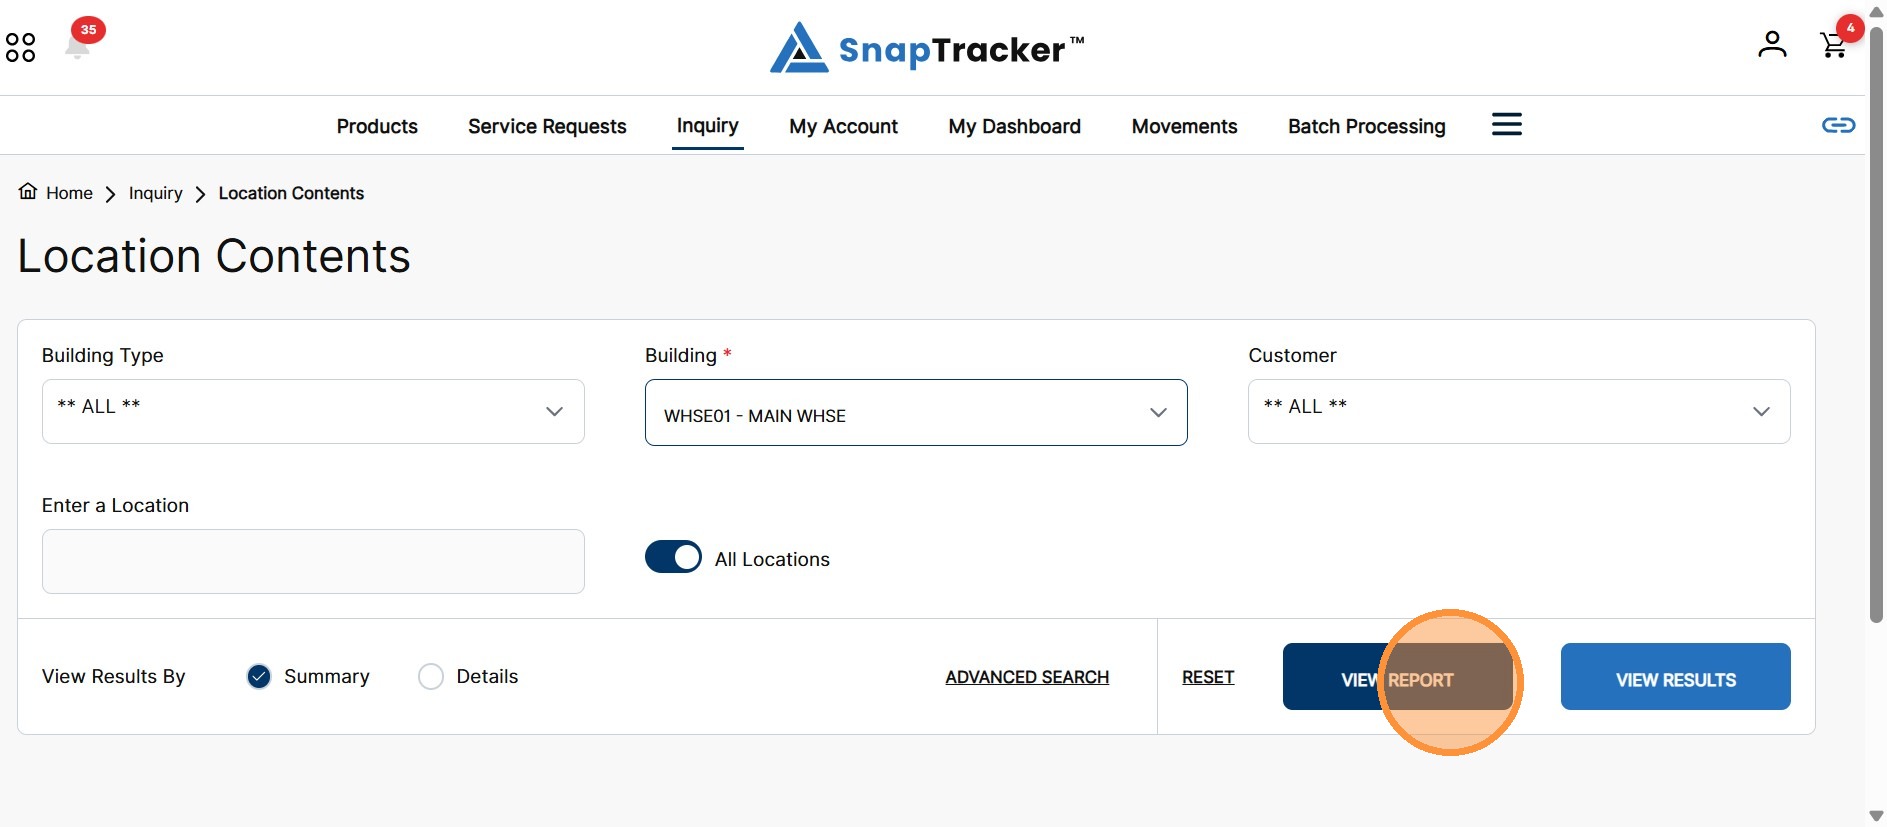
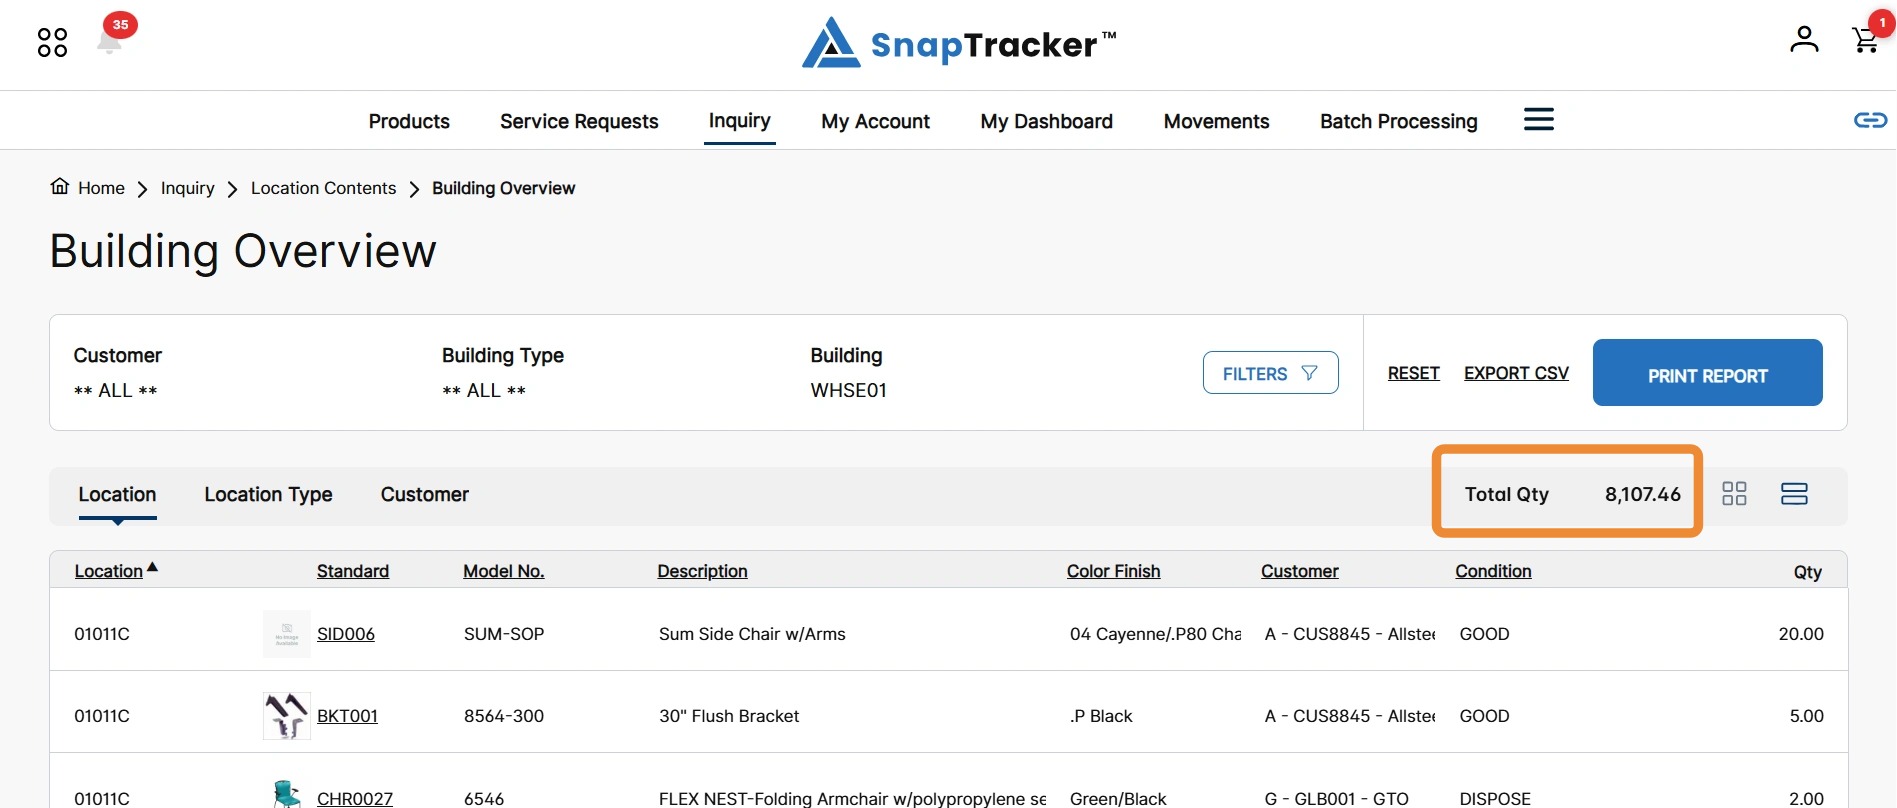
The Building Overview screen displays by Summary in the View Report format.
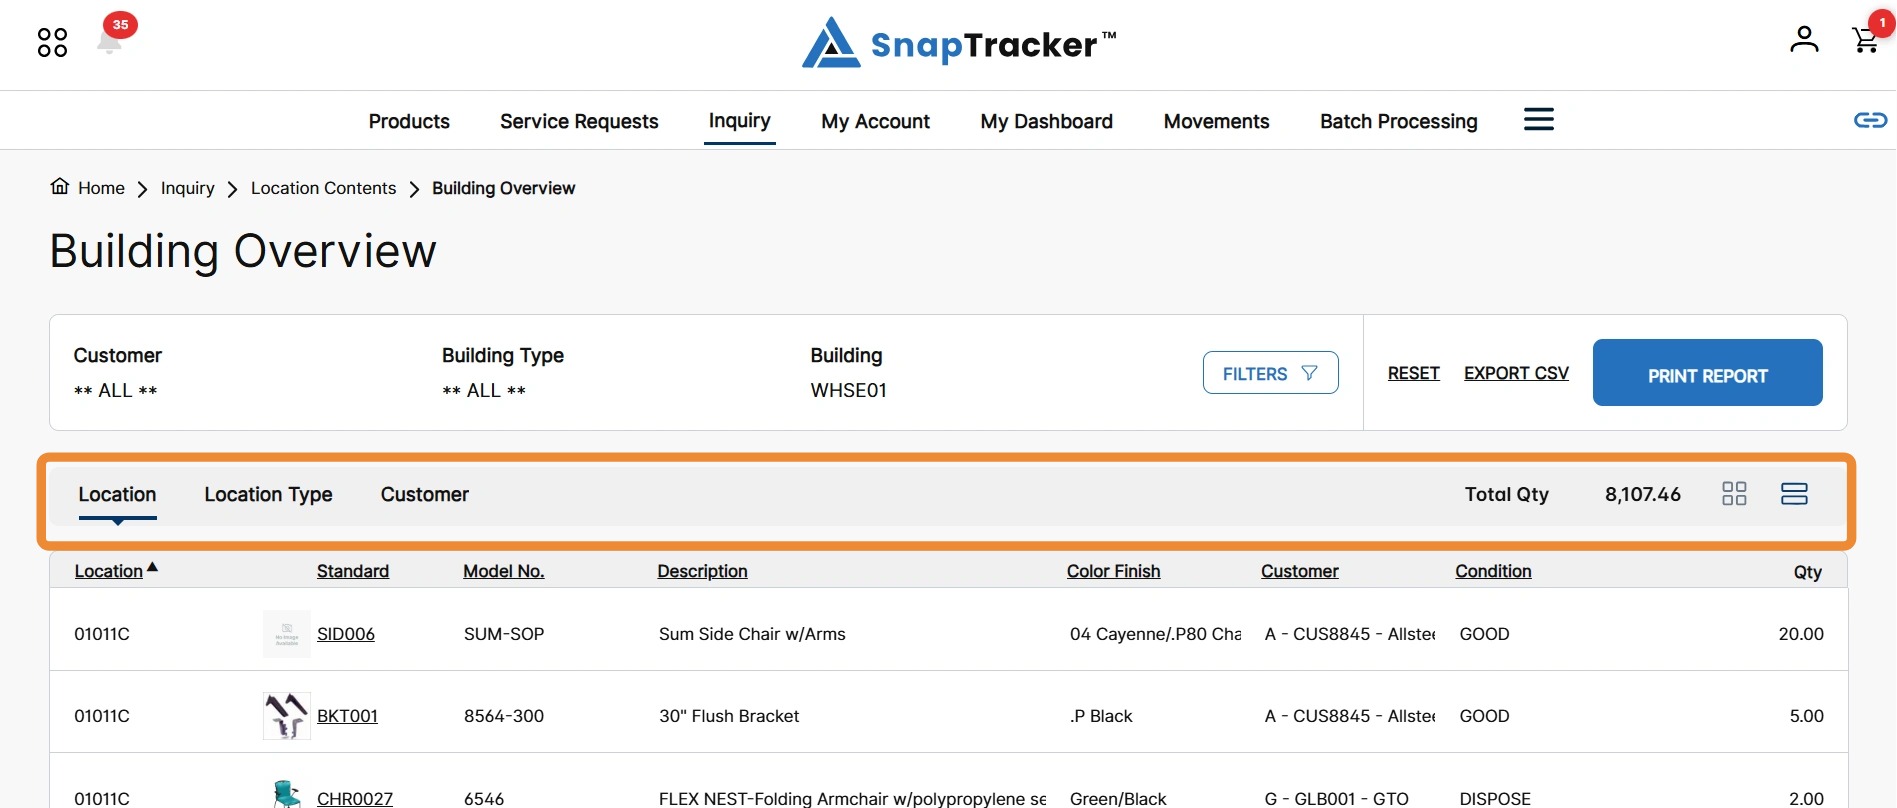
Below the results header is the inventory results section. By default, the Location tab is highlighted, showing inventory categorized by Locations within the selected Building.
When searching through multiple Customers, available tabs to view results are Location, Location Type, and Customer.
When results for a single Customer display, available tabs to view results are Location, Location Type, Standard Class, and Condition.
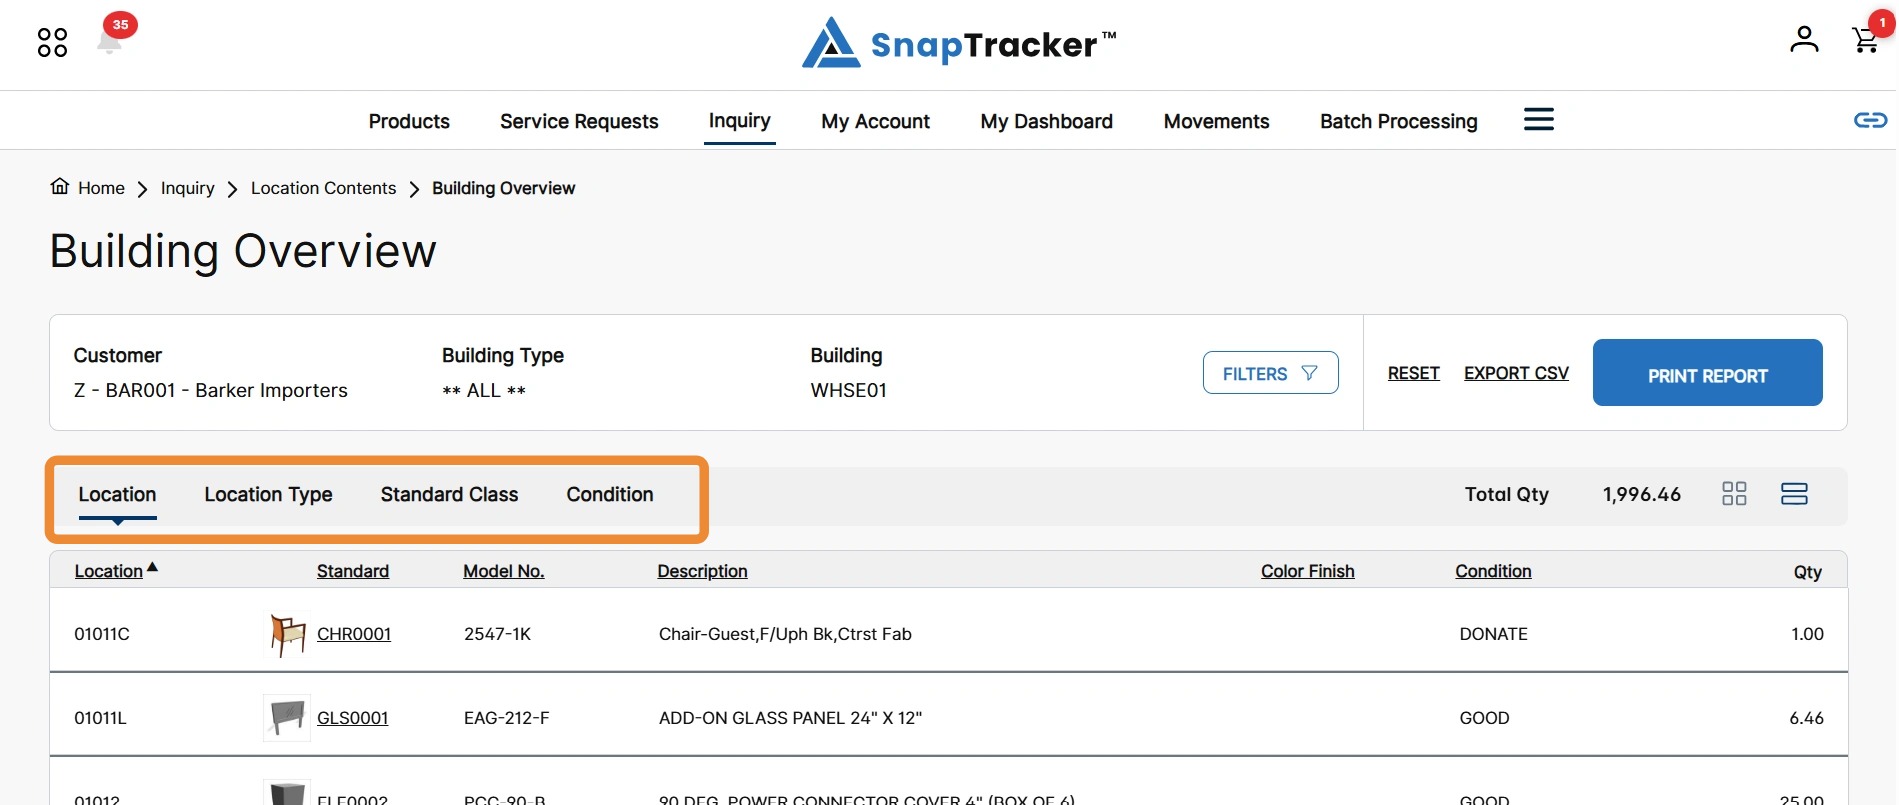
The Total Qty value indicates the total quantity of product within the selected Building, based on any additional filters applied.
This value stays the same on each of the different Location, Location Type, and Customer tabs if no further filters are applied.
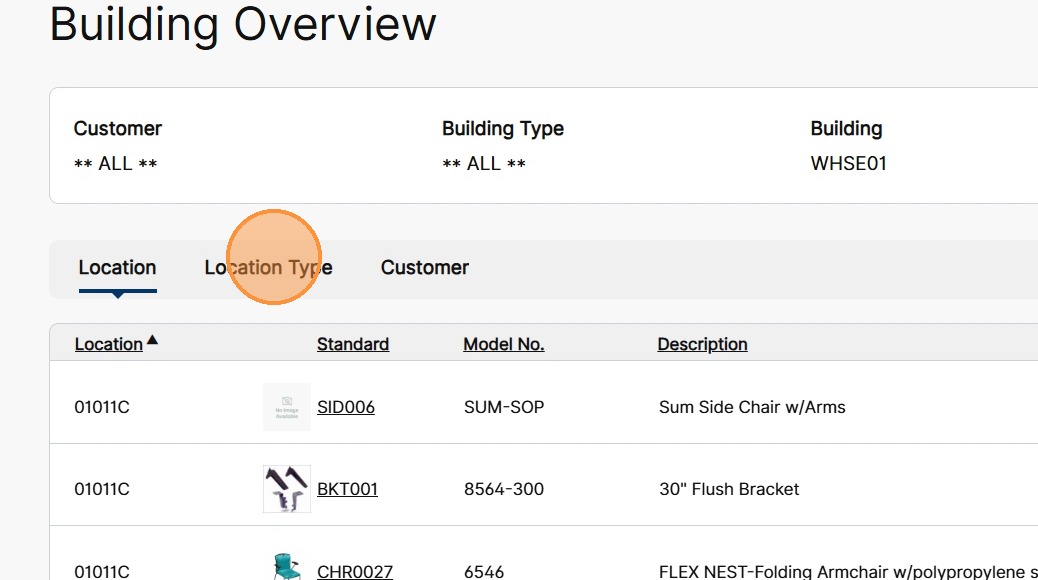
5. To reorganize the results in different categories, click the other tabs, such as Location Type.
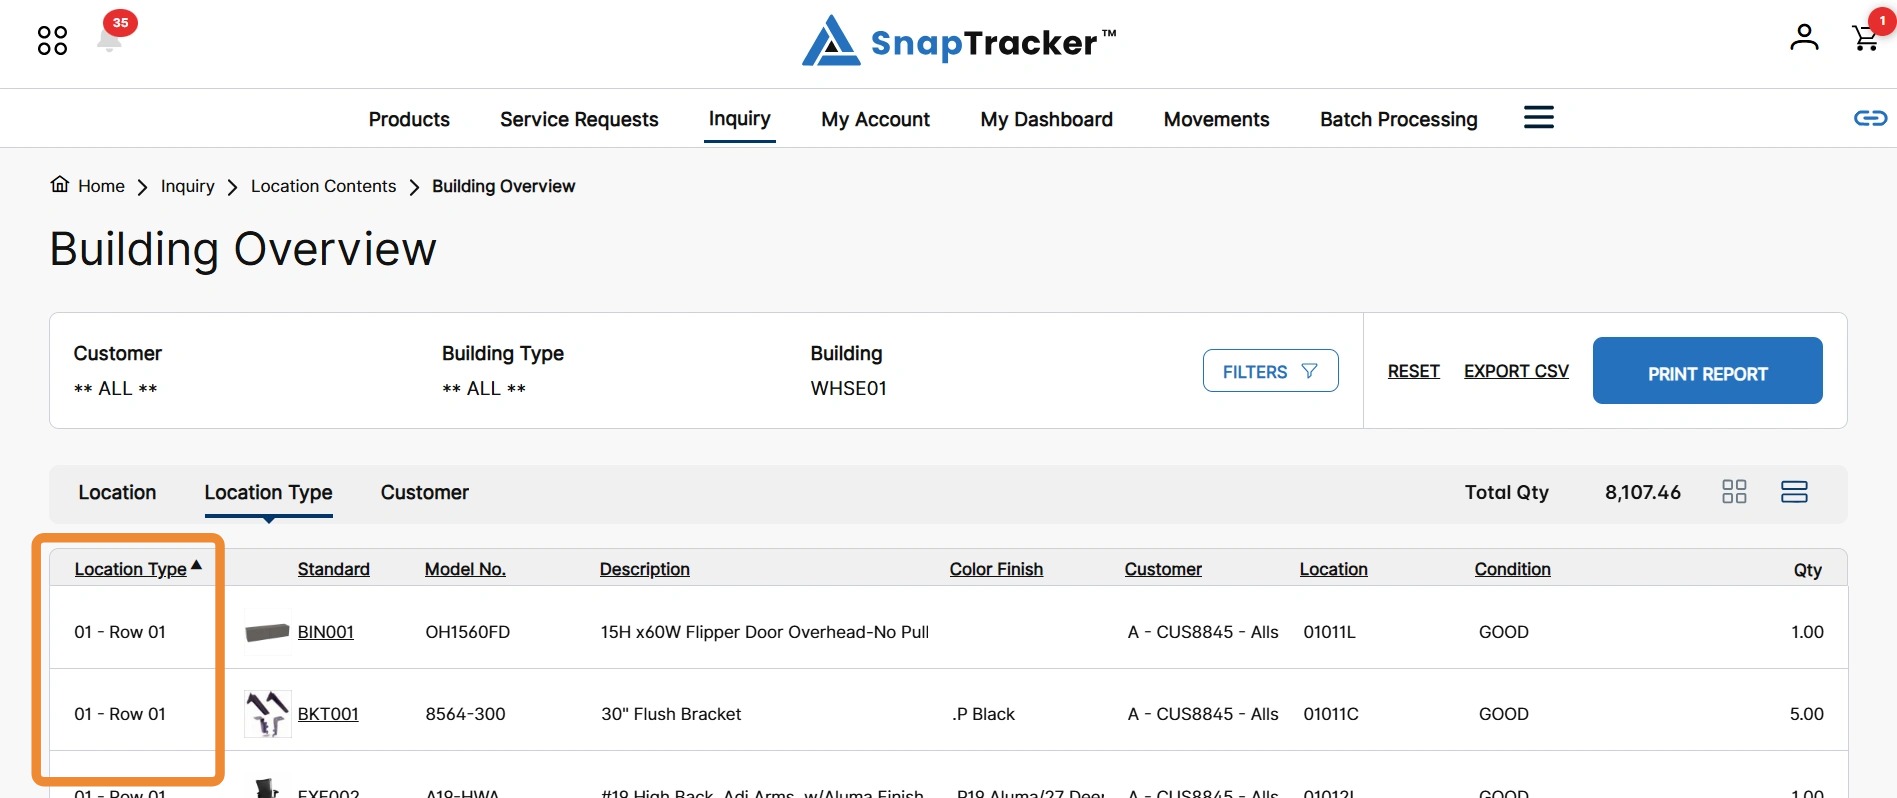
The Building Overview results update, displaying by the selected tab. Notice that the first column of the results now includes Location Type.
When viewing results by Summary and View Report, the results display in a table, with various Standard details.
As the Location tab is selected, the results are sorted by default with the Location field in ascending order.
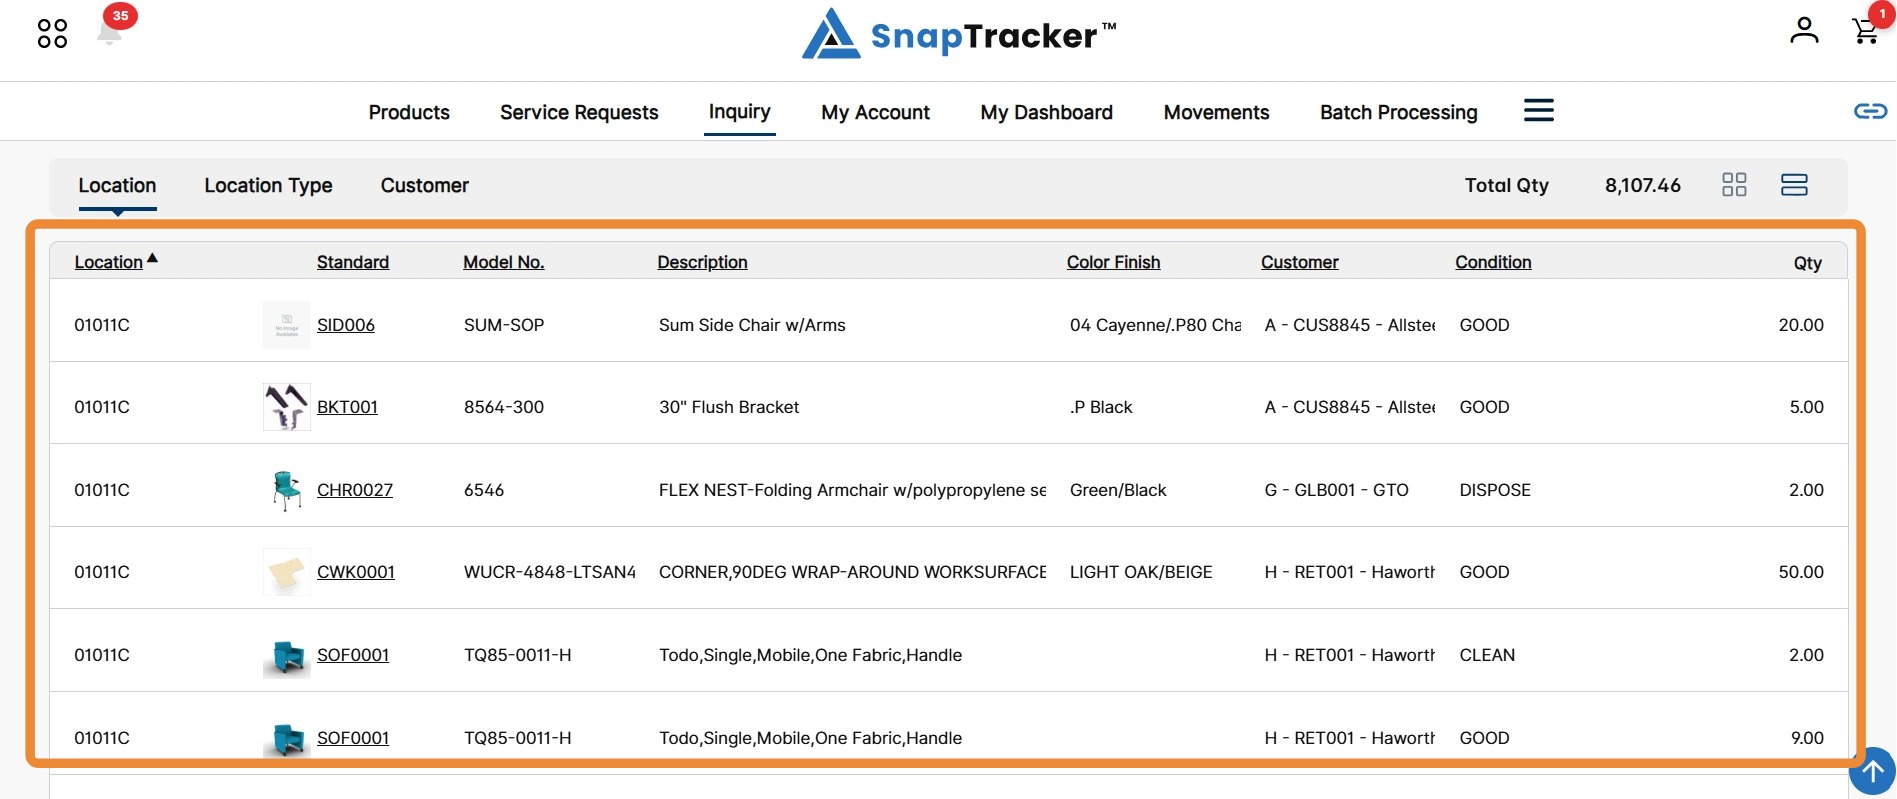
Observe the fields in the Standard Details table when Location tab is selected:
- Location – The Location the product is in.
- Standard – The unique Standard identifier.
- Model No – The Model Number.
- Description – The Standard Description.
- Color Finish – The color finish of the Standard (if applicable). Note: Color Finish displays depending on whether the field is enabled.
- Customer – The Customer the Standard is associated to. Note: The format that the Customer field displays is based on Customer settings.
- Condition – The Condition associated with the Standard quantity per line.
- Total Qty – The total quantity of product on hand.
Note: The Standard Details can change slightly based on your selection.
In the Location Type tab, the results display similar details, but additionally with the Location Type field.
As the Location Type field is selected, the results are sorted by default with the Location Type field in ascending order.
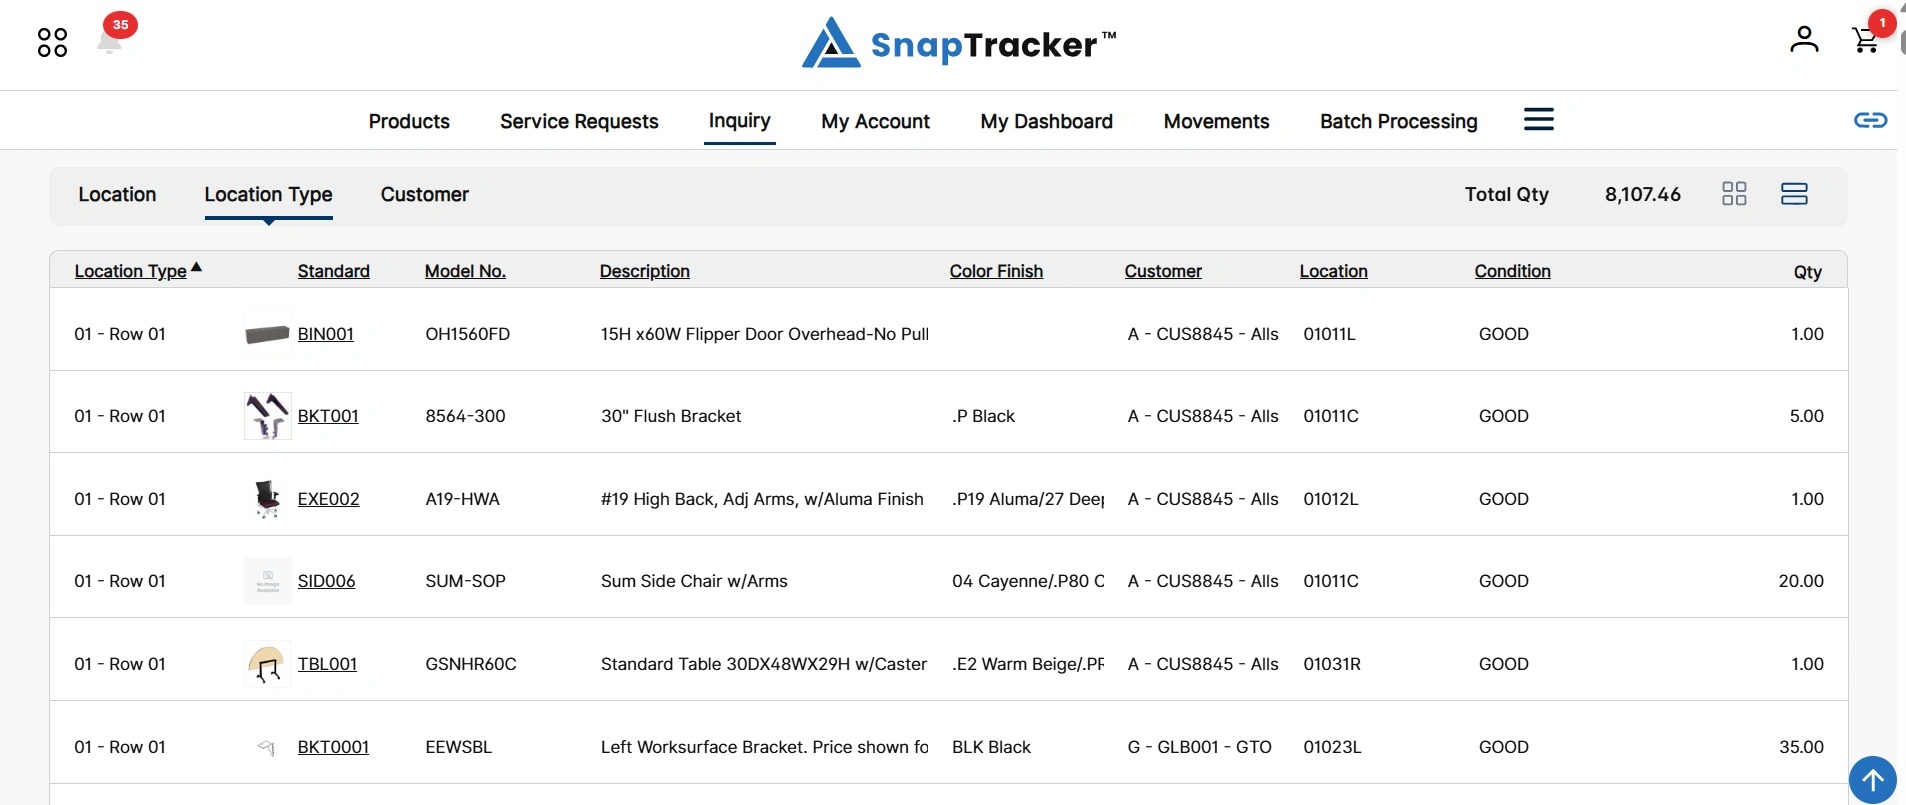
6. To access the Results View from the Report View, select the View Results icon.
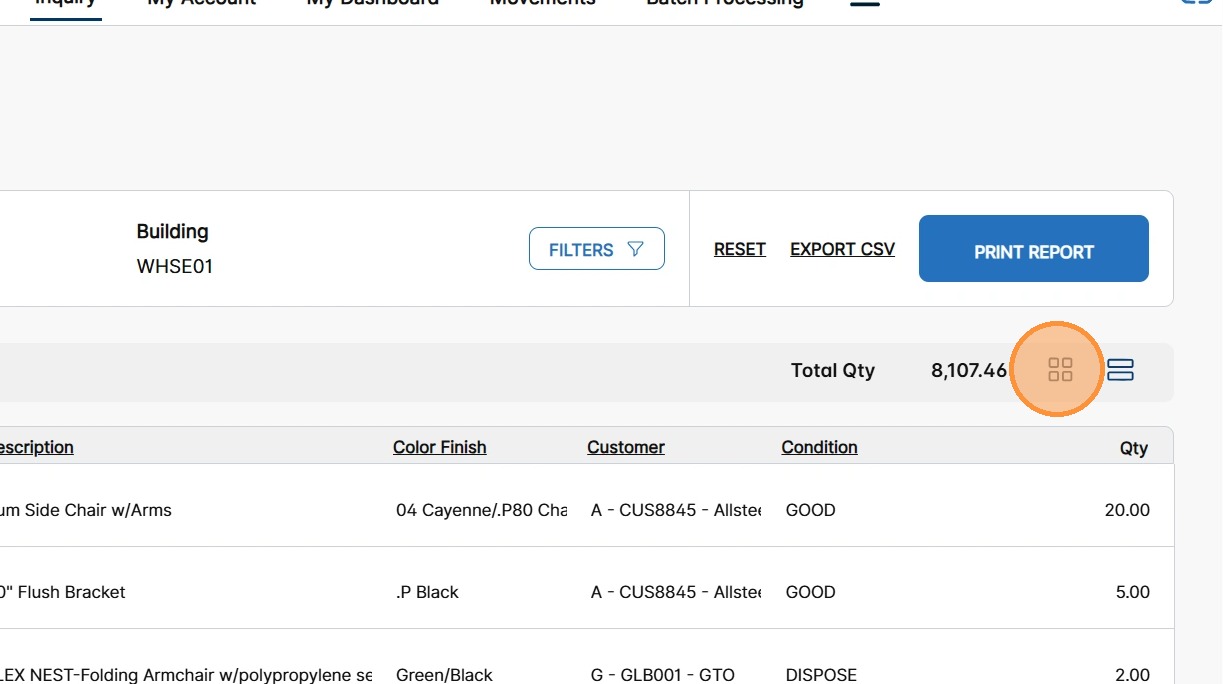
The Results View displays.
For more information on navigating the Results View, see “How to Use Inquiry – Location Contents – View Results.”
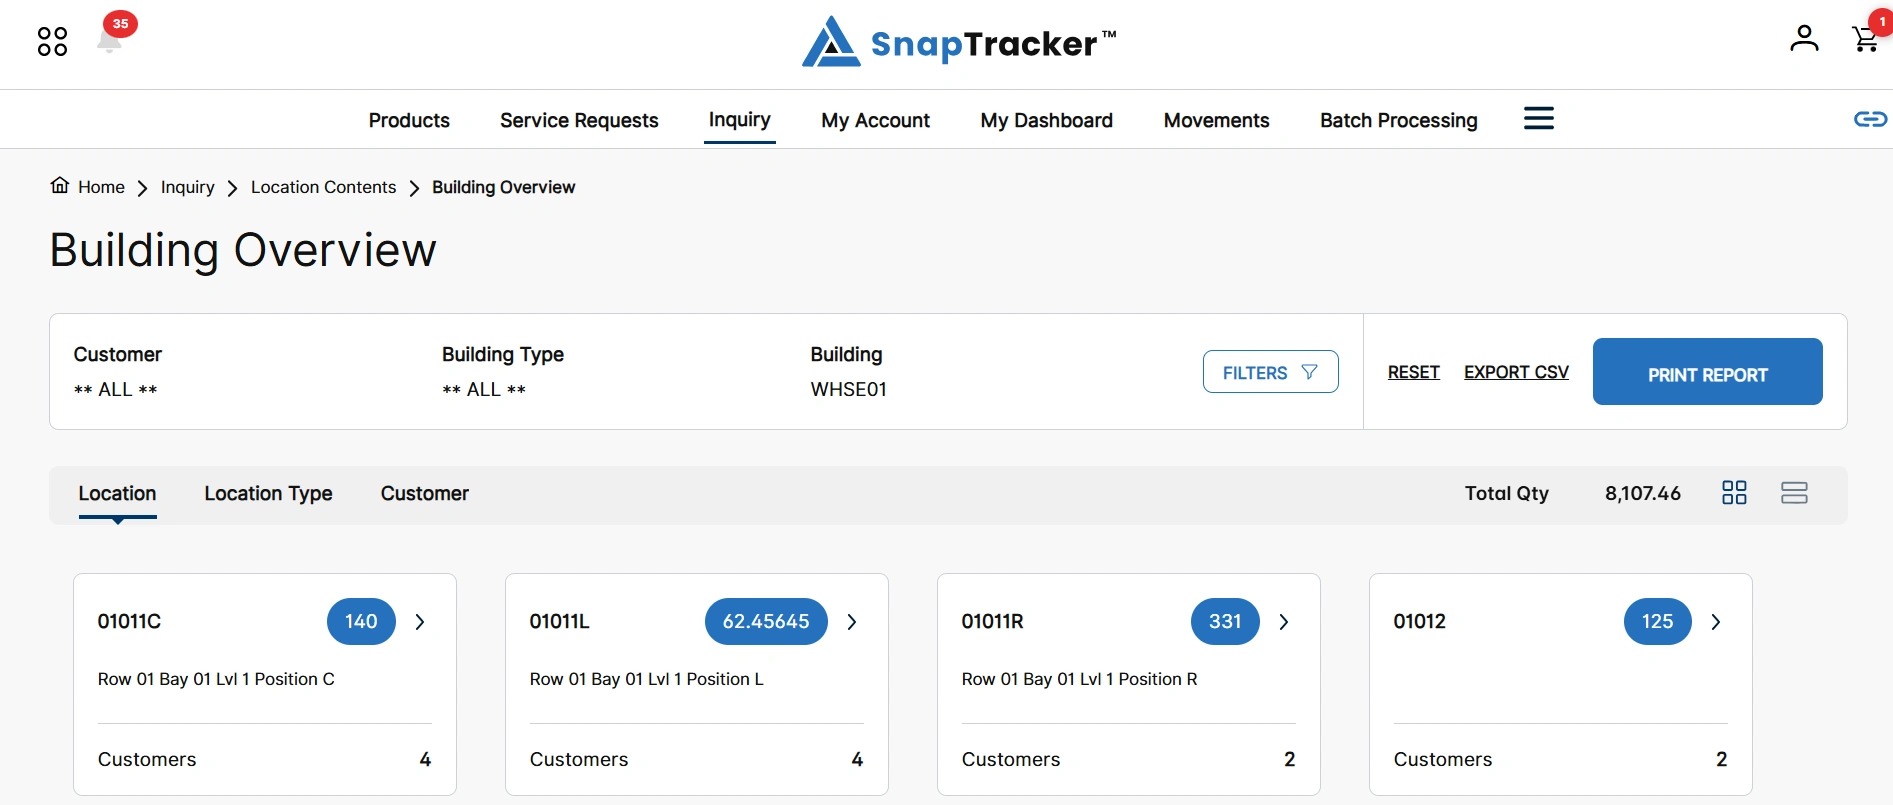
An additional option is available in View Report to generate a report with item level (serial number) information.
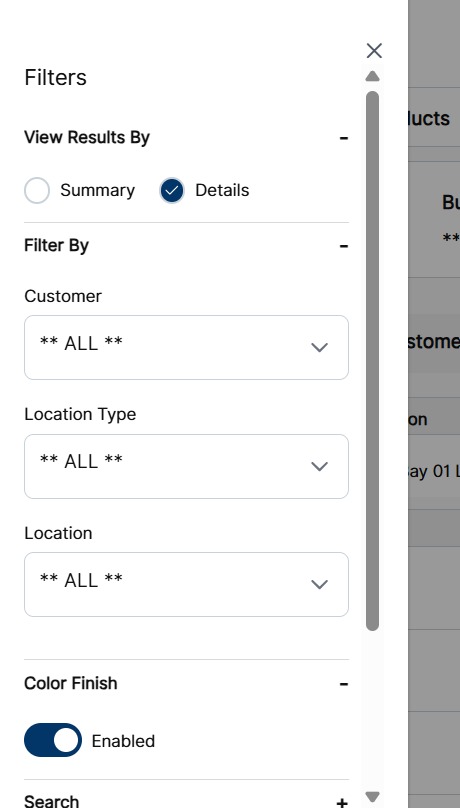
7. On the Main Search screen, from View Results By, select Details and click View Report.
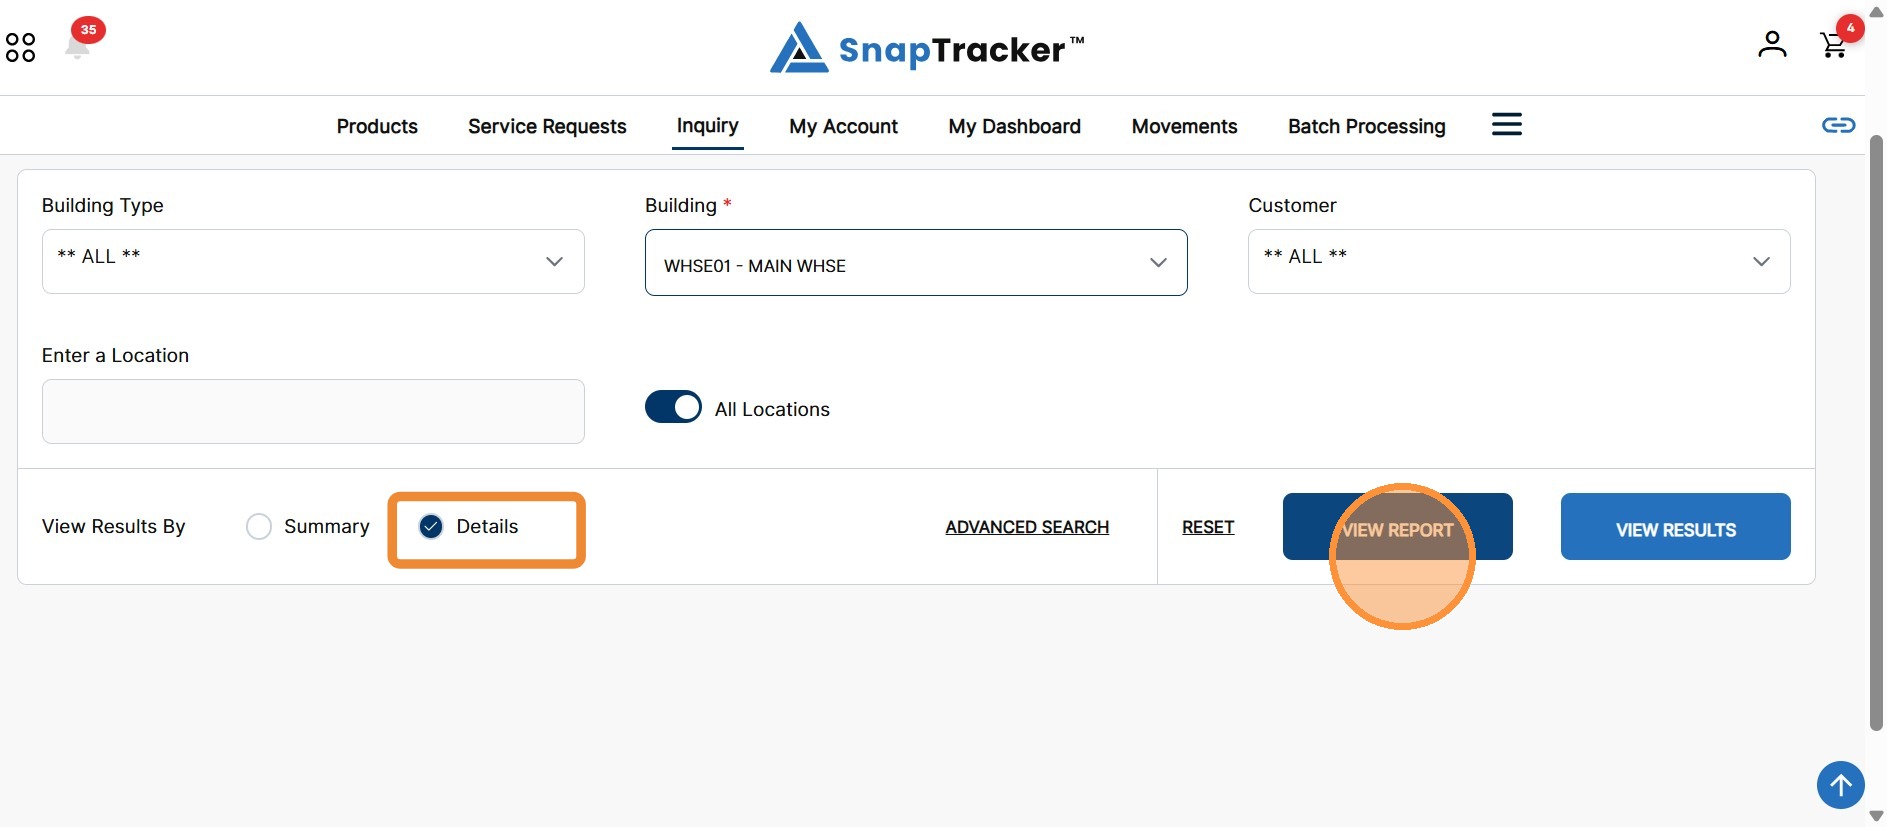
Alternatively, this view can also be accessed in the Filters side panel within the results after clicking View Report.
Click the Filters to open the Filters side panel, and in the View Results By section select Details and click Apply.
For more information on using the Filters side panel, see “How to Use Inquiry – Location Contents – Results Header.”
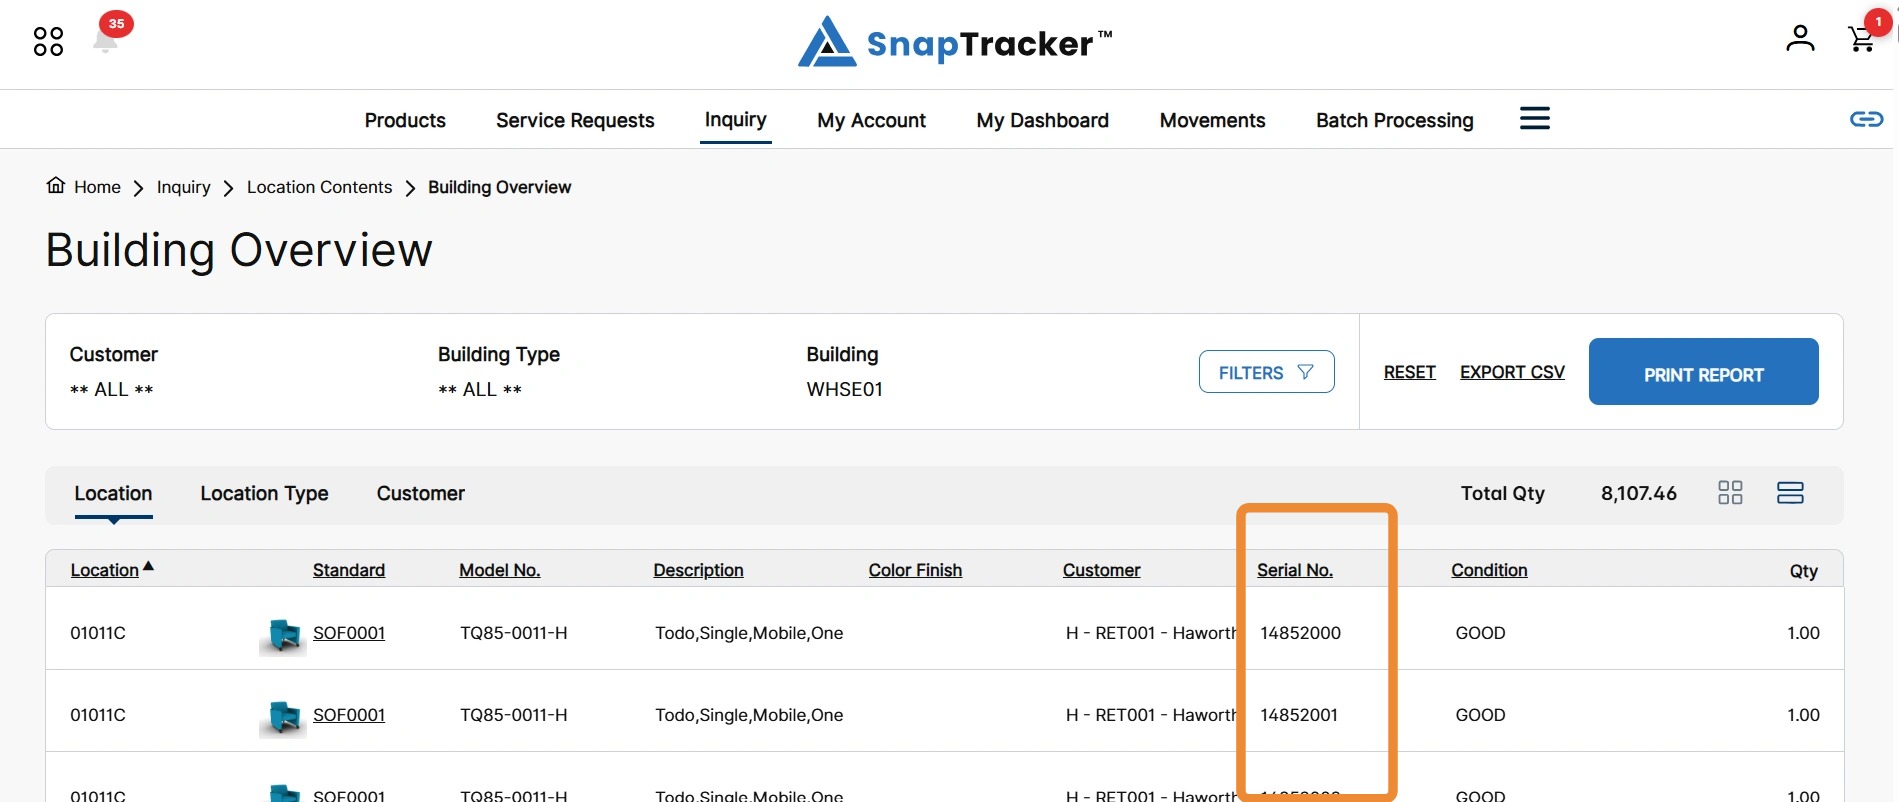
The Building Overview screen displays by Details in the View Report format.
The default Location tab is highlighted and the results are displayed in expandable rows.
All the same Standard Details as the Summary view displays, but additionally the Serial No. column is added to indicate one row for each item.
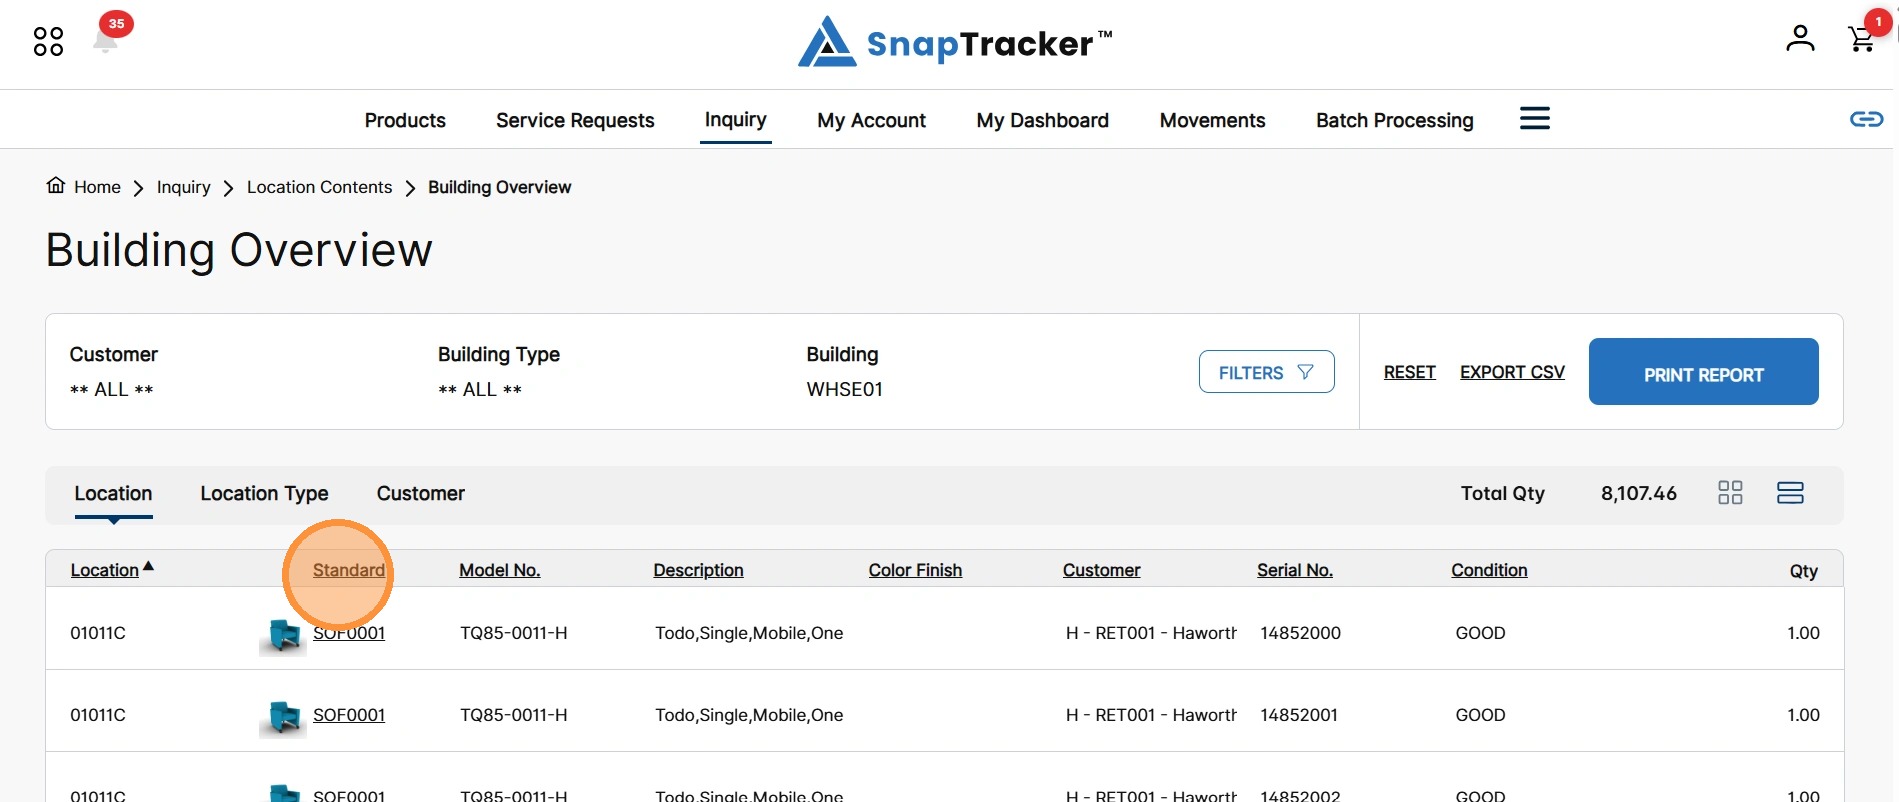
8. To reorganize the results, click a hyperlinked column header.
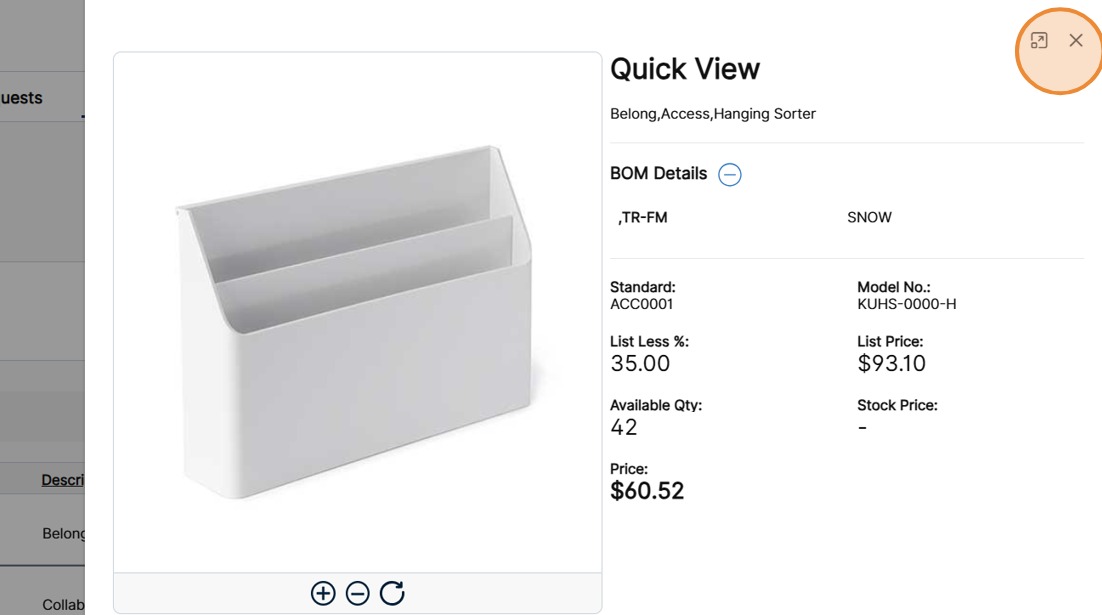
9. To view additional details related to a Standard, including a larger image, click a Standard hyperlink.
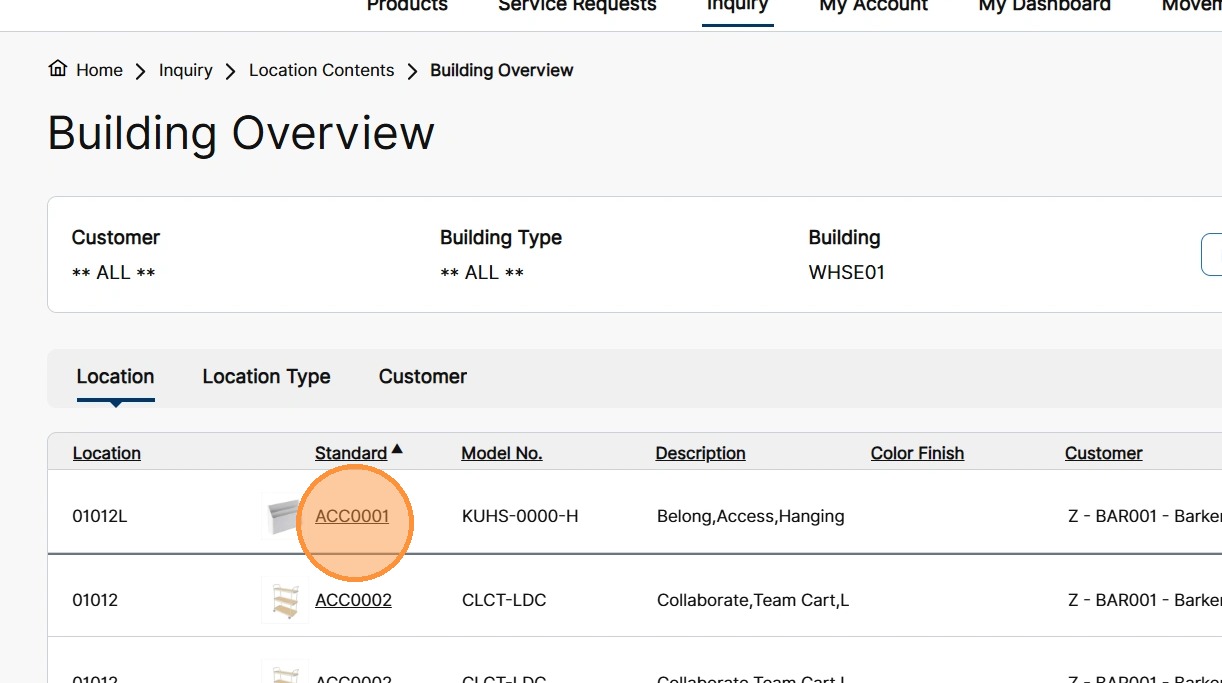
The Quick View side panel displays.
In the Quick View side panel, the large Standard image displays. If applicable, the Standard global gallery images are available to view. Additional Standard details such as BOM also display.
To close the Quick View side panel, click X.
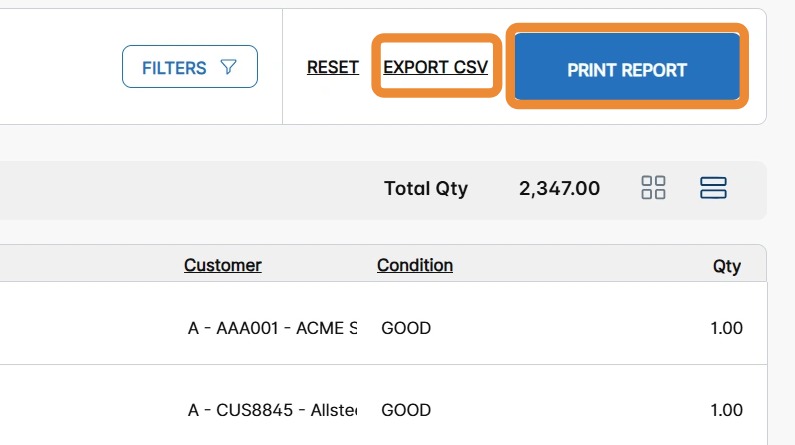
10. To download the Building Overview results, in the Results Header section, click Export CSV or Print Report.
- Export CSV – Click Export CSV to export the Building Overview results in .csv format.
- Print Report – Click Print Report to print the Building Overview results in .pdf format.
Note: The Print Report button also displays at the bottom of the screen.
To learn more about Location Contents, refer to the following:
“How to Use Inquiry – Location Contents – Basic Search.”
“How to Use Inquiry – Location Contents- Advanced Search.”