
How to Modify a Cart
After items are added to carts, modifications may be required due to new or changing requirements. Changes may include adding or editing notes, adding ad-hoc products, and editing or removing existing product in the cart.
Before starting, make sure:
- You are logged into SnapTracker.
- Your account has shopping enabled.
- You have access to a minimum of one customer with shopping enabled.
- You have a cart created with product in it.
This post outlines the process to modify carts by adding, editing, or removing products and cart details.
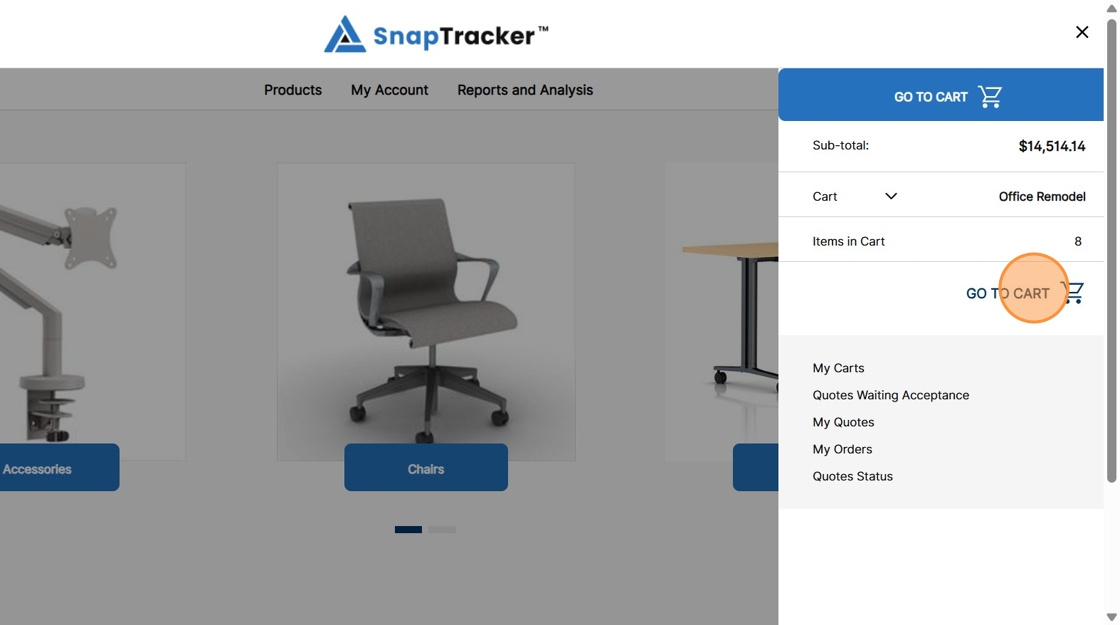
1. In the header section, click the Cart icon.

2. To view the active cart details, from the Cart side panel, click Go to Cart.
The Cart displays.
Observe the following cart actions:
- Print – Print the all cart information, or Print the selected cart products only.
- Delete – Delete the selected cart products.
- Update – Update the quantity for selected cart products with edited quantity values.

3. Select the checkbox beside your desired products and make any edits.

4. Click the desired action (either Update or Delete).
Note: To save the changes in the cart, you must click Update or Delete.

To add additional product to the selected cart, you can navigate to an Inquiry screen.
Refer to the following posts:
- How to Use Inquiry – Quick Search
- How to Use Inquiry – Product Search
- How to Use Inquiry – Product Catalog
5. For additional functions, click the More Actions icon.

Observe the following functions:
- View My Carts – Redirect to My Carts screen.
- Insert Line – Manually add an ad-hoc item to your cart. This is a line that can be created for a non-Standard product.
- Add/Edit Line Note – Add or edit a note for the selected line item. Once added, a note icon displays beside the line in your cart.

6. Click the desired action function.

7. To add an ad-hoc line to the cart, click Insert Line.
The Insert Line pop-up screen displays.
Enter the desired information and click Create.
Note: Description is a required field.

A success message displays and an ad hoc line is added to the cart.

To add a note, you first need to select a line. The same note can be added to multiple lines at one time, simply select all lines you want to add the note to.
8. To add a Note, click Add Note.
The Add Line Note screen displays.
Enter information in the Enter a Line Note text box and click Create.

A success message displays. An icon displays beside the selected item, indicating there is a note. If you hover over the icon, the note information displays.

9. To edit or delete a note, click More Actions > Add/Edit Line Note.
The Add Line Note pop-up screen displays. Make any necessary changes, then click Delete or Update to save the changes.
