
How to Create a Quote Manually
Quotes are typically created by dealers as project proposals for their client to approve new product purchases. Quotes are created after extensive discussions and require tracking and signed approvals. Once approved on the site by the client, the full order details can be sent back to the business system for finalization.
SnapTracker provides the ability for a user to upload dealer quotes and assign the quotes to another user, such as a customer, for acceptance.
Creating a quote and assigning it to another user enables you to provide your customers with access to quotes from your business system online.
The quote can be created by uploading a SIF file and/or by adding product to the quote from the Inquiry screens of Quick Search, Product Picture Search or Product Catalogs.
Quotes are for new product orders only.
Before starting, make sure;
- You are logged into SnapTracker.
- Your user account has shopping enabled.
- You have access to a minimum of one customer with shopping enabled.
- You have access to My Quotes.
This post outlines how to create a quote in SnapTracker.
There are two ways to access the My Quotes screen.
1. The first way is:
In the header section, click My Account.

2. Click My Quotes.

3. The second method is:
In the header section, click the Cart icon.

4. In the Cart side panel, click My Quotes.

The My Quotes screen displays.
Note: Filters may be shown or hidden by default based on your user settings.

5. On the My Quotes screen, click Create Quote.

The Create Quote pop-up displays.

6. From the Select a Customer dropdown, select the correct Customer.

7. In the Quote Name text box, enter the name of the quote.
Note: Quote Name is required.
In the Quote Description text box, you can enter a description, if desired.

8. Click Create Quote.
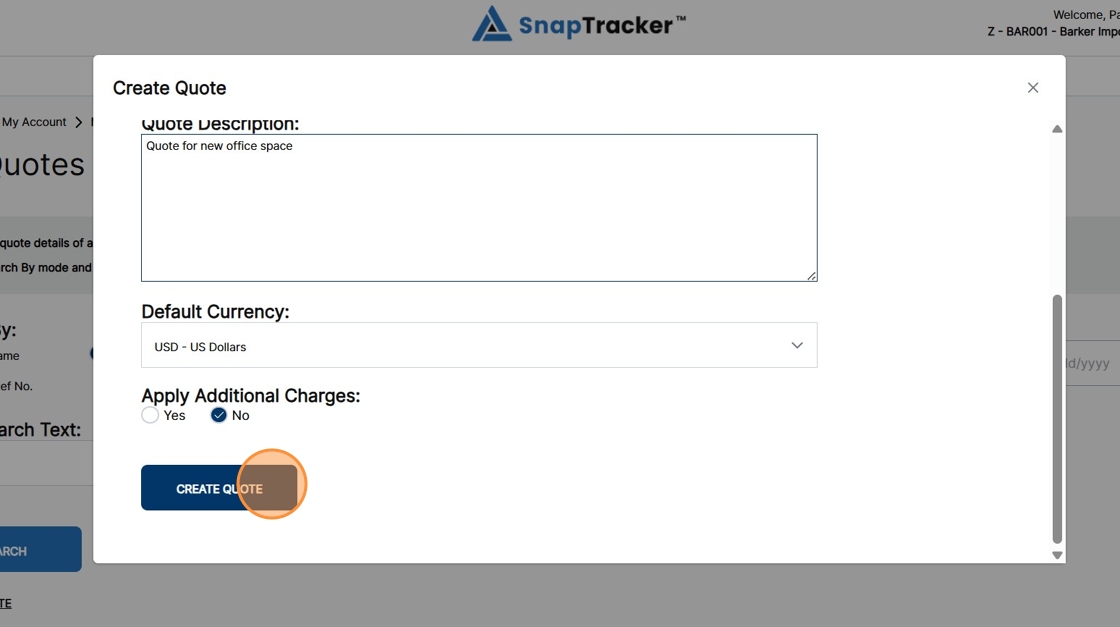
The pop-up closes and the Cart screen displays. The cart is currently empty.

9. Add product to the quote from the Inquiry screens, or the additional upload functions.
Refer to the following articles:
- How to Use Inquiry – Quick Search.
- “How to Use Inquiry – Product Search“
- “How to Use Inquiry – Product Catalog“
- “How to Modify a Cart“
- “How to Create a Quote Using a SIF File”

10. Once all products are added to the quote, click Create Quote.
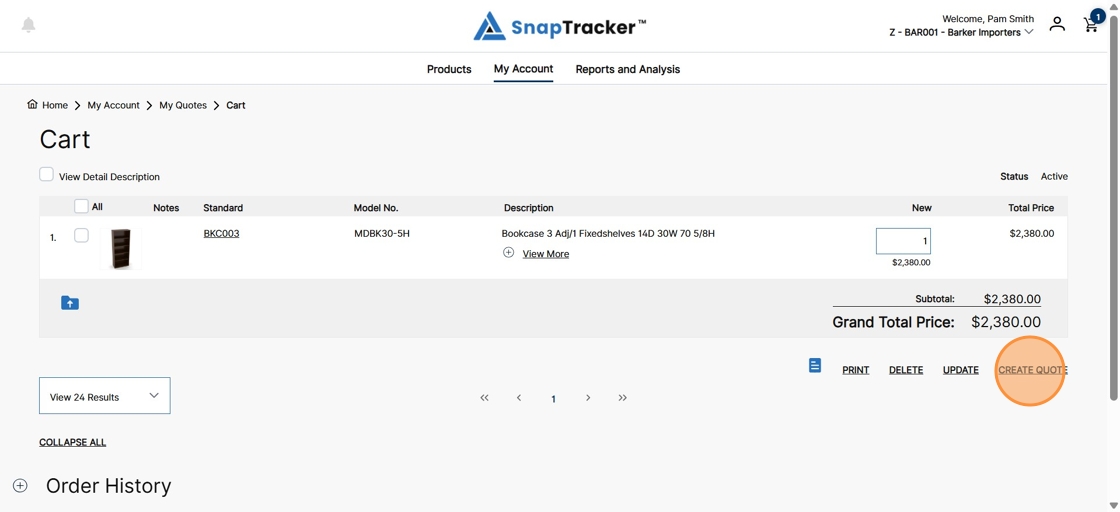
The Checkout screen displays.

11. In the Checkout screen, populate the required fields. Populate optional fields as desired.
Note: The Checkout screen in the My Quotes screen is identical to the Checkout screen for a regular cart.

12. Once all information is added, click Create Quote.

The Publish Quote screen displays.

13. On the Publish Quote screen, click the Select a User dropdown.
Note: The Select a User dropdown lists all users that have access to the selected Customer.

14. Search for or select the desired User to accept the quote.

15. Click Assign User.
Note: An email is sent to the selected User at the end of the process.

The selected User displays in the Select a User dropdown.

16. In the Enter Custom Email Notification or Send default text box, edit the custom email notification as desired, or simply send the message that displays in the text box.
Click Publish Quote.

The My Quotes screen displays.
The quote is published and the status of the quote changes to awaiting acceptance. An email is sent to the selected User letting them know there is a quote waiting for them on the site.
Note: Once a quote is assigned to another user, it no longer displays in the My Quotes screen. It displays in the Quotes Waiting Acceptance screen. Quotes cannot be edited once they are assigned to a user for acceptance.