How to Inquire on Individual Work Orders
The Inquiry – Work Order screen enables you to quickly find a desired work order and view all necessary details. The individual Inquiry – Work Order screens provides access crucial work order information in the work order header, as well as full work order fulfillment information, such as the products required for the order, items allocated, work order ticket numbers (WOTs), etc.
Before starting, make sure:
- You are logged into SnapTracker.
- You have at minimum one work order created with products allocated to it.
- The correct Customer is selected from the Customer selection list.
- You have access to Work Order Inquiry.
This post outlines the process of inquiring for individual work order information.
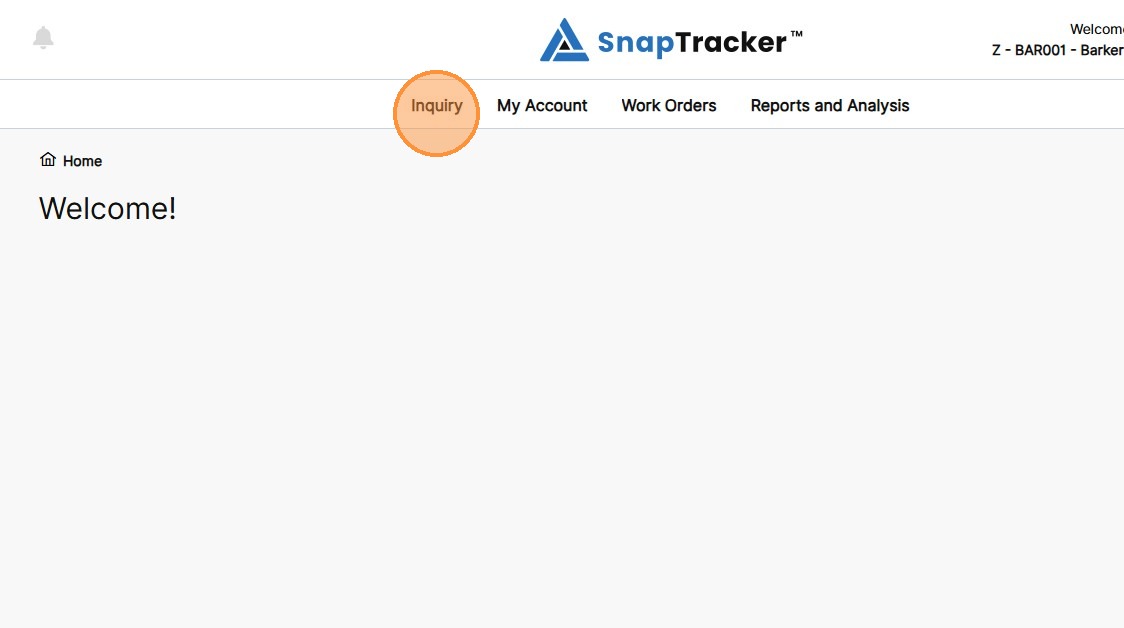
1. In the header section, click Inquiry.
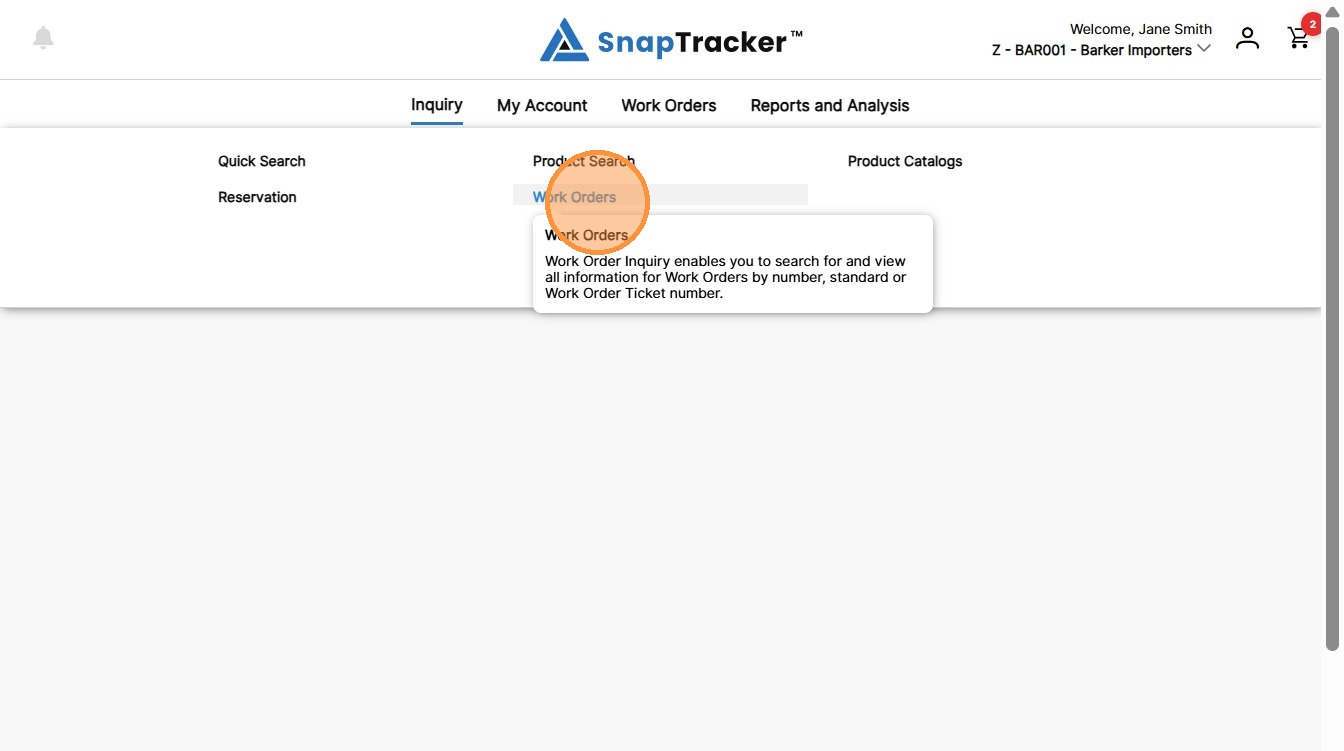
2. Click Work Orders.
Another way to access the Inquiry Work Order screen is to navigate to the Inquiry main screen.
From here, select Work Orders.
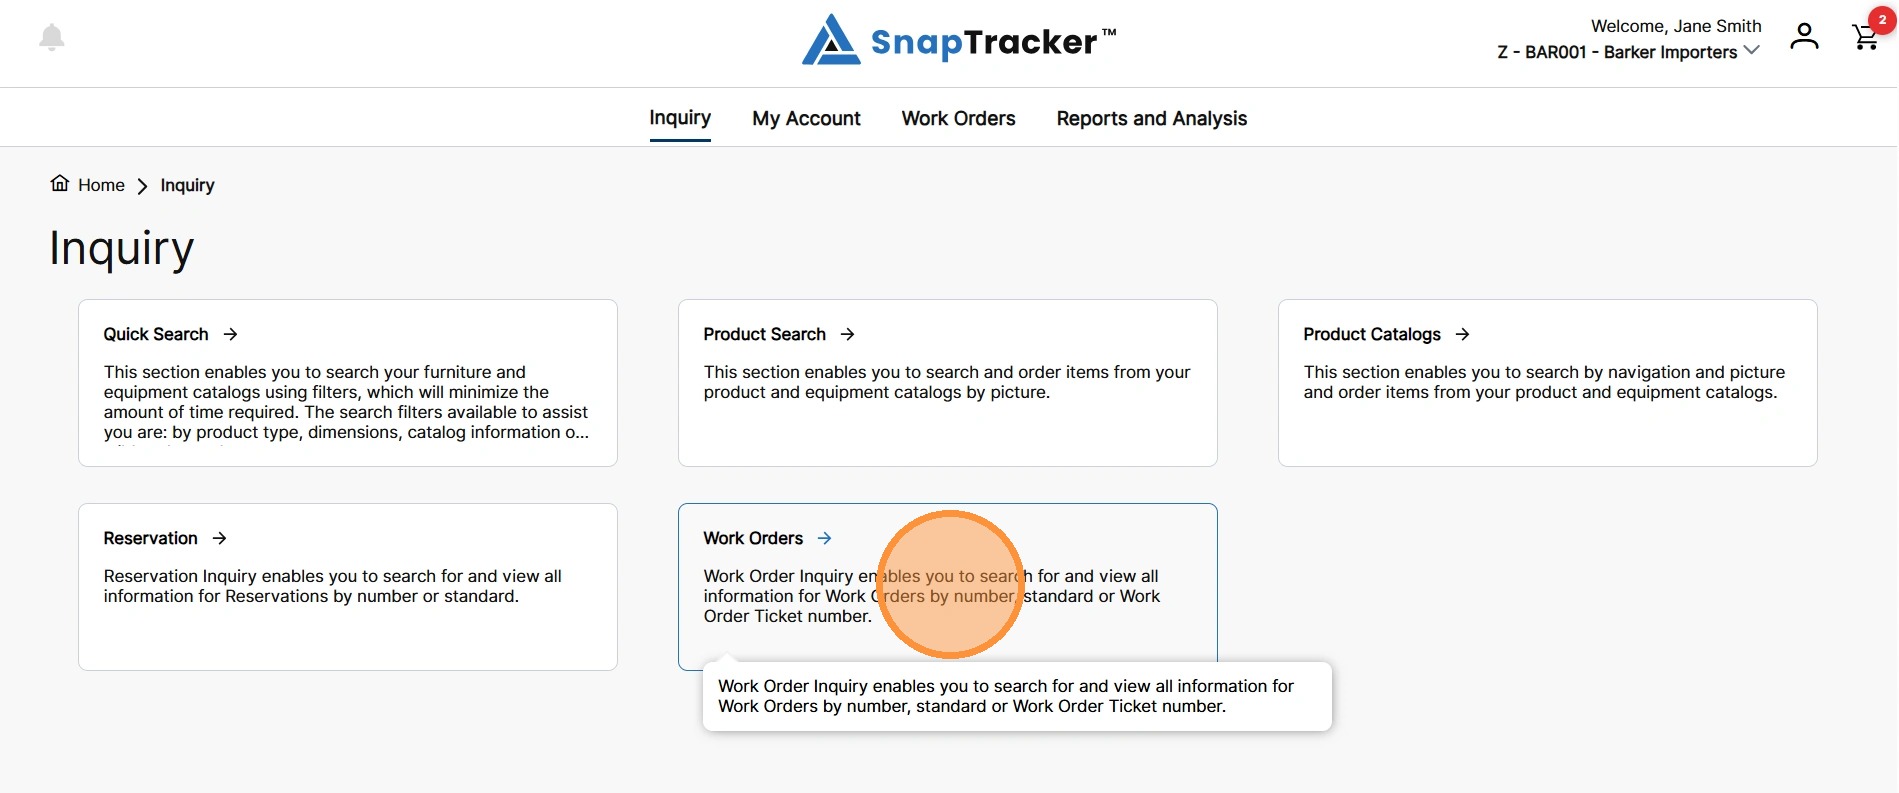
The Work Order Inquiry screen displays.
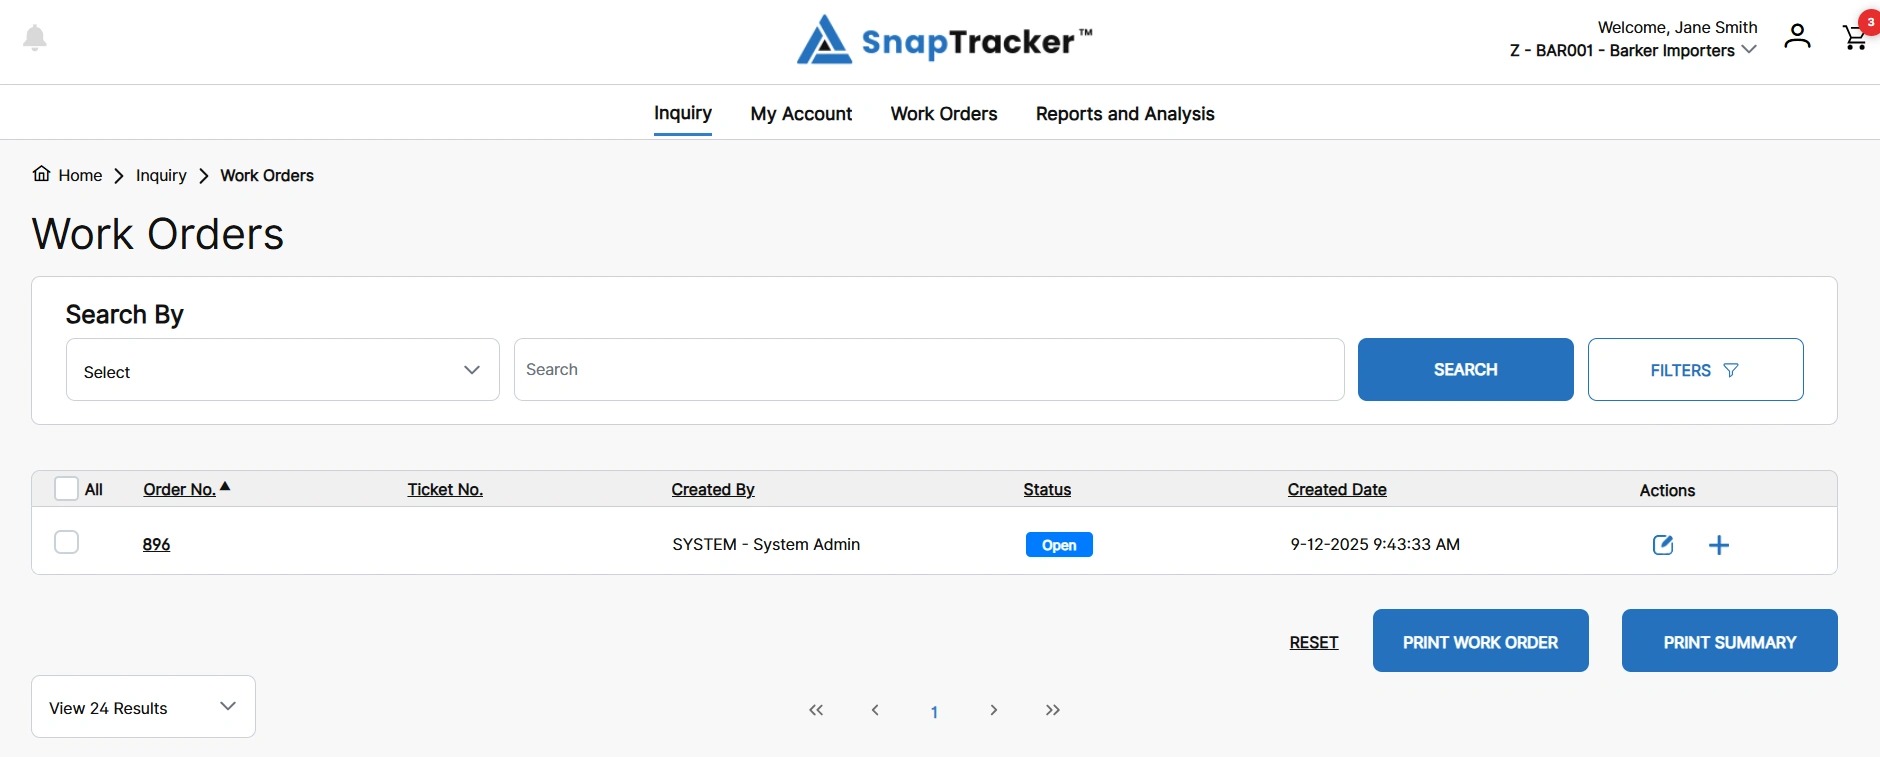
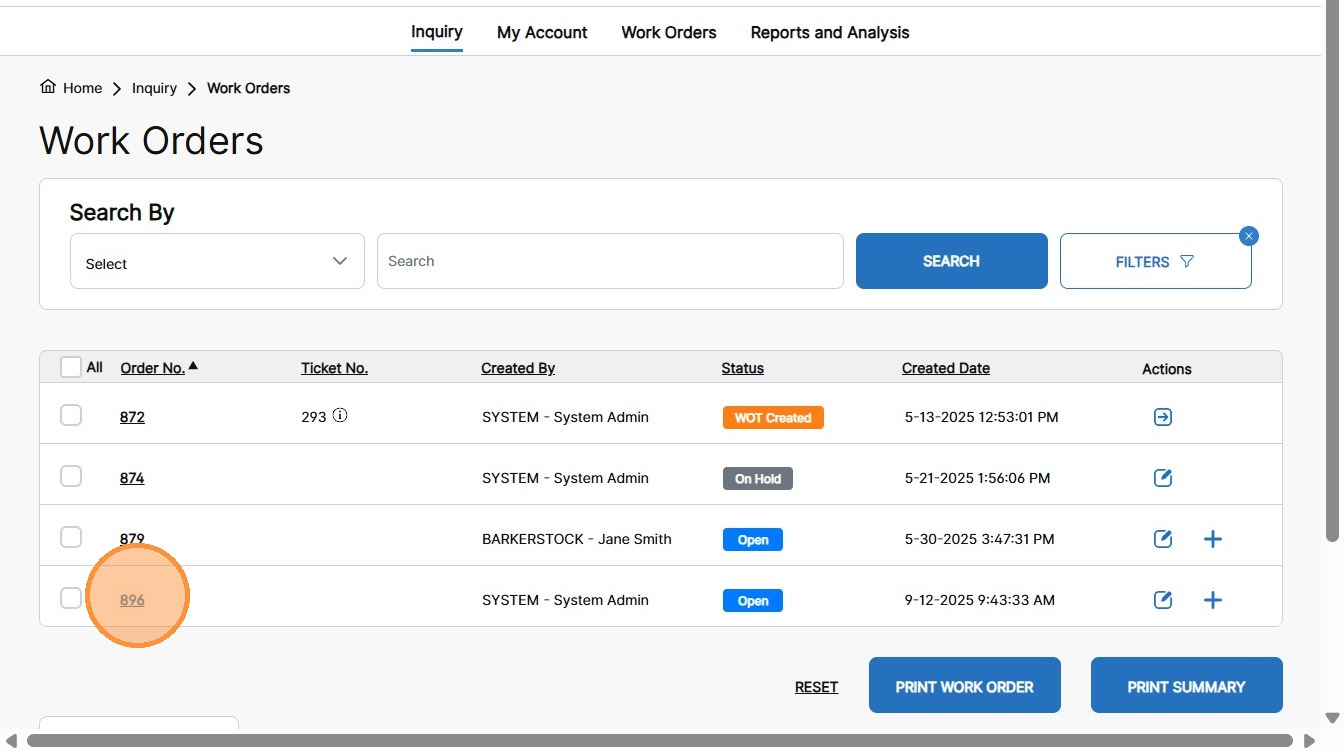
3. Search and apply filters to find the desired work order as necessary, and click the hyperlinked order number.
See “How to Use Inquiry – Work Order” for full inquiring instructions.
The individual Work Order screen displays.
Note: By default, the first line is expanded.
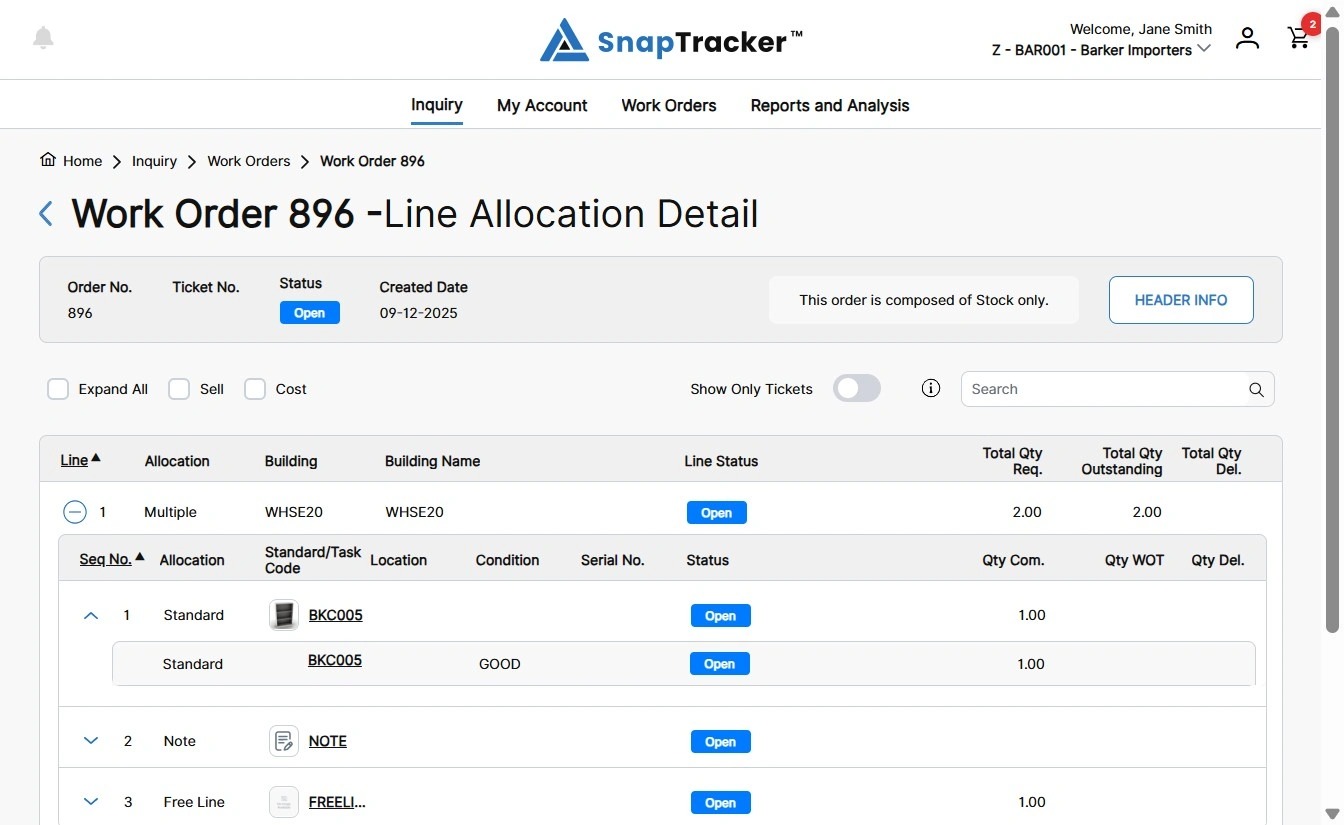
Observe the following fields in the header area of the individual work order screen:
- Order No. – The work order number.
- Ticket No. – The last WOT associated with the order, if available. Note: Only the currently active ticket number displays.
- Status – The work order status.
- Created Date – The created date of the work order.
- Composition Message – The composition message will summarize the type of products that make up the order (e.g. if only Stock items, the message that displays is “This order is composed of Stock only.”)
4. To view the work order header information, click Header Info.
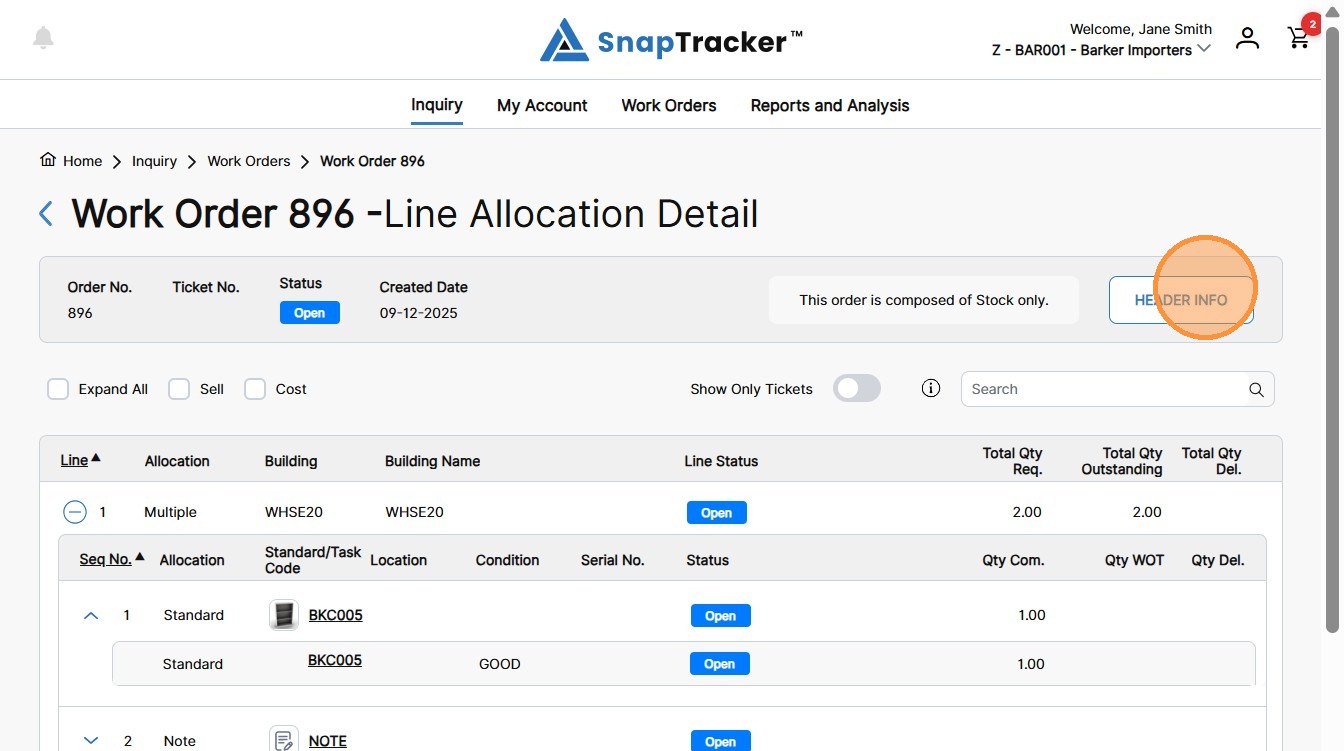
The Work Order Header side panel displays.
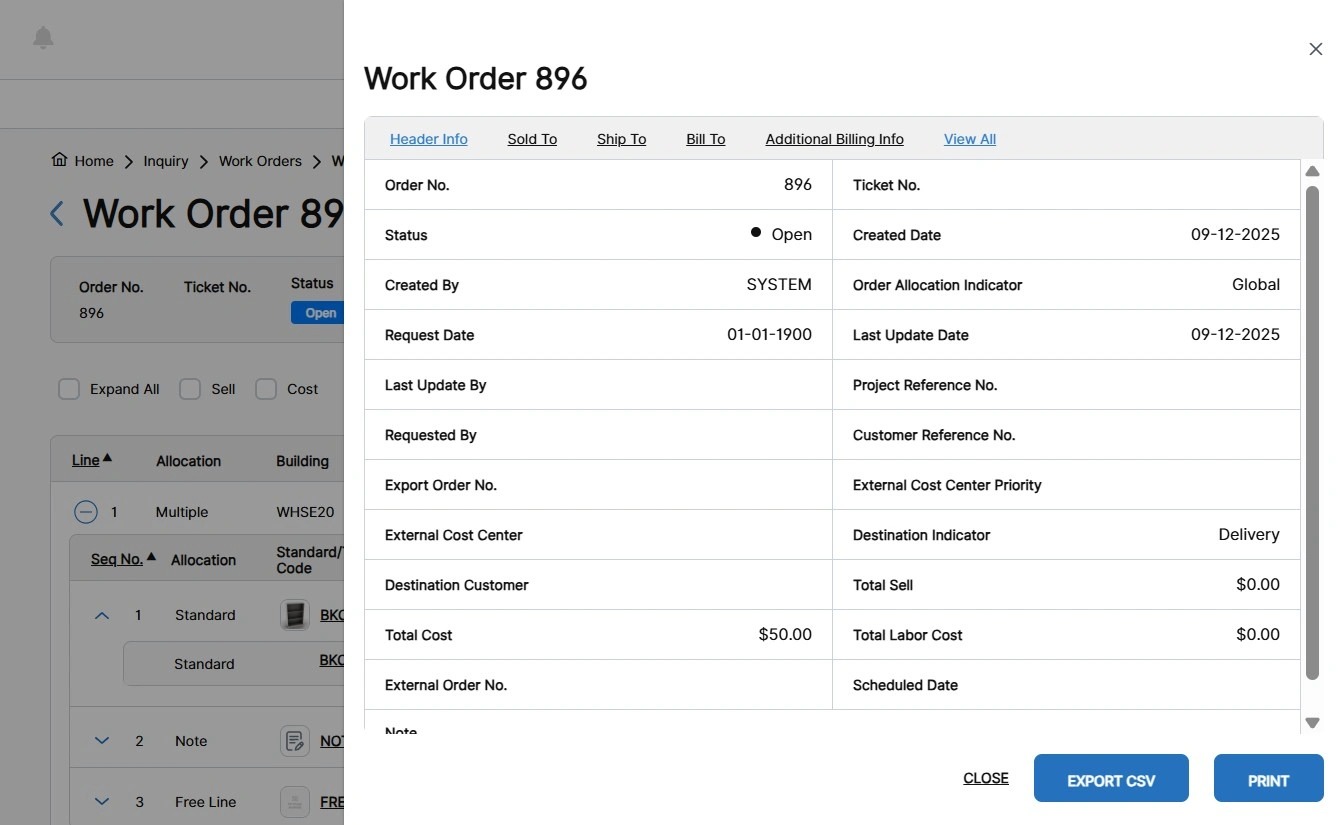
The work order header information is organized by the following tabs:
- Header Info – Primary information related to the work order, such as the Order No., Created By User, Last Update Date, etc.
- Sold To – The Sold To addresses and contact information.
- Ship To – The Ship To addresses and contact information.
- Bill To – The Bill To addresses and contact information.
- Additional Billing Info – Any additional configured billing information fields, dependent on each Customer’s configuration.
- View All – Displays all information from the tabs listed above in one screen.
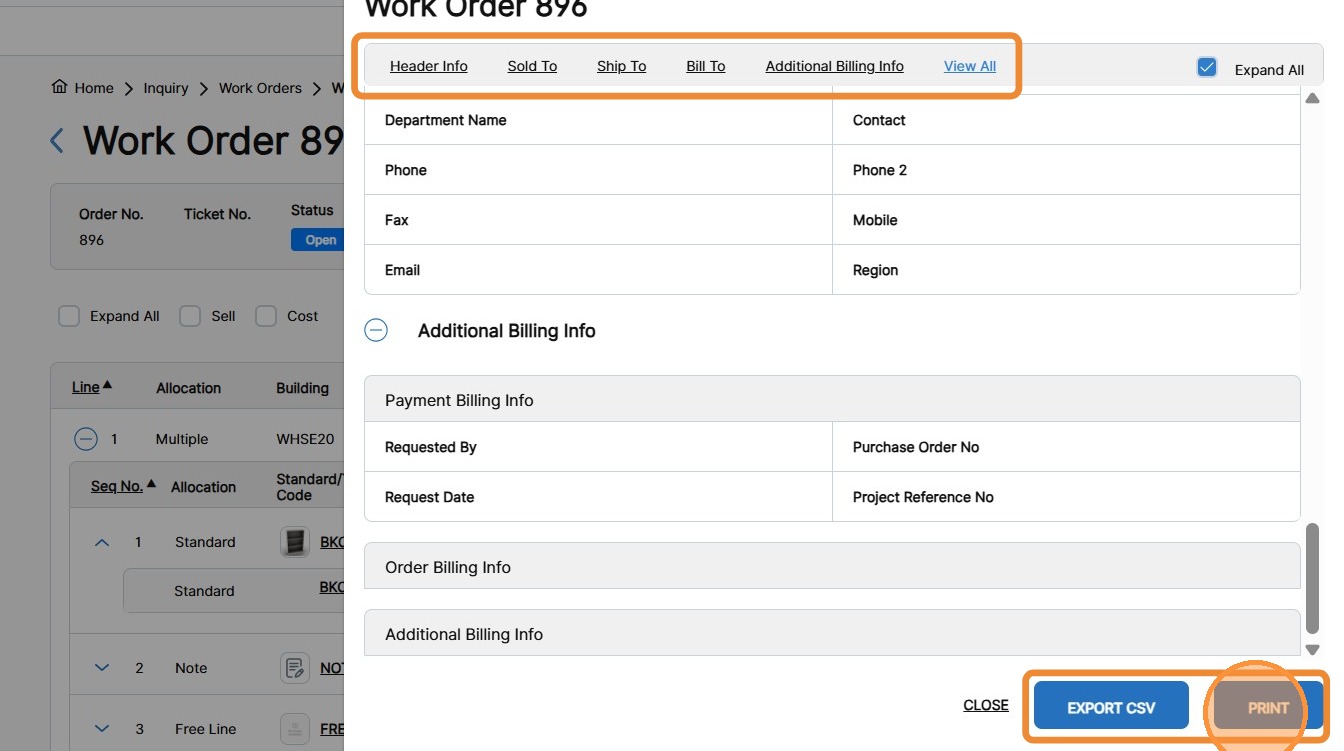
5. To print any work order header information, select the desired tab and click Export CSV or Print.
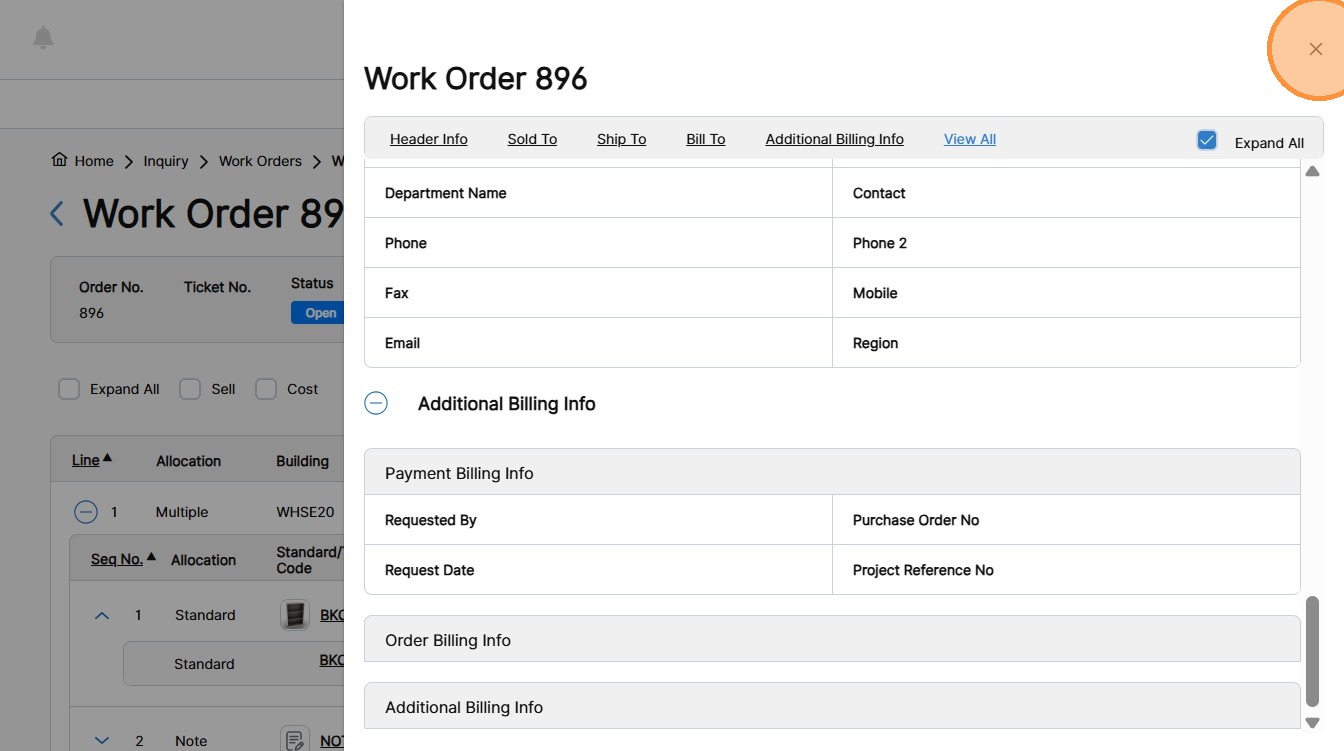
6. To close the Work Order Header side panel, click X.
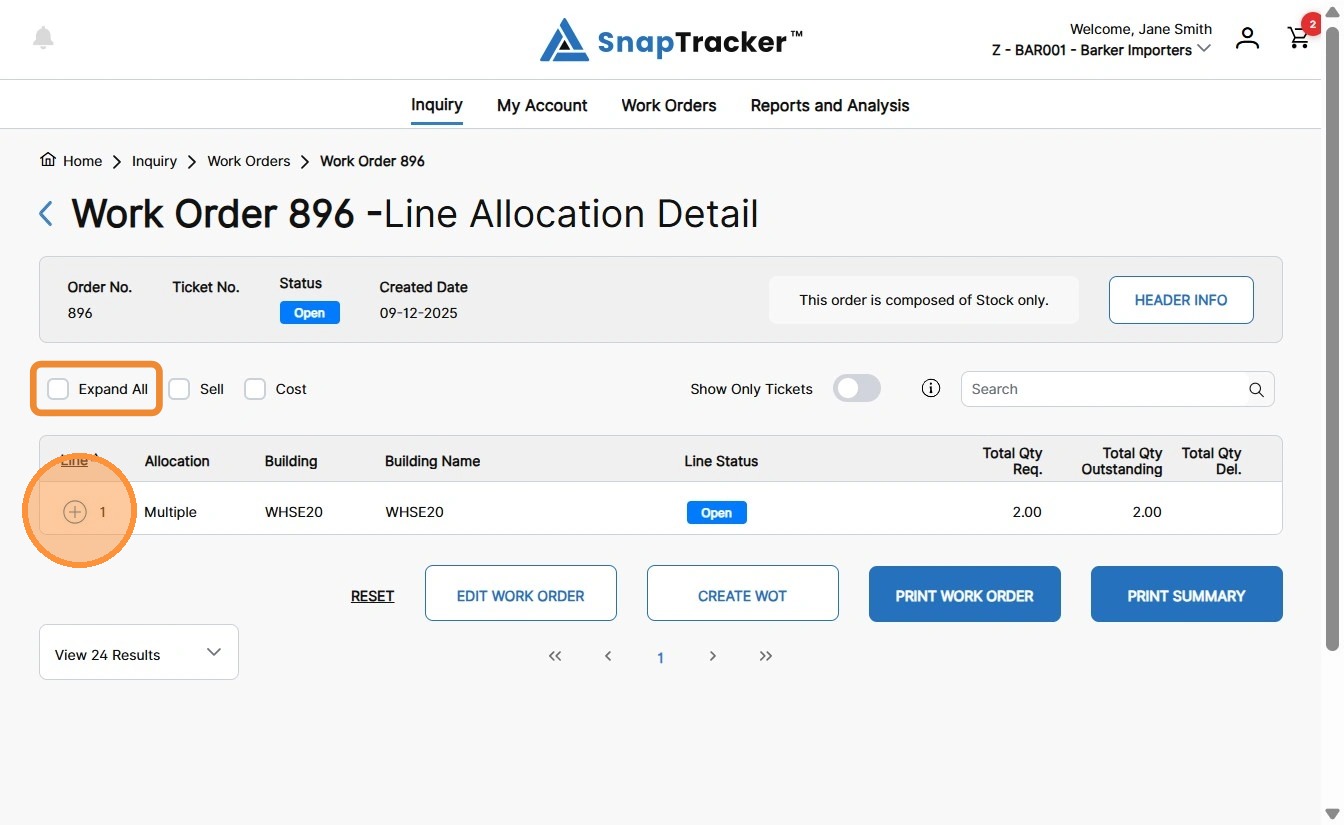
At the top level of the results on the individual work order screen, line level information displays.
Observe the following columns:
- Line – The work order line number. Note: By default the results are sorted by Line in ascending order.
- Allocation – The types of product allocated in a line, indicating the product types assigned from Standard, Buildup, Service, Freeline, Note, to Multiple (various types).
- Building – The Building the product is to be pulled from.
- Building Name – The name of the Building.
- Line Status – The status of the line.
- Total Qty Req. – The total quantity of items required in the line allocation.
- Total Qty Outstanding – The total quantity of items outstanding to fulfill the line allocation.
- Total Qty Del. – The total quantity of items already fulfilled and delivered (or transferred) in the line.
7. To view further information for a specific line, click the expand icon at the top level of a respective line, or Expand All to expand all lines.
At the secondary level of the results in the individual work order screen, the product and item level information displays.
Observe the following columns:
- Seq No. – The sequence number of the products. Note: The Products are by default sorted by Seq No. in ascending order.
- Allocation – The allocations in a line, indicating the product types assigned from Standard, Buildup, Resource (for Services), Freeline or Note.
- Standard/Task Code – The unique Standard or Task Code (for a Service).
- Location – The Location an item was delivered or transferred from. This information is only populated after an item is delivered or transferred and the allocation is complete.
- Condition – The requested Condition of an item. If the Customer is configured to Request Product by Condition, the Condition of the requested Condition displays. Once delivered the actual condition of the item when it was delivered or transferred on the work order.
- Serial No. – The serial number of an item. This information is only populated after an item is delivered or transferred on the work order.
- Status – The status of the product.
- Qty Com. – The total quantity of product that is committed to the work order.
- Qty WOT – The total quantity of product that requires a WOT to fulfill the work order.
- Qty Del. – The total quantity of product that has been delivered.
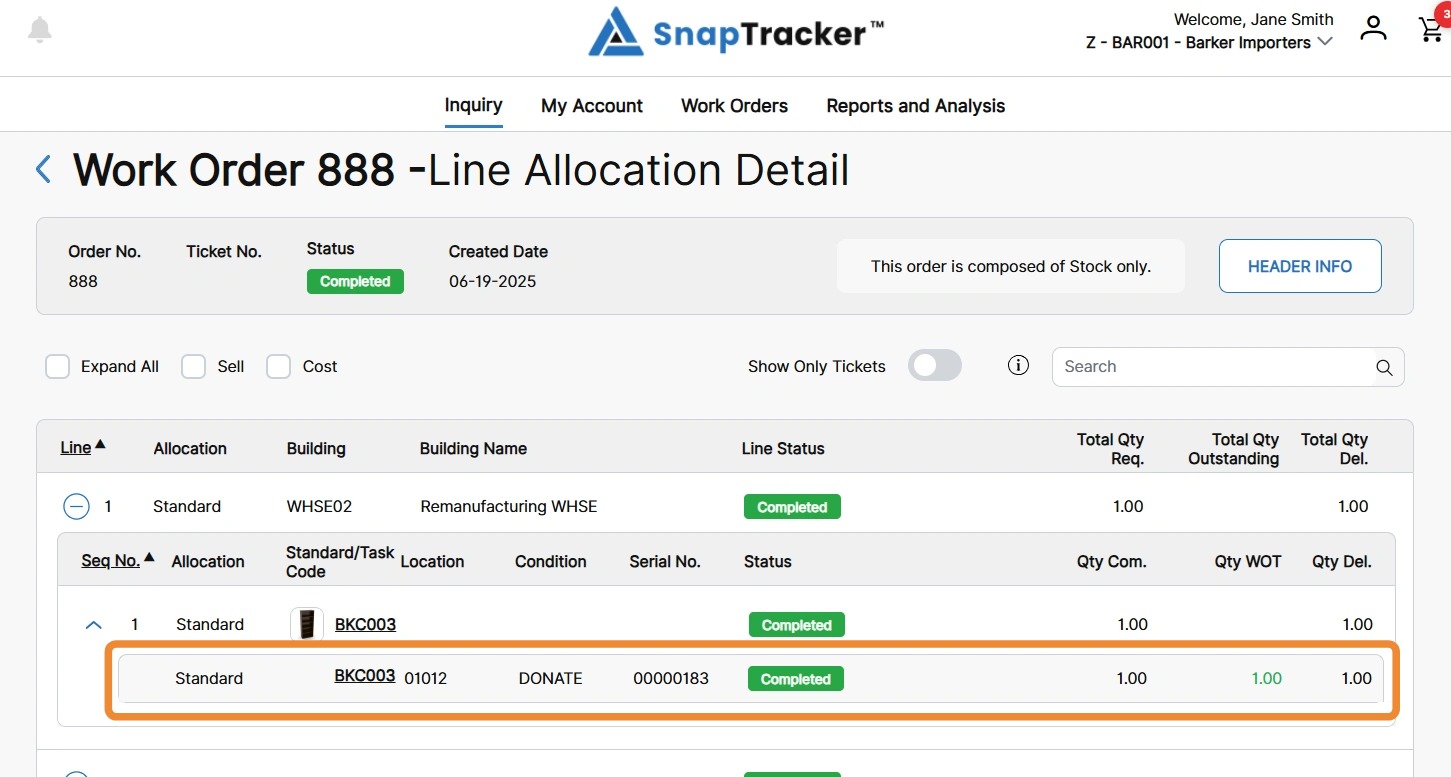
Observe a secondary level product where the status is Completed. An item has been delivered or transferred.
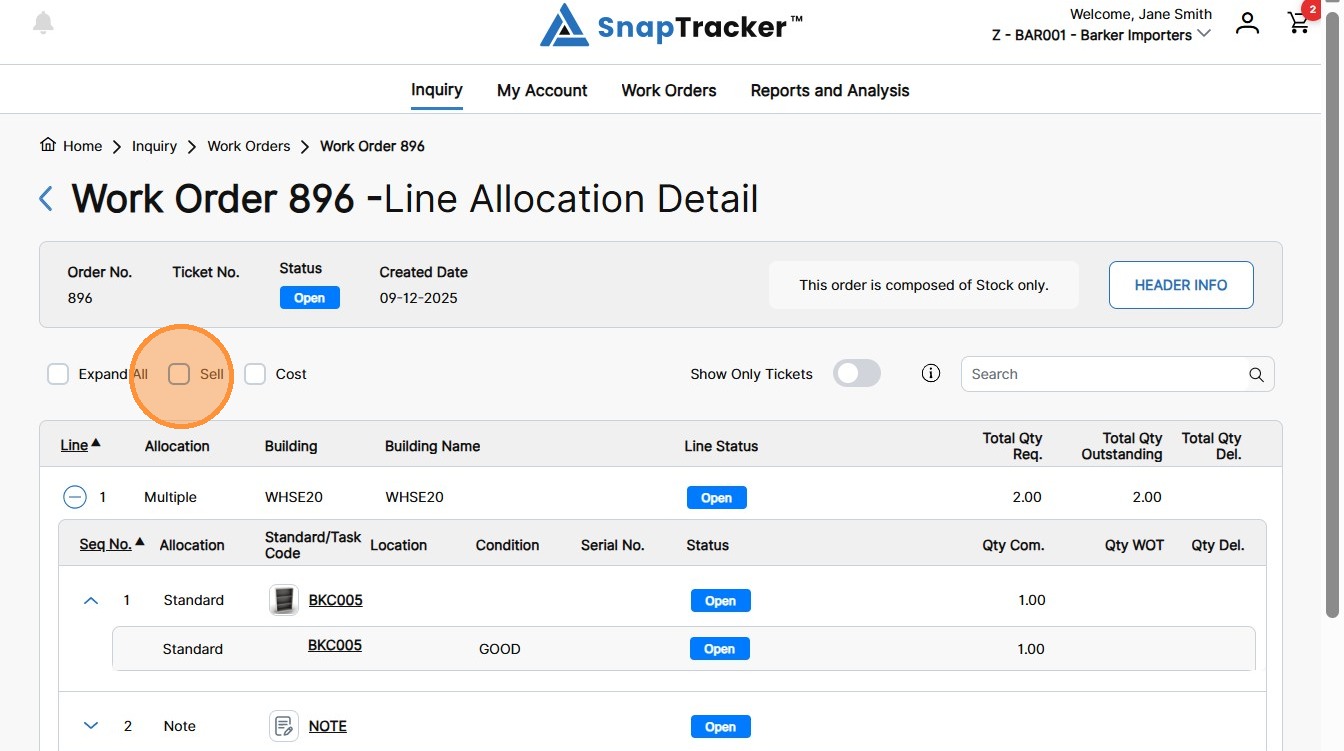
8. To add Sell and Cost information to the secondary product level information, select the Sell and/or Cost checkbox.
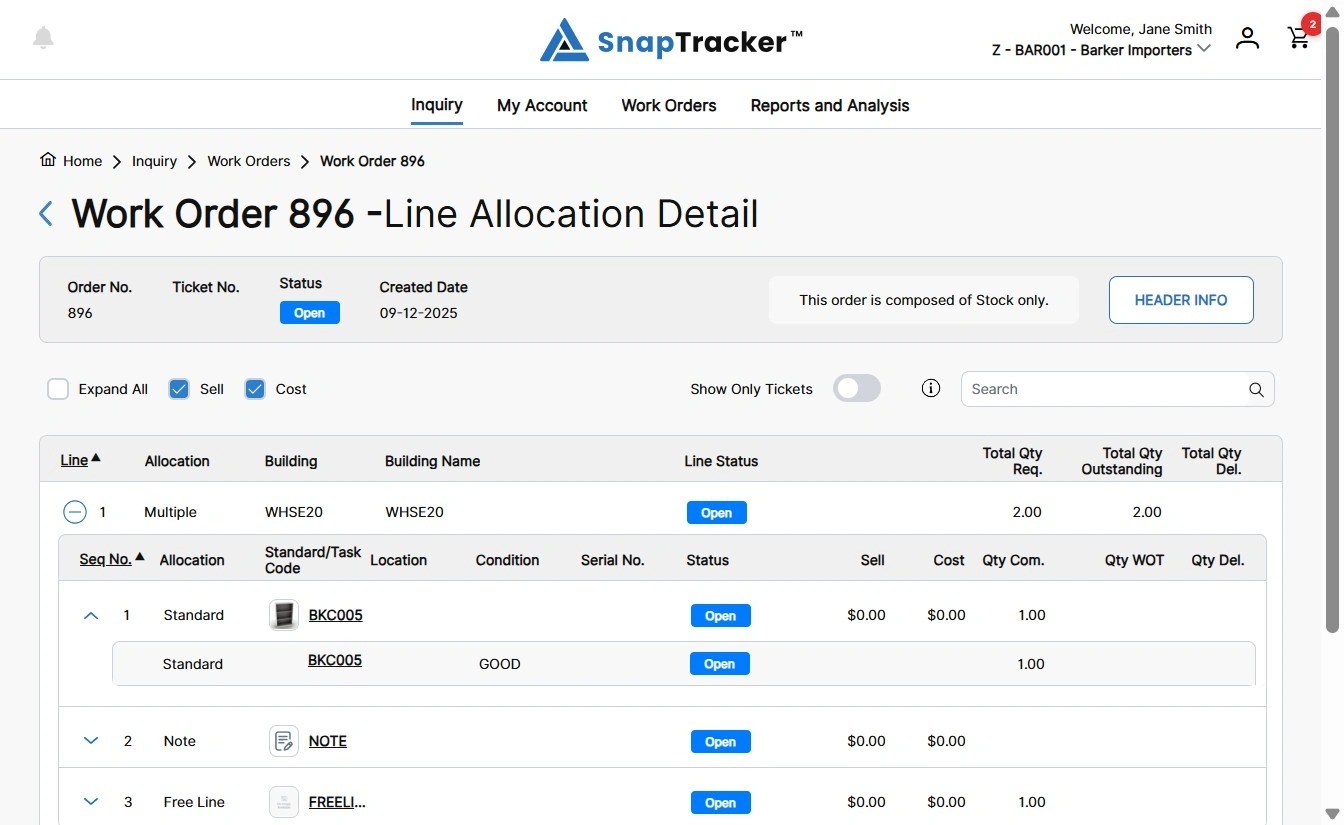
The Sell and Cost fields display in the secondary level.
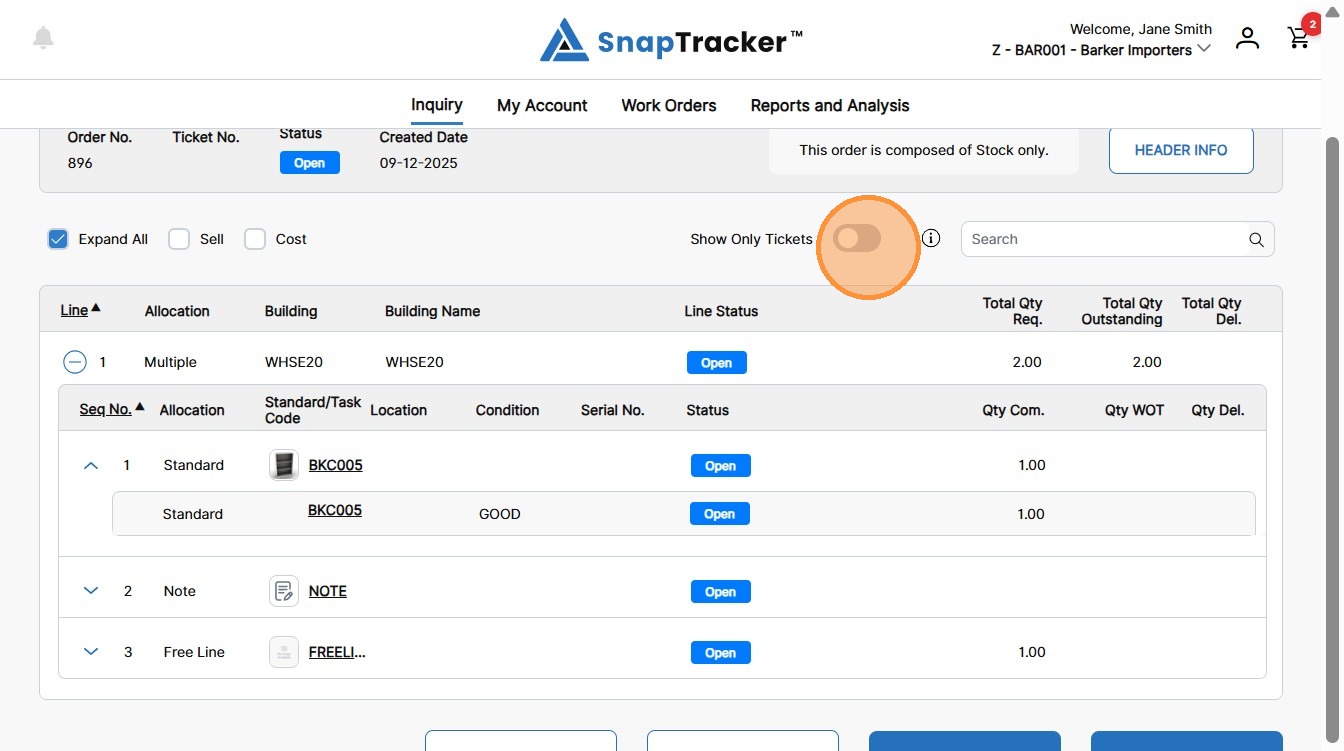
9. To filter the product list for only those with a WOT created, toggle on the Show Only Tickets toggle.
10. To apply an additional search within the individual work order, in the search field, enter the desired search input and press Enter.
Note: If multiple search terms are desired, enter the search inputs separated by a comma.
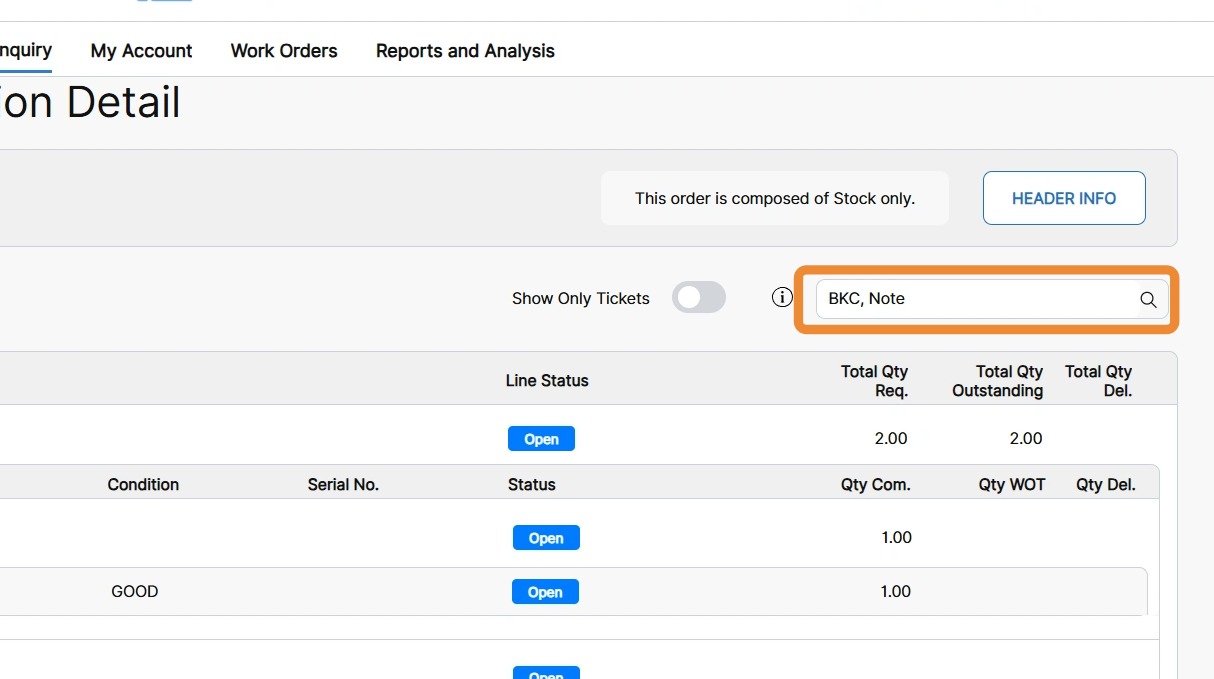
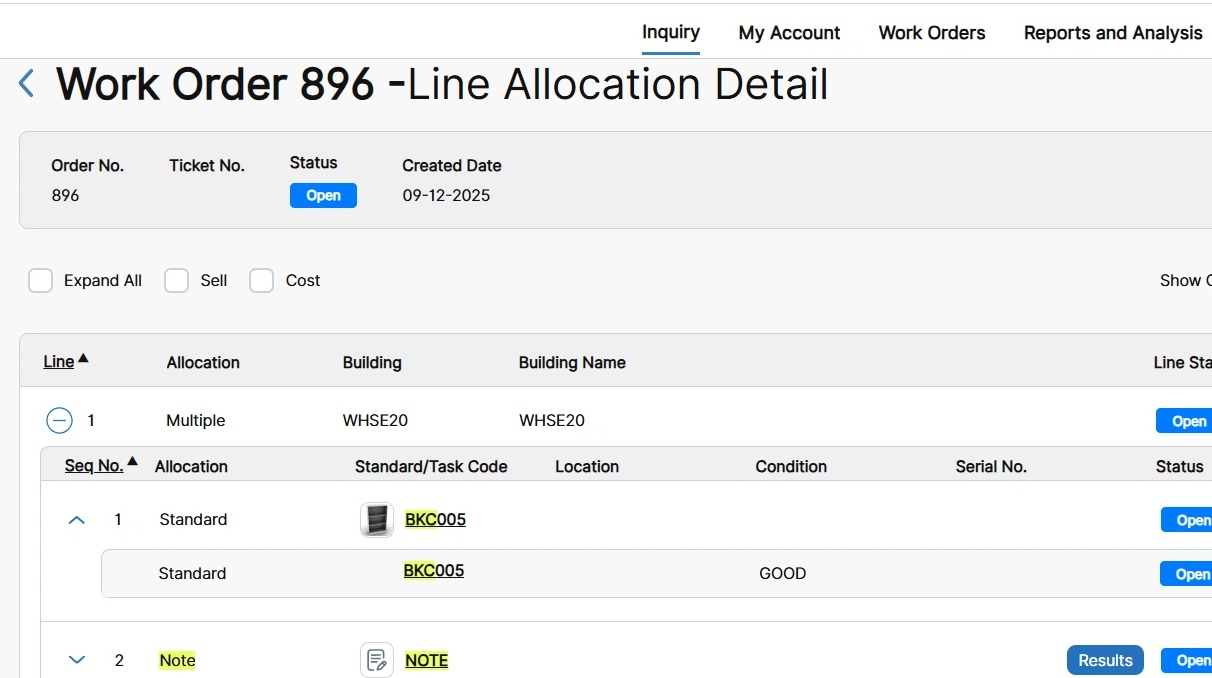
The matching results are highlighted, and any collapsed row will show a Results icon to indicate matching results.
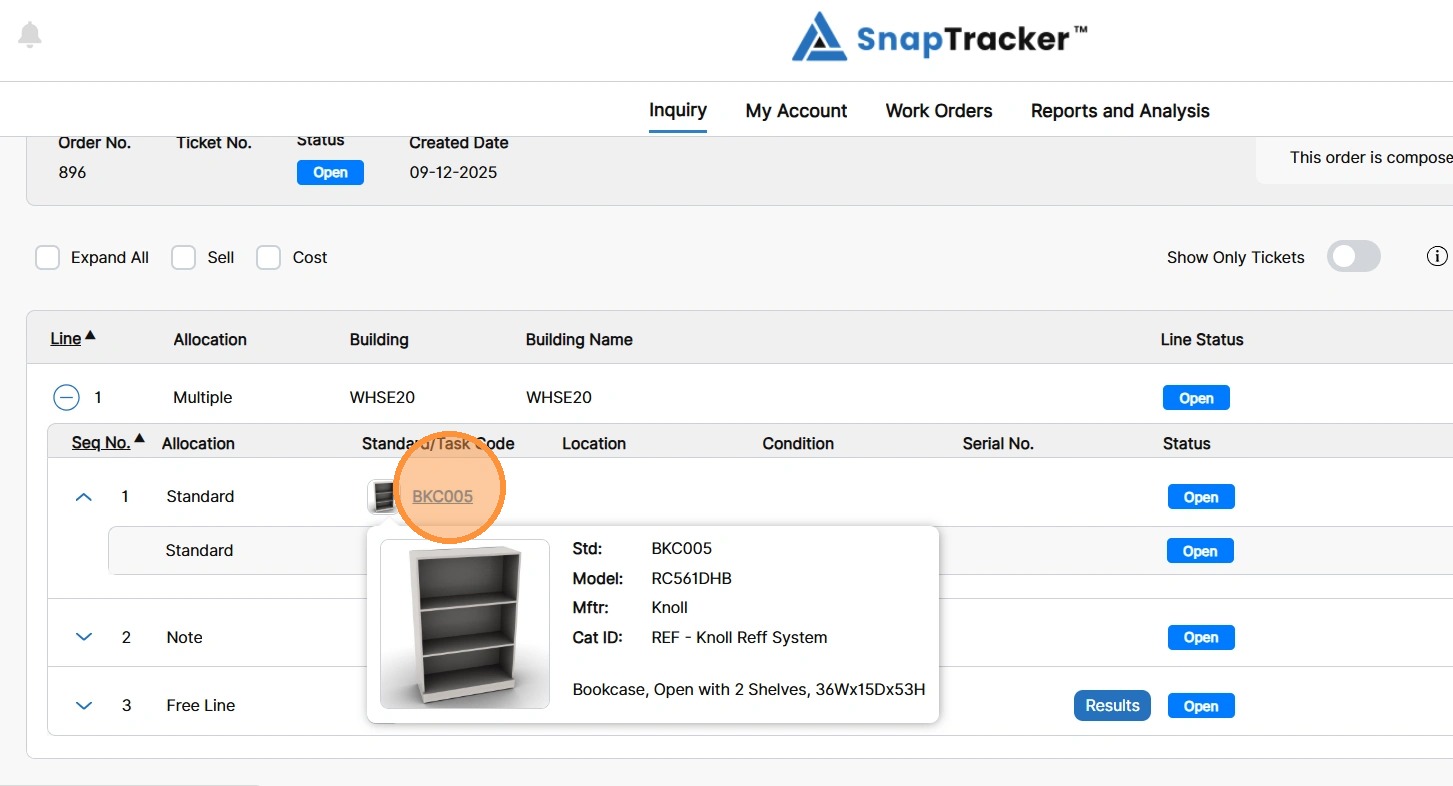
11. To view quick information on a product, hover on the hyperlinked Standard/Task Code.
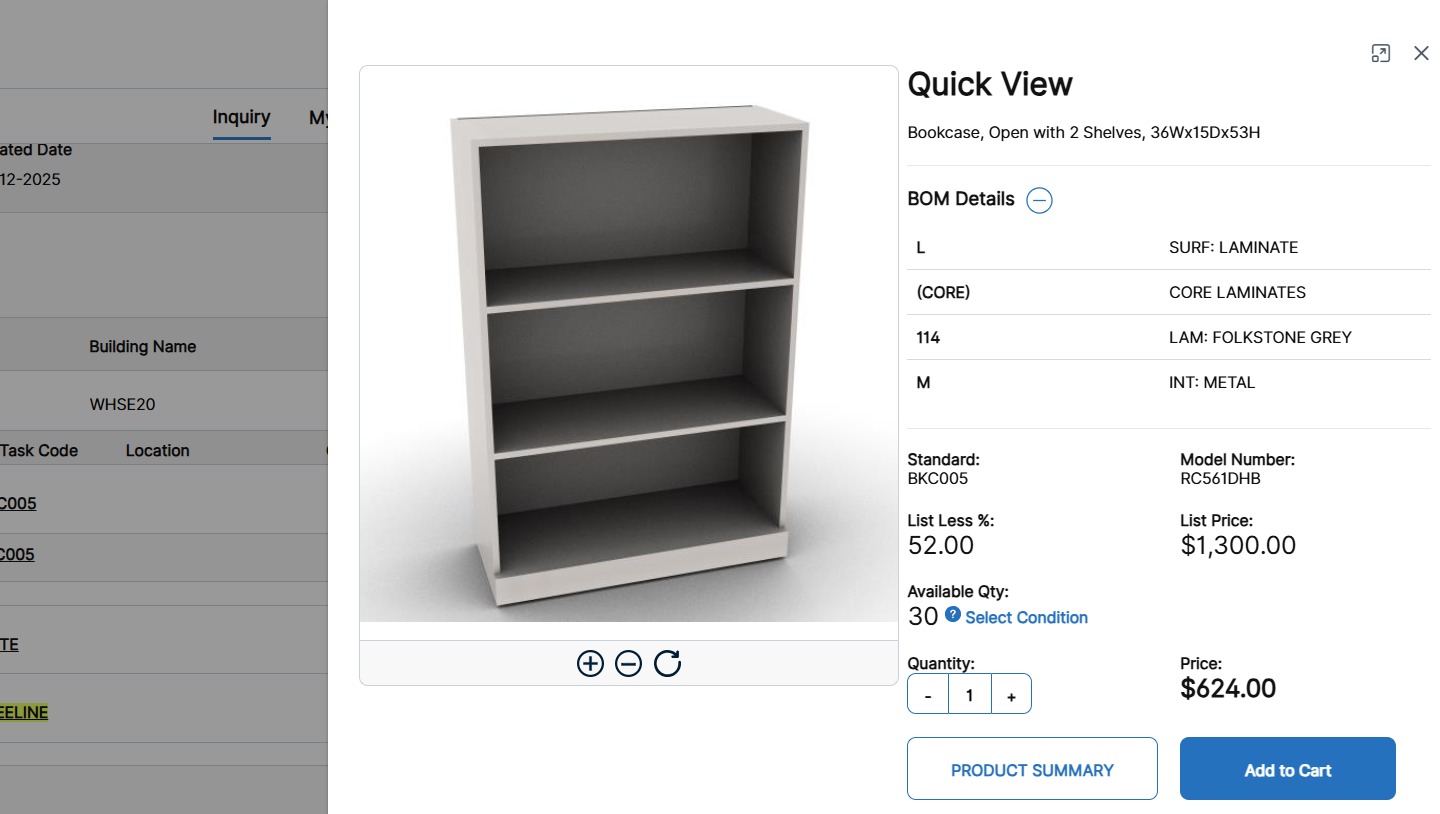
To view full product information, click the hyperlinked Standard/Task Code.
The Quick View side panel for the product displays.
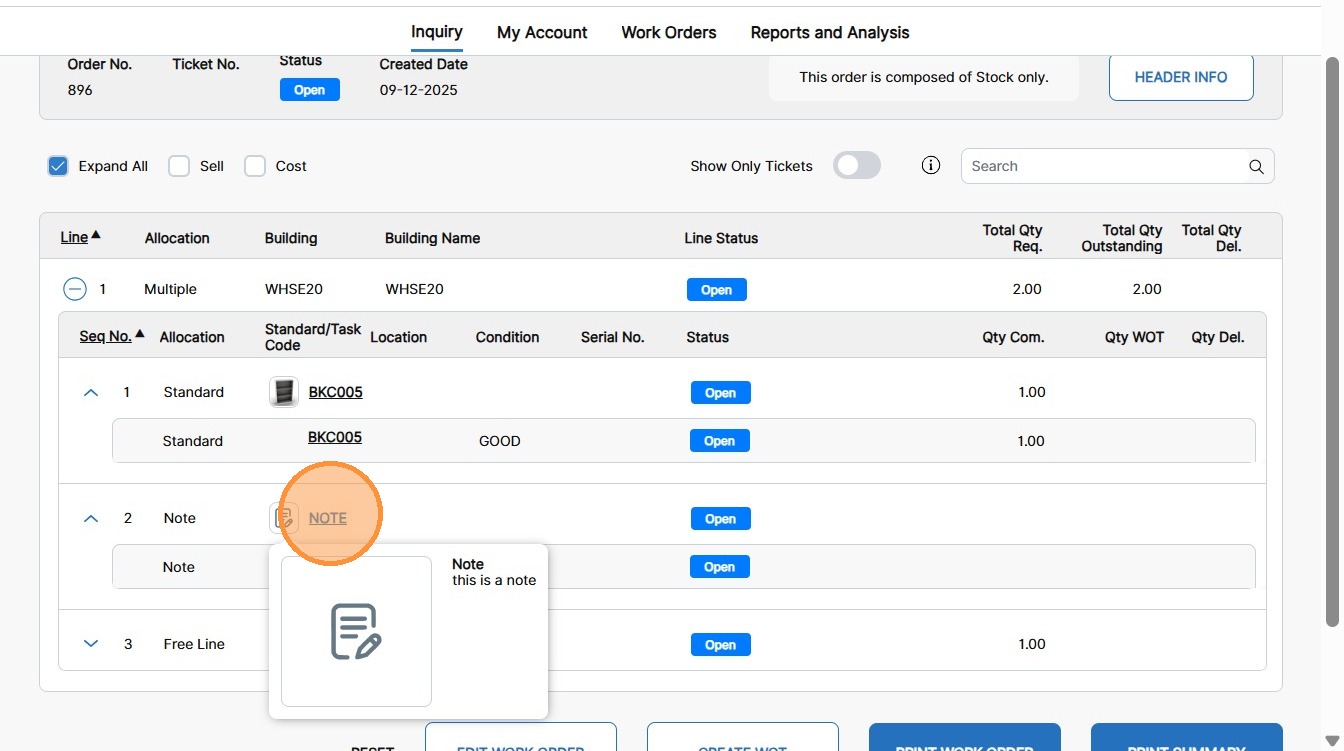
12. To view quick information on a note, hover on the Note hyperlink.
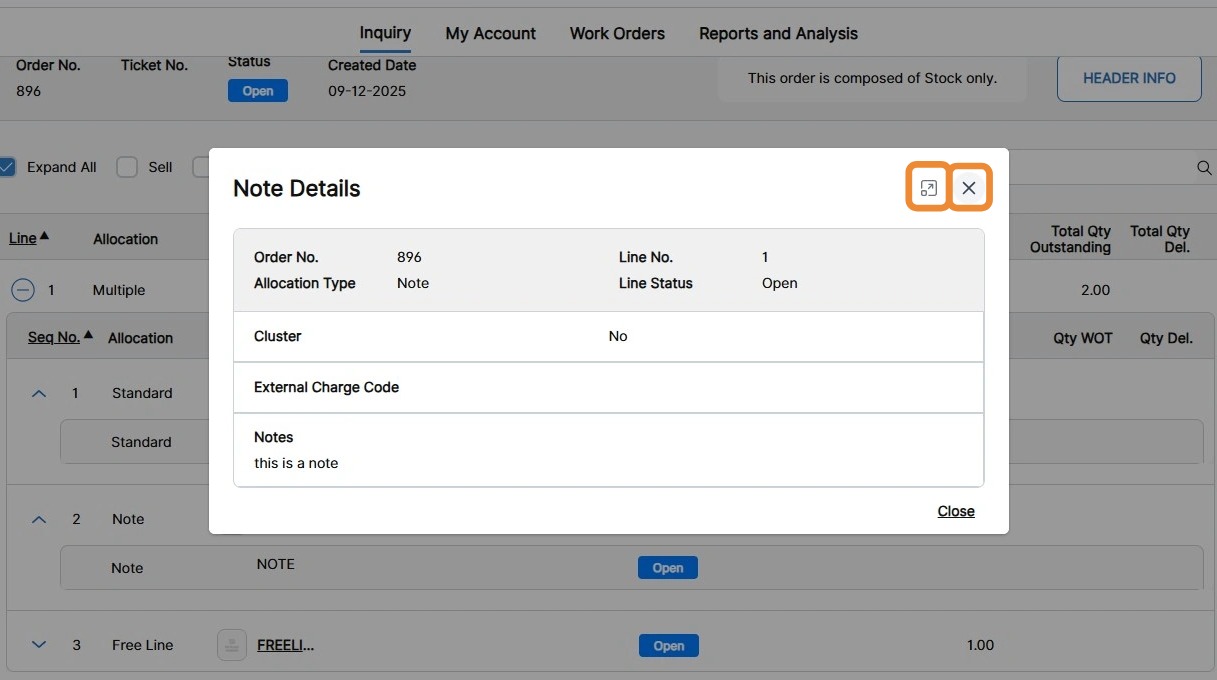
To view full Note information, click the Note hyperlink.
The Note pop-up displays. Click Expand icon for a larger view, or click X to close.
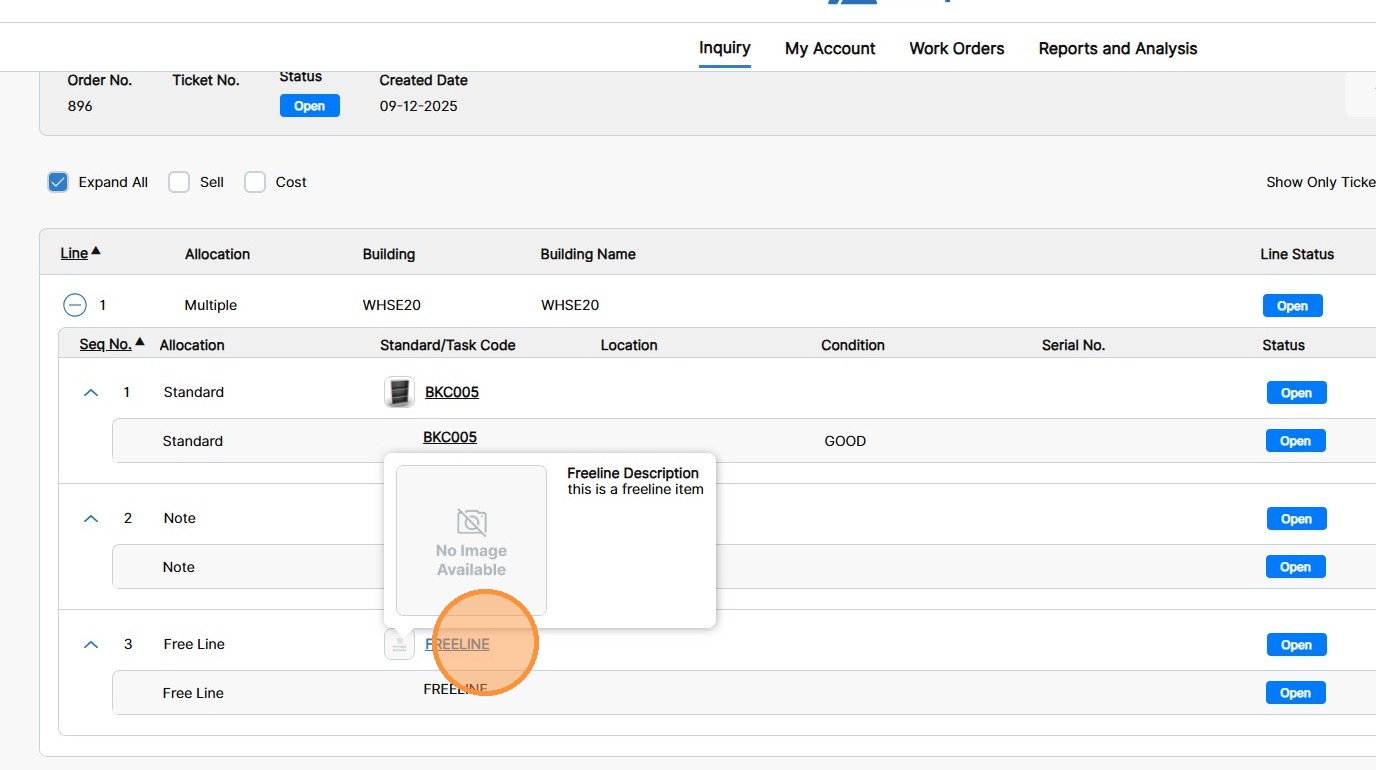
13. To view quick information on a freeline, hover on the Freeline hyperlink.
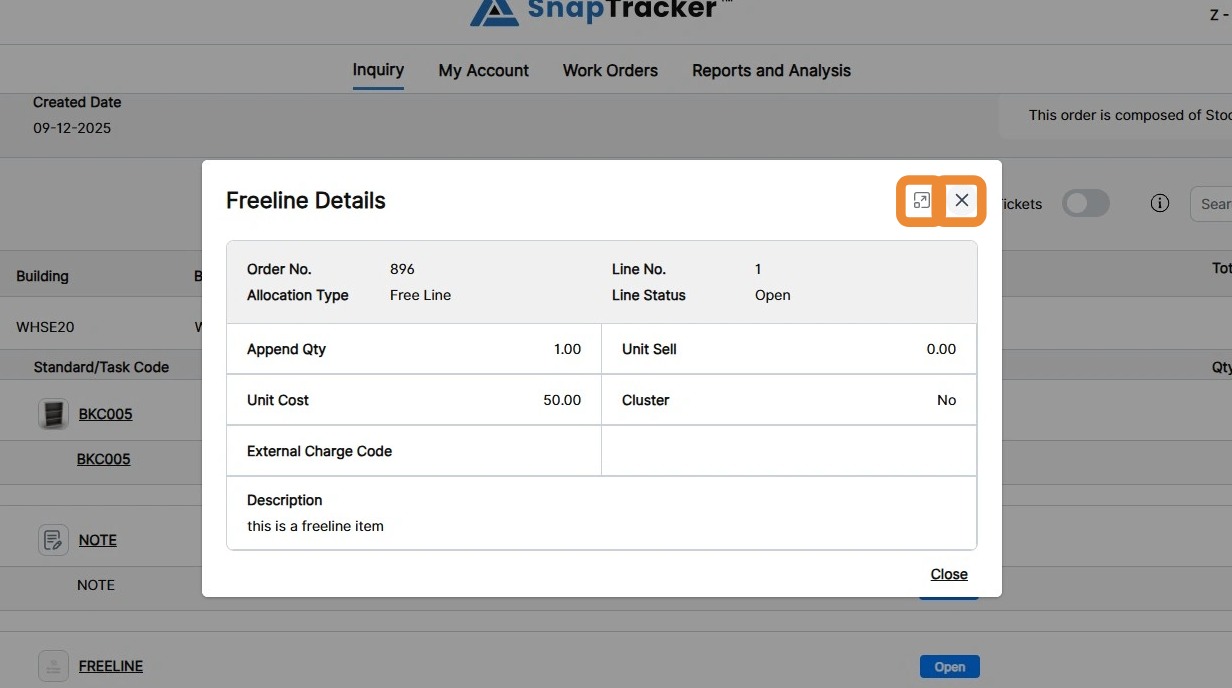
To view full freeline information, click the Freeline hyperlink.
The Freeline pop-up displays. Click the Expand icon for a larger view, or click X to close.
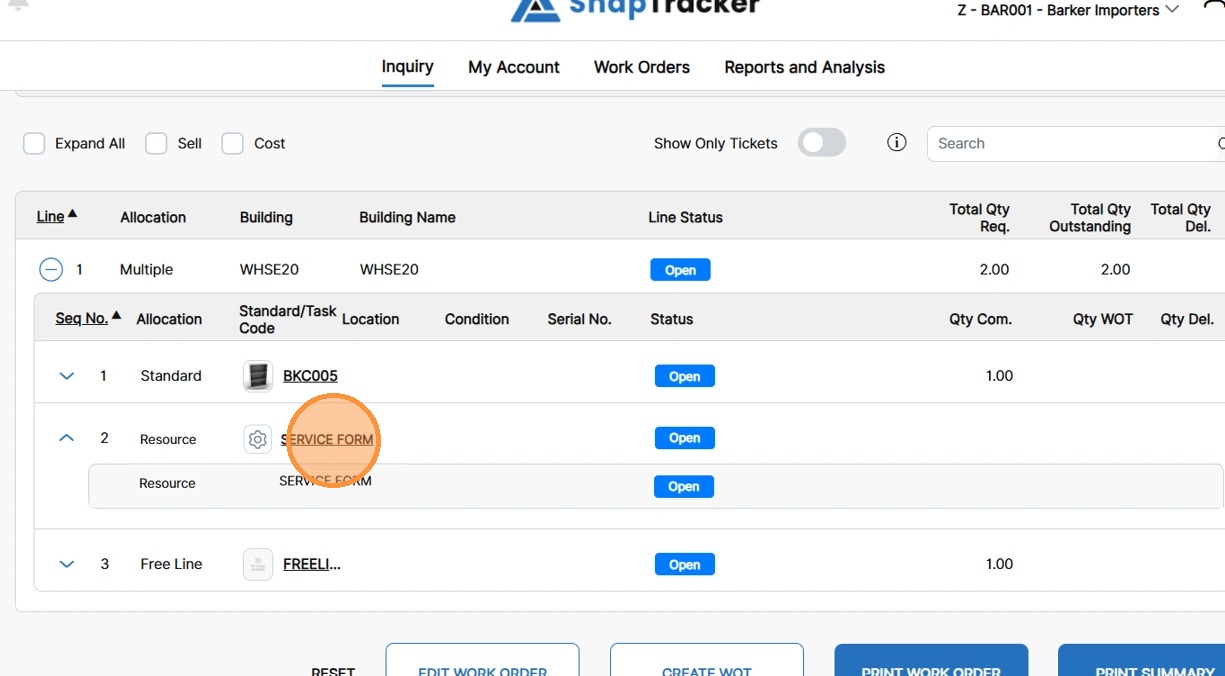
14. To view more information on a Service request, click the Service hyperlink.
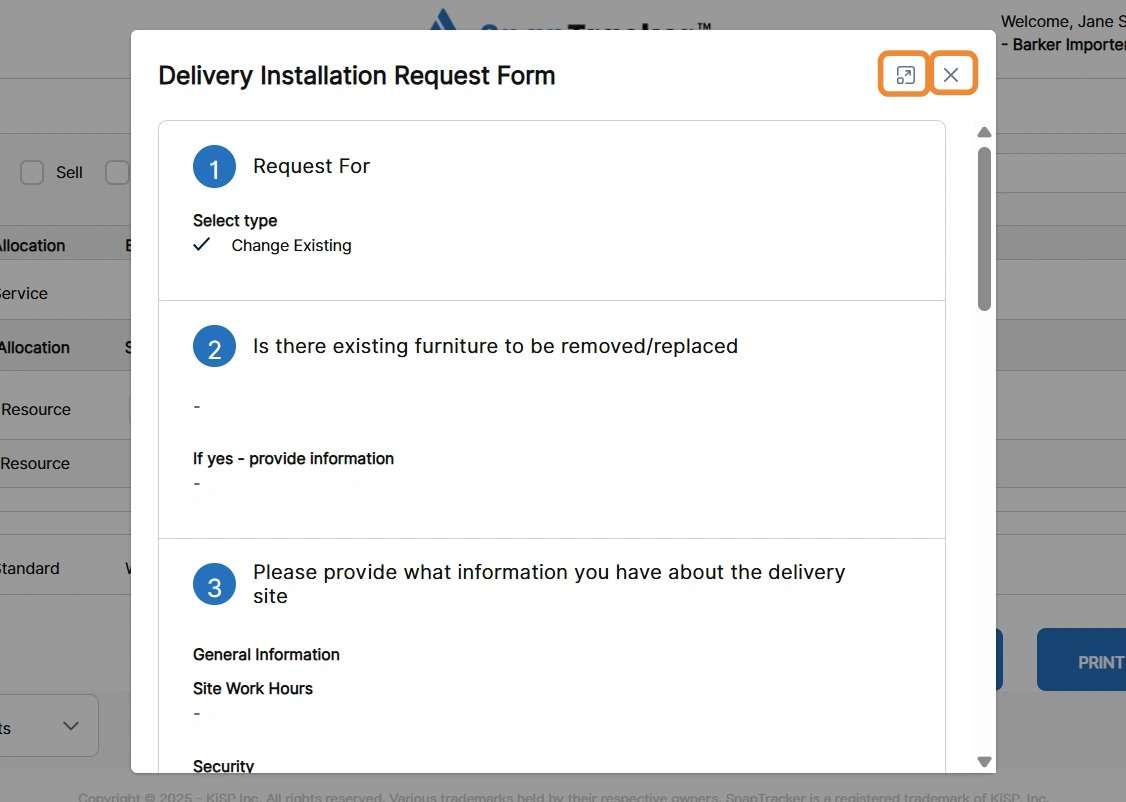
The Service pop-up displays. Click the Expand icon for a larger view, or click X to close
15. To complete an action associated with the work order, click the available action buttons.
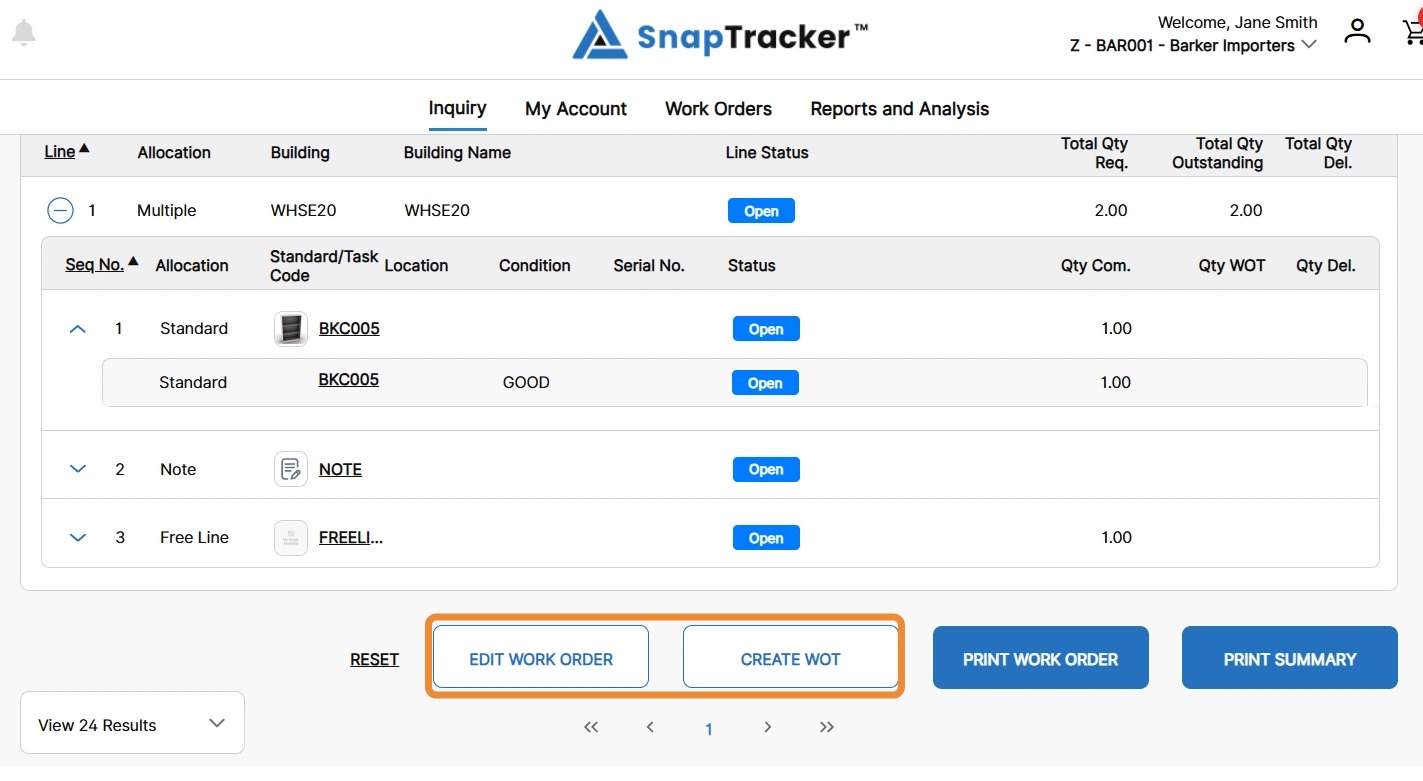
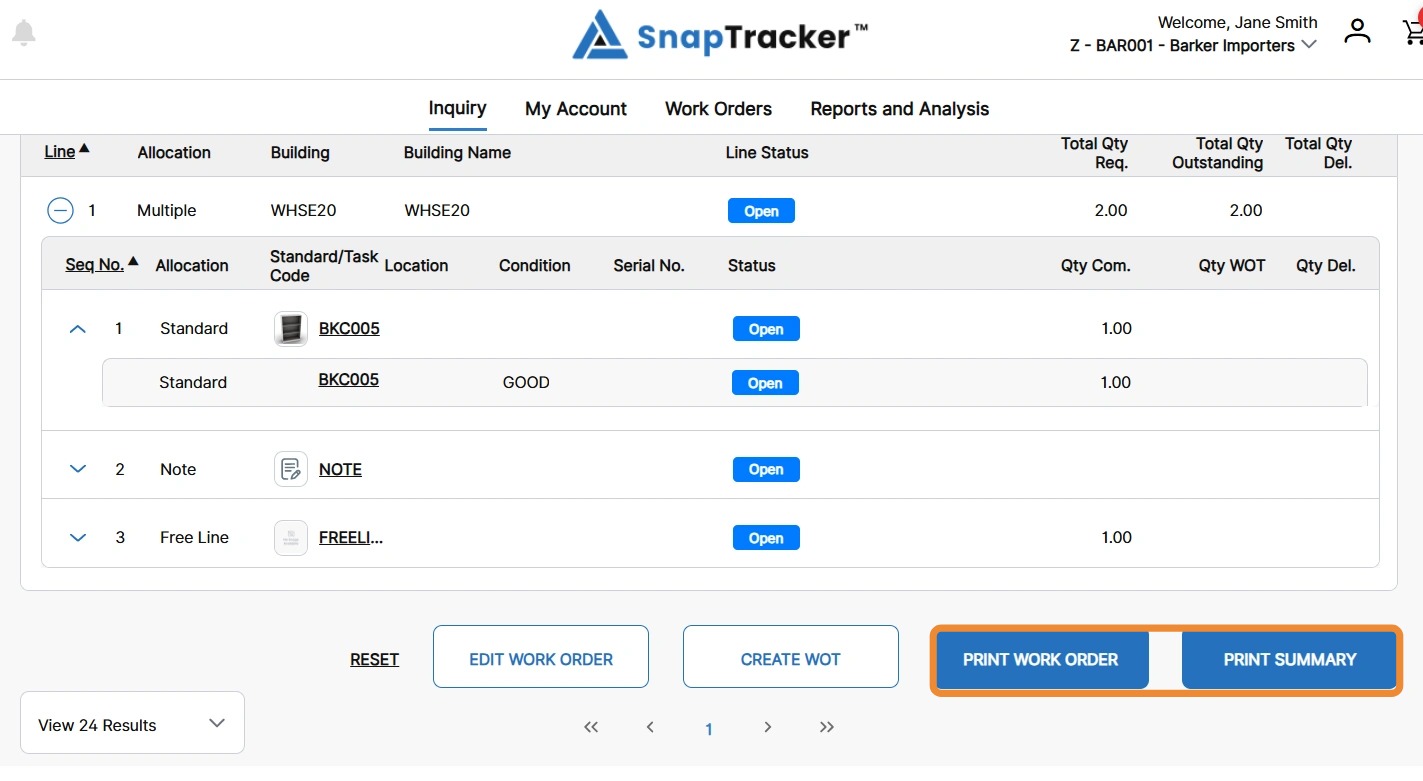
16. To print the work order details or the work order summary, click the respective Print button.