How to Set Up Email Notifications?
After an order is created, SnapTracker generates and sends out two sets of email notifications. One is sent to the requestor automatically. The other is sent to the email addresses that are configured in SnapTracker for the type of requisition created. Emails can be configured to be sent out to different email addresses based on the type of requisition created. This tutorial post outlines the process for setting up email notifications.
Note that there are two levels of email notifications: System and Customer. If you don’t explicitly set up notifications at either level, an email is sent to the Order Contact Email in the Company screen, to ensure that someone at the dealership is notified of a request.
In other words, SnapTracker checks for email notifications in the following order:
- Customer Email Notification – If there are no addresses here, then SnapTracker checks…
- System Email Notification – If there are no addresses here then SnapTracker checks…
- Company screen and looks at the Company Order Contact Email.
Before getting started, just wanted to note that there are two types of users that can be configured to receive emails when requests are created: SnapTracker Users and Freeform Users. Freeform Users are typically people that do not have access to SnapTracker, but need to be notified when requisitions are created. Freeform Users are created in the Assign Email Notification screen. The procedure is outlined at the end of the tutorial.
The processes of setting up System and Customer Email Notification are fairly similar. In general it involves 2 steps:
- Assign recipients.
- Assign the type of requisition notification the recipients receive: New, Stock, Service or all three.
Step-by-step instructions: How to Set Up System Email Notifications?
STEP 1 – Assigning recipients
1. From the left navigation, select Utilities >Email Notification Setup.
The System Email Notification Setup screen displays.
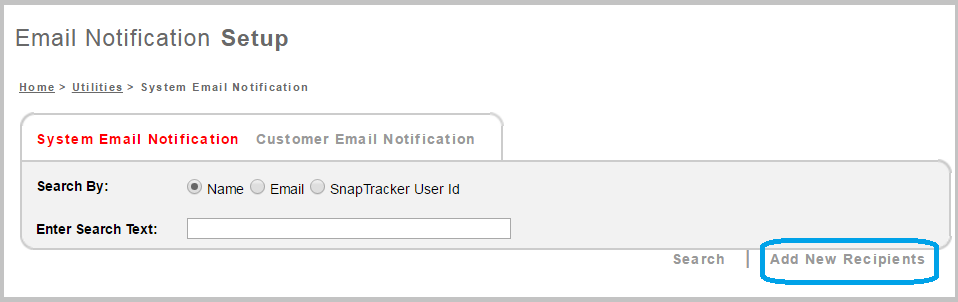
2. Click Add New Recipients.
The Assign Email Notifications pop-up screen displays.
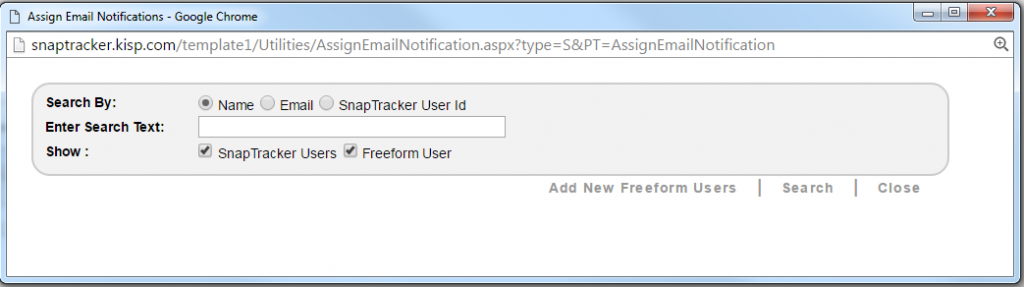
You can select both SnapTracker Users and Freeform Users on this screen. By default, the checkboxes for SnapTracker Users and Freeform User are selected.
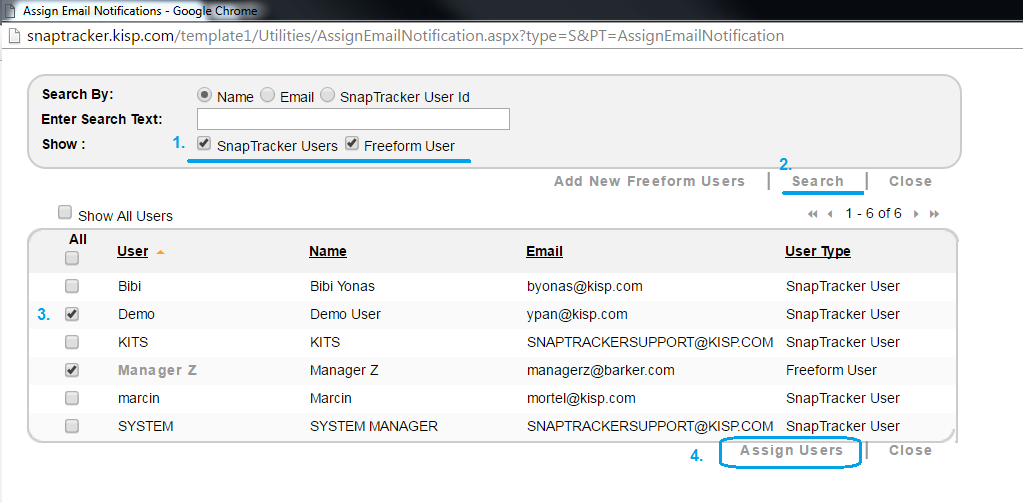
3. On the Assign Email Notifications screen, select or deselect the checkbox for showing SnapTracker User and Freeform User.
4. Click Search.
A list of users that can be assigned to receive notifications display.
5. Select the checkbox beside the user(s) you want to assign an email recipients.
6. Click Assign Users.
7. When all users are assigned, click Close.
The Assign Email Notifications screen closes and the assigned users display on the System Notification screen.
STEP 2 – Assigning Notification Type: New, Stock, Service or all three?
The next step is to assign the notification type(s) for each recipient. There are three options for the type of email request the recipients receive: New, Stock and/or Service. For example, I can configure a user to receive notifications only when an order with Stock product is created, while setting another user to receive emails for both Stock and New products.
- To assign the notification type, select the check box next to the User, and click Change Values.
- In the Create Request column, use the check boxes to control the notification type (Stock, New, or Service).
- In the Include SIF File column, use the check boxes to control whether a SIF file is to be included in the email for the user and for the specific type of order (New or Service).
Note: SIF files are not created for Stock Orders.
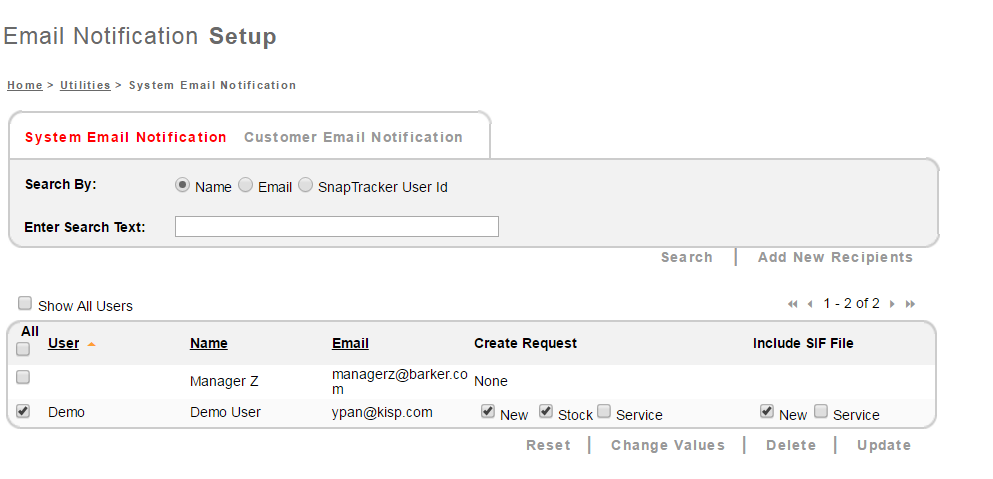
- Click Update.
The users are configured as recipients for System Email Notification. In this case, the Demo User receives notifications for orders with New (with a SIF file attached) and Stock products, while the Freeform User Manager Z receives notifications for Stock orders.
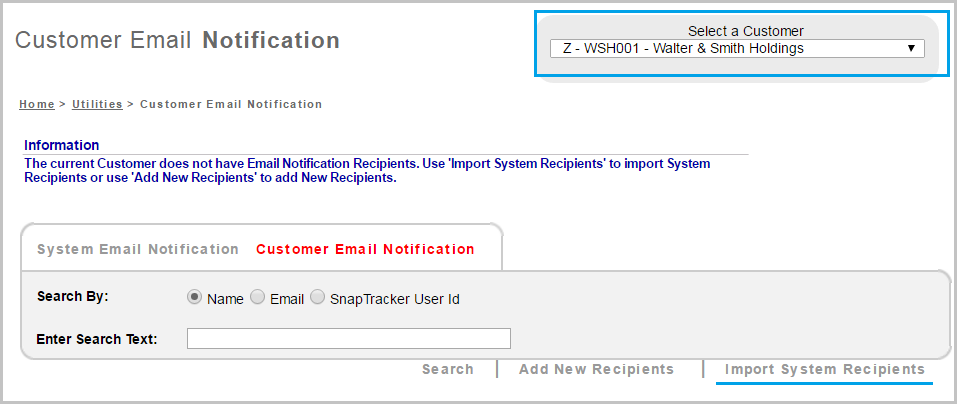
How to set up Customer Email Notifications?
Any Customer Email Notifications overwrite the recipients set up in the System Email Notifications screen and Order Contact Email address set up in the Company screen. The process of setting up Customer Email Notification is very similar to setting up System Email Notifications. The only differences are:
- In the Customer Email Notification screen, select a Customer.
- You have the option to Import System Email recipients.
- If there are no recipients assigned at the Customer level, a message displays saying: The current Customer does not have Email Notification Recipients. Use ‘Import System Recipients’ to import System Recipients or use ‘Add New Recipients’ to add New Recipients.
Keeping in mind these differences, you can follow the same steps to set up Customer Email Notifications: first assign recipients and then assign notification type to the recipients!
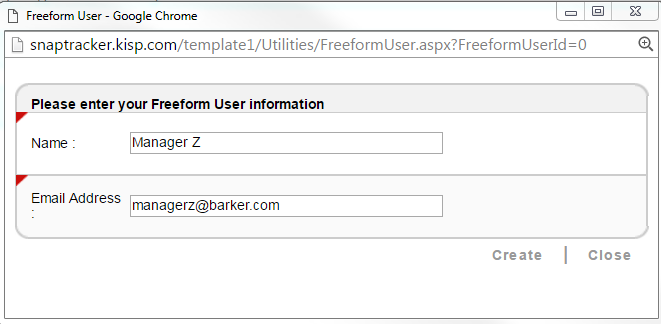
How to set up a Freeform User?
From the Assign Email Notification screen.
- Click Add New Freeform Users.
- Enter the required information and click Create.