How to Set Up Standards Manually II- Creating and Assigning Options and Finishes
Standards that are manually created do not automatically have associated Options and Finishes. Before you can assign options and finishes to a Standard, you need to first create the options and finishes.
This tutorial post outlines how to create options and finishes manually in SnapTracker.
Step-by-step instructions
Creating Options and Finishes Manually
From the left navigation, select Setup>Standard Setup>Standard Product.
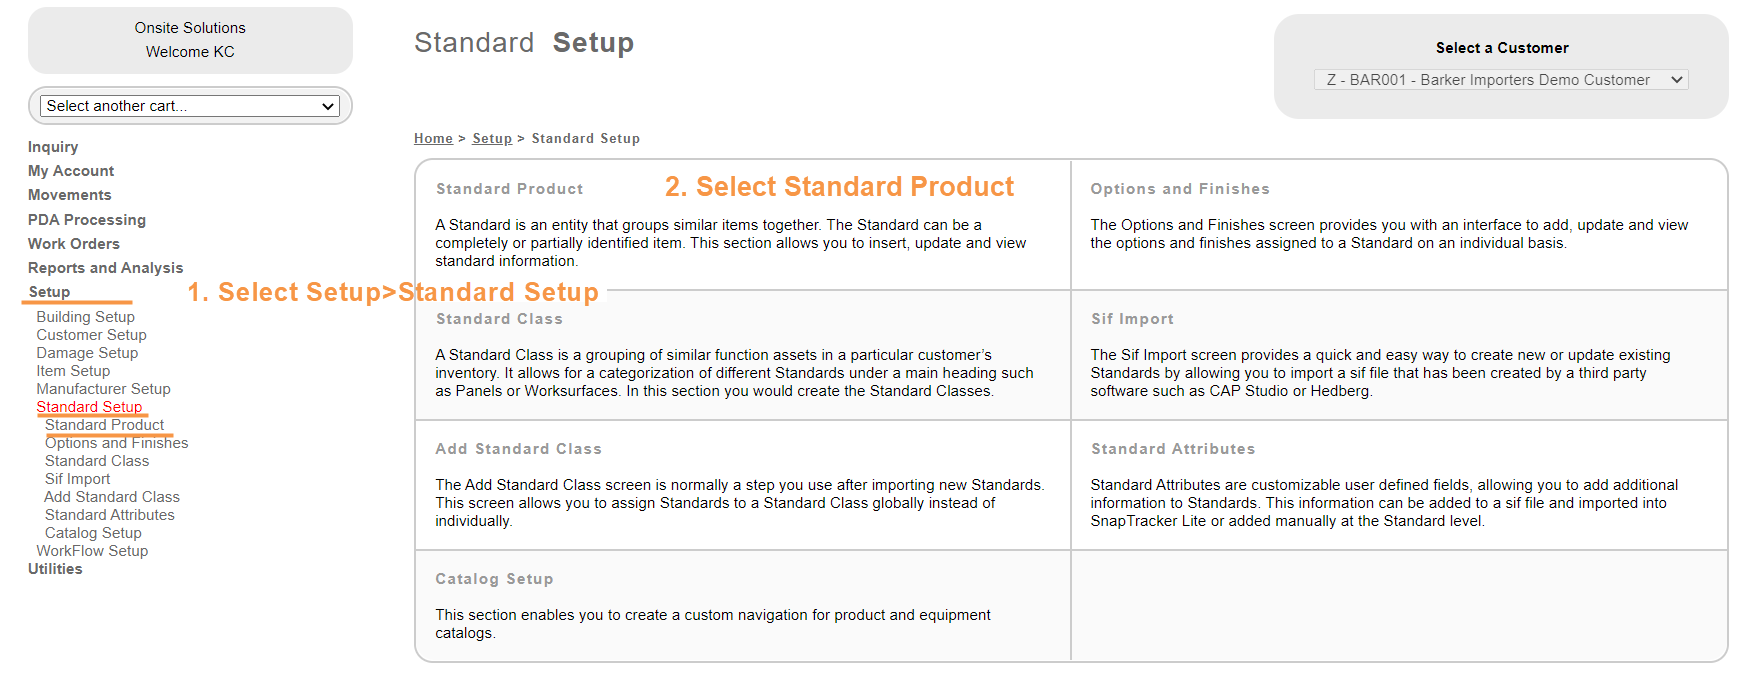
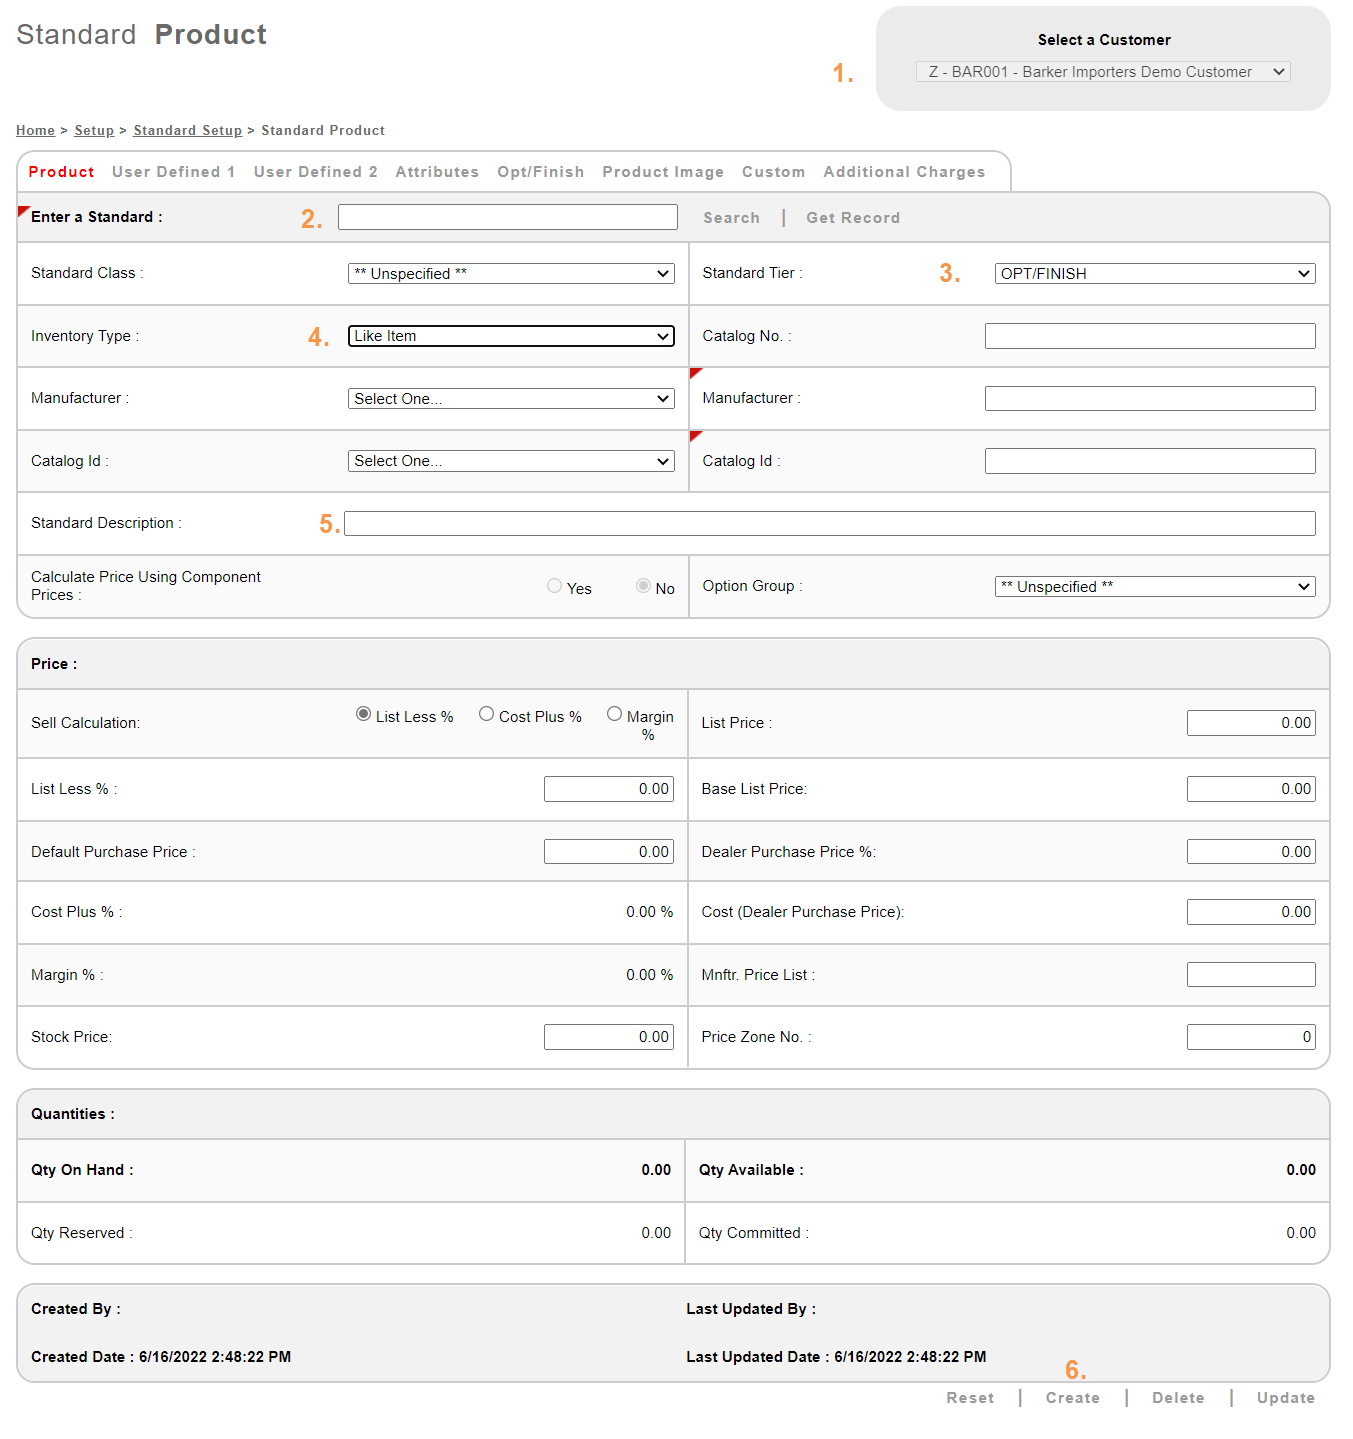
The Standard Product Setup screen displays.
This is where you can create a new Options/Finishes tier Standard.
- From the Select a Customer drop-down selection box, select the Customer Number under which you would like to create the new Options/Finishes tier Standard.
- In the Enter a Standard text box, type in the Options/Finishes tier Standard you wish to create.
- From the Standard Tier drop-down, select OPT/FINISH.
- From the Inventory Type drop-down, select Like Item.
- In the Standard Description box, enter the description of the option/finish.
- At the bottom of the page, click Create.
Assigning Options and Finishes to a Standard
After creating the Options and Finishes, we can now assign the options and finishes to Standards created as Standard, Buildup or Workstation tier Standards.
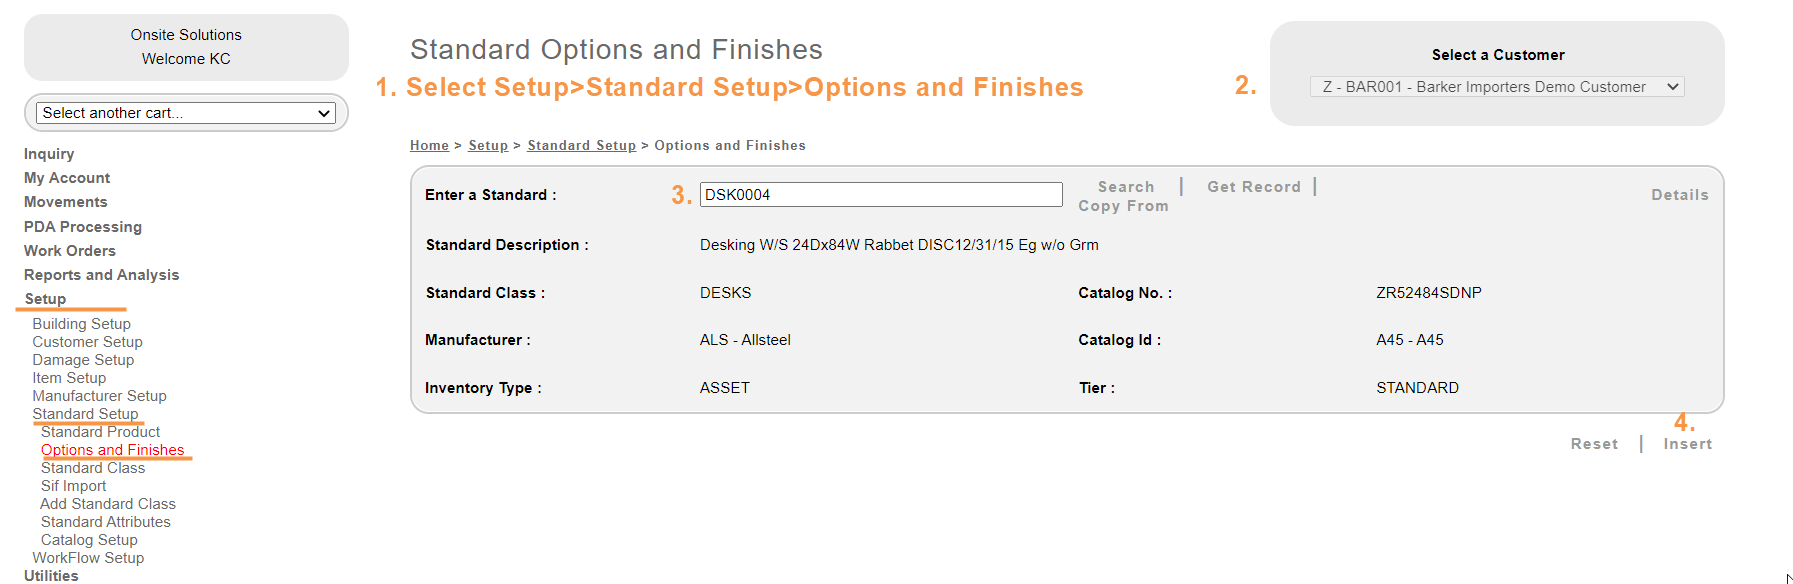
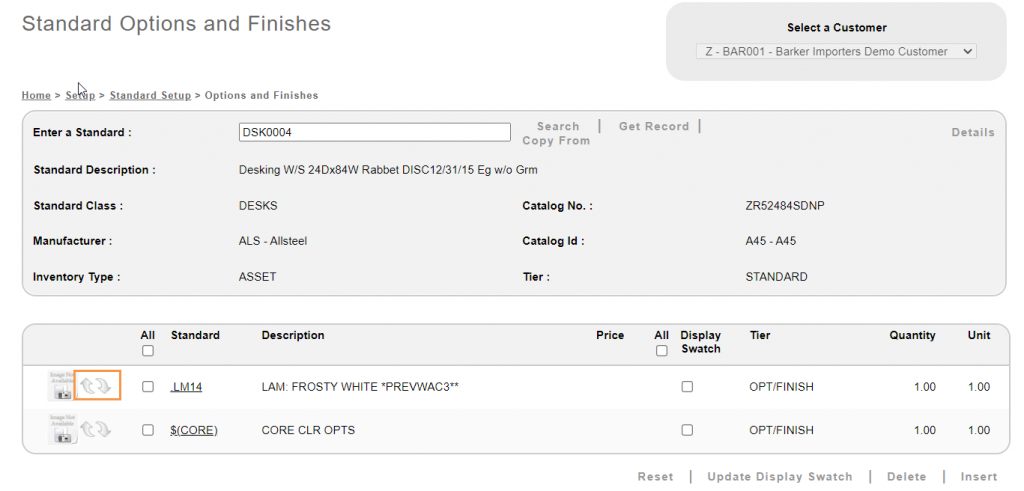
- From the left navigation, select Setup>Standard Setup>Options and Finishes. The Standard Options and Finishes screen displays.
- From the Select a Customer drop-down, select the Customer Number.
- In the Enter a Standard text box enter the Standard either by typing in the Standard or by doing a Search. (This is the Standard you want to assign Options and Finishes to, not the option/finish Standard).
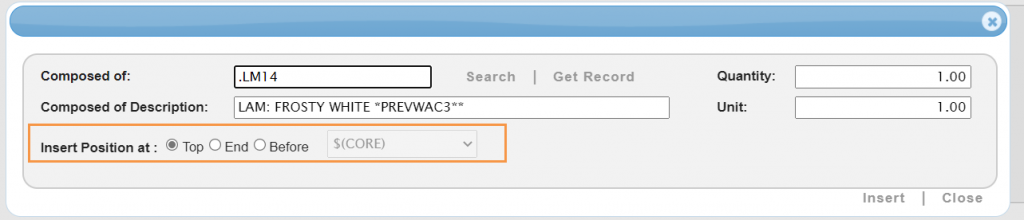
- Click Insert. The Composed Of screen displays as a pop-up screen.
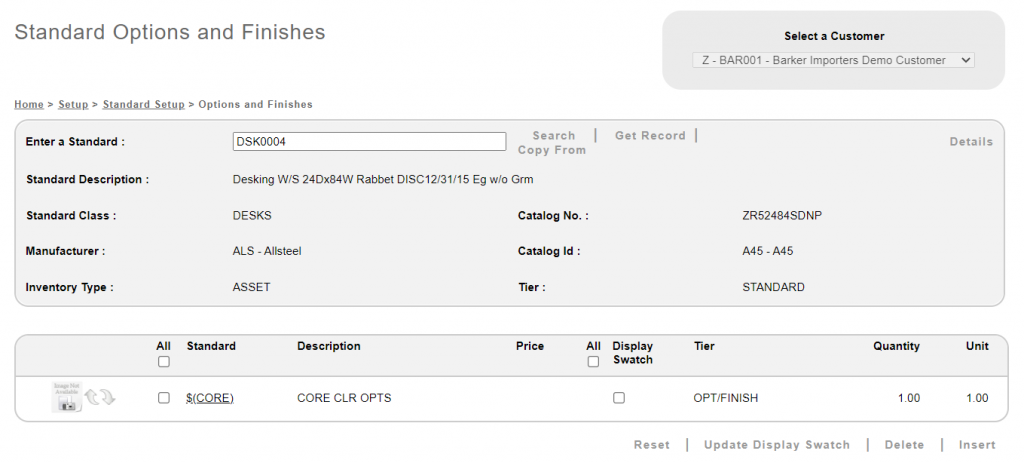
- In the Composed of text box, enter the Option/Finish Standard and click Get Record, or click Search for the list of options/finishes to display.
- Click Insert. The screen closes.

The Standard Options and Finishes screen refreshes and the assigned option/finish displays on the screen.
To add another Option/Finish to the Standard, repeat Steps 3-6.
When adding additional options/finishes, use the Insert Position at field. This determines the order of options and finishes and where the new option/finish displays in the listing. You can determine if it should show at the top, at the end, or before another option/finish already assigned.
You can also change the order of the option/finishes listing in the Standard Options and Finishes screen after the option/finish is assigned.
Click the up and down arrows beside the option/finish and it moves up or down one level each time.
Tips
You may also Delete and Update Options and Finishes on the same screen.
You may use KiTS, the web-based furniture specification tool to help specify Standards regarding Options and Finishes, pricing, product image etc. It’s an efficient way to specify Standards. To learn more, click here or contact Support at SnapTrackersuppport@kisp.com or call 416.499.2457, ext. 1.