
How to Use the Product Summary and Location Summary Screens
The Product Search screen, from the Product Search screen, enables you to view full product details and Location Summary information. Products can be added to your cart from here, with specific conditions based on your shopping settings. The Location Summary includes information regarding buildings, locations, and quantity details, as well as individual item level information for the desired product.
Before starting, make sure:
- You are logged into SnapTracker.
- You have a minimum of one Standard and one Standard Class created.
- You have navigated to the Product Search screen.
- The correct Customer is selected from the Customer selection list.
This post outlines the process navigating to the Product Summary screen, including Location Summary information and item level information from the Product Search.
Note: Depending on your user settings, you may not see all information mentioned above.
1. On the Product Search screen, click a Standard Class.

The Standard Summary screen displays showing all Standards assigned to the selected Standard Class.

2. To view additional details for a specific Standard, click the Standard.
Note: You can click the Standard image, Model Number or Standard.

The Product Summary screen displays.

Observe the Product Summary screen.
The screen is separated into two sections:
- Summary – A header with product details, such as Standard, Model No., and Manufacturer. The Details button displays a pop-up with more Standard Details.
- Product Details – Key product information for shopping, such as the product image, available quantity, price, bill of materials, etc.
3. To hide the Summary section, click the Hide Summary icon.
The Summary section collapses.

4. To add the selected product to the cart, modify the Quantity field (if required) and click Add to Cart.

The selected product is added to your cart and a message displays informing you.
5. Depending on how the Customer is configured, you can also click Select Condition to add product in selected Conditions.
Note: This feature is available based on customer settings.
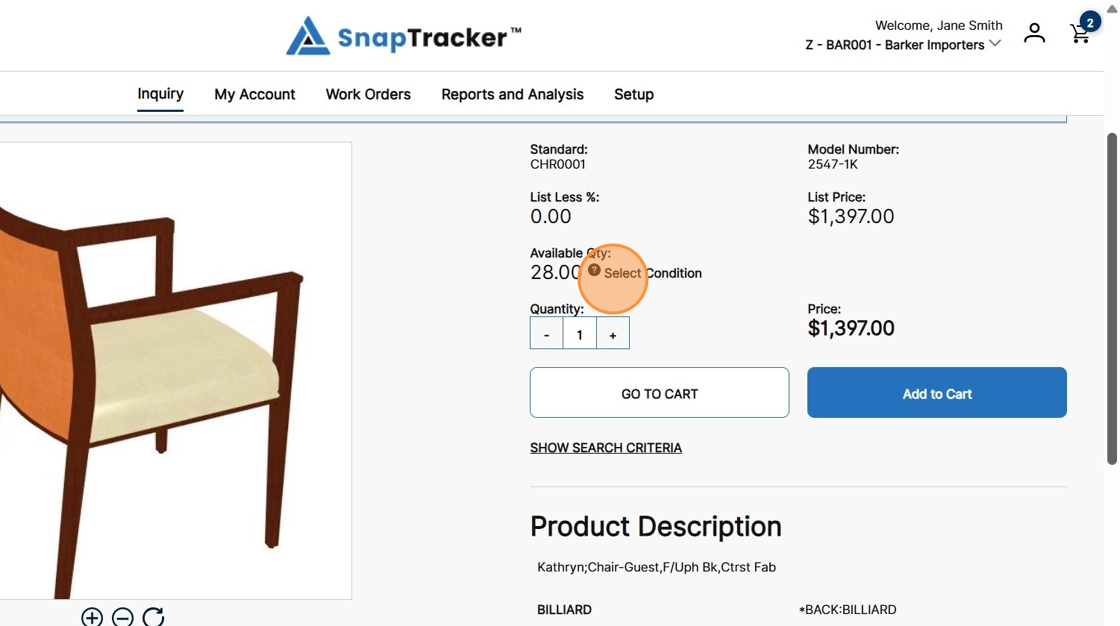
The Shop by Condition pop-up displays.

6. To add the selected product to the cart, modify the Add Qty field and click Add to Cart.

The selected product is added to your cart and a message displays informing you.
Observe the sub-navigation tabs in the top section:
- Standard Summary – Navigates to the Standard Summary results screen from your Product Search.
- Product Summary – Navigates to the Product Summary screen of a selected Standard.
- Location Summary – Navigates to the Location Summary screen of the selected Standard.

7. To view Location information, click Location Summary.
The Location Summary screen displays.

8. To view or hide additional details on the Location Summary screen, check or uncheck the Expand All checkbox.

The expanded Location Summary table displays.

Observe the fields in the Location Summary table:
- Building Level – Includes Building, Building Name, and Building Quantity On Hand.
- Location Level – Includes Location, Location Description, and Location Quantity on Hand.
- Item Level – Includes Serial Number, Condition, Last Inventory Date, and Item Quantity on Hand.
Location information can be printed or exported to a CSV file. Buttons for each are available at the bottom of the screen.
9. To filter the results, click Filters.

The Filter side panel displays.

Observe the Filter side panel:
- Search Keyword – Select a field from the dropdown to search through. In the text field, type a keyword and press Enter.
- Select a Building Type – Select Building Types to filter by (reflects any previous selections on the Product Search screen).
- Select a Building – Select Buildings to filter by (reflects any previous selections on the Product Search screen).
- Condition – Select Conditions and/or Acceptability Flags to filter by. Click Expand All to view all Conditions within each Acceptability Flag.
10. Populate the desired filter fields and click Search.

The filtered results of the search display.

11. To view additional details for a serial number, click the hyperlinked serial no.

The Item Details side panel displays.

12. To view more detailed information for the selected item, click the different tabs.

Item information can be printed or exported to a CSV file. Buttons for each are available at the bottom of the screen.