
How to Create, Edit, and Delete Custom Reports
SnapTracker has many standard reports in the Reports & Analysis screen and the My Dashboard screen. Additionally, users can create custom reports, based on specific requirements.
You have the ability to upload your own Crystal Reports within the SnapTracker interface. Providing you have SAP Crystal Reports 2013 or 2016, and a connection to your SnapTracker database, you can write your own reports by connecting to the database located in the KiSP data center. Once the reports are complete, you can upload the reports into the interface and control Menu Access by each user.
Before starting, make sure:
- You are logged into SnapTracker.
- You have access to Custom Report Upload.
This post outlines how to create (upload), edit, and delete your custom reports.
1. In the header section, click Utilities.
Note: Depending on your browser, you may need to click the View menu items icon to see Utilities.
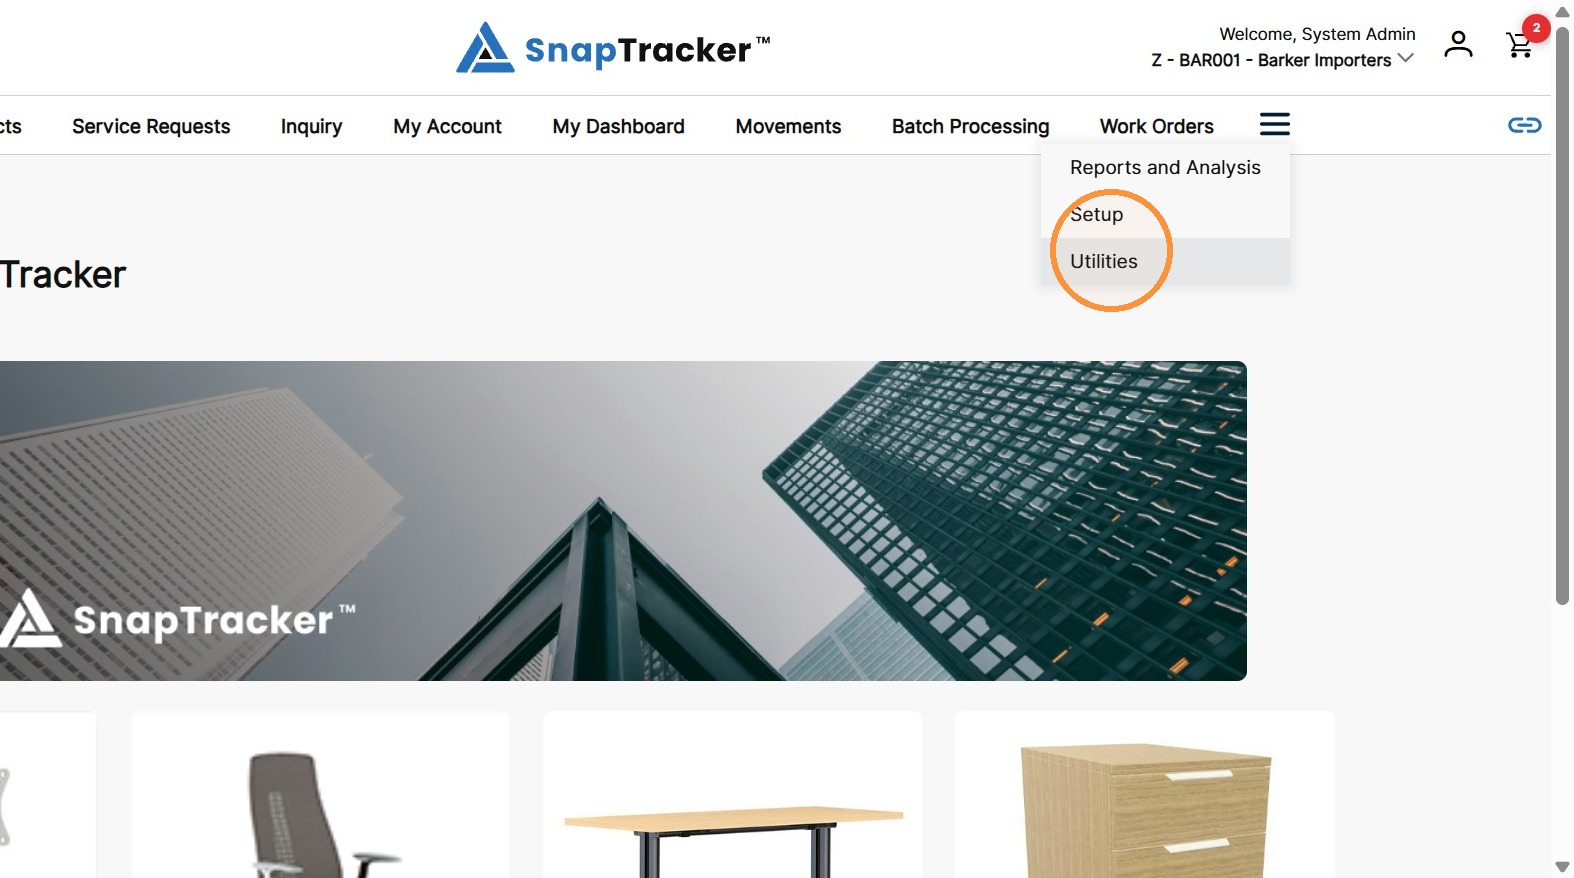
2. Click Custom Report Upload.
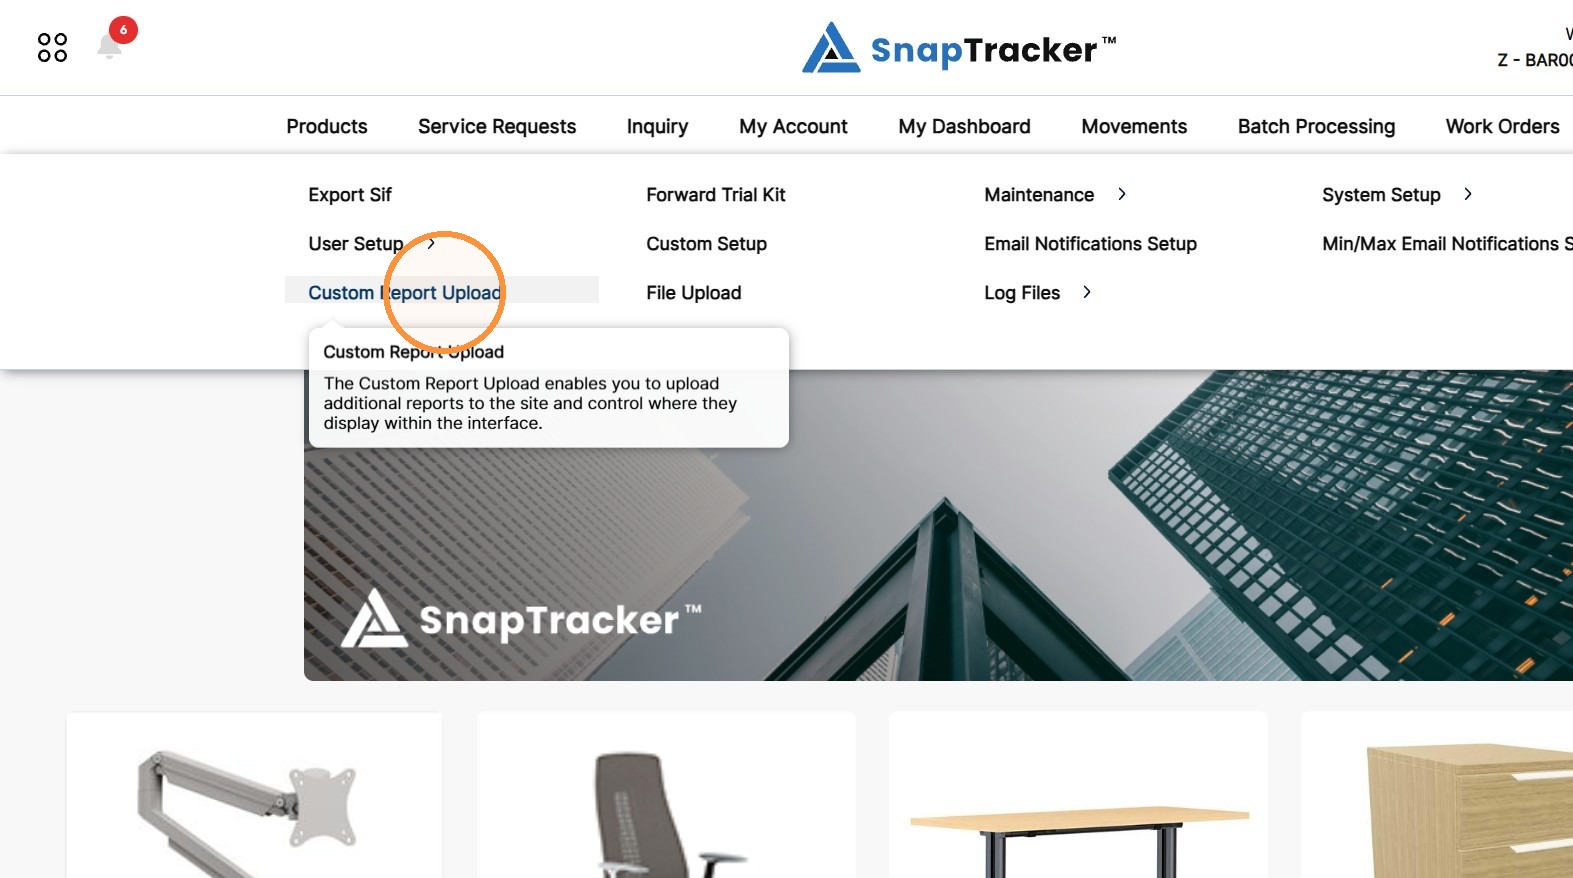
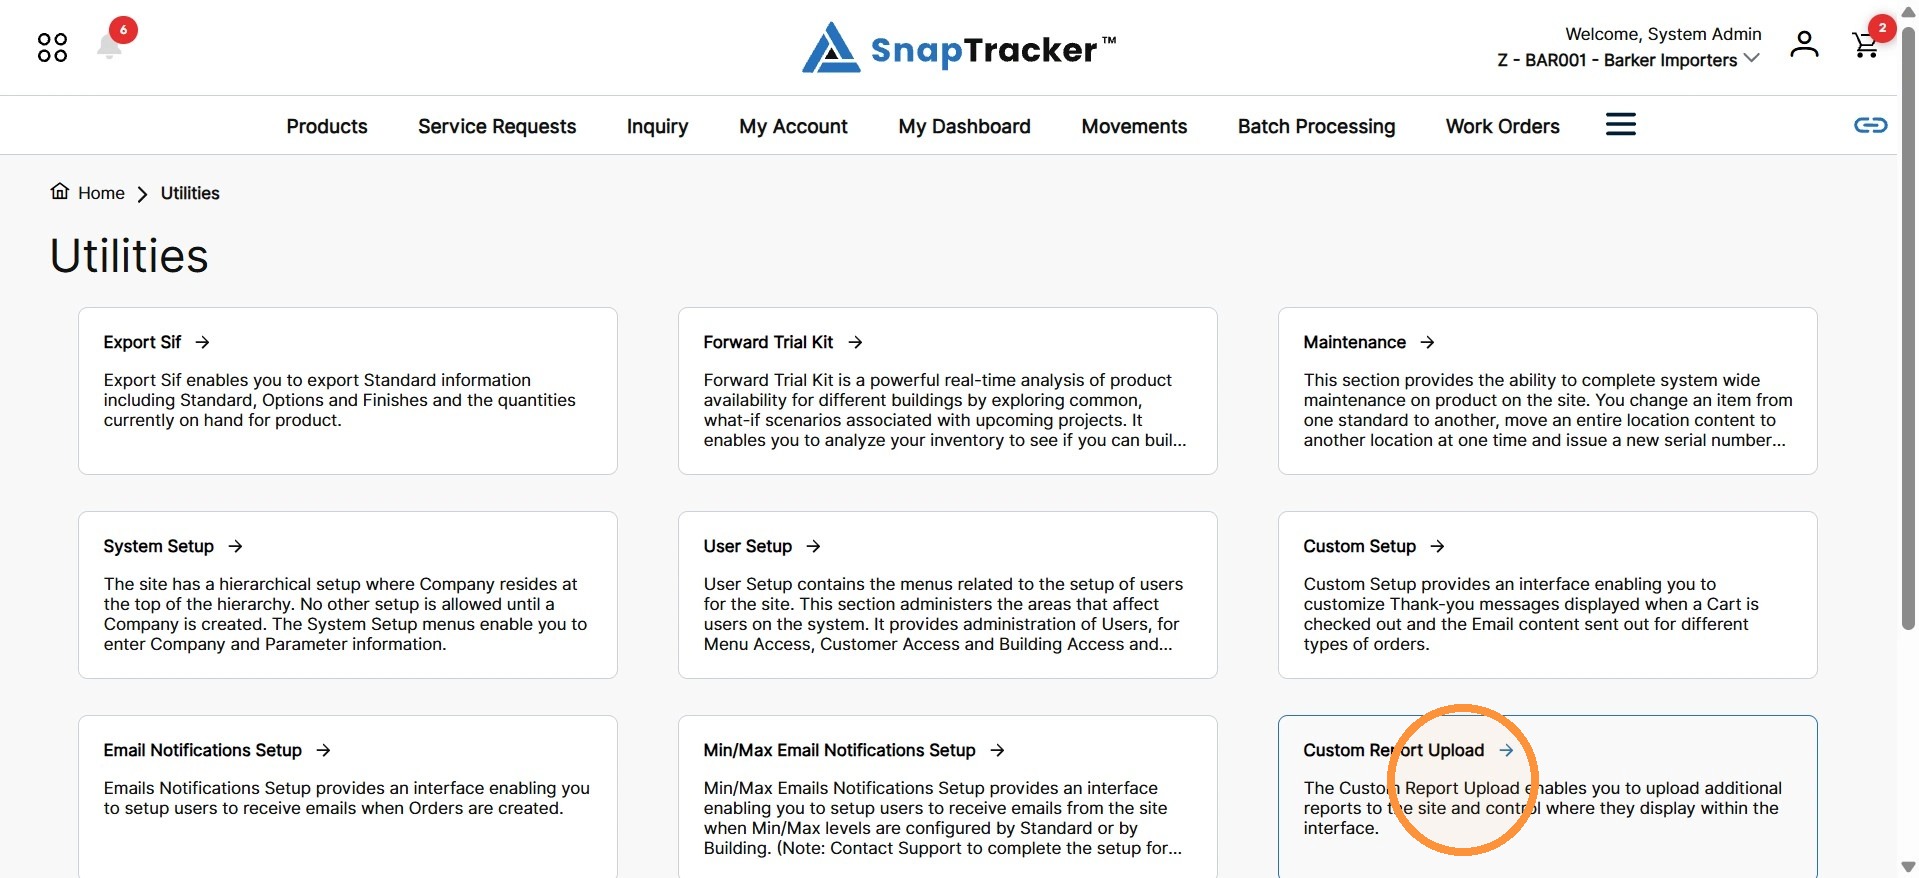
Another way to access the Custom Report Upload screen is to navigate to the Utilities main screen.
From here, select Custom Report Upload.
The Custom Report Upload screen displays.
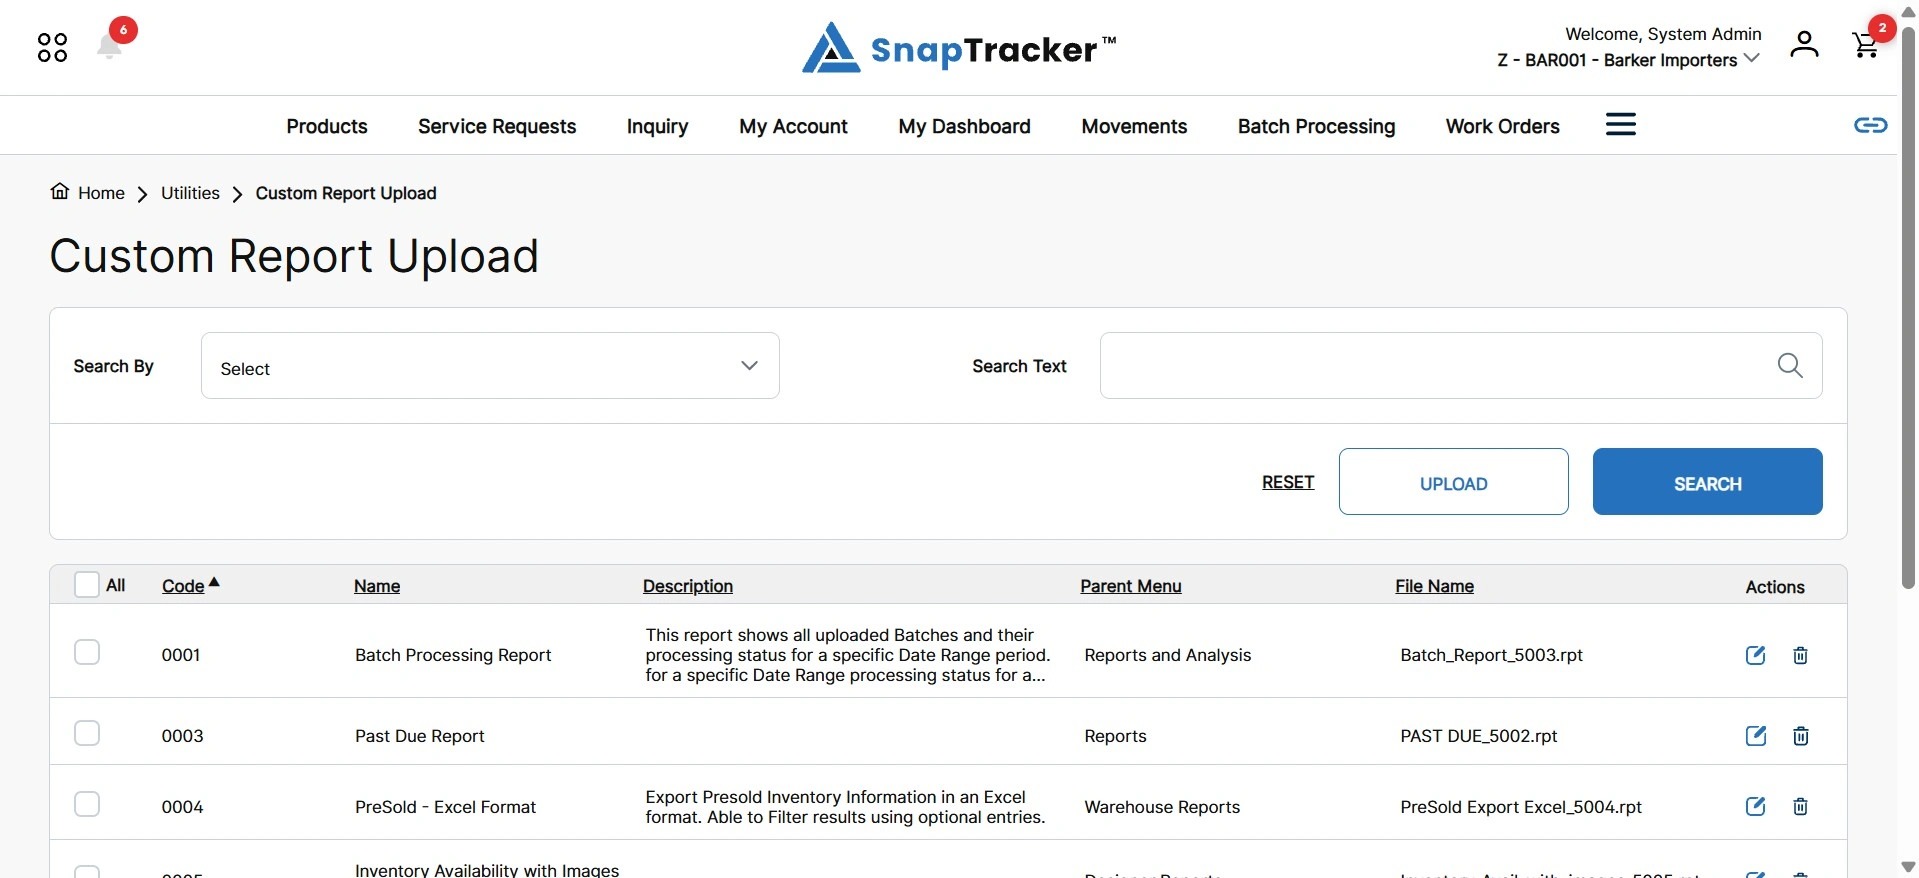
Observe the fields in the results:
- All – Select the checkbox of the desired custom report(s), or select All, to complete a bulk action.
- Code – The code associated to the custom report. Note: This does not have to be a unique field.
- Name – The name of the custom report.
- Description – The description of the custom report.
- Parent Menu – The menu the custom report is assigned to. Note: Custom reports can be assigned to native SnapTracker pages (e.g. Report & Analysis) or custom menus.
- File Name – The uploaded file name for the custom report.
- Actions – Available actions for an existing custom report. The options are Edit or Delete.
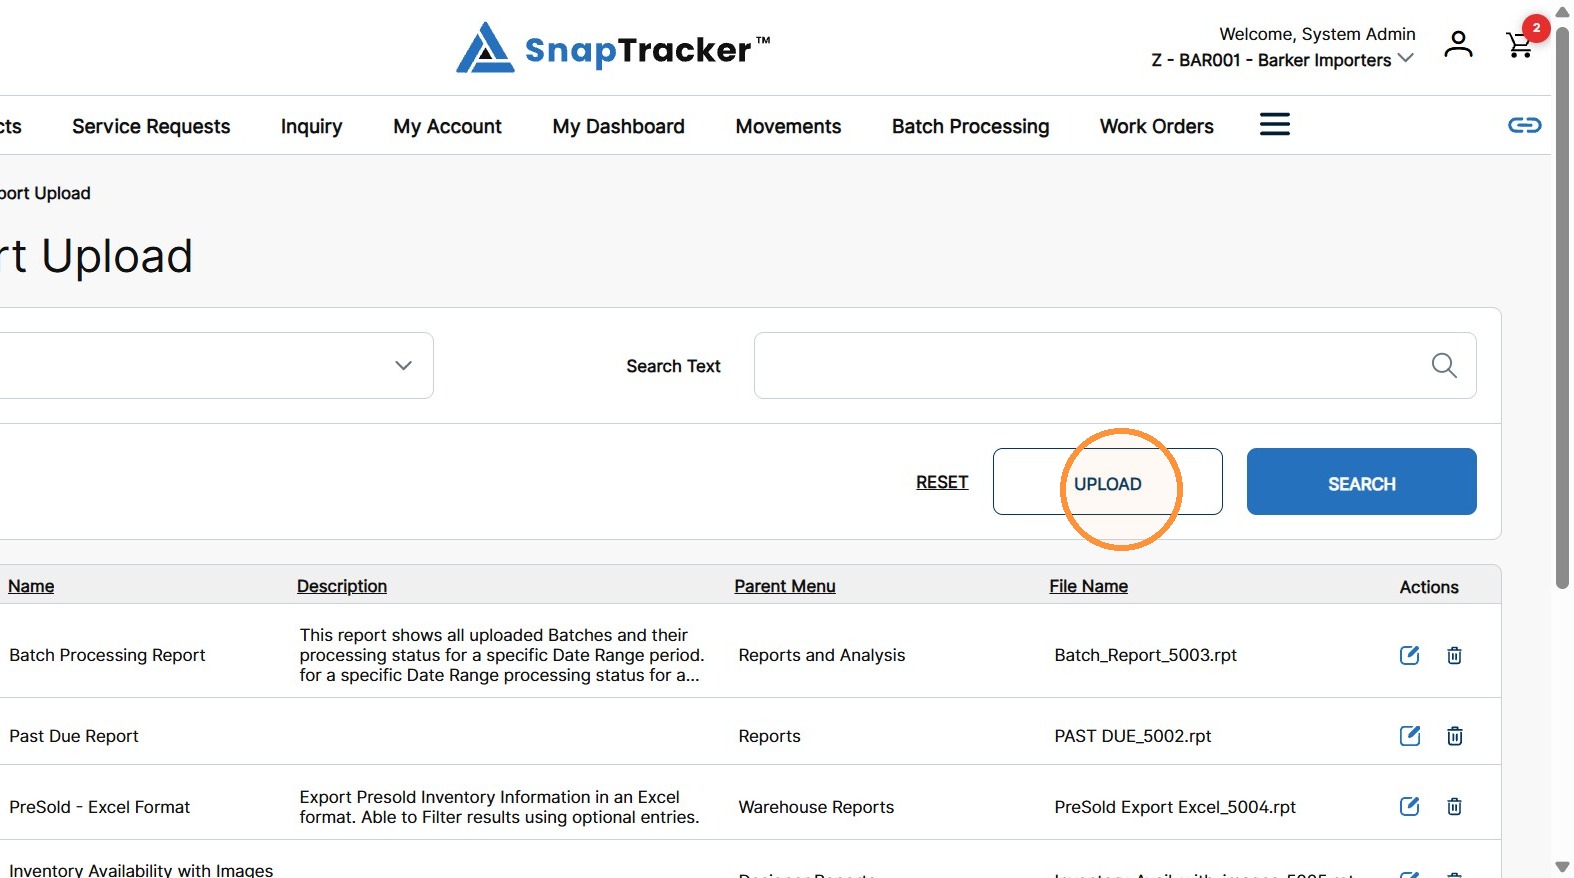
3. To create (upload) a new custom report, click Upload.
Note: You can only create one custom report at a time. The Upload button becomes disabled until the new custom report is created, or the action is canceled.
A new, empty row displays in the results table.
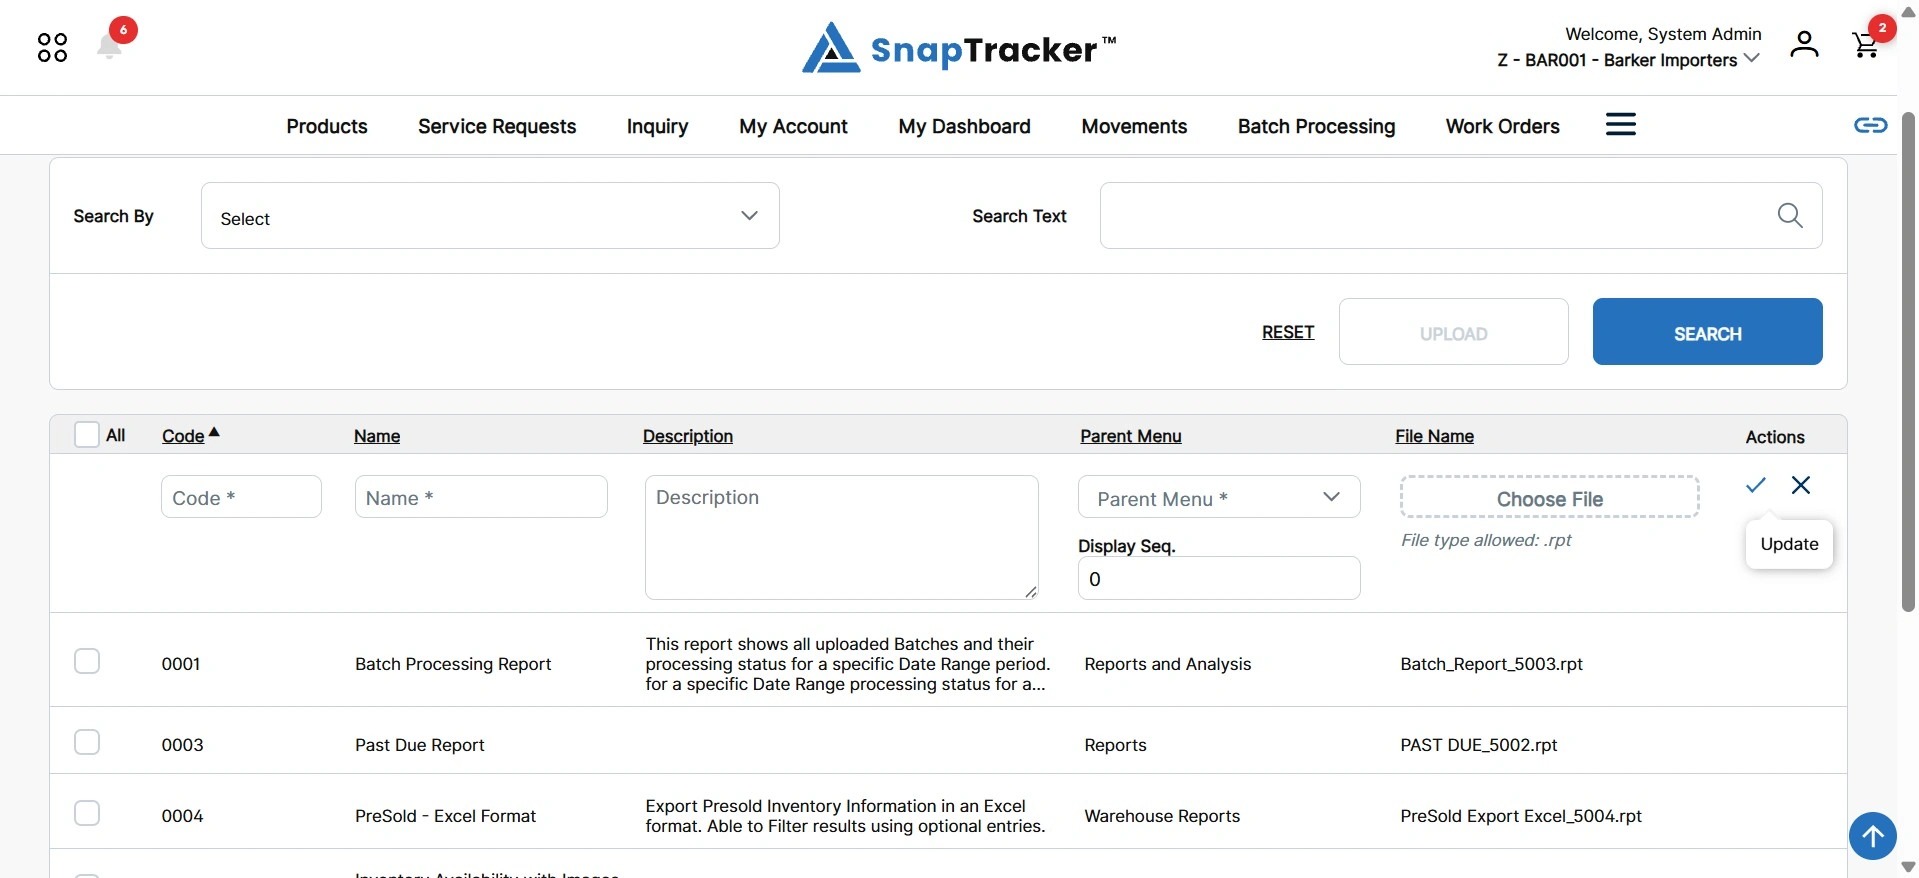
Observe the fields to input in for the new manufacturer:
- Code – (Required) The code associated with the each custom report. Note: This does not have to be a unique field.
- Name – (Required) The name of the custom report.
- Description – The description of the custom report.
- Parent Menu – (Required) The menu the custom report is assigned to. Note: Custom reports can be assigned to native SnapTracker pages (e.g. Report & Analysis) or custom menus.
- Display Sequence – The display sequence of the report menu within the Parent Menu it is assigned. By default, the display sequence is “0”. Note: If all menus have a display sequence “0”, the menus are sorted alphanumerically.
- File Name – The uploaded file name for the custom report.
Note: The required fields are indicated by an asterisk.
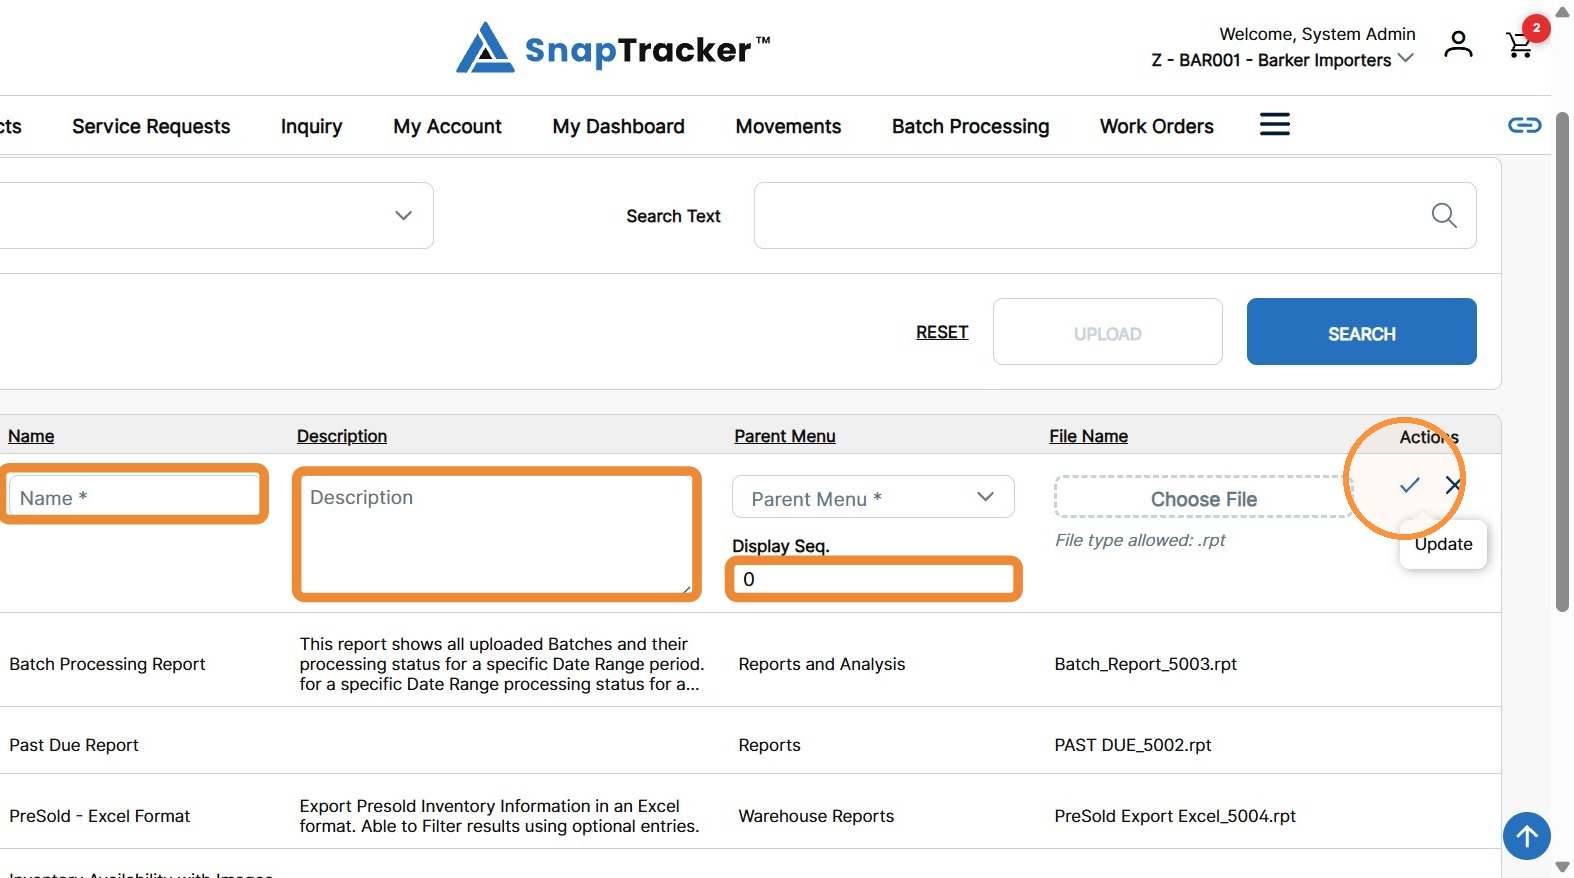
4. Enter in the desired data in the relevant text field.
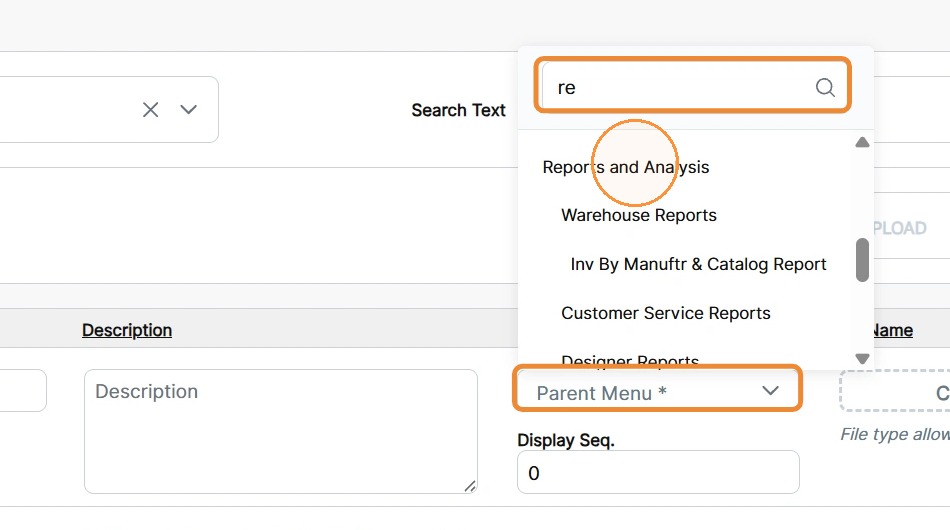
5. In the Parent Menu field, click the dropdown field.
In the expanded dropdown selection box, scroll through the options or enter a desired search term in the text box, and select the desired menu.
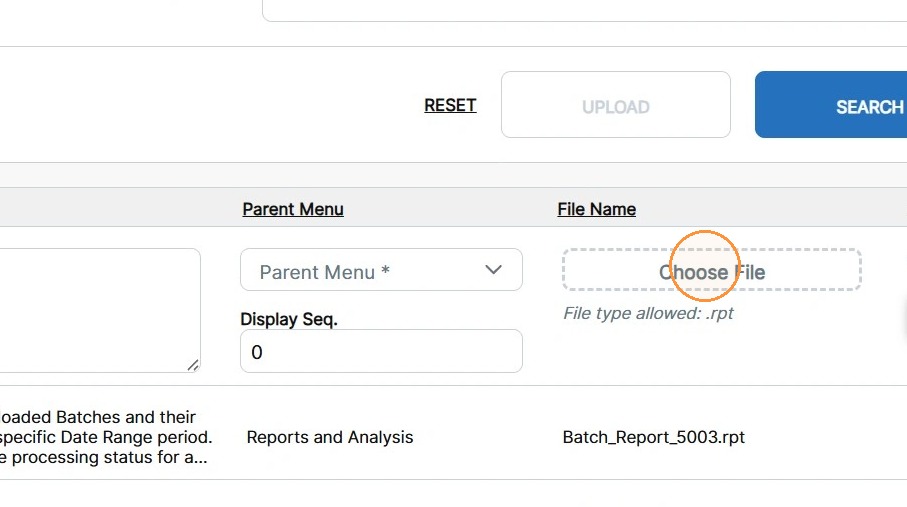
6. In the File Name field, click Choose File to select the desired report file to upload from your computer.
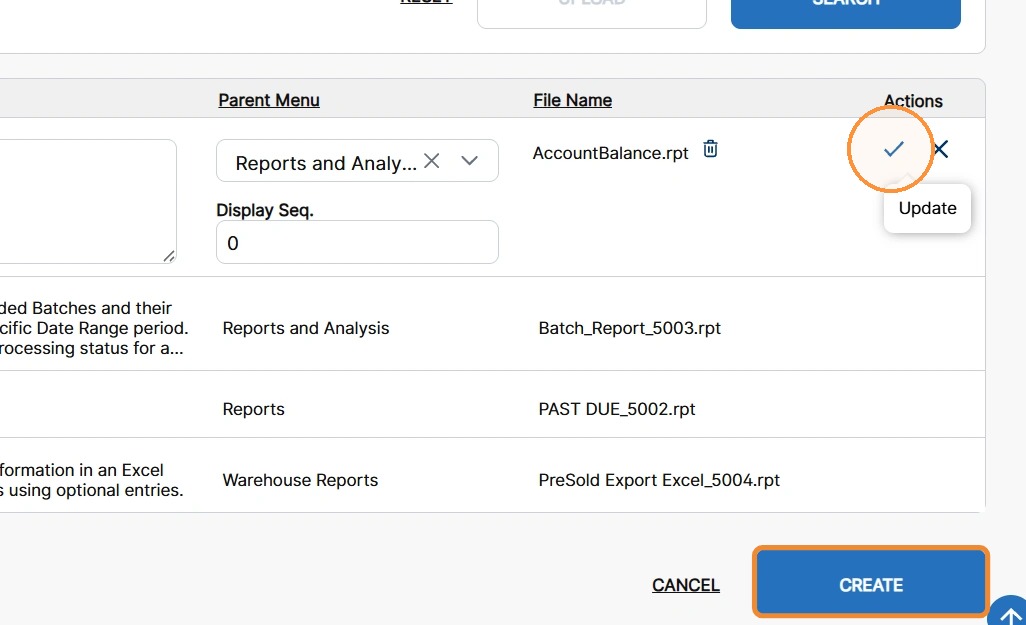
7. After populating the desired fields, click the checkmark icon or Create to create the new custom report.
Note: Alternatively, click the X icon or Cancel to remove the unsaved entry.
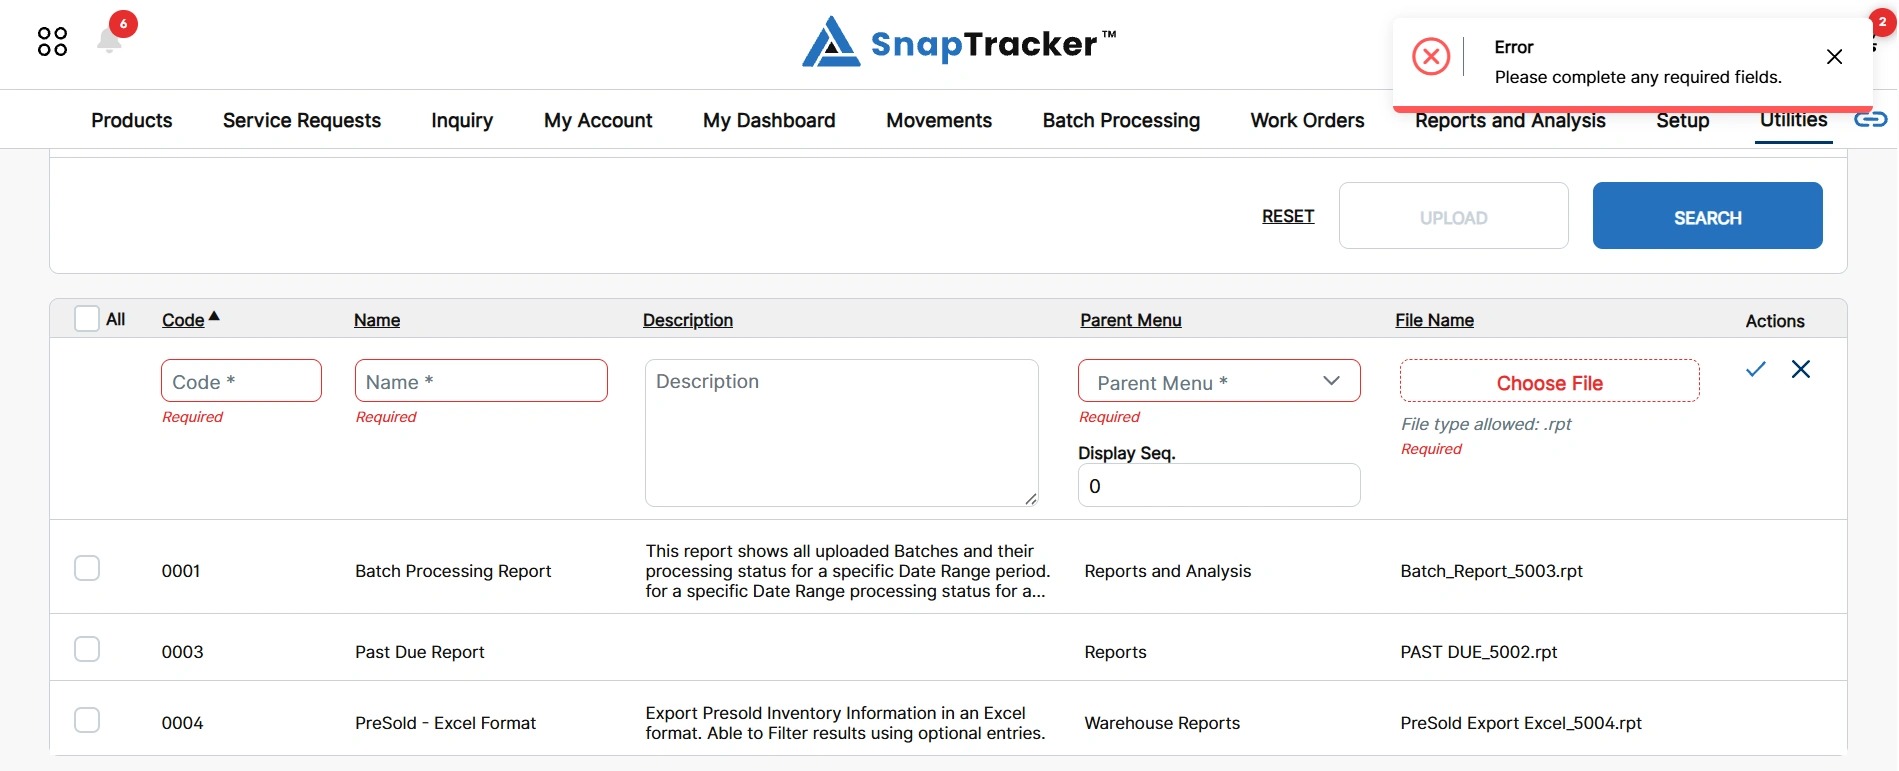
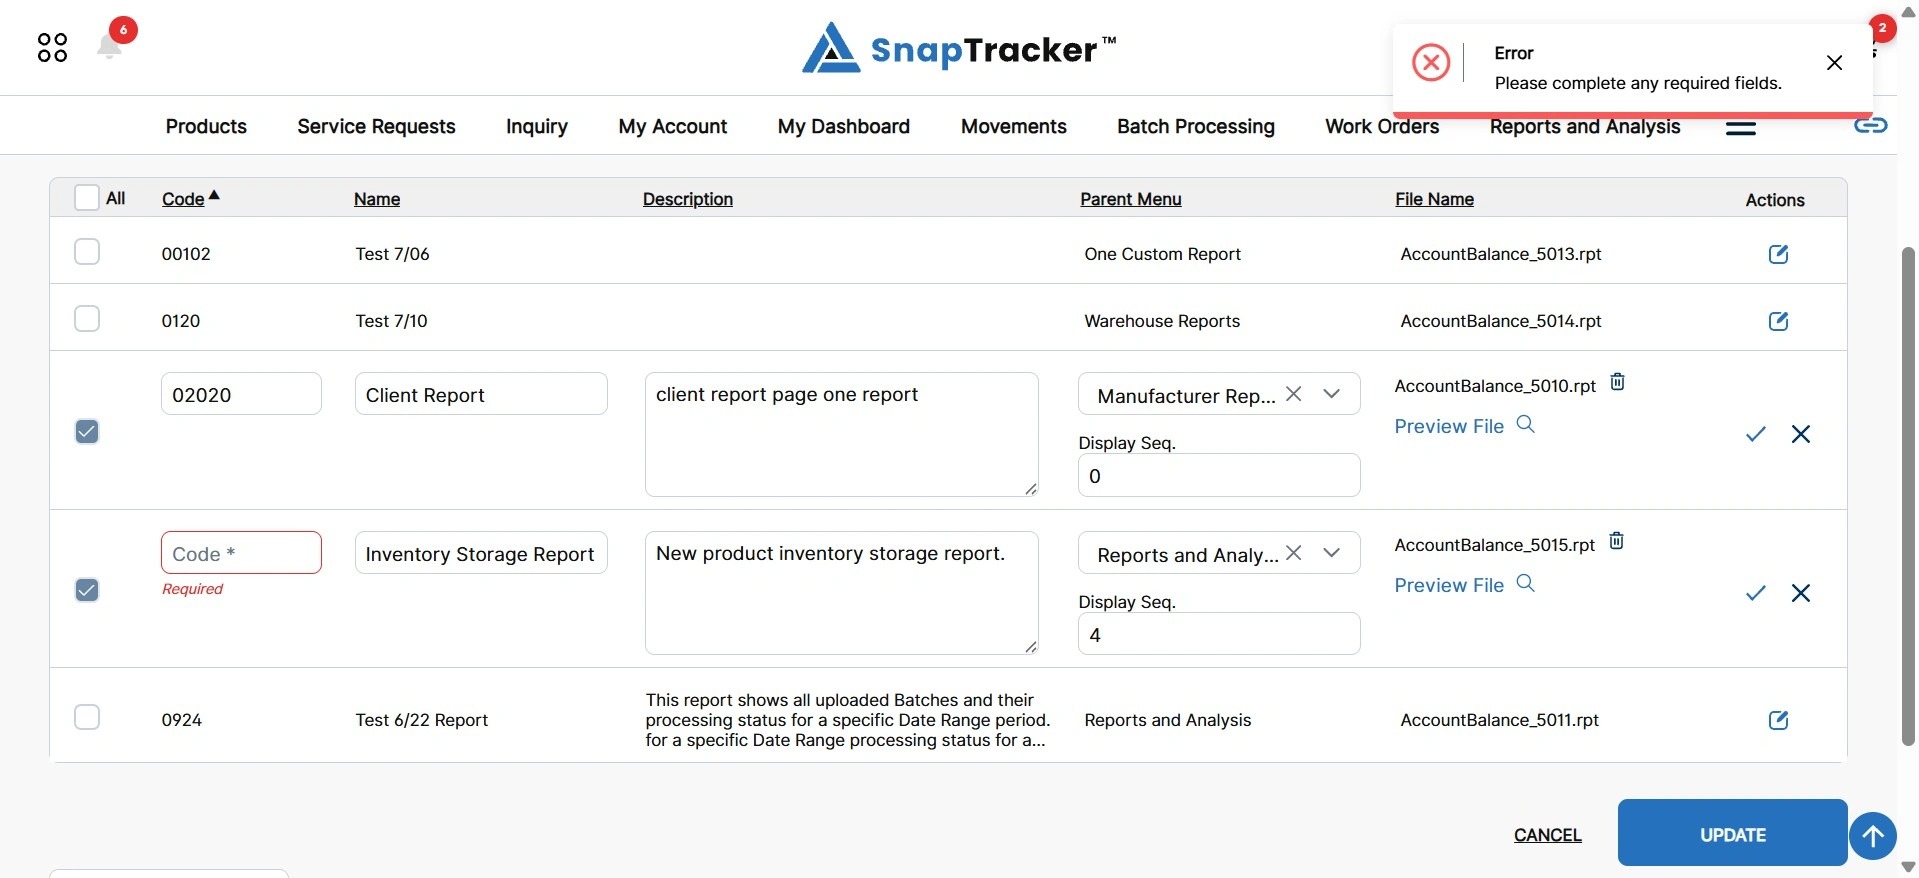
If any required fields are missing, the missing field is highlighted and Required displays below.
An error message displays, indicating that all required fields need to be entered.
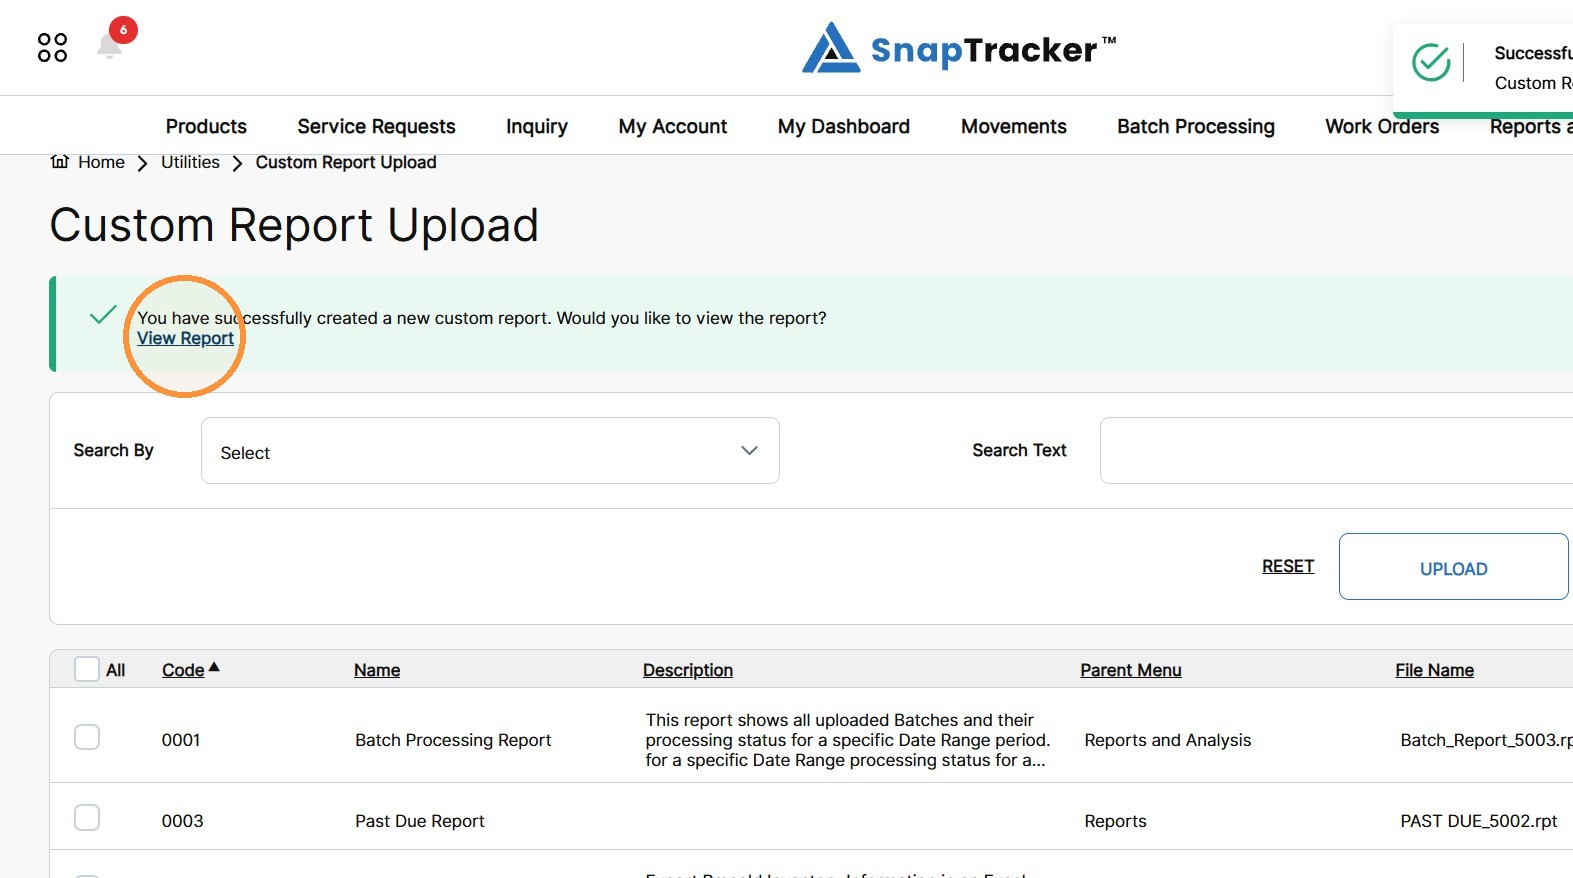
If the new custom report is created successfully, a success message displays, as well as an additional message to view the report.
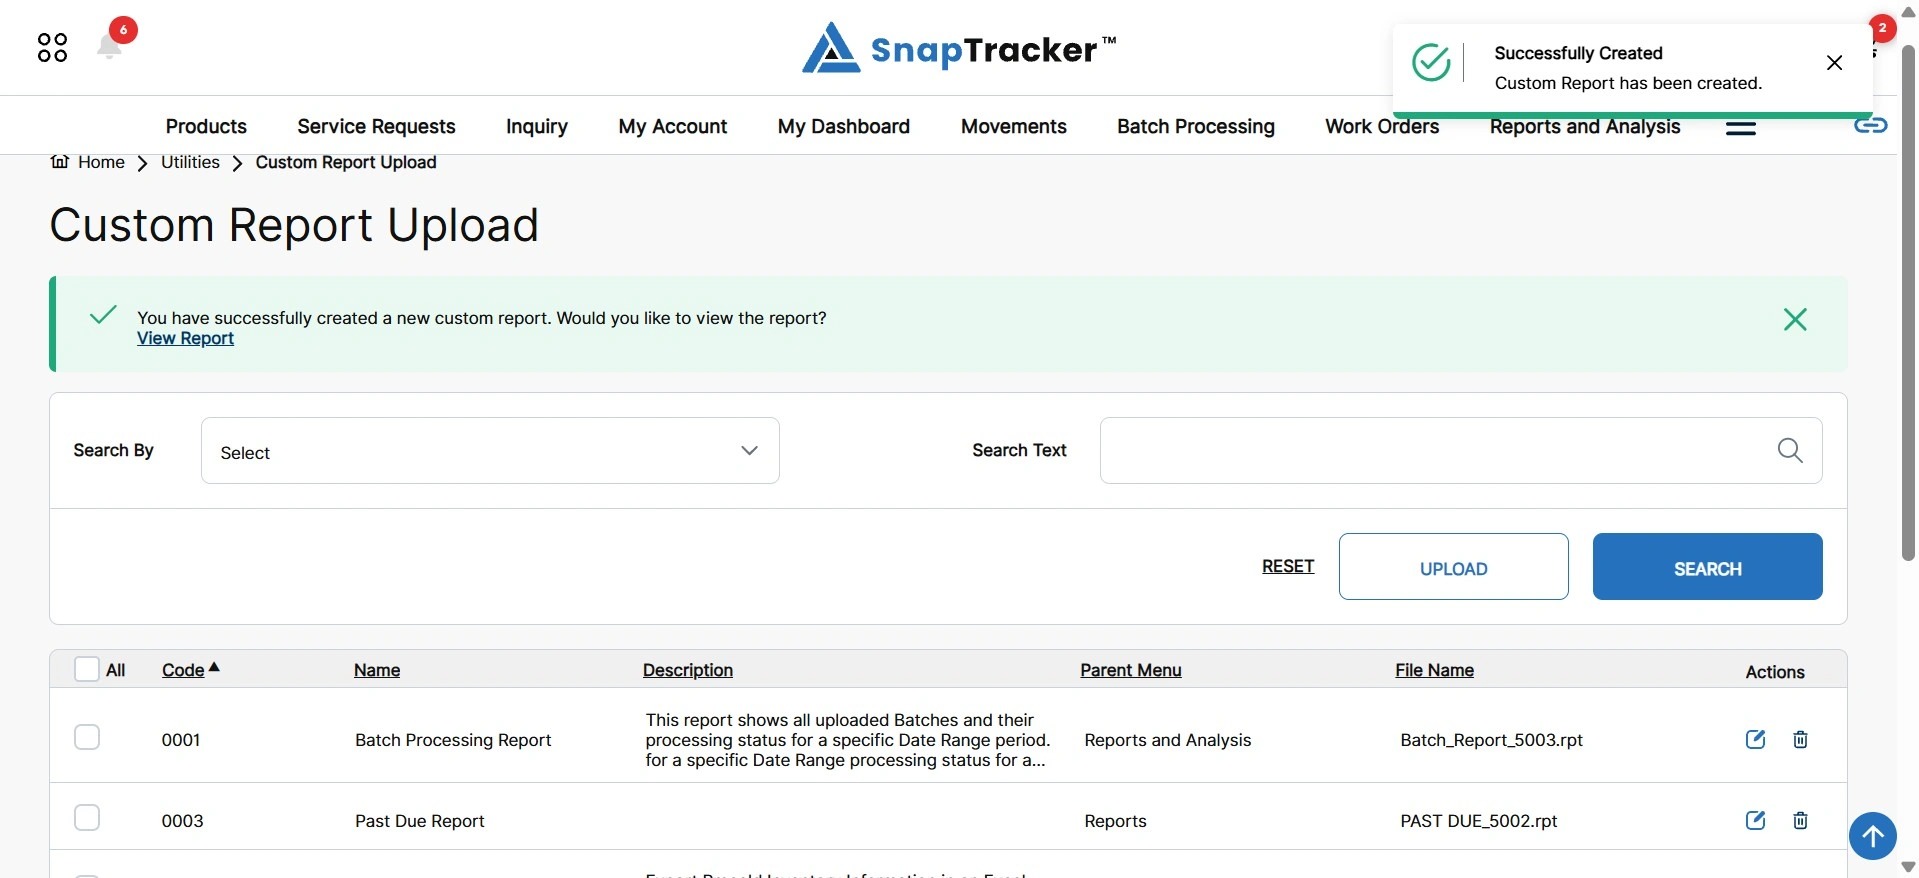
8. To view the newly created report in SnapTracker, click View Report.
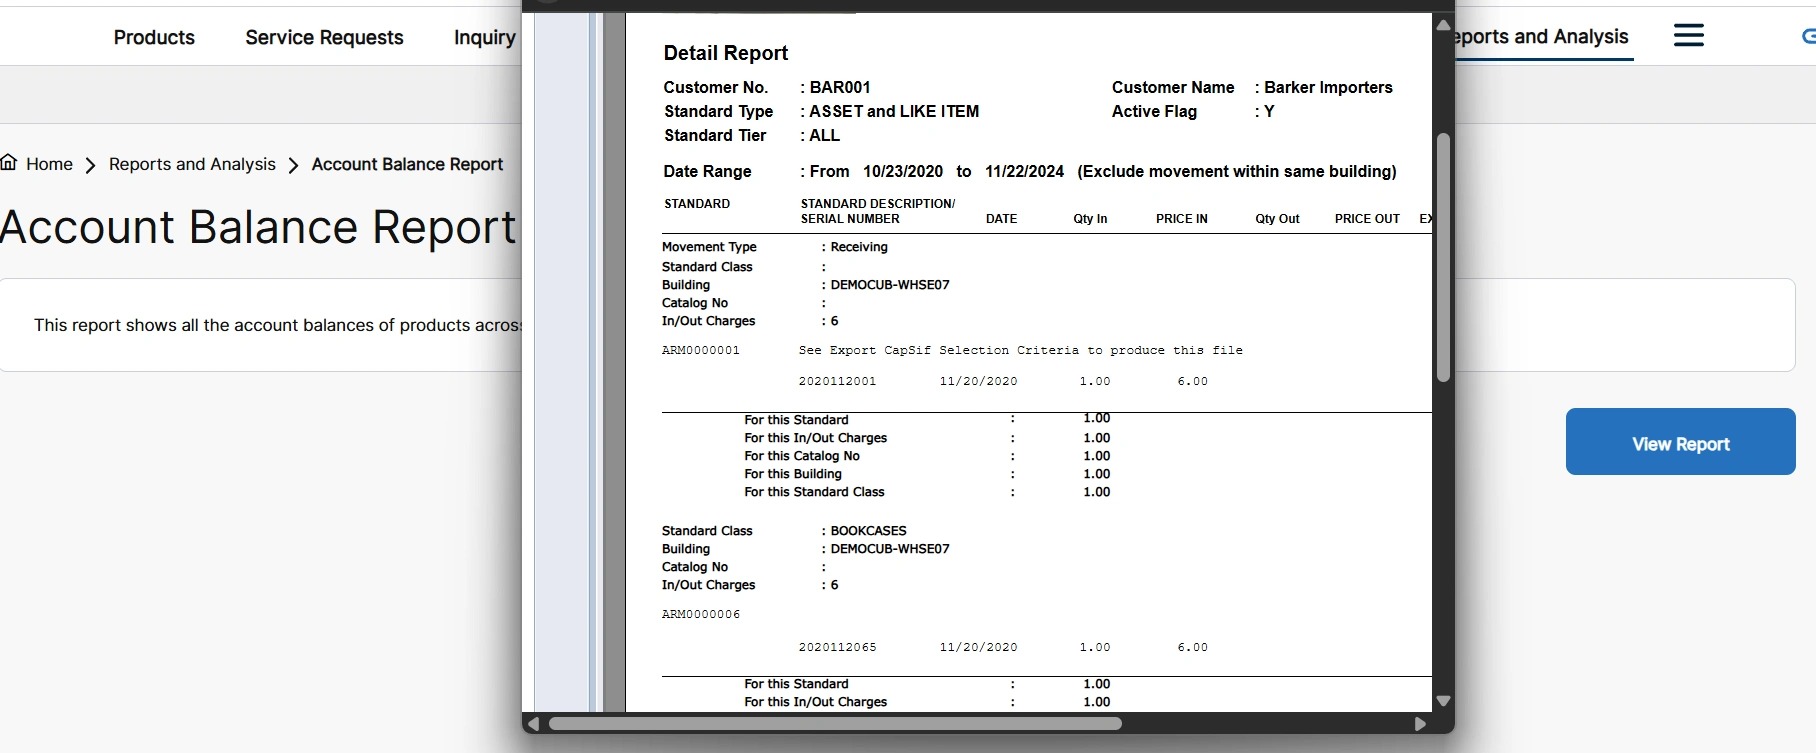
The custom report screen displays, with the new report pop-up automatically opening.
9. To edit a custom report, click the Edit icon for an individual custom report.
Alternatively, to edit multiple custom reports, select the checkbox of the desired custom reports and click on the global Edit button.
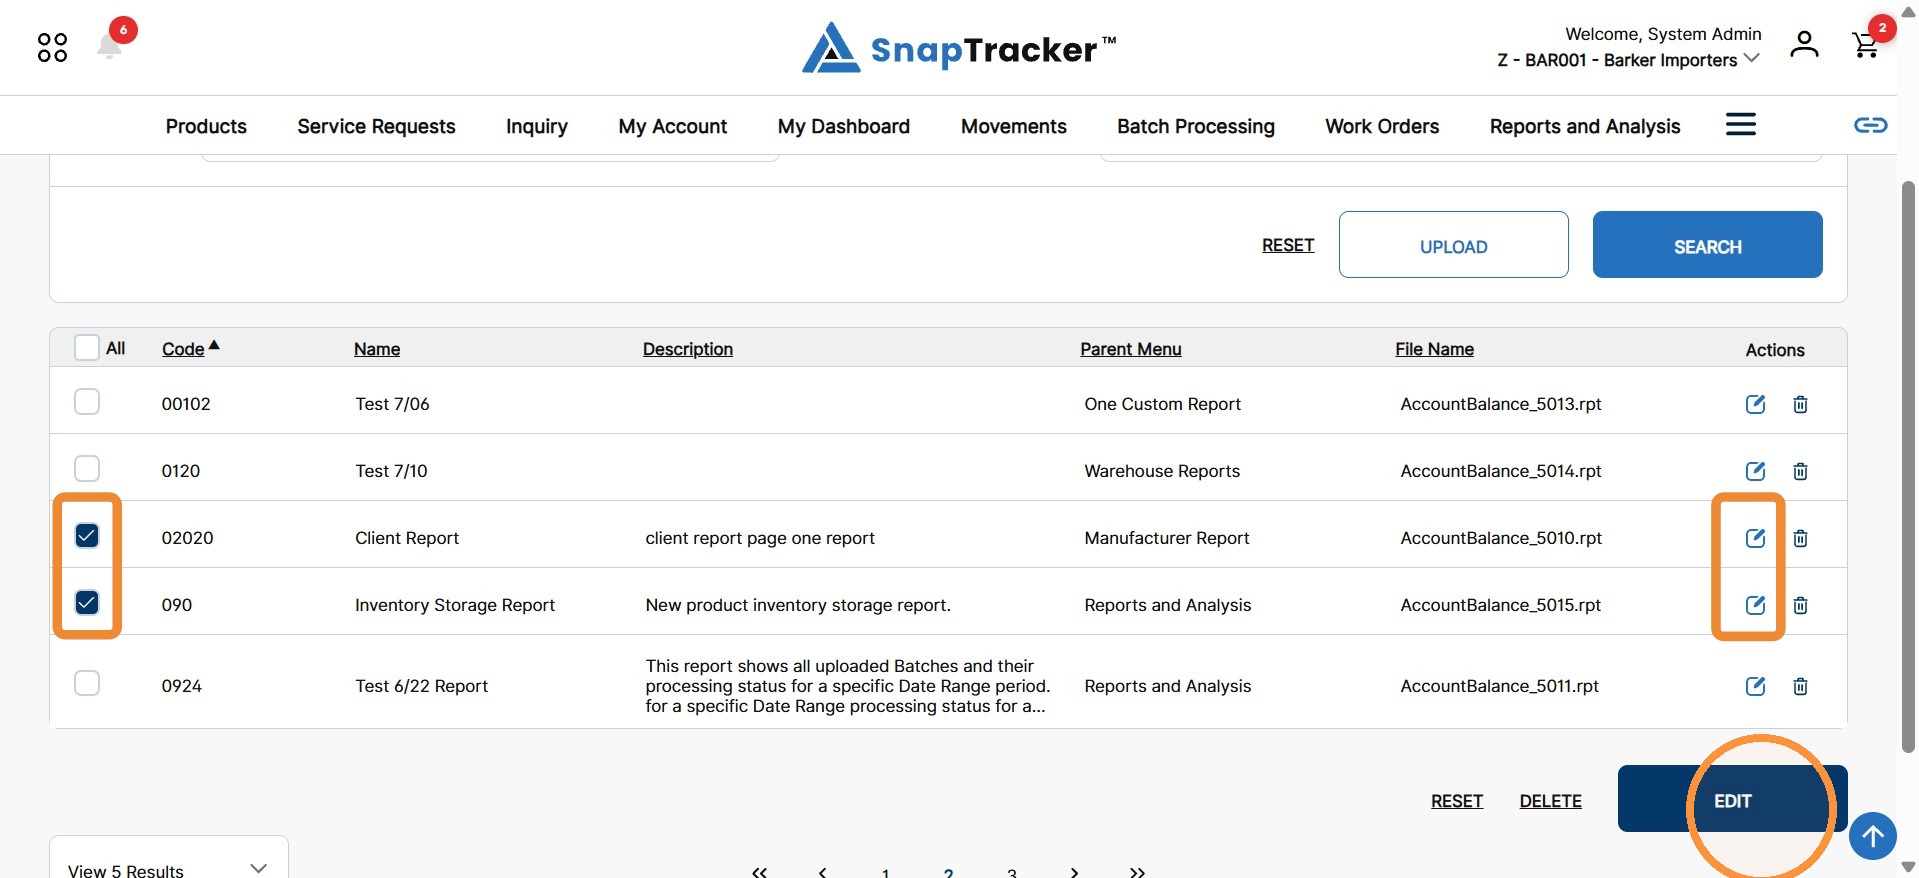
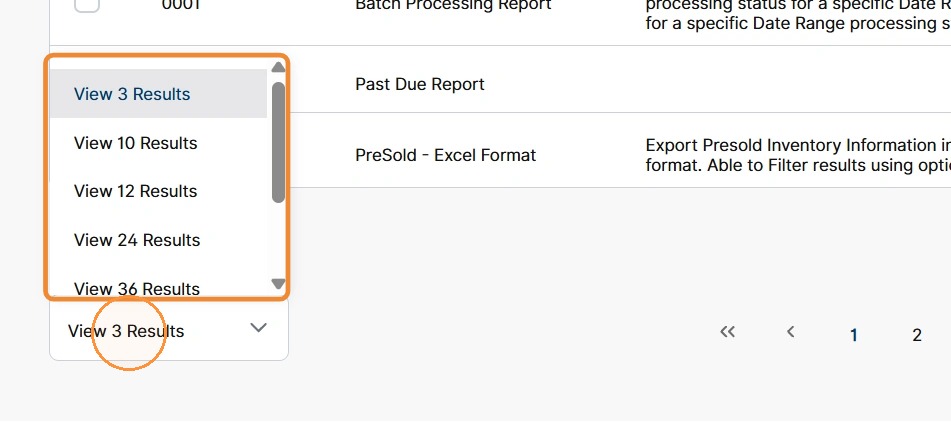
Note: You can only edit multiple custom reports that display on the screen at once, not across multiple pages. To edit more custom reports, click the View Number of Results dropdown to adjust the number of results to view on the page.
The selected custom reports change to Edit mode, where editable fields are enabled.
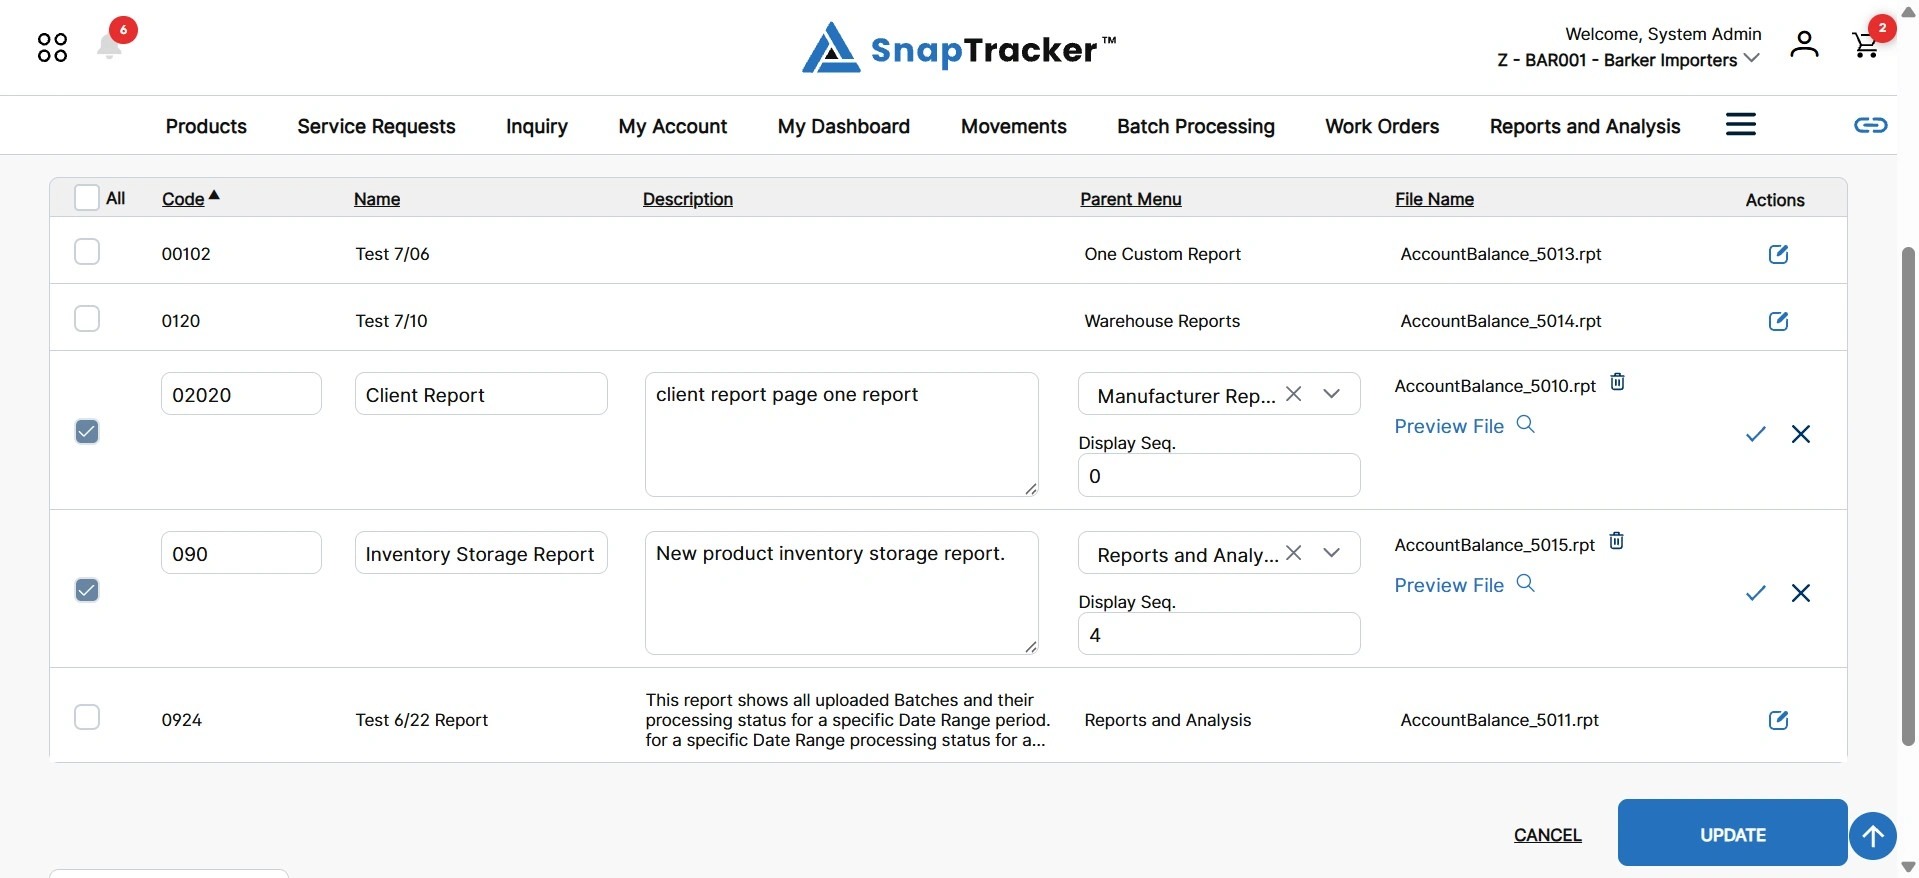
10. To preview the report file, click Preview File.
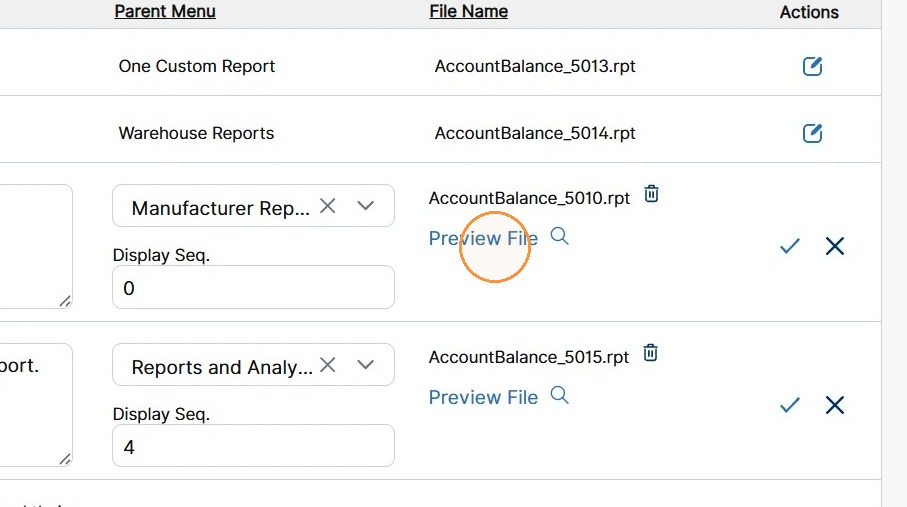
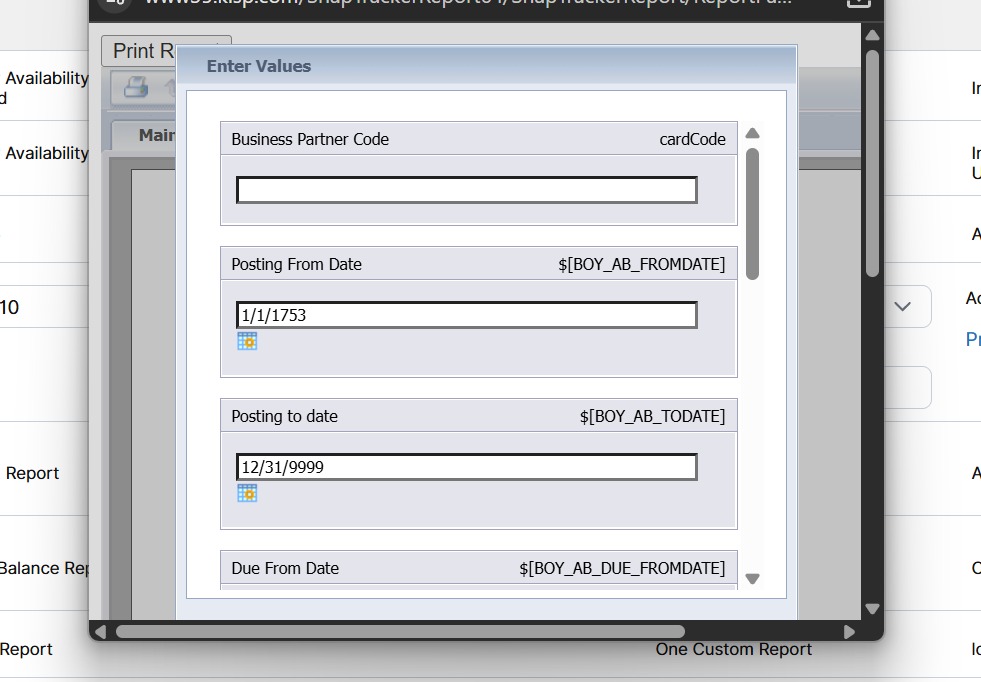
The report pop-up displays for your review.
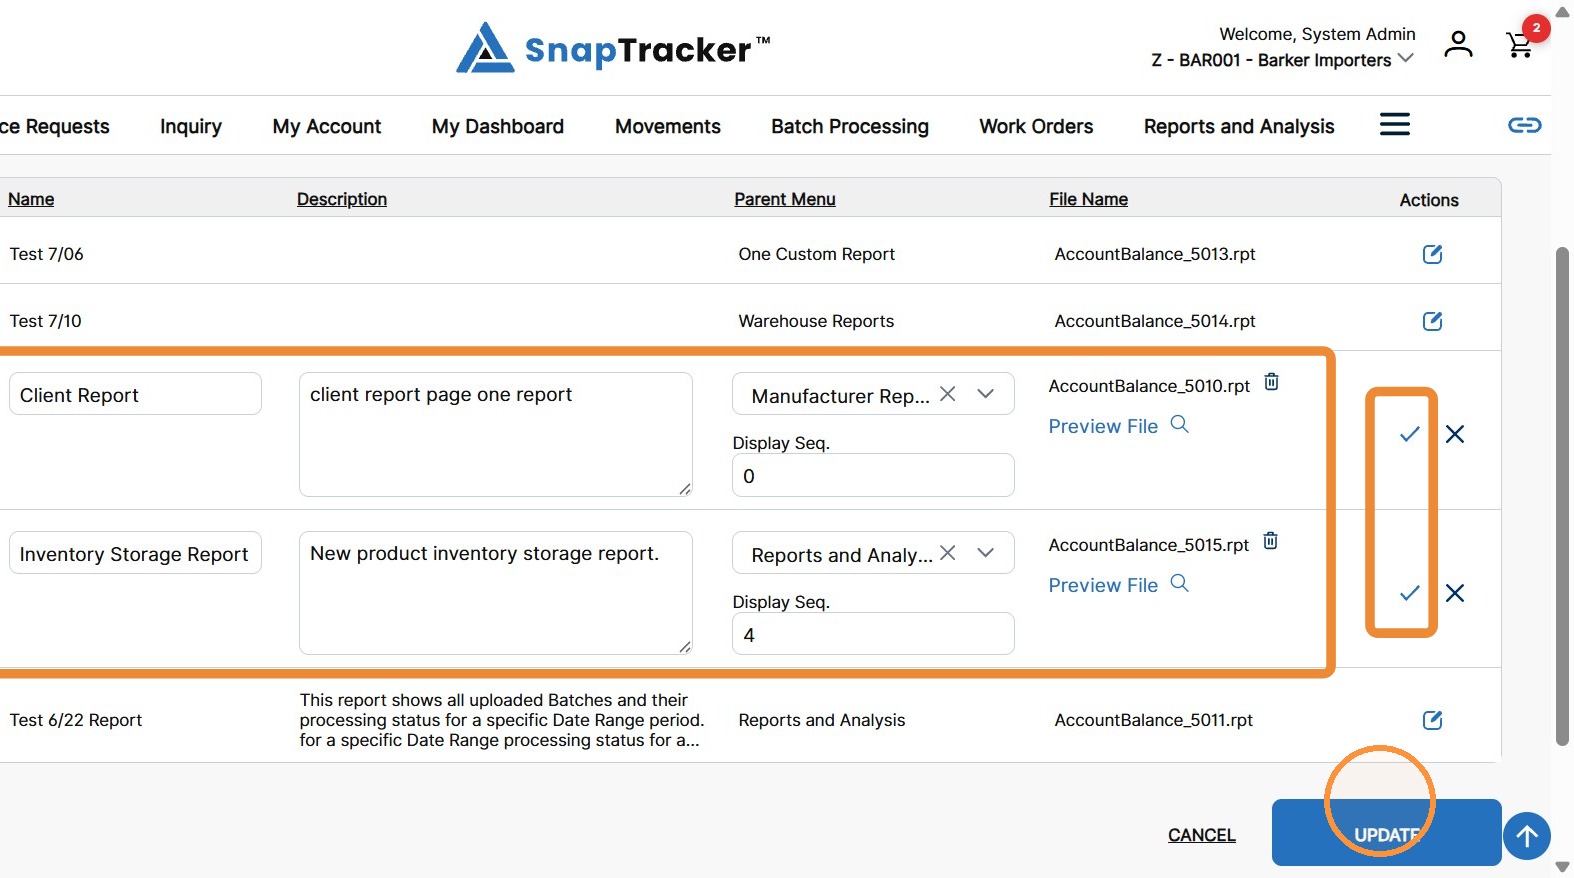
11. Edit the desired fields.
Click the checkmark icon for an individual report to save changes, or click Update to save changes for all reports.
If any required fields were removed, the missing fields are highlighted and Required displays below.
An error message displays, indicating that all required fields need to be entered.
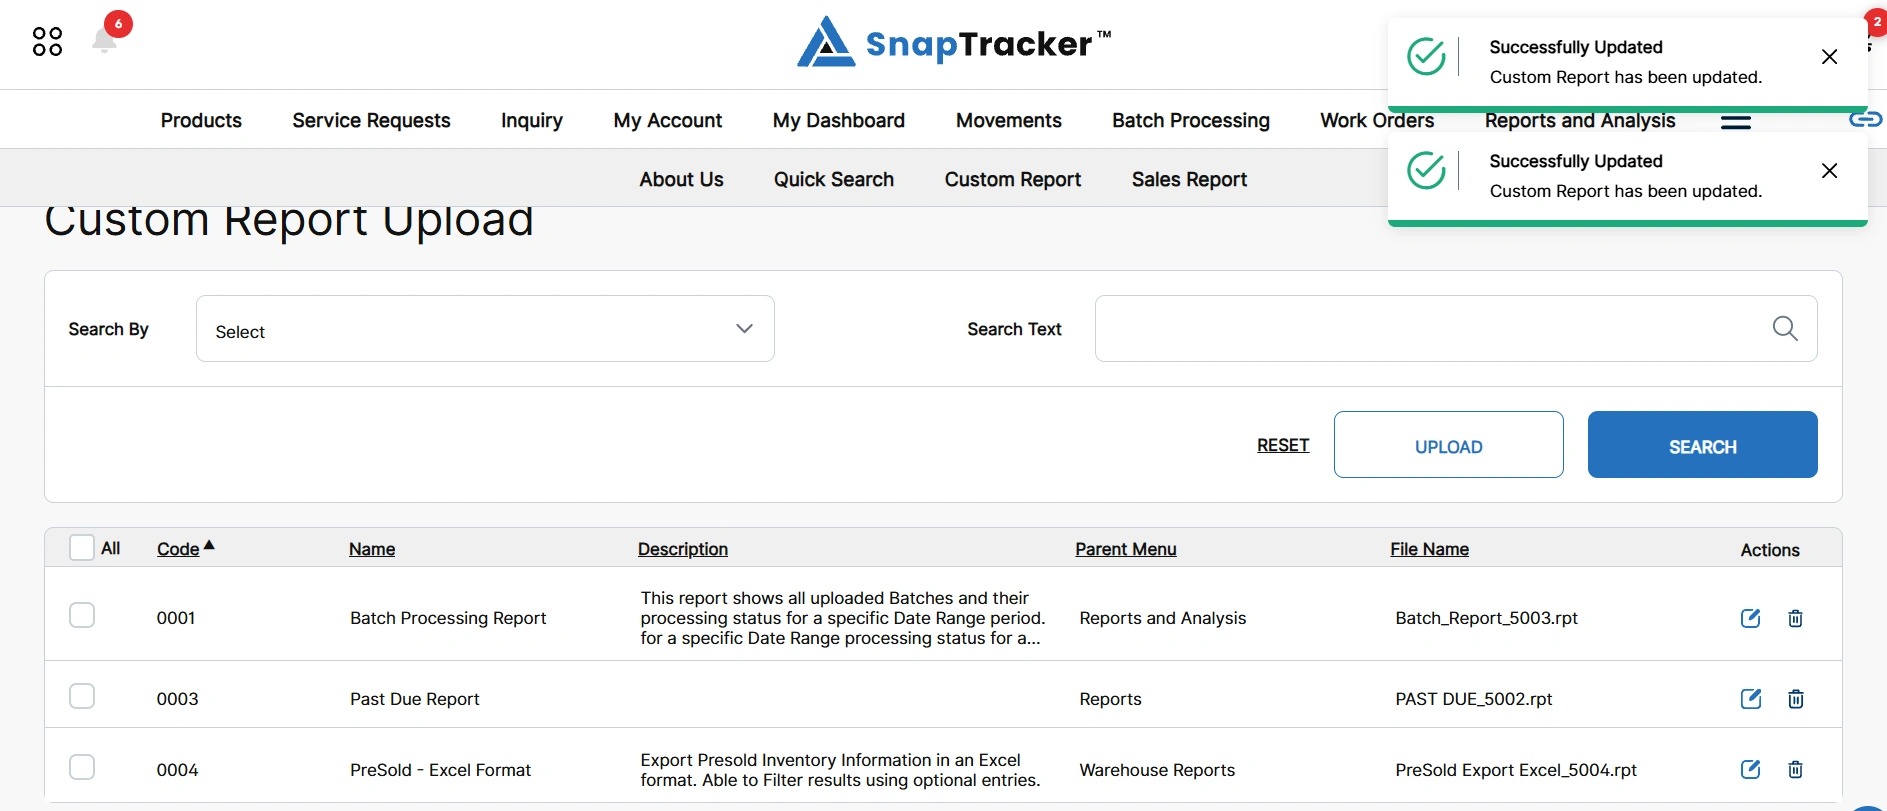
The custom reports update with the applied changes and success messages display.
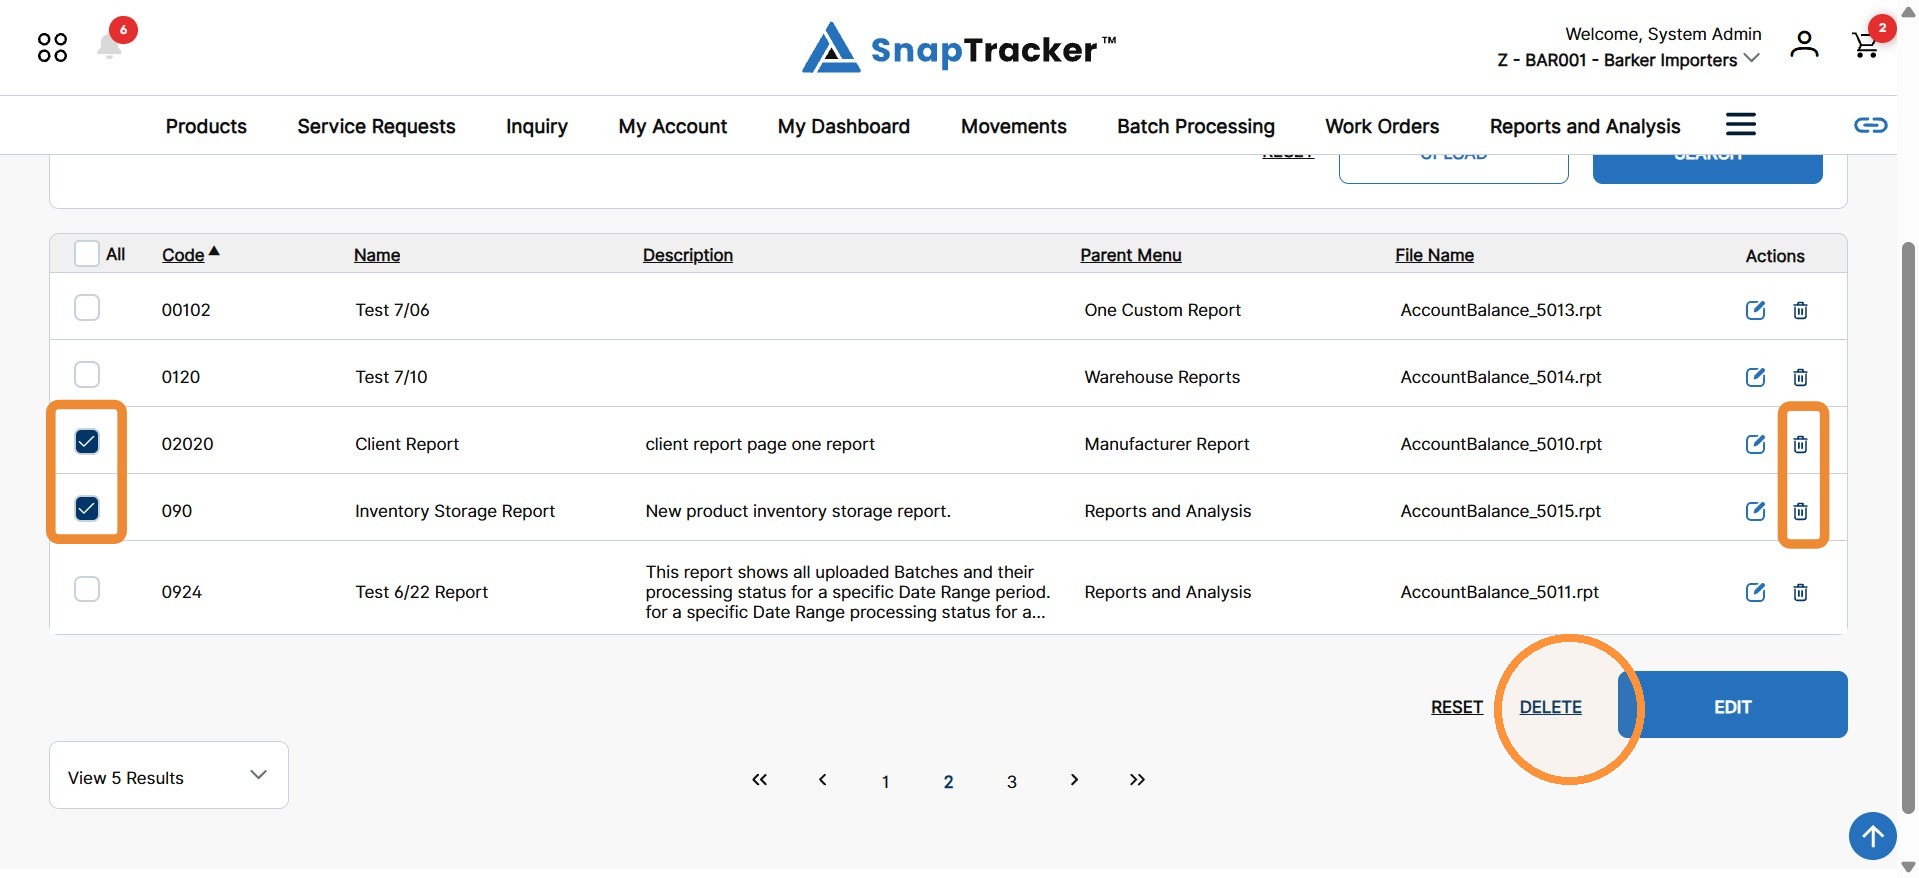
12. To delete a custom report, click the trash icon for an individual custom report.
Alternatively, to delete multiple custom reports, select the checkbox beside the desired custom reports and click the Delete button.
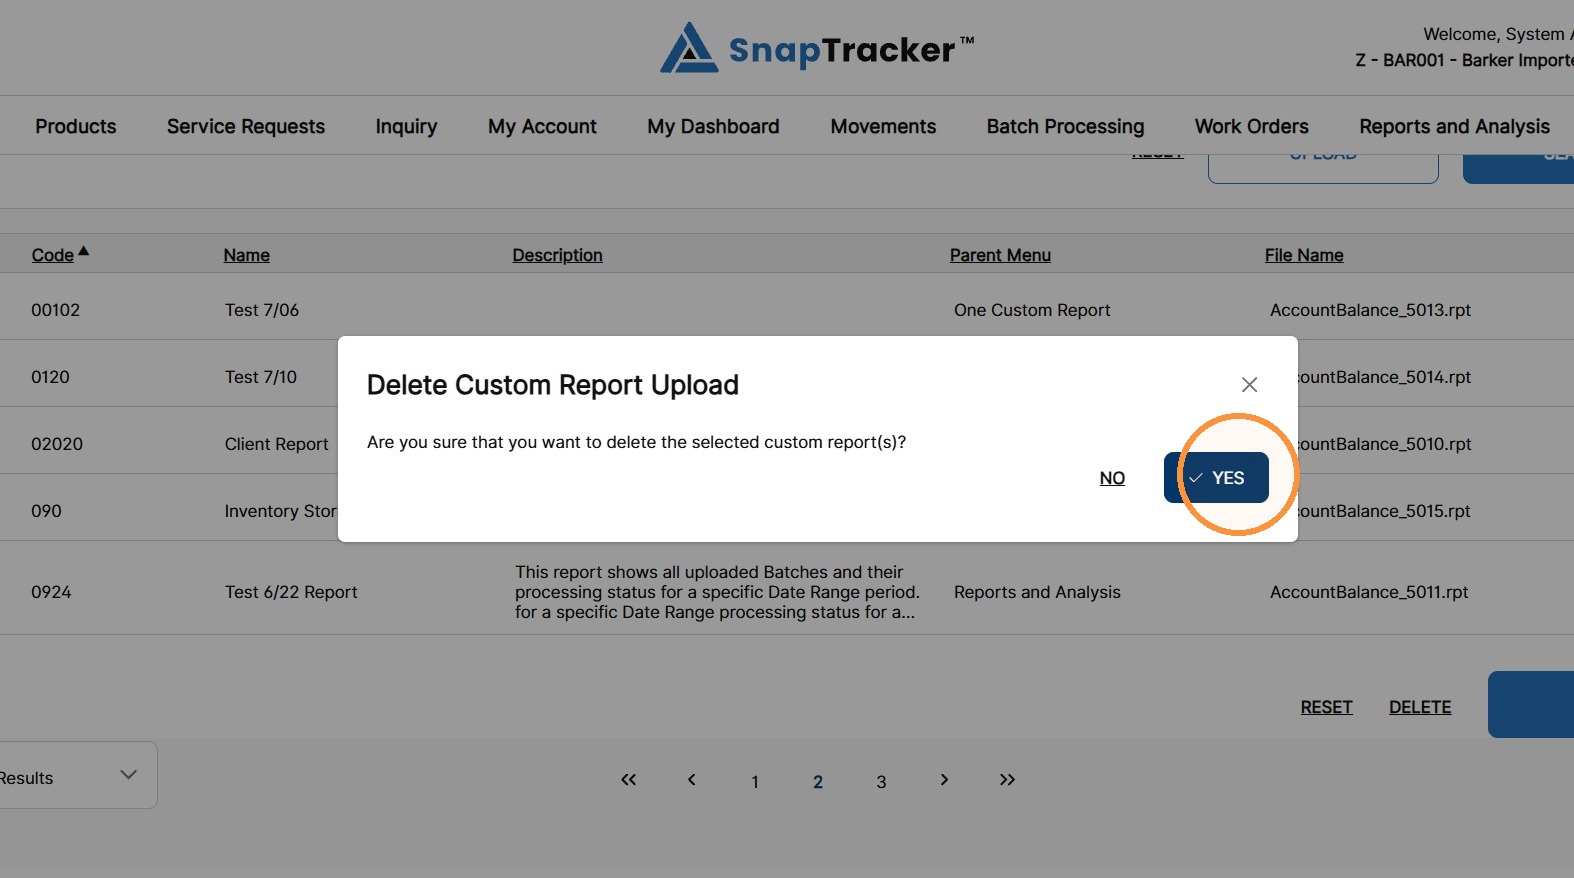
The Delete Custom Report Upload pop-up displays.
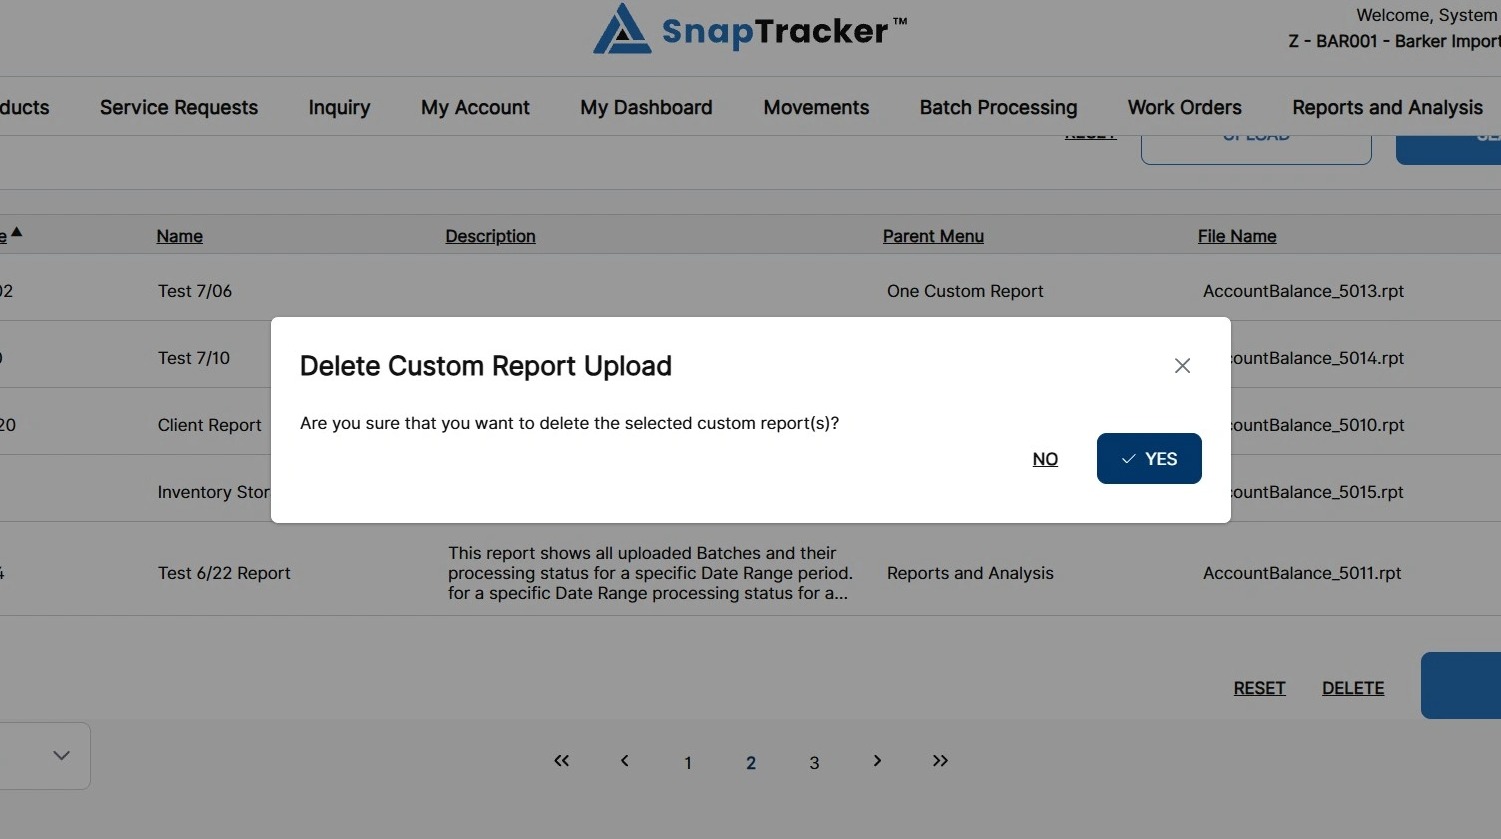
13. Click Yes to delete the selected custom report(s).
To cancel the delete, click No or X.
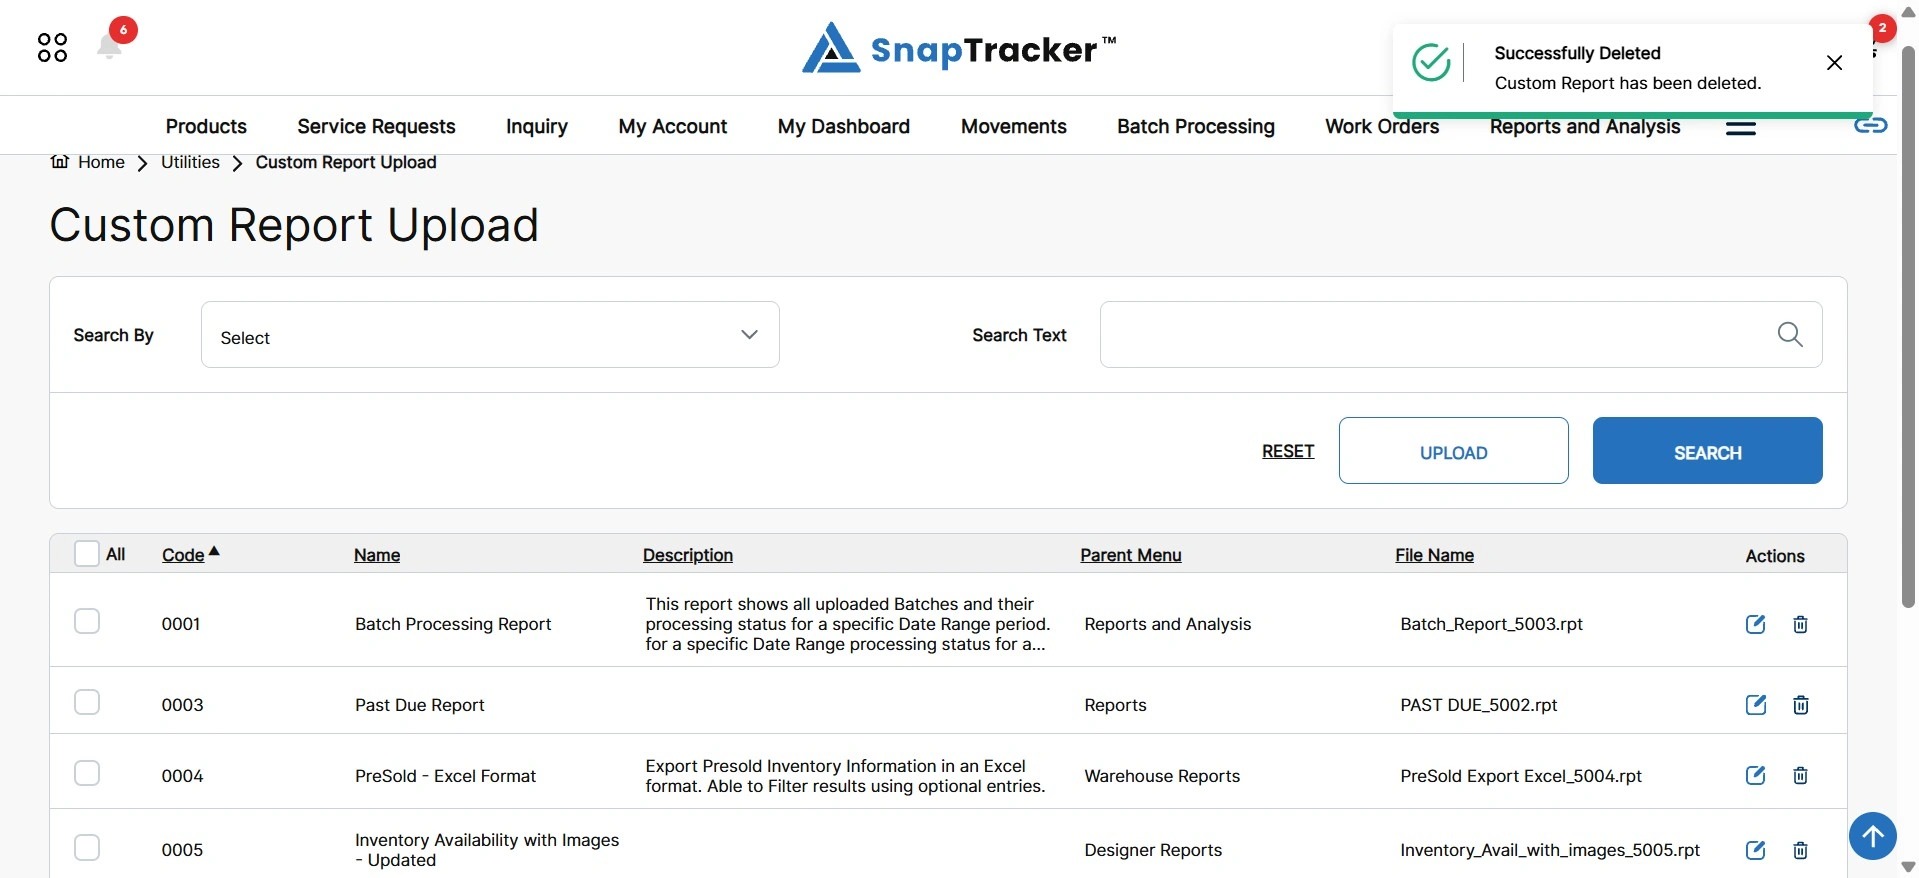
If the deletion is successful, a success message displays.
For more information on how to conduct a search for custom reports, see “How to Search for Custom Reports.”