
How to Create, Edit, and Delete Locations
Once Building and Location Types are created, the final step in setting up Buildings is creating Locations. These are the physical locations where product may be installed or stored (depending on the Building Type). When this final step is complete, the Buildings are available for product to be received in for any Customers created in the SnapTracker database.
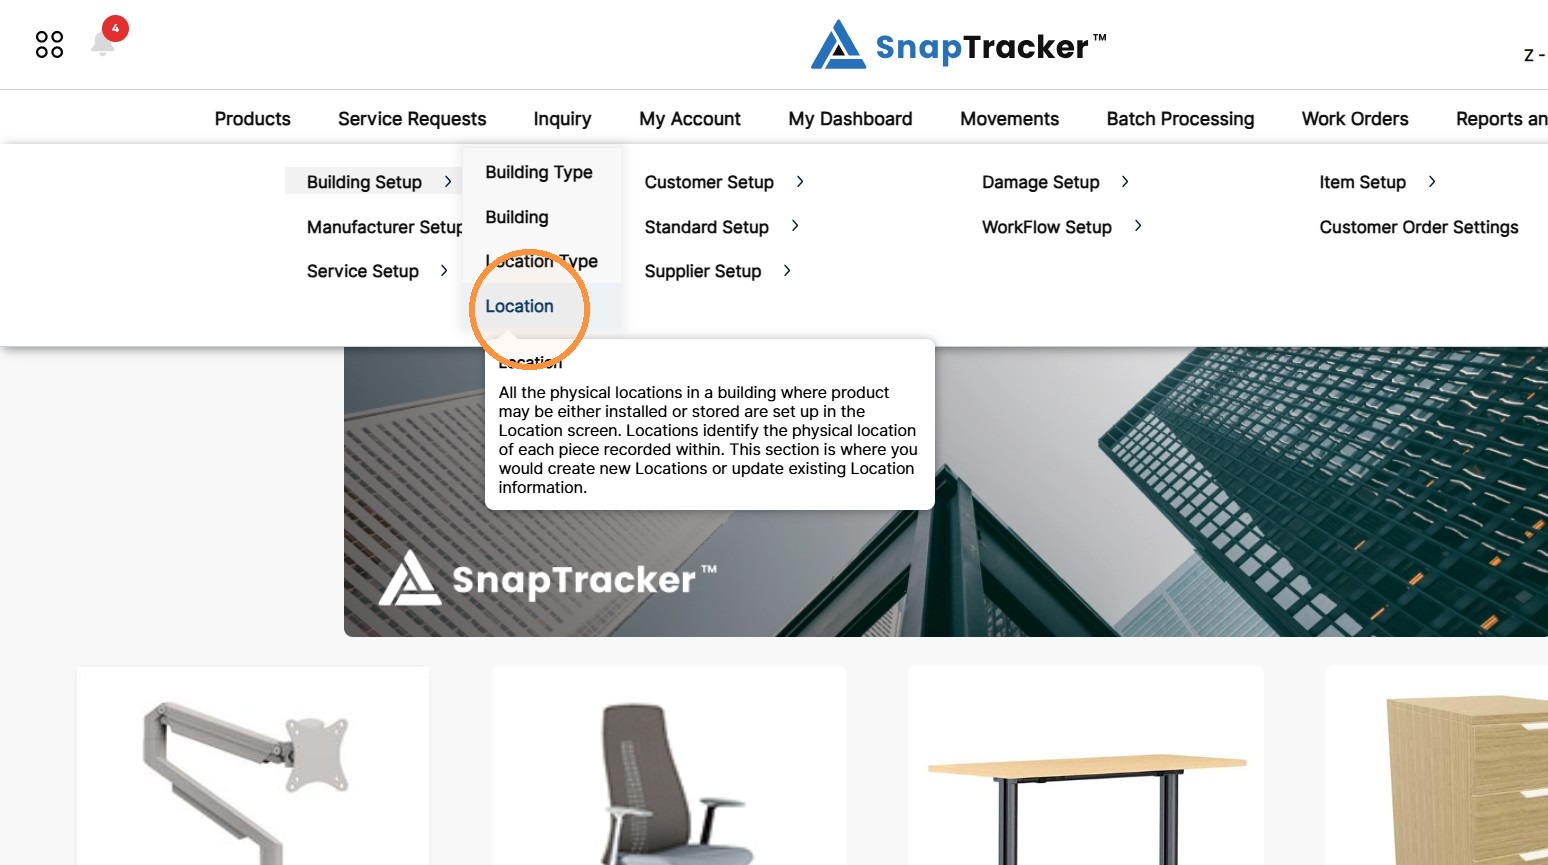
All the physical locations in a Building where product may be either installed or stored are found in the Location screen.
The Location screen enables you to manage the Locations across your SnapTracker site. Locations are set up once and accessible to all Customers on the site. The Location screen enables you to conduct a search through all existing Locations, based on the specified Building, to view details and last update dates. You may create, edit, or delete a Location as desired. Note: A Location can only be deleted when it is empty.
Before starting, make sure:
- You are logged into SnapTracker.
- You have access to the Setup – Location screen.
This post outlines how to create, edit and delete Locations on your SnapTracker site.
1. In the header section, click Setup.
Note: Depending on your browser, you may need to click the View menu items icon to see Setup.
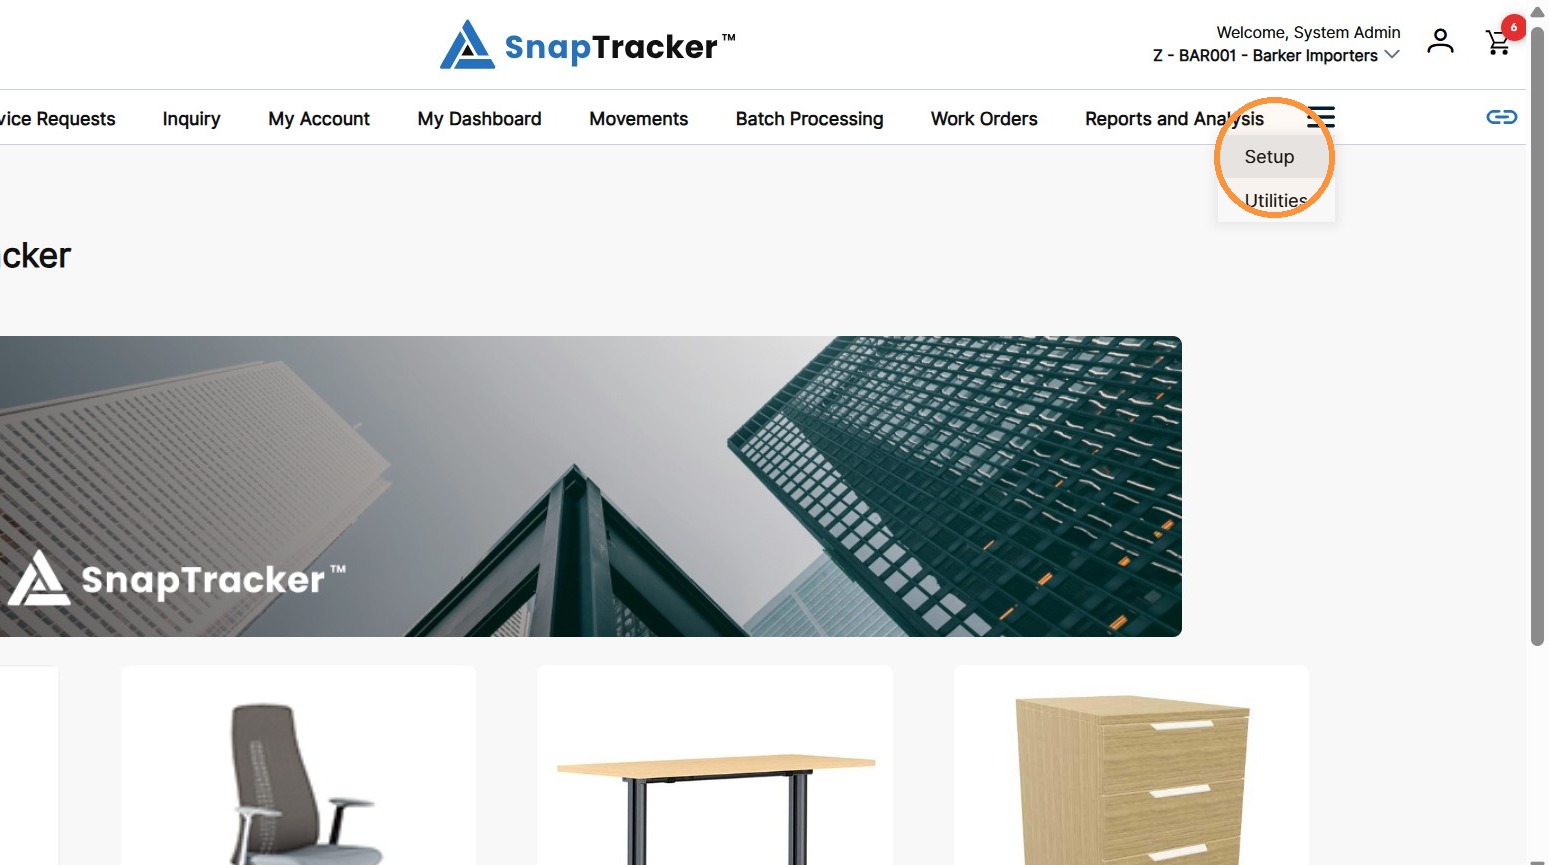
2. Click the arrow beside Building Setup, then click Location.
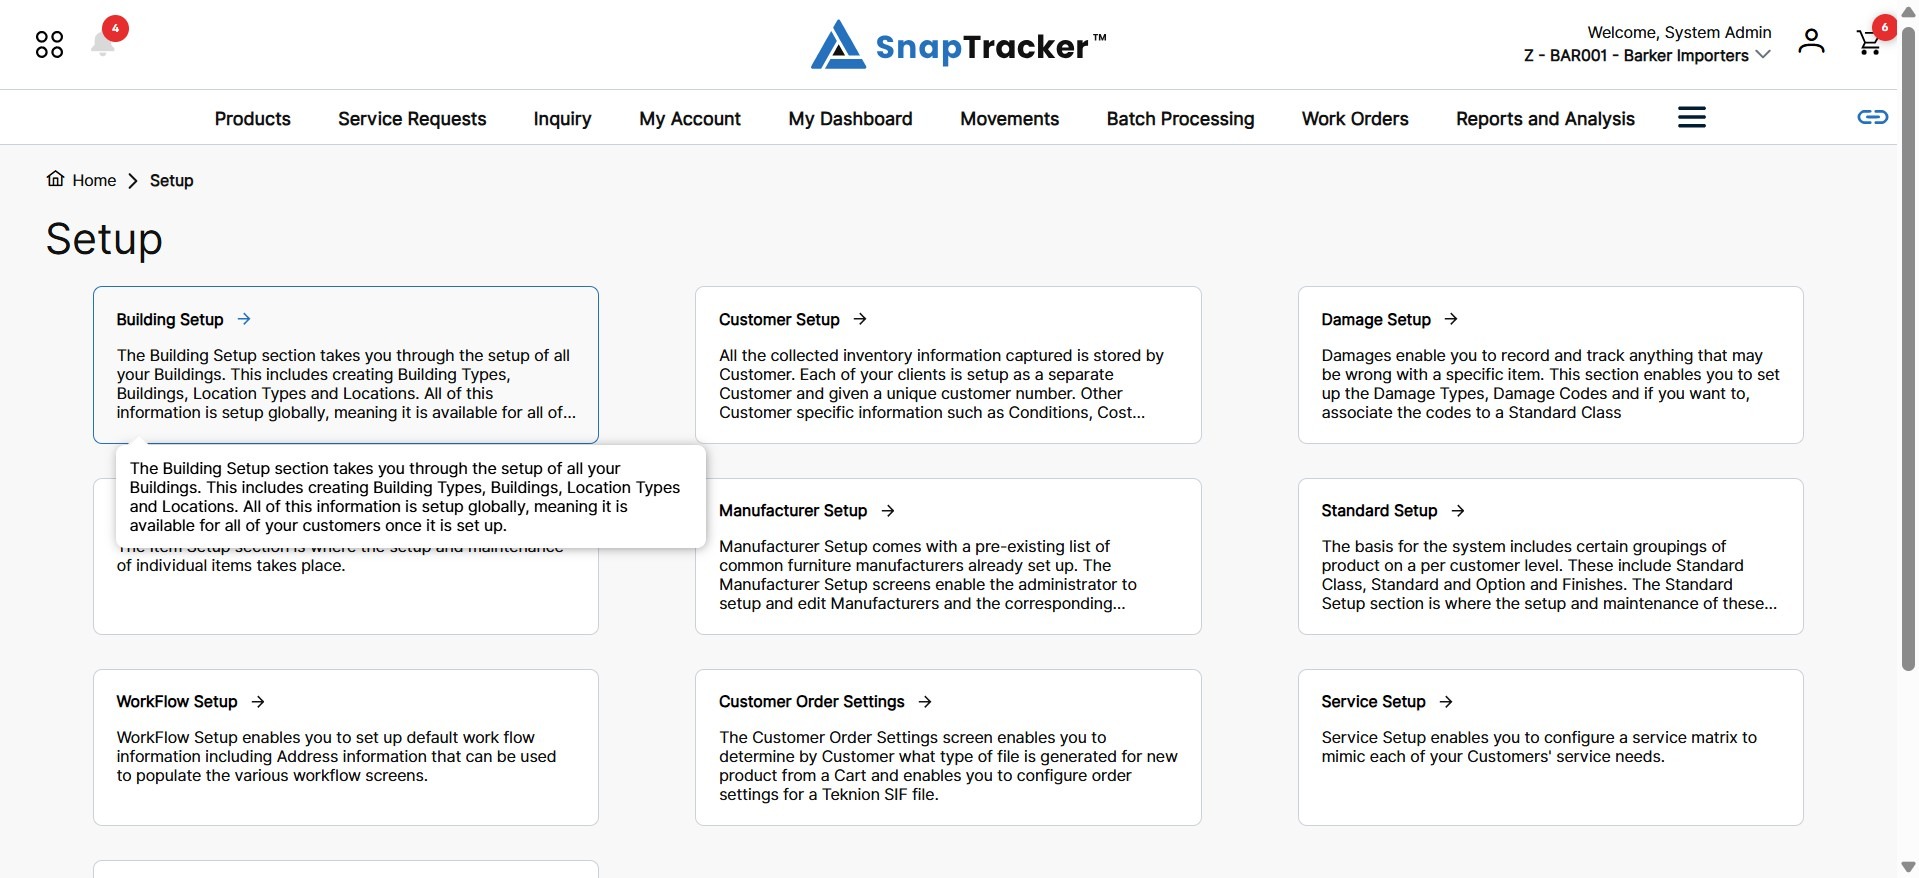
Another way to access the Location screen is to navigate to the Setup main screen.
From here, select Building Setup.
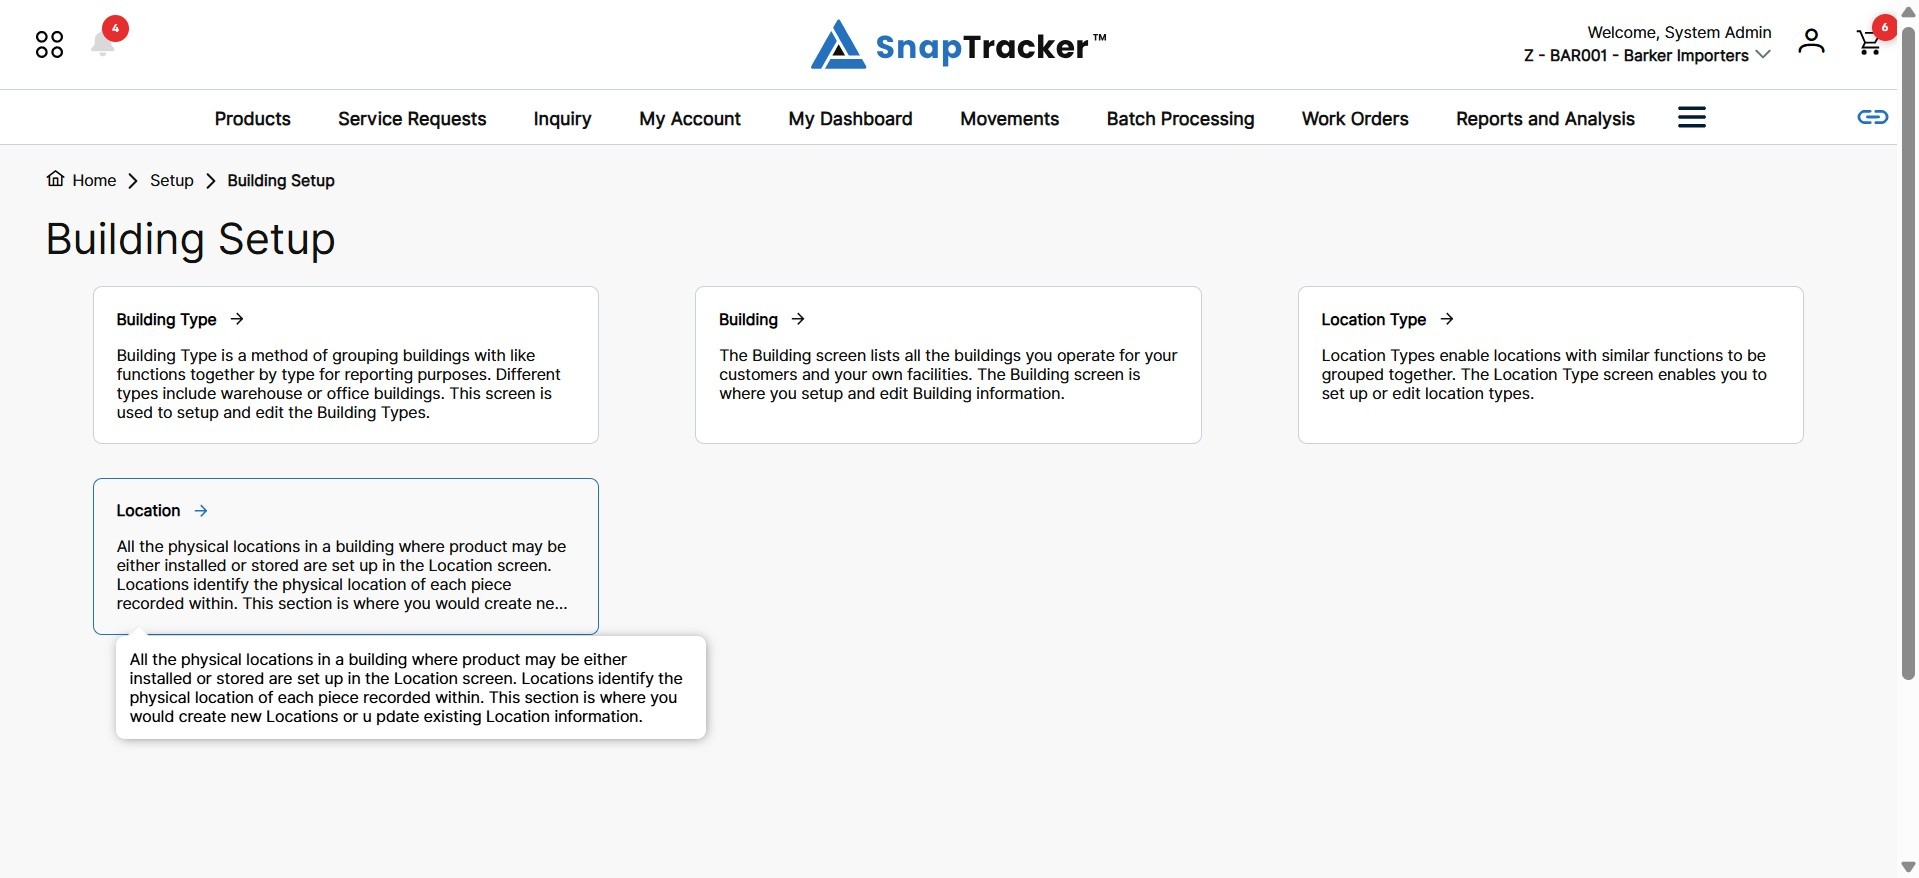
The Building Setup screen displays.
From here, select Location.
The Location screen displays.
Note: By default, no results display.
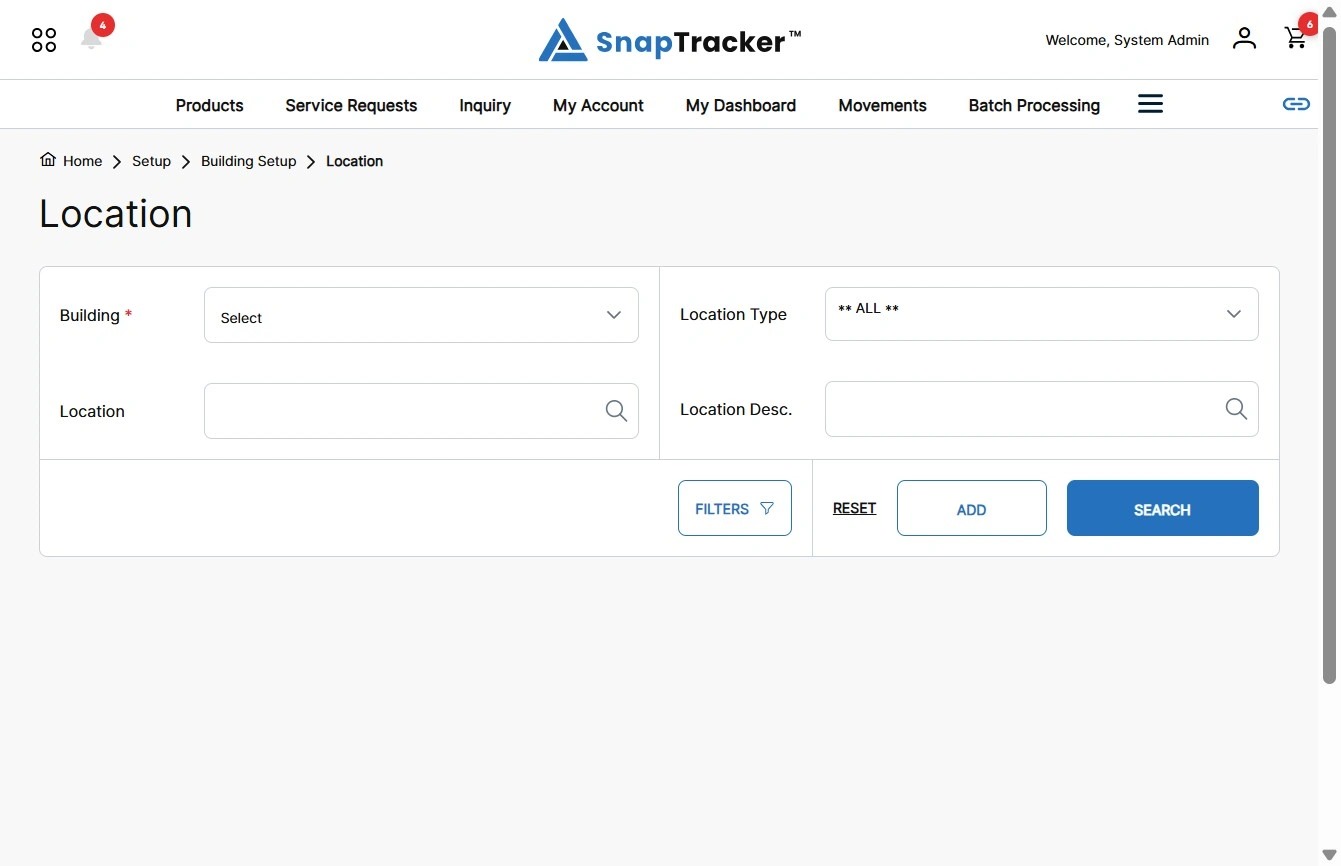
3. To create a new Location, click Add.
Note: You can only create one Location at a time. The Add button becomes disabled until the new Location is created or the action is canceled.
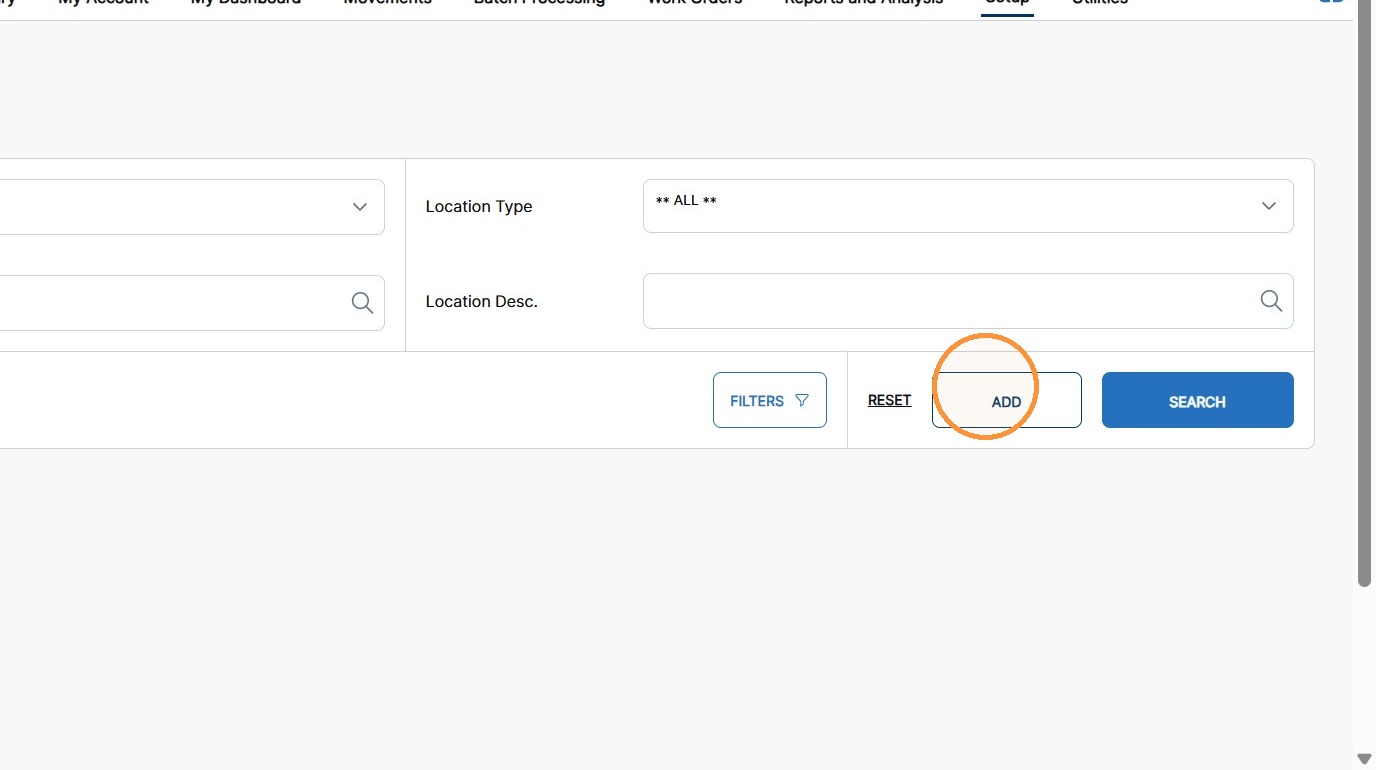
A new, empty record displays in the results table.
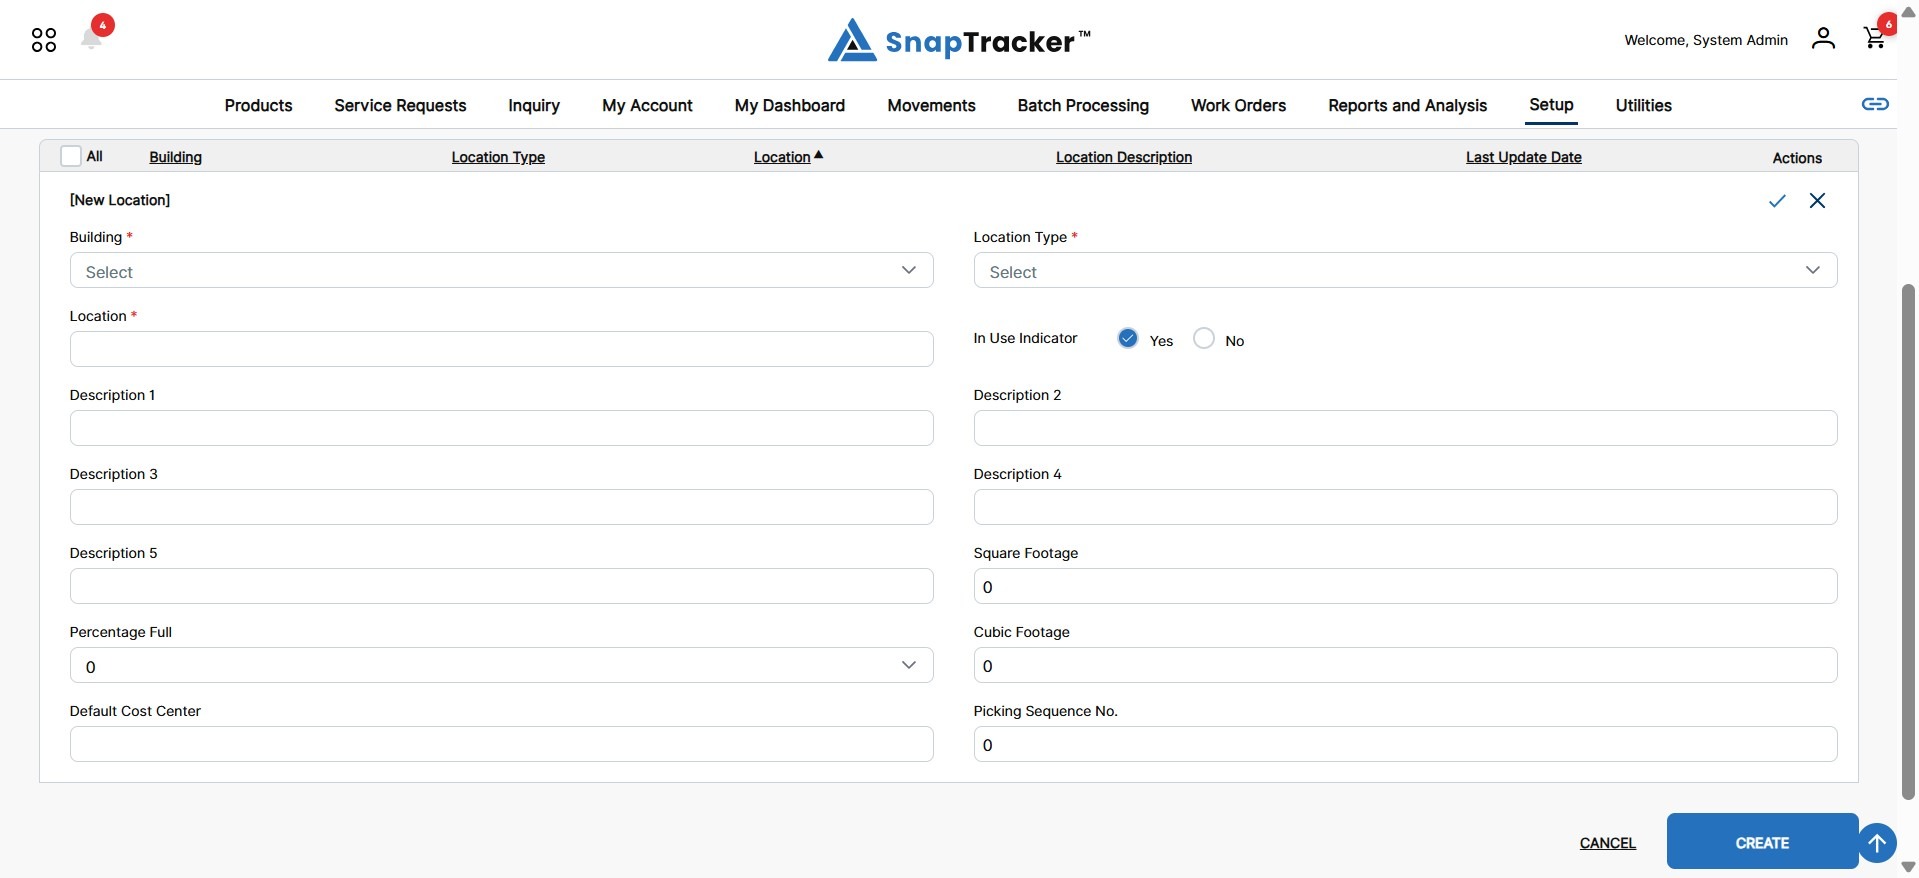
Observe the fields to input in for the new Location:
- Building – The Building the Location is created in.
- Location Type – The Location Type associated with the Location.
- Location – The Location ID. (Maximum 10 characters).
- In Use Indicator – Indicates whether or not the Location is in use. Note: This influences whether the products in this Location show up for inquiry searches and movements.
- Description 1 – The first description of the Location. (Maximum 30 characters).
- Description 2 – The second description field of the Location. (Maximum 30 characters).
- Description 3 – The third description field of the Location. (Maximum 30 characters).
- Description 4 – The fourth description field of the Location. (Maximum 30 characters).
- Description 5 – The fifth description field of the Location. (Maximum 30 characters).
- Square Footage – The square footage of the Location, if applicable. (Maximum 8 digits).
- Cubic Footage – The cubic footage of the Location, if applicable. (Maximum 8 digits).
- Percentage Full – The percentage of the Location’s capacity that is currently occupied.
- Default Cost Center – The default cost center for the Location. This is your company’s own cost center or department that uses the specified space. (Maximum 50 characters).
- Picking Sequence No. – The picking sequence number for the Location. This number identifies different areas in your warehouse in relation to the shipping/receiving dock door. This can be used when creating a Work Order Ticket (WOT). (Maximum 2 digits).
Note: The required fields are indicated by an asterisk.
4. To create a new Location, populate the desired fields and click the checkmark icon or Create.
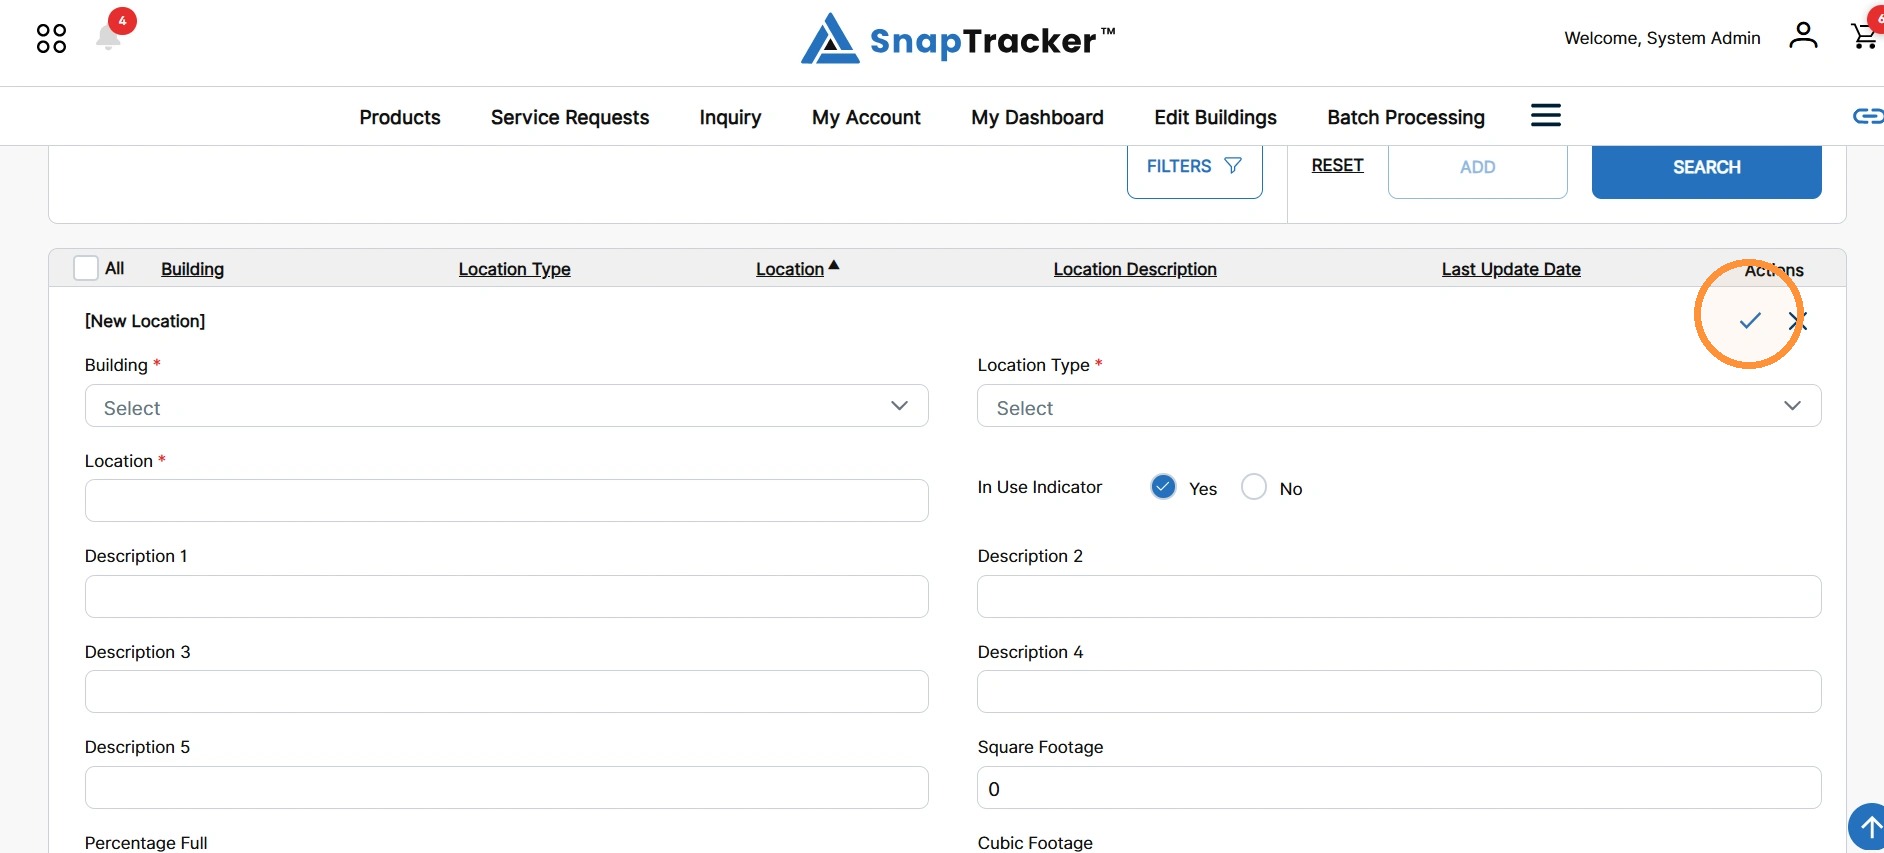
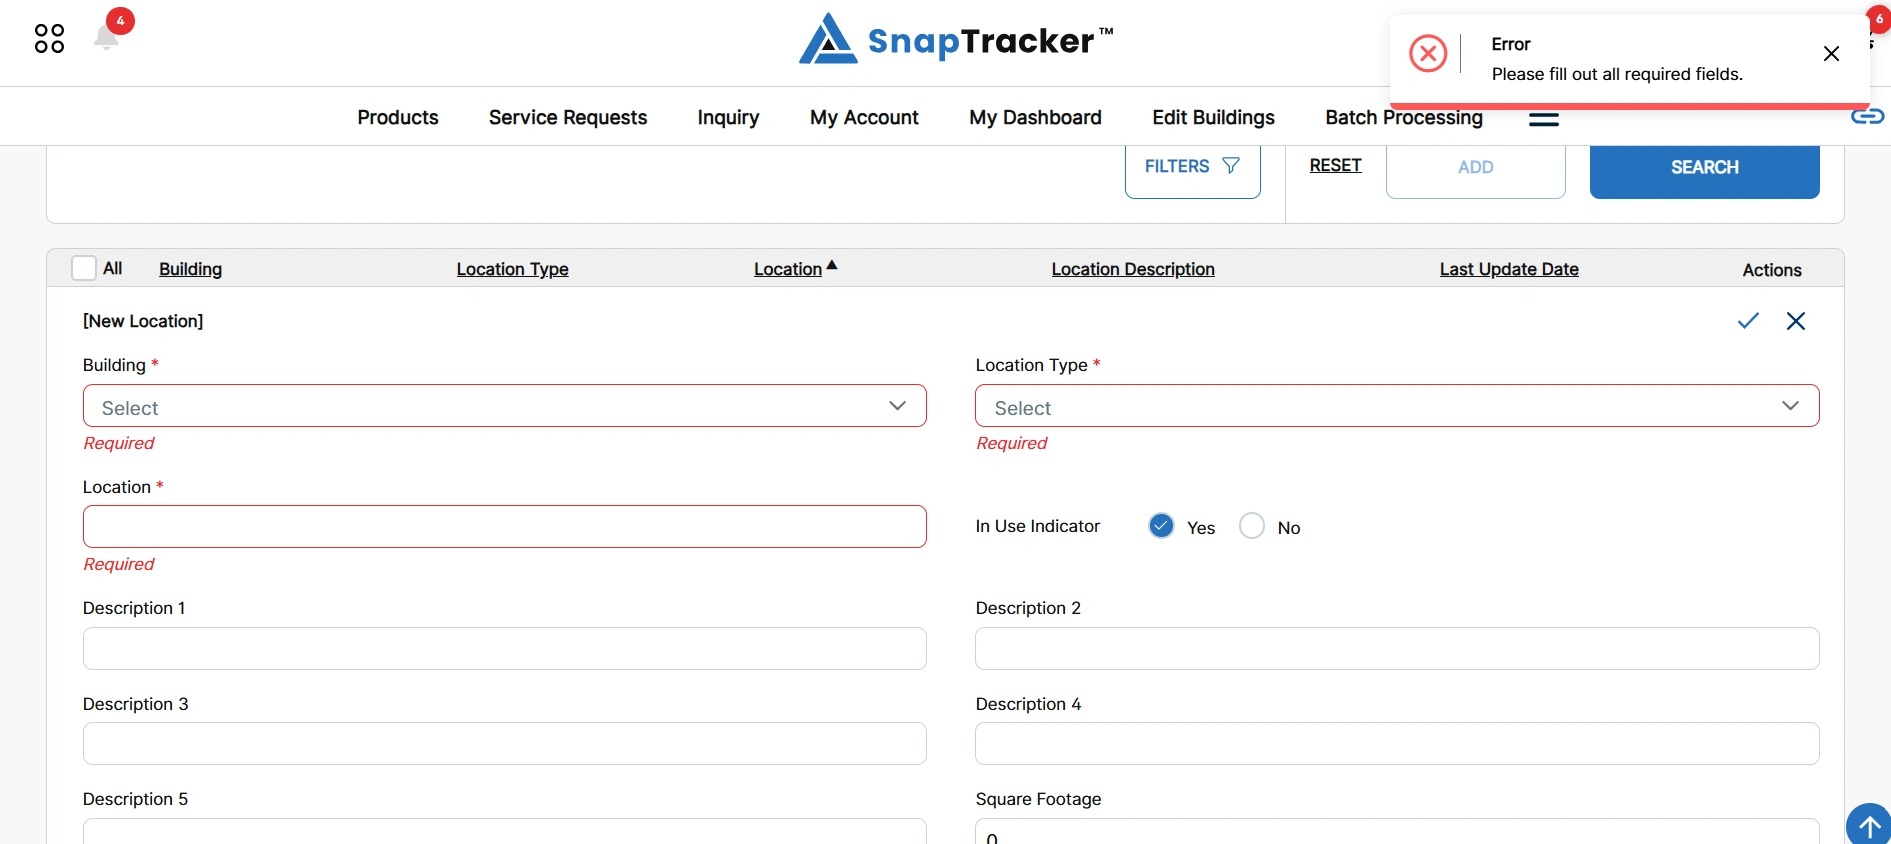
If any required fields are missing, the missing field is highlighted and Required displays below.
An error message displays, indicating that all required fields need to be entered.
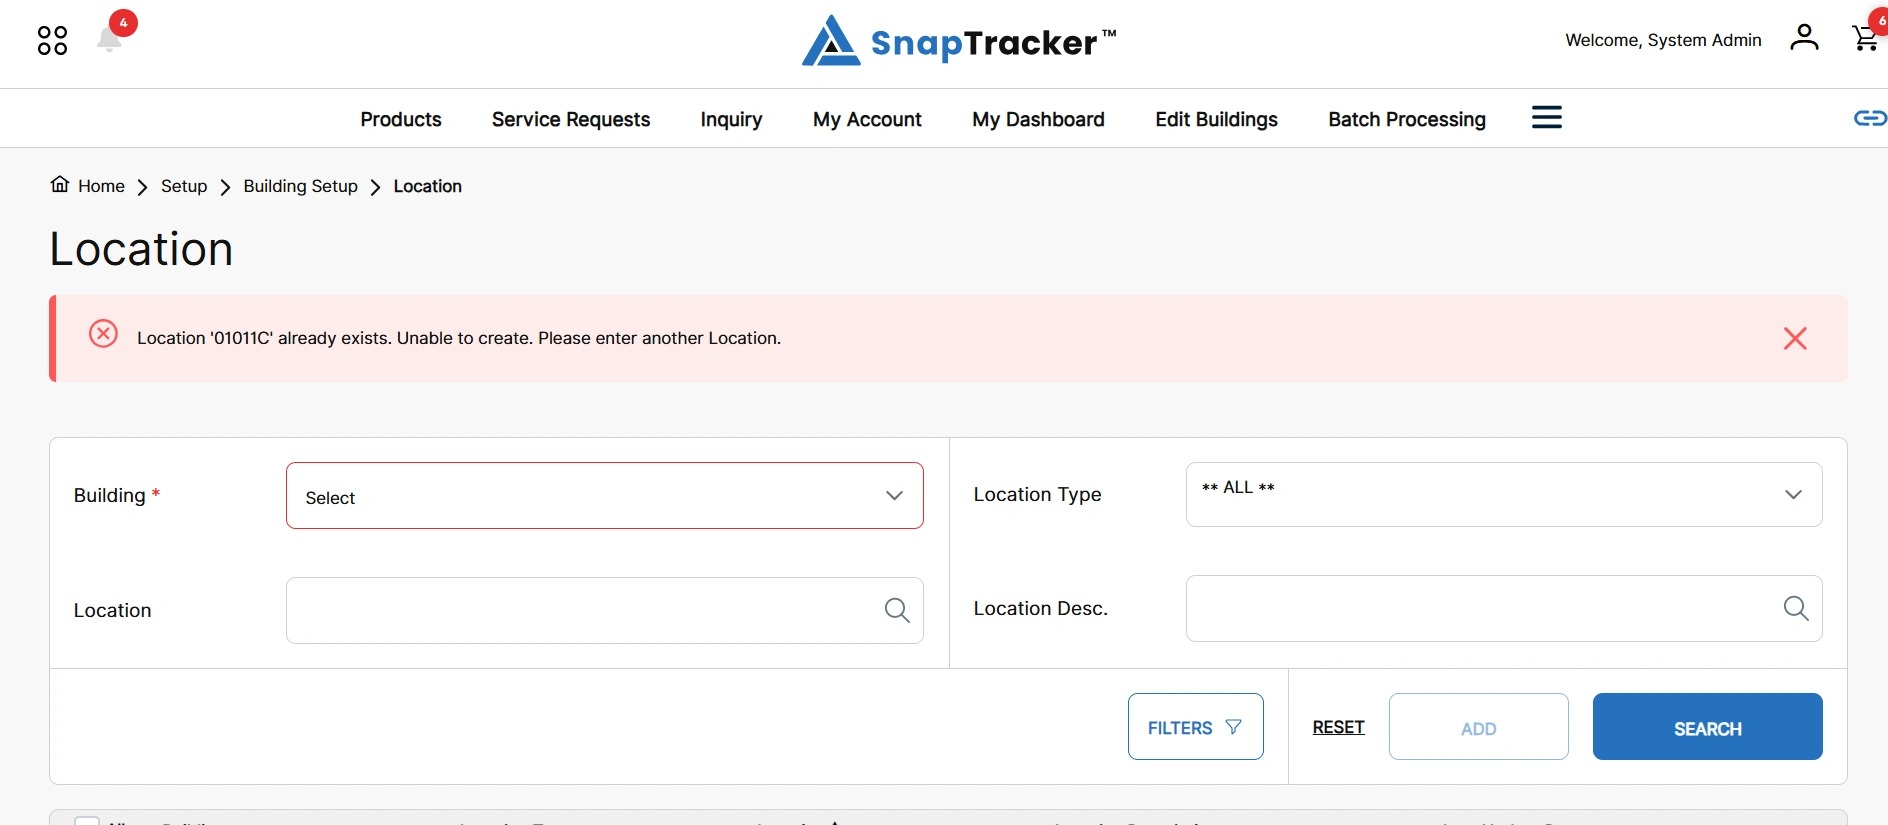
If a Location within the selected Building already exists with the same Location ID, an error banner displays, indicating that the Location already exists.
Note: A Location can be created in another Building with the same ID.
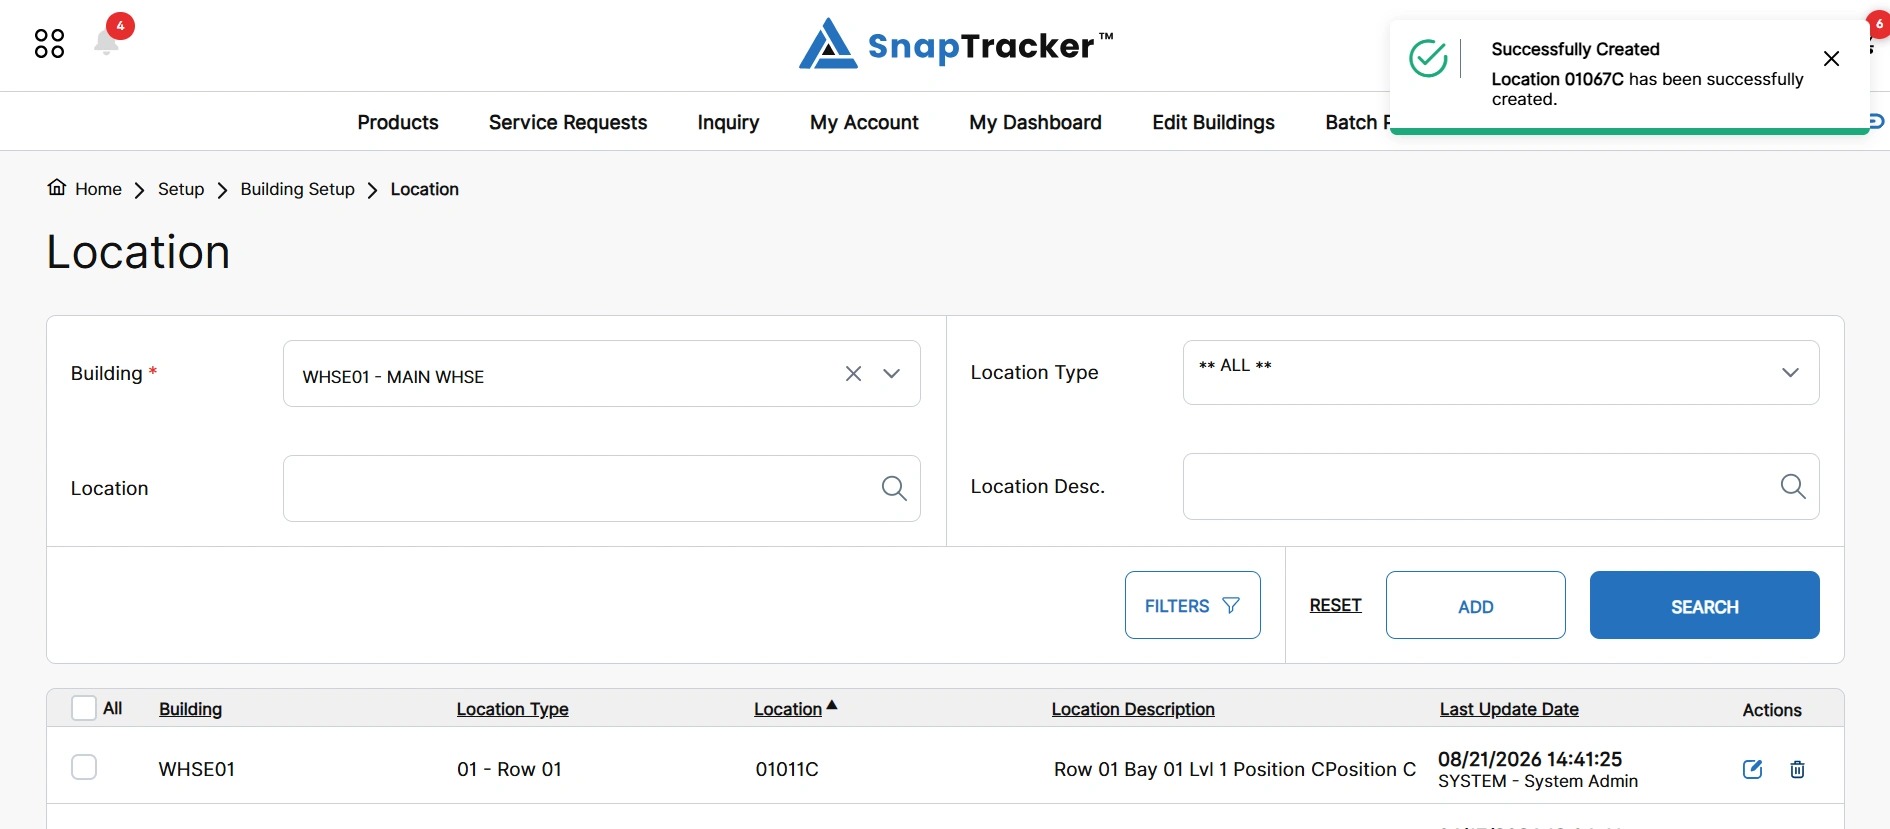
If the new Location is created successfully, a success message displays.
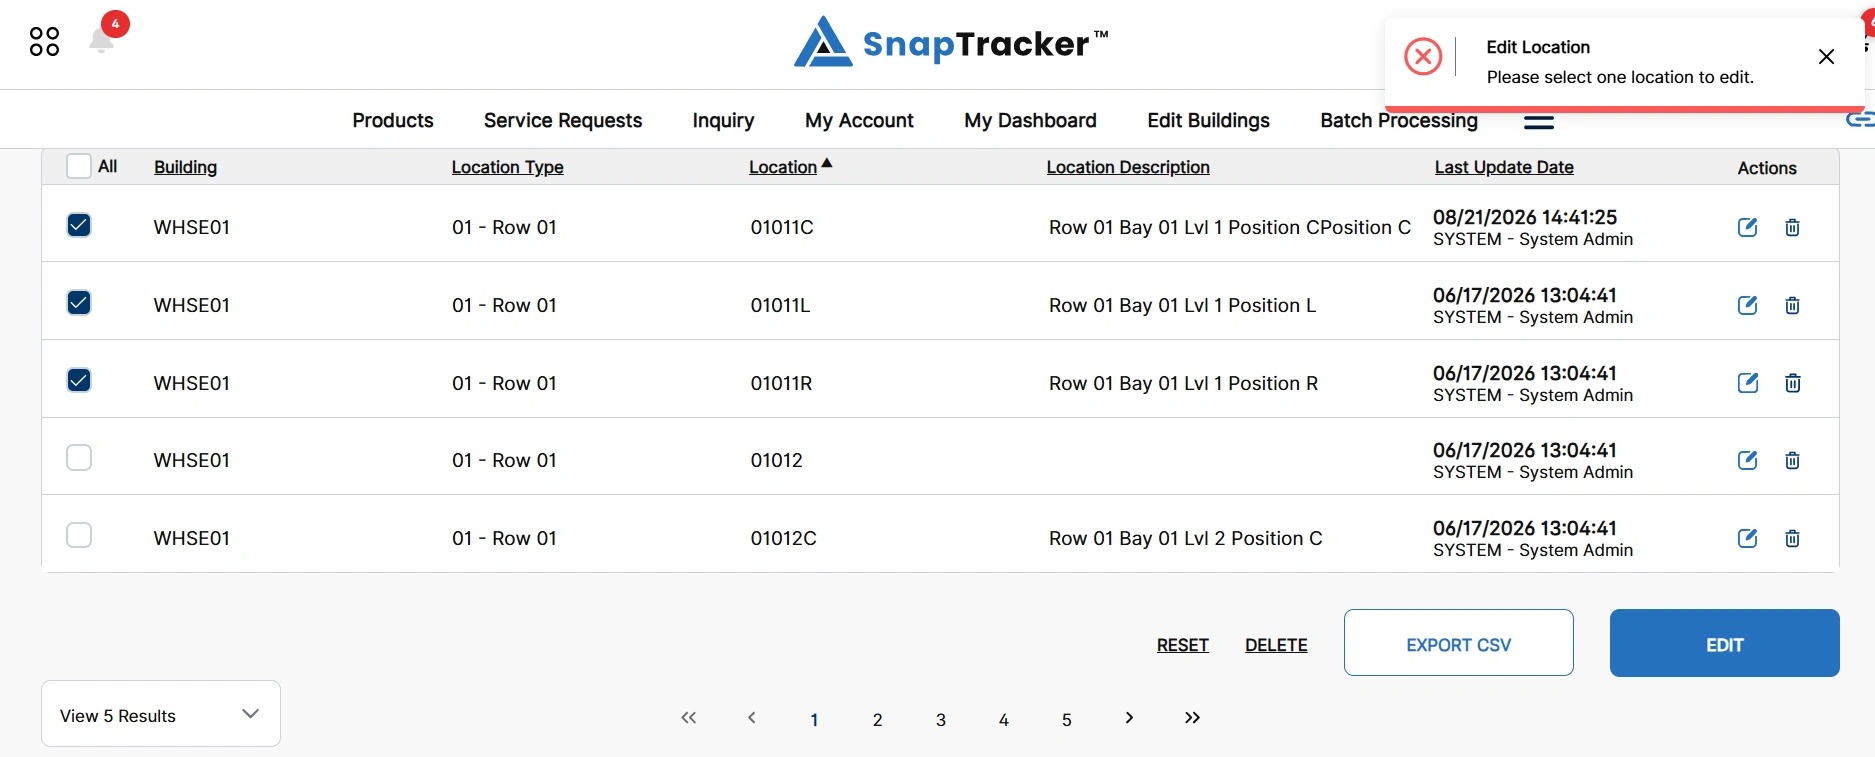
5. To edit a Location, click the Edit icon for an individual Location, or select the checkbox of the desired Location and click the global Edit button.
Note: You can only edit one Location at a time.
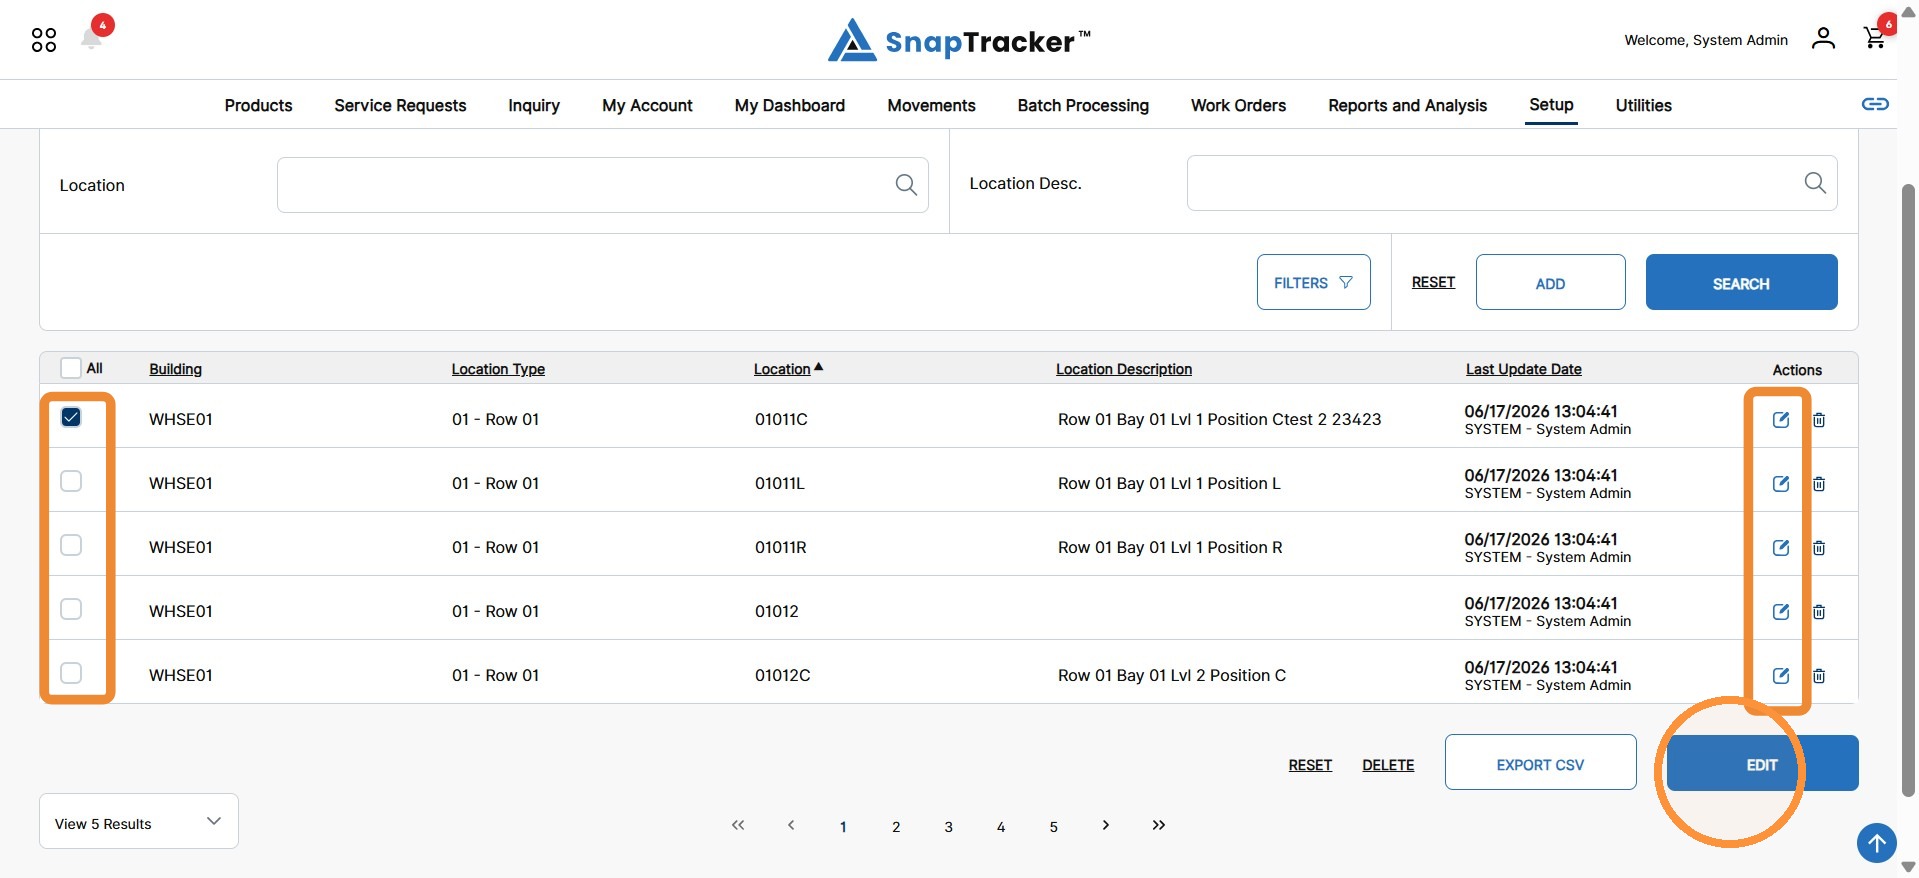
If multiple Locations are selected for edit, an error message displays.
The selected Location changes to Edit mode, where editable fields are enabled.
Note: The Location field is disabled because it is a primary key and cannot be modified after creation. If the field is incorrect, delete and re-create a new Location.
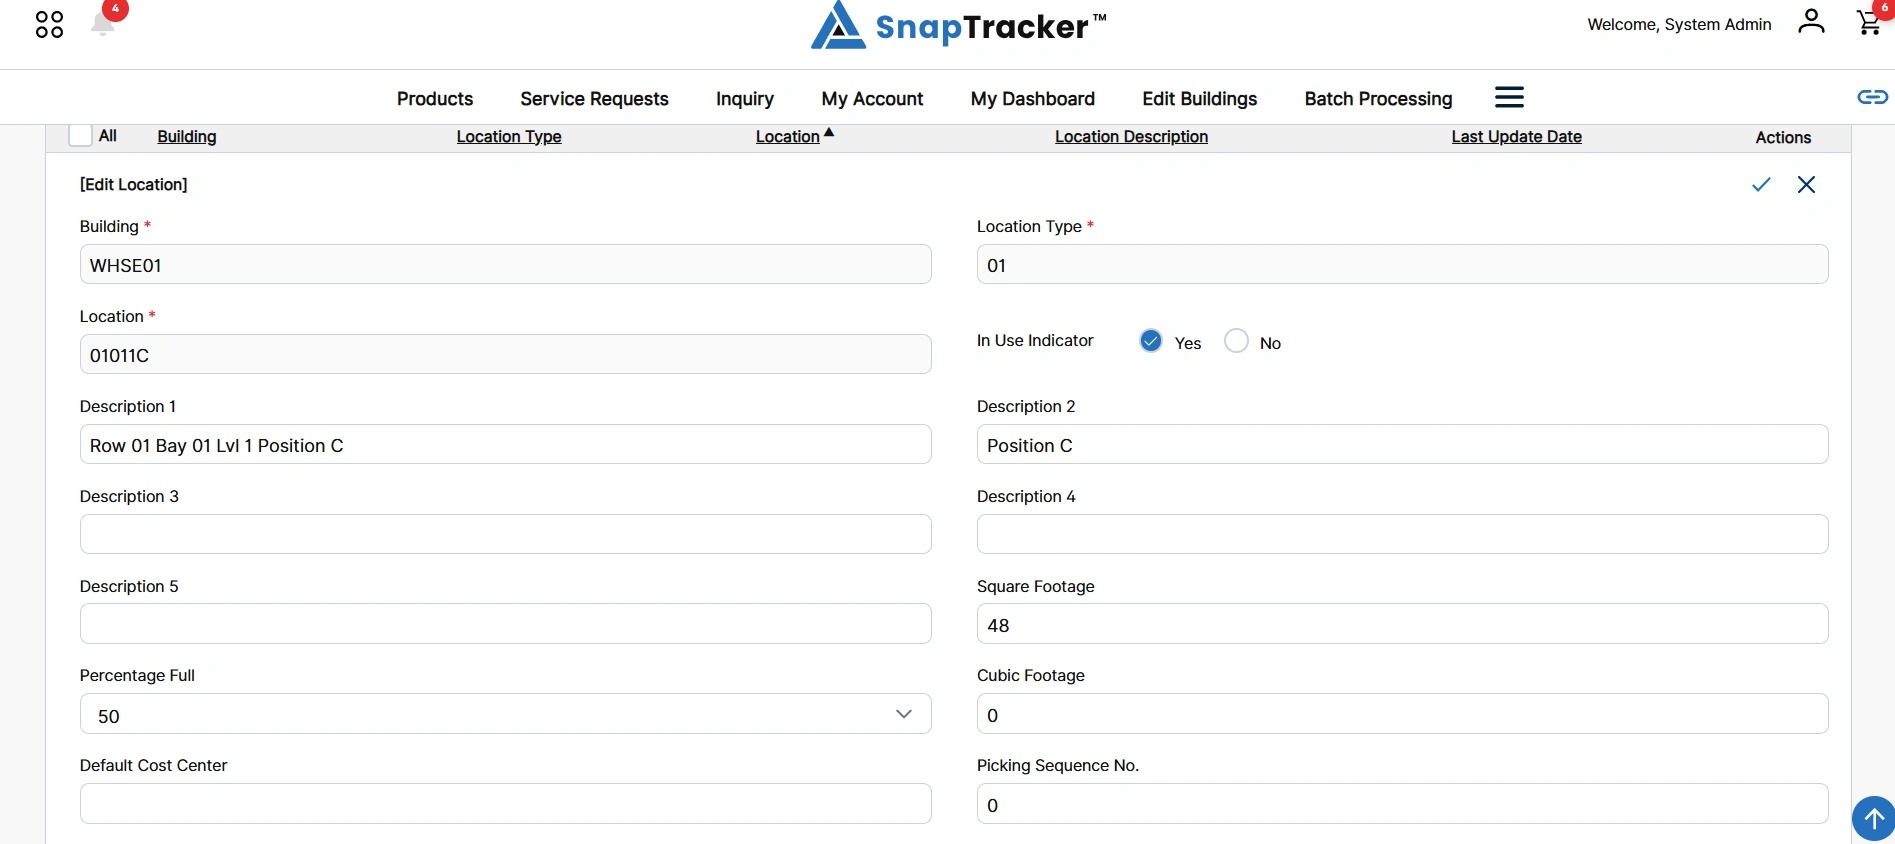
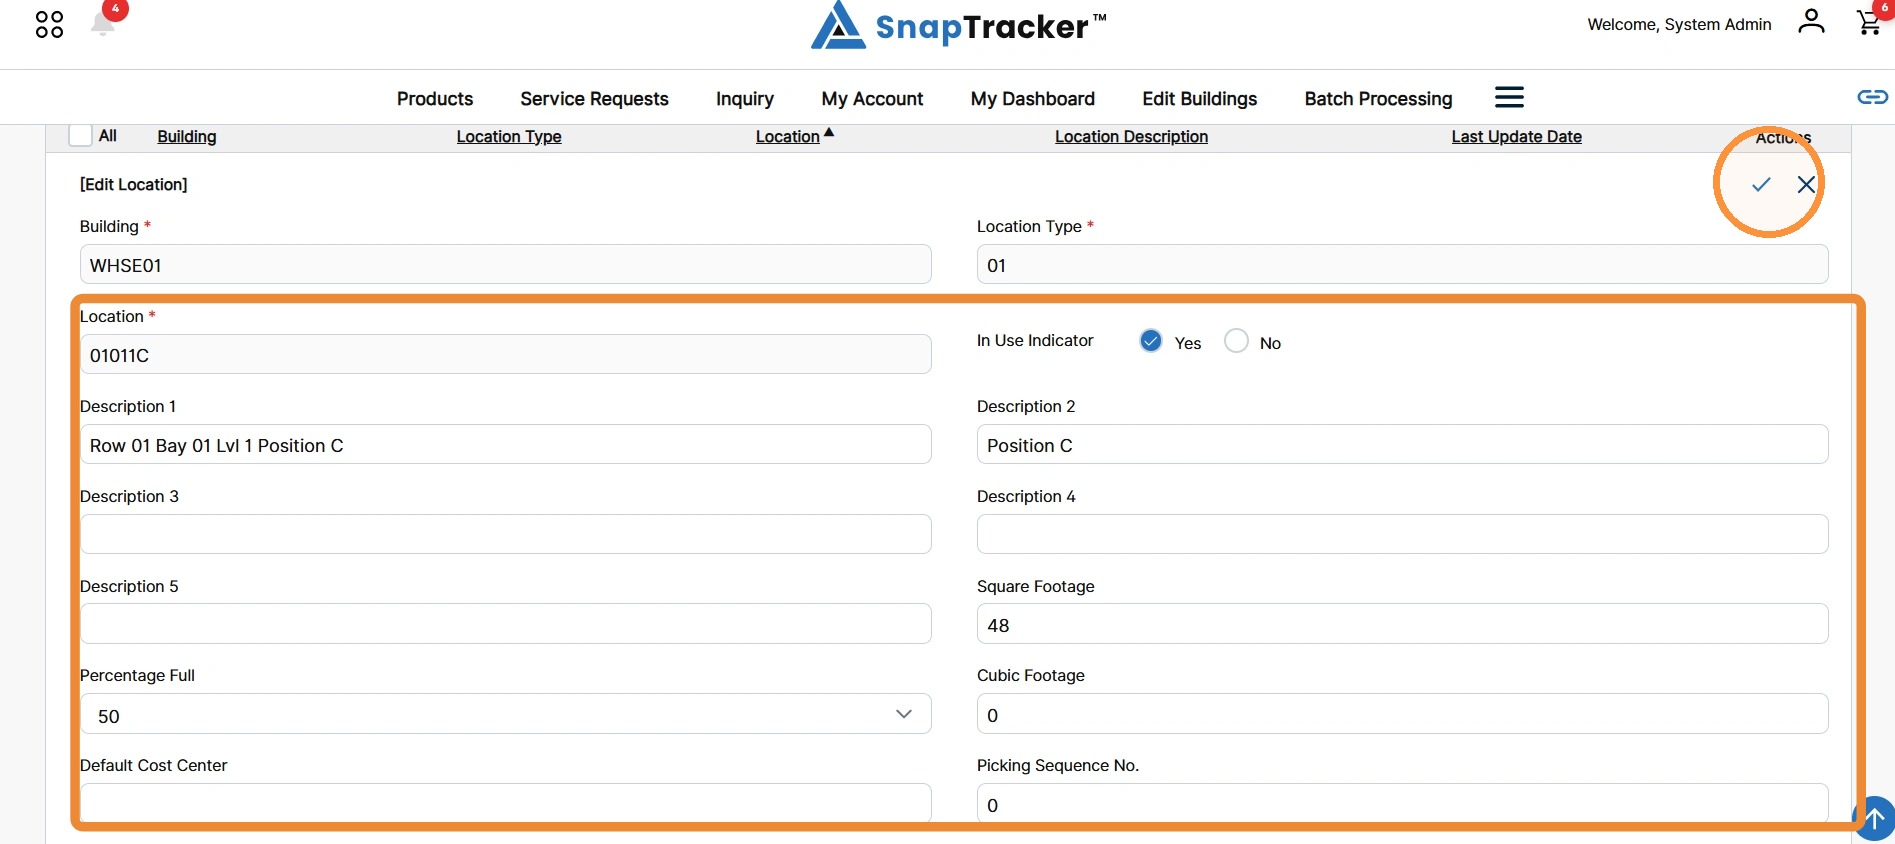
6. Edit the desired fields.
To save changes, click the checkmark icon for an individual Location, or click the global Update.
To cancel, click Cancel or the X icon for an individual Location.
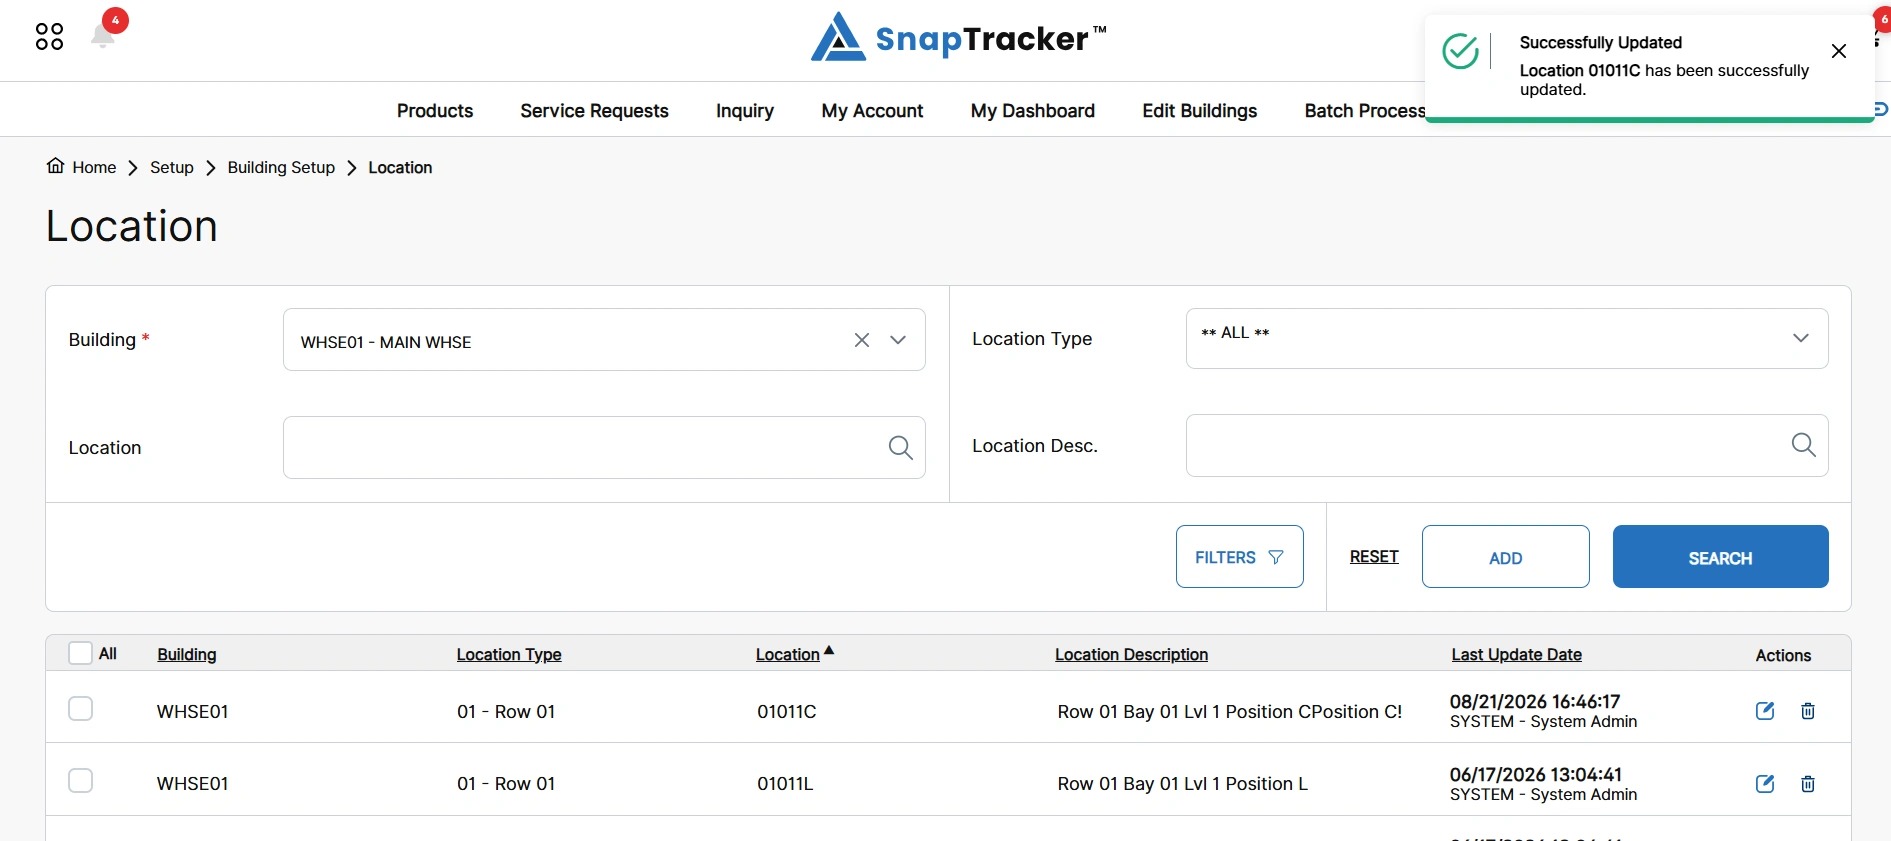
The Location updates with the applied changes and the success message displays.
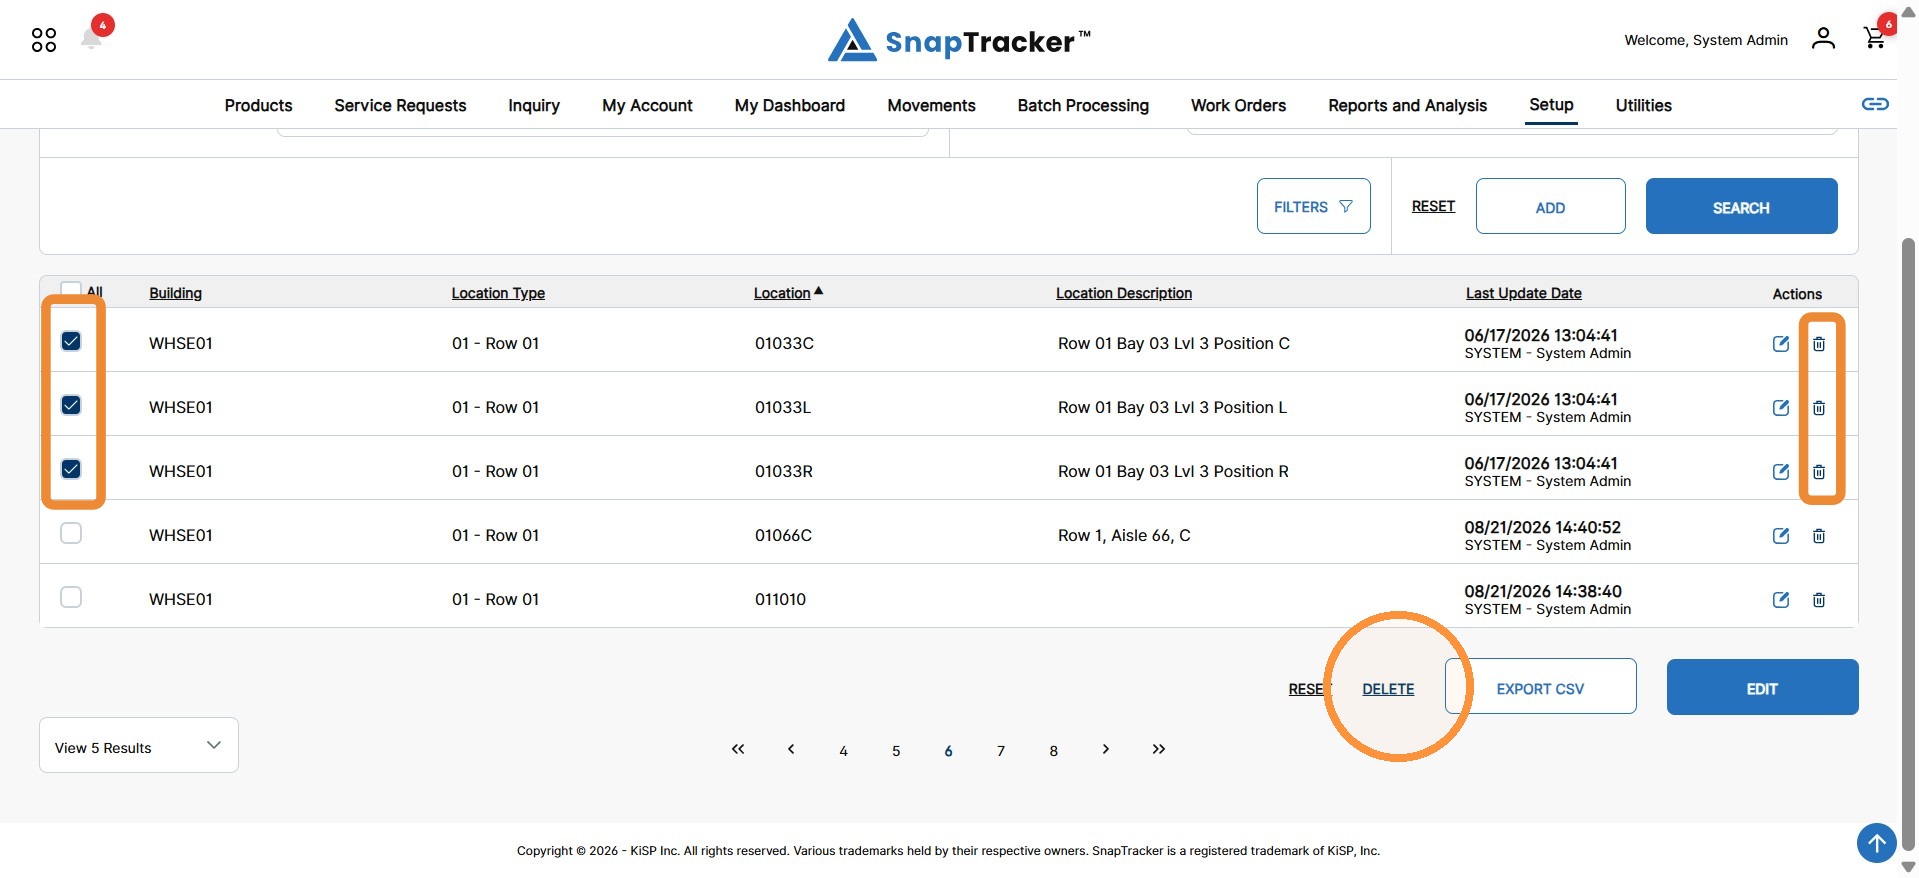
7. To delete a Location(s), select the checkbox(es) beside the desired Location(s) and click the global Delete, or click the individual trash icons.
Note: A Location can only be deleted when it is empty.
The Delete Location pop-up displays.
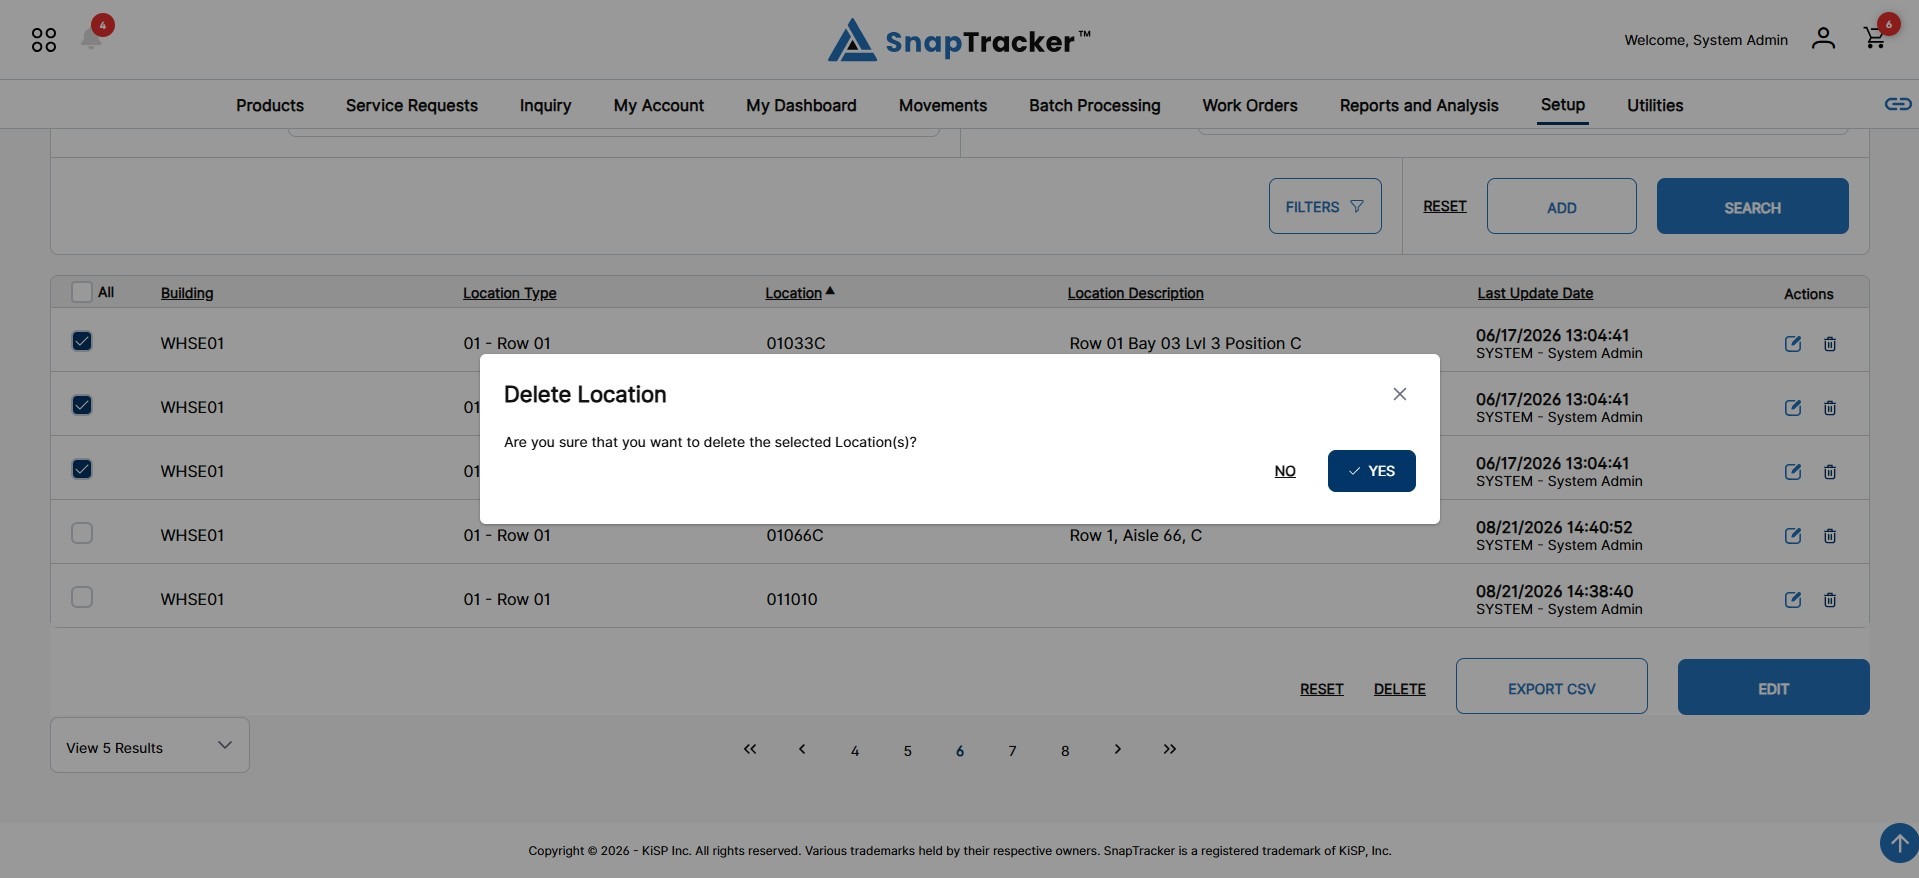
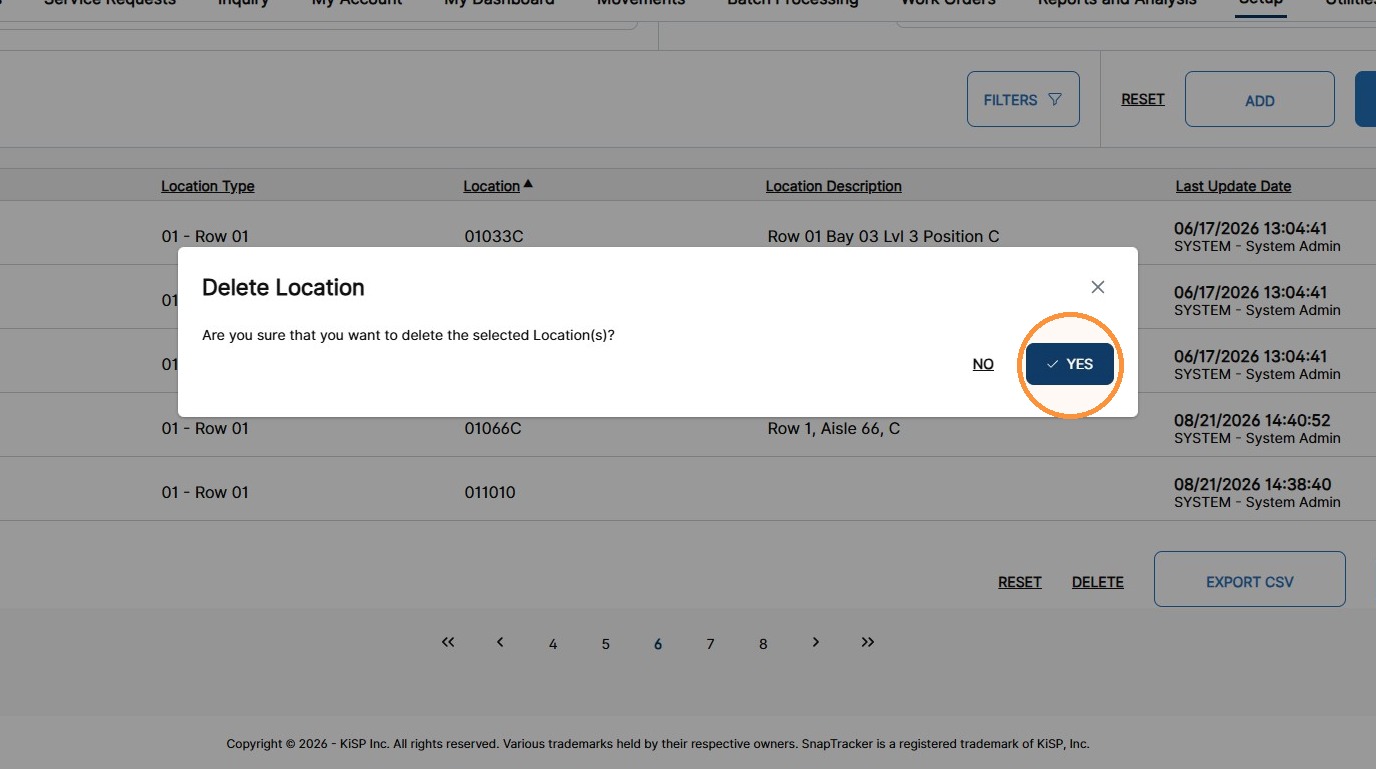
8. Click Yes to delete the selected Location(s).
To cancel the delete, click No or X.
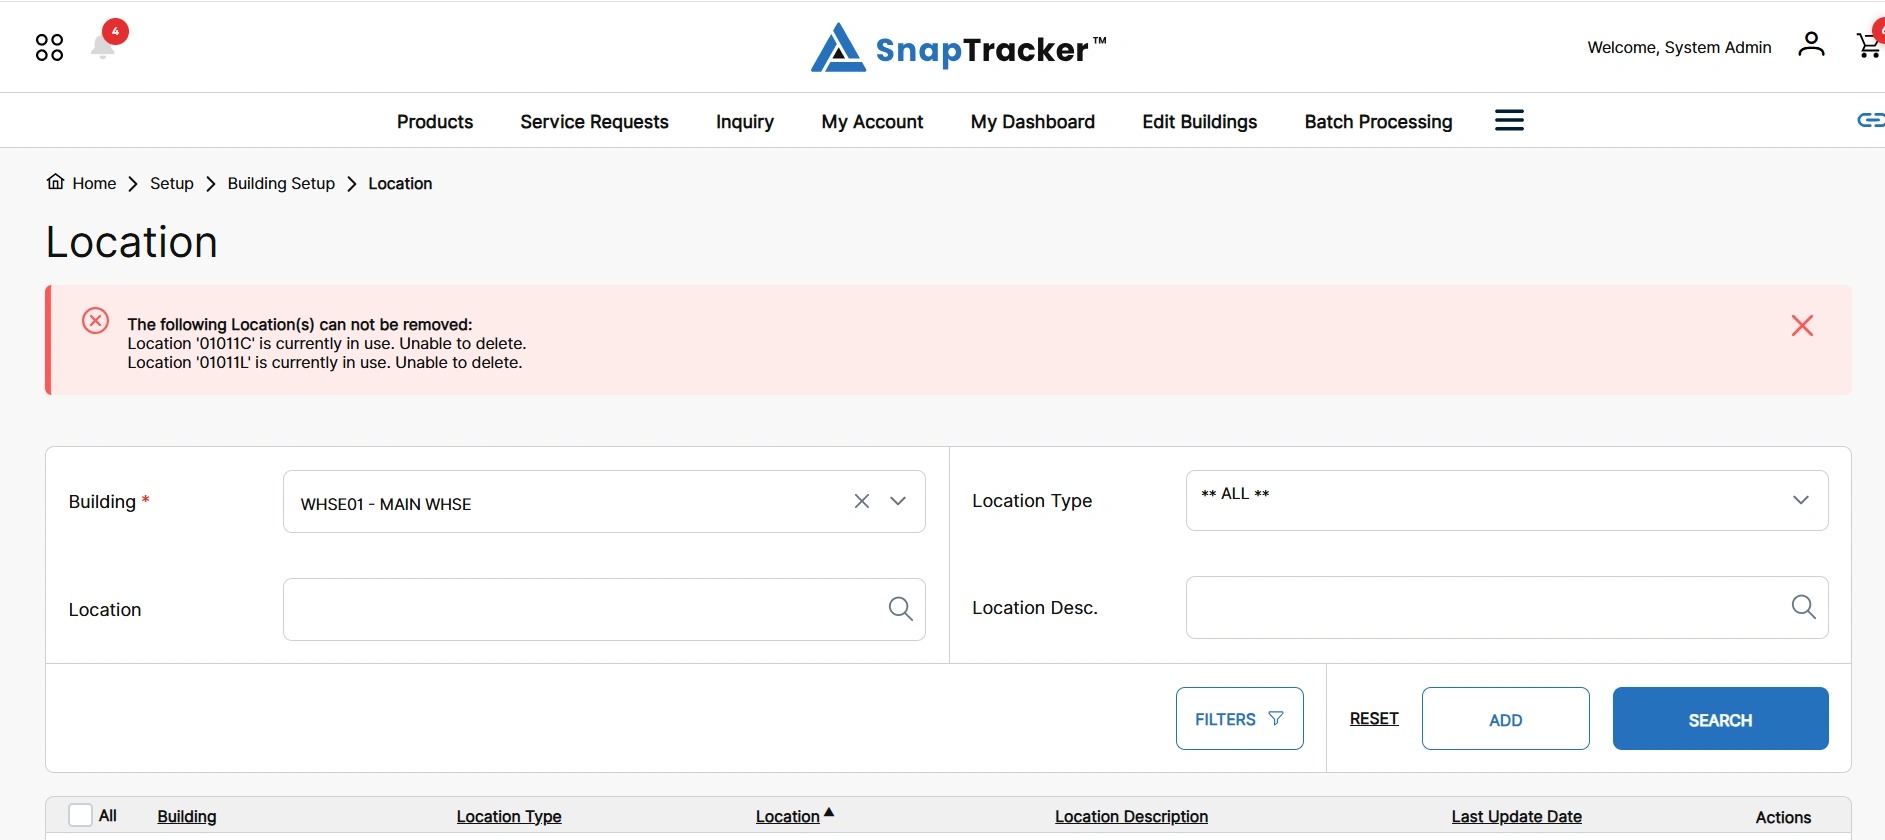
If the Location is in use and deletion fails, an error message displays.
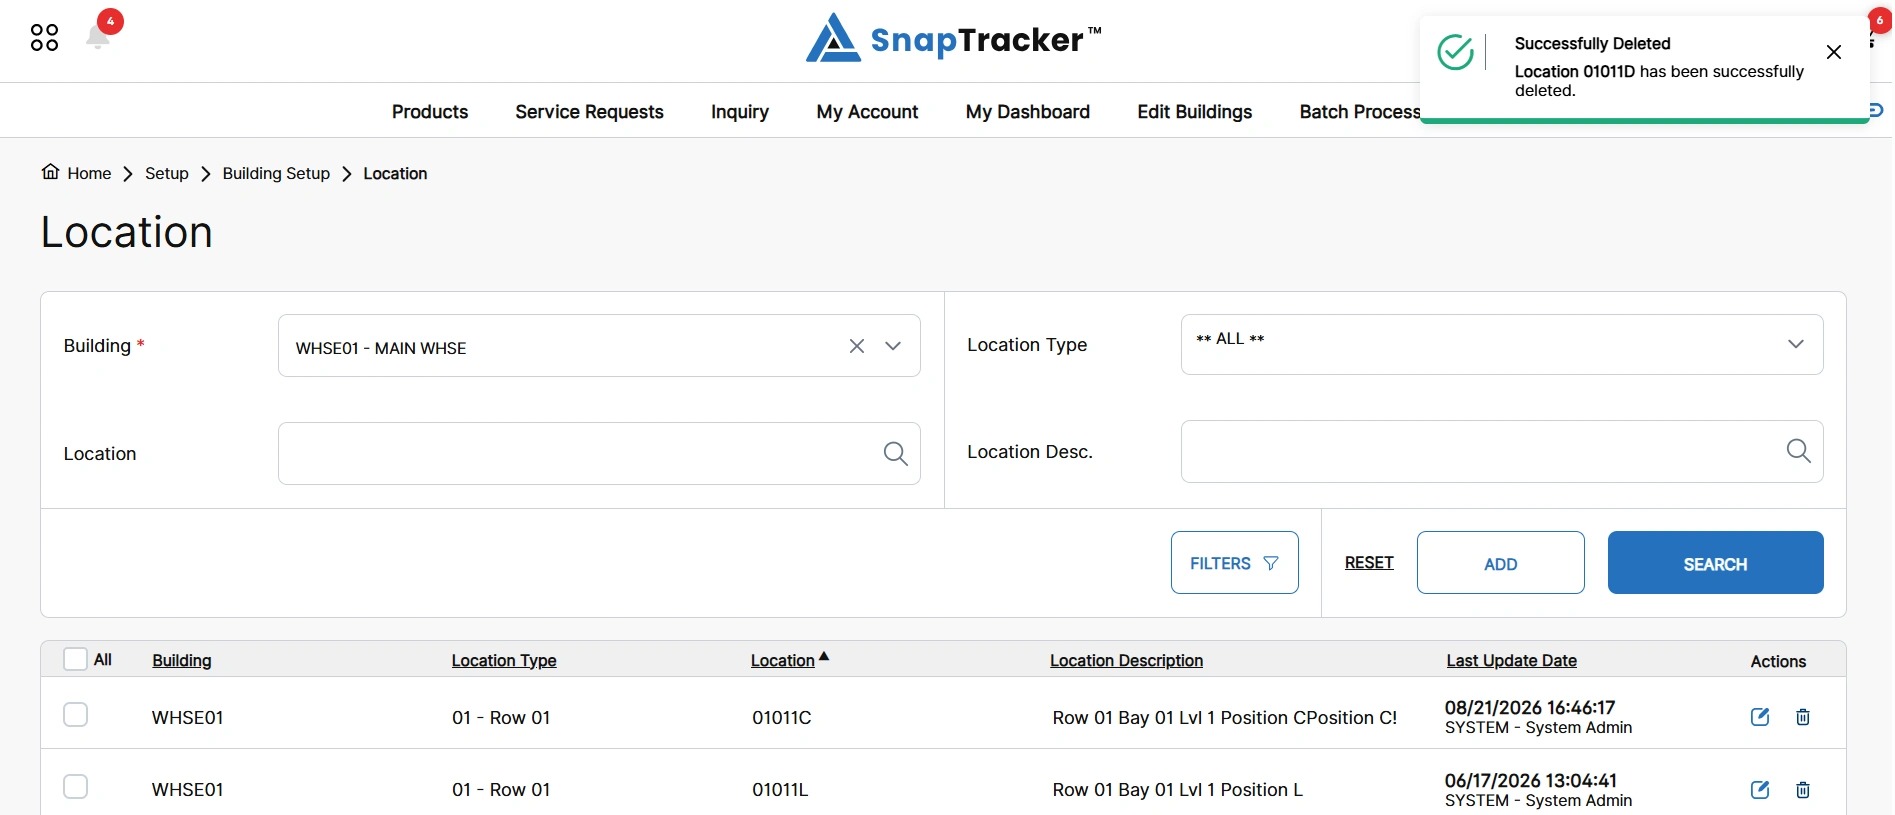
If the deletion is successful, a success message displays.
For more information on how to conduct a search for Locations, see “How to Search for a Location“.
For information on the bulk creation and editing of Locations see “How to Use File Upload“.